Blender Video Editing Tutorial

Video editing is gaining popularity like never before. To get the desired outcomes and unleash the creative sides, people rely less on video editors. For this, they look for a simple video editor that is well-equipped with impressive features. And if such an editor turns out to be a free one, this turns out to be a cherry on the cake. Of course, when we talk about an open-source, free, powerful video editing software, Blender video editor tops the list. So, how to use Blender video editor?
Well, it is a world top open-source video editor. In simple words, it is free to download and use. Also, it is available for Windows, Linux, and Mac. Blender is not just a video editor. It is a full-fledged 3D animation suite that offers modeling, rendering, motion tracking, and many more. Being a feature-rich editor, using blender for video editing allows a ton of features like live preview, transitions, speed control, adjustment layers, filters, histogram displays, etc.
The audio section, it has features like syncing, waveform visualization, scrubbing, and audio mixing. It has 32 slots available for adding audio tracks, video clips, and images. You can opt for performing basic as well as complex tasks. In the next section of the Blender video editing tutorial, you will get to know how to use blender software for video editing:
How to Edit Videos with Blender
Designed with a user-friendly interface, Blender allows you to edit videos with ease. Even if you a beginner and not familiar with this tool, you can start and learn video editing using Blender in no time.
Before launching the tool, do not forget to check its maximum available memory size. Opt for setting it to slightly lesser value as compared to the amount of RAM in your workstation. Just make sure not setting it a lot lower else some operations in Blender may slow down. Also, do not set it too high else it might take some memory from other applications. This may result in swapping.
Here is a step-by-step guide on how to use Blender for video editing:
- Launch Blender.
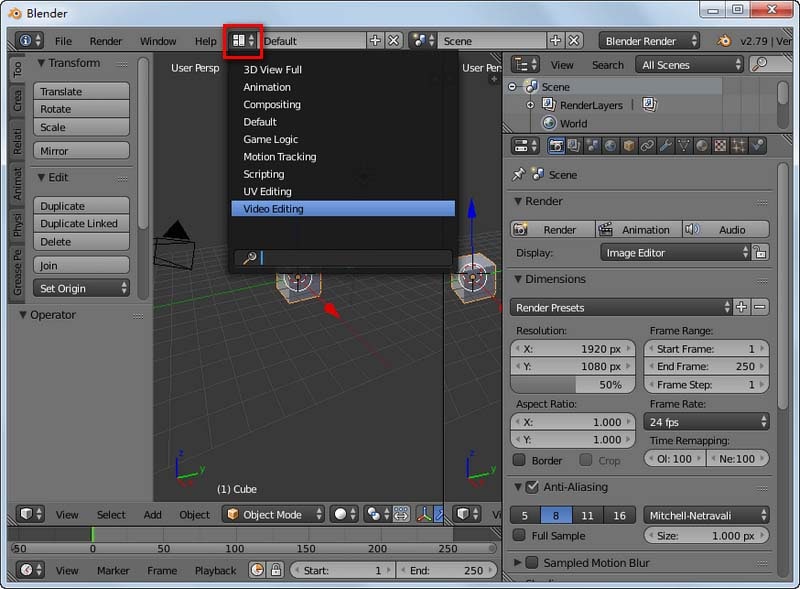
- Select the ‘Video Editing’ mode from the pull-down menu at the top of the window. Now you will be able to see all the video sequence editor controls.
- Now go ahead for playing the video clip or just simply move it until you reach the very end of your clip that you have to cut. So do it frame by frame instead. To stop recording, opt for the red button to record once again. You will find these cut videos in the folder called “My Videos” or in the “default” set on your computer.
- Choose the output format and frame rate. You are advised setting the exact output format as well as frame rate while the importing of the videos happens else the video would result in the wrong speed and the quality will also go down. Also, under the dimensions of the picture, ensure the resolution percentage setting is 100%.
- Then comes the editing part of the video.
For changing the properties panel once again to the strip view panel, opt for using the context menu.
- Just drag and then opt for dropping the video clip or audio strip to the sequence editor. You will see two strips: the audio trip that’s in cyan and the video strip, which will be in dark bluish.
- Now opt for Right-clicking the video strip to highlight it and then opt for adding a transform strip. Similarly, op for right-clicking the audio strip so you can highlight it. Then on the right side, opt for the properties and then opt for showing the waveform.
- The next step is enabling the AV-sync. This step should be done to sync your audio and video. To do so, at the Timeline windows’ bottom, opt for setting the AV-sync option. Click playback and check the AV-sync option to make sure it is applied.
- Now you can move ahead with basic trimming/cutting options. For trimming a video, opt for the point depending upon where you have to cut. To do this, you can simply opt for VCR style controls. You can directly enter a frame in the current frame box, and for that opt for left-clicking about anywhere in the timeline. You can also opt for left-clicking somewhere on the VLA Editor sequence. A green line will be seen, which simply lets you know the selected frame at present.
As you reach to the point where you want to make a cut, hold down SHIFT and right-click both the audio and video of the video strip. Once both get selected, press K to make a hard cut.
- Time has come to add video effects. To add colors strip to your video, right-click the video strip. Choose Add option followed by Effect and then select you are allowed to set the color effect duration as per your needs. Similarly, you can add other effects as well.
This guide covers some basic operations while editing a video with Blender. You can explore more features during the editing process.
Best Blender Alternatives to Use
Despite being a powerful video editor, Blender has its disadvantages. The sheer arrangement of numerous features drops the learning curve. Most of its tutorials focus on the 3D animation or modelling side. It is not much functional in video editing even though it has a built-in video editor.
Moreover, the resources to help you with video editing are very limited. This drawback deters a lot of people away from it. If you think Blender is just not the right choice for you, here are its alternatives. These alternatives have all the video editing features that Blender video editor has but those are even more functional.
1. Wondershare DemoCreator
DemoCreator is one of the easiest video editing tools. It is perfect for making tutorials, demo videos, gaming vlogs, presentation recordings, or any such videos. Apart from simply capturing the screen, it includes a video editing suite made for editing recorded videos and any other imported video.
Like any other editor, it allows you to crop your videos. You can also cut, rotate, add annotations as well as captions. Moreover, you can export the video as GIF, MP4, MP3, or MOV. You can even share the edited videos to social media.
 Secure DownloadSecure Download
2. Apple Final Cut Pro X
Developed by Apple, Final Cut Pro X is one of the best video editing software. This is used by filmmakers as it is very helpful in creating professional videos. Undoubtedly, its design carries that impressive, efficient Apple style. It gives tough competition to other video editors available in the market.
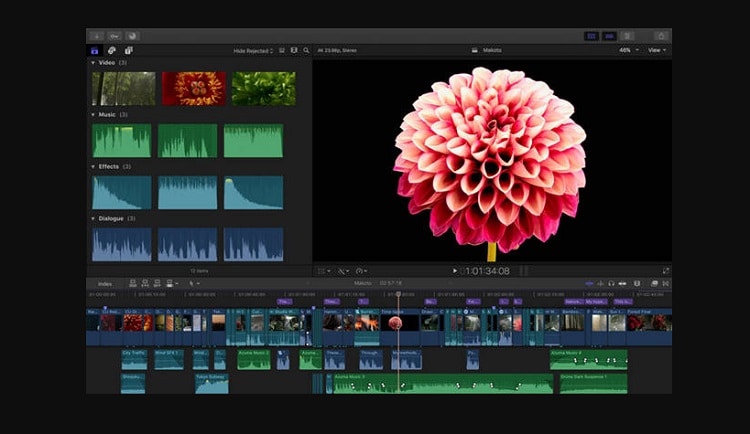
Taking a glance at its features, Final Cut Pro X runs very fast and offers high-quality effects and dynamic transitions. Above all, its exported files do not take up much space. This editor is highly recommended for YouTube Vloggers.
3. CyberLink PowerDirector
Developed by CyberLink, this free video editor has everything that an editor would demand. The creative tools are best suited for Android and desktop users. It helps you to create 4K-quality videos from the clips taken from several devices. Apart from basic features, it is packed with special features like motion tracking and video collages. Motion tracking allows you to focus on particular subjects in every frame.

Moreover, video collages help you to merge numerous photos and transform them into a motion video. Then, the video stabilization feature comes to your rescue when you have shaky footages. Other than the above-mentioned features, PowerDirector allows you to add voiceovers and sound effects using chroma key. Though many of its features are free, you need to buy an advanced suite for more creative editing tools.
Conclusion
Summing up, Blender is an amazing video editing software that helps you to produce professional and high-quality videos and that too without any watermark. It is very flexible and customizable. Also, it may be a bit complicated for an amateur video editor, but a little practice may bring out their professional side. It can be used for any purpose, be it commercial purpose or educational. In case you do not gel well with Blender, you can try your hands on its alternatives anytime.


