
How to Record and Edit Video Demonstrations with Adobe Captivate

Adobe Captivate is part of the Adobe Suite, which is a collection of Adobe Corporation products. Adobe Captivate is a paid application, therefore you'll have to pay for it. The software is generally used to create eLearning resources such as instructional films, mind maps, and charts, among other things. It also can record screen actions, making it ideal for recording instructive movies and software demonstrations. Even if no transaction is made, the program is free to download and use. This implies that until you pay for the licensed version, you won't be able to fully use the tool. Adobe Captivate is a presentation maker that works similarly to PowerPoint but is superior in several ways. As a result, several Adobe Screen recorder competitors can fill in the gaps left by Adobe Captivate. Continue reading to discover more about these worthwhile options, as well as how to put some of them to use.
Part1. How to Record Video Demonstration with Adobe Captivate
Adobe Captivate is a professional screen recording program for creating information products by capturing what happens on your computer. If you want to educate others on how to utilize difficult software, such as that used in 3D computer design, this is the way to go. The program is capable of much more than just recording your screen. To create an interactive lesson or course, you may use PowerPoint presentations and other smart objects. This post will provide you with a quick overview of how to capture your screen using Adobe Captivate. In addition, we'll show you how to use the greatest screen recording alternative to Adobe Captivate.
Adobe Captivate may be useful if you want to develop information products using screen recordings. You may record what is occurring on your device and share it with your audience if you know how to record the screen with Adobe. One of the software's features is the ability to capture or record a screen. It offers a lot more than that to provide you with a fantastic video editing experience. It may, for example, assist in the creation of interactive lessons by including PowerPoint presentations and other items. This is unquestionably a tool for individuals who are serious about building video-based courses.
Part2. How to Recording with Webcam
With its smart authoring capability, Adobe Captivate can help you create device-independent, fully responsive eLearning courses. It provides the best-in-class screen capture by capturing all on-screen operations, including mouse movements, system sounds, and keyboard activity, via an intuitive interface.
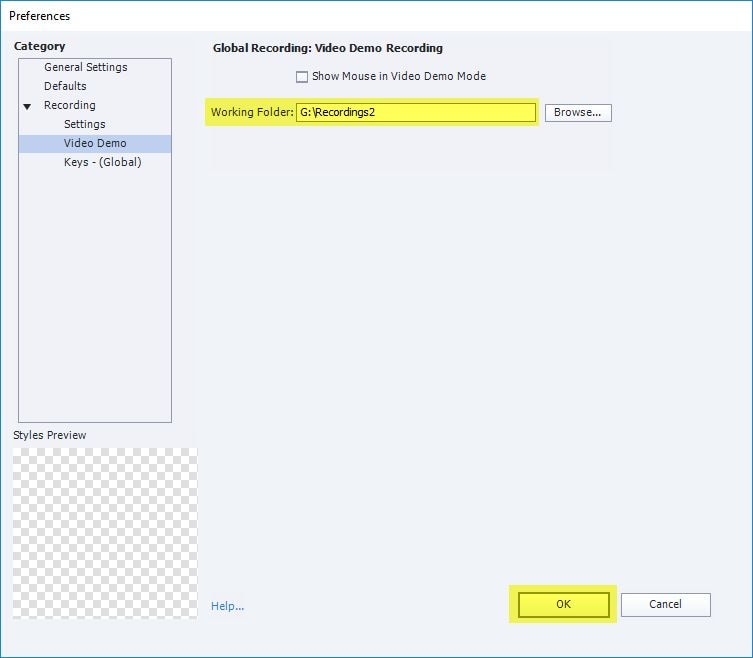
Step 1: Adobe Captivate can also import PowerPoint presentations, including all related objects, animations, and multimedia, allowing you to keep your PowerPoint and Adobe Captivate projects in sync. From the Edit menu, choose Preferences before creating a video instruction using the Adobe screen recorder. After that, you may adjust the video and audio settings under the Project option's Size and Quality option.
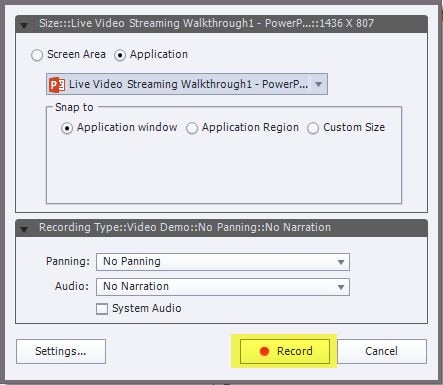
Step 2: Select the File menu, then the Record a new option, then the Video Demo option. Then, depending on what you want to capture, choose the Screen Area option and specify the corresponding choices, such as Screen Area, Custom Size, and Full Screen.
Step 3: Select the required audio channel, such as System Audio, to record the audio files from your computer if you wish to add narration during the recording process. Then, to acquire the desired recorded file, choose Record from the drop-down menu.
Step 4: After you've finished recording, look for the first slide in Adobe screen capture's work area. All of your slides, as well as our mouse movement on the screen when in Demo mode, are shown on the filmstrip.
Step 5: In preview mode, you may now replay the recorded video. You may save the movie to your computer or post it to the Internet, such as YouTube or an eLearning system. You may also make changes to the video before posting it or saving it.
Part3. How to Change Background After Recording
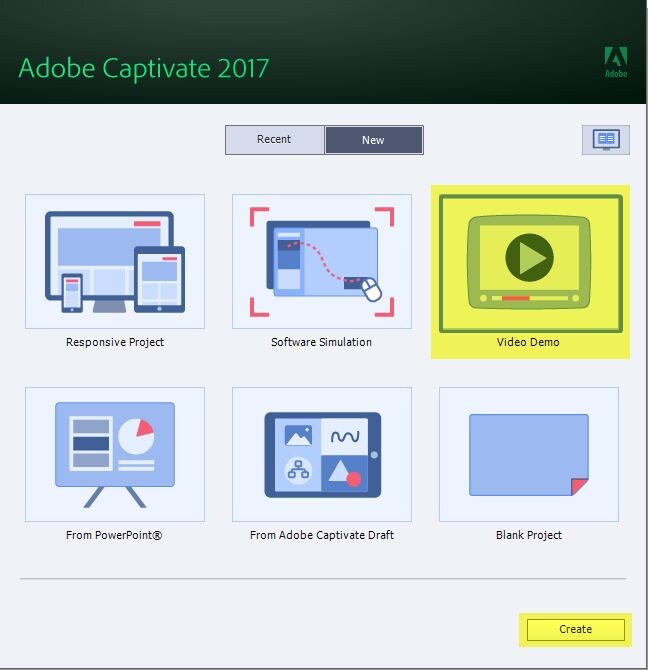
- Open Adobe Captivate and choose the Video Demo option from the welcome screen
- On the screen, a popup "Video Capture dialogue" will display. You must alter the parameters of the screen area, set the capture area to, enable both microphone and system audio, and automate panning on the left side of the screen.
- You can see your camera picture on the right side of the screen. You may begin the chroma key process here. To do so, go to the bottom of the picture preview and click the Change Background button.
- Draw a vertical line from the top of the head to the bottom of the screen, then a horizontal line across your shoulders to erase the backdrop. Alternatively, you may change the backdrop by clicking on the background itself. You may also use a translucent background for your movie and use the project stage as the backdrop. Once you've chosen a checked backdrop, you'll be able to do so.
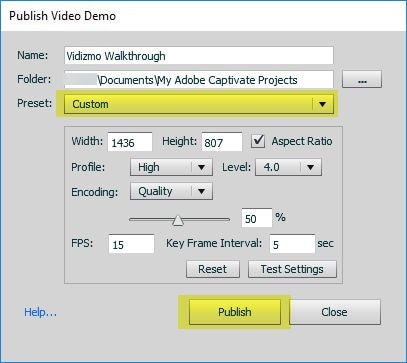
- Finally, under the Publish tab, click Publish to Computer to publish. A popup box called Publish Video Demo will appear on the screen, allowing you to alter the video's details.
Part4. How to Mask a Portion of Your Video
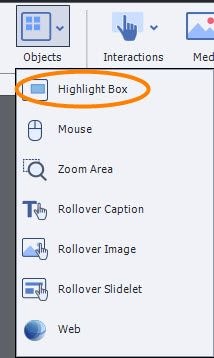
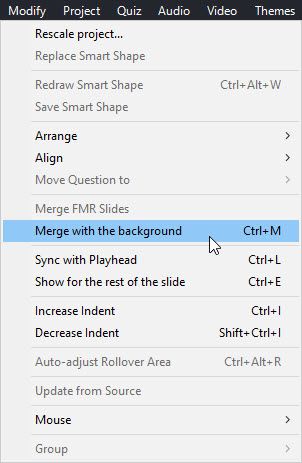
What if you've filmed a simulation or demo, but a user name that shouldn't be made public is visible? Don't be concerned! Adobe Captivate can create online courses that can be viewed on a variety of platforms, including desktops, iPads, and mobile phones. You may conceal it with a highlight box, then blend the box into the backdrop.
Step 1: Make a new project and fill in the placeholders with images.
Step 2: Create a Text Button and format it. Organizing Set Flash Video Properties after inserting a Flash video. Insert Text Animation and Add Animation to a Slide
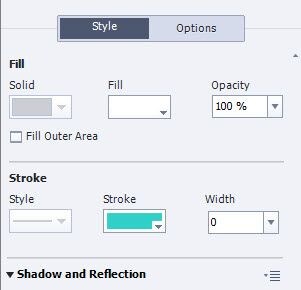
Step 3: Apply a Slide Object with an Effect. Modify the properties of the effect before saving and importing it.
Step 4: The crucial element to remember here is that we may publish to numerous devices and applications using a single source file. We can now publish to HTML5, SWF, Video, Executable, App, Adobe Connect, and Captivate Prime, among other formats.
Part 5. Properties of a Video Demo Project
All interactive objects, quiz questions, and even the whole quiz may be set to enable 'Infinite Attempts' in Adobe Captivate. However, Adobe Captivate developers often misunderstand this word, resulting in several inquiries on the Adobe Captivate Forum. E-learning writers often query why to Captivate interactions don't enable them to click on the same item or quiz question several times in a row endlessly. Sometimes all you need is a simple video clip that you can submit to YouTube or embed into your website. In such circumstances, a Video Demo project is required. Video demonstrations are used to create.mp4 video files that the learner encounters in a linear method from beginning to finish. As a result, Adobe Captivate’s interactive elements aren't available in Video Demos.
Audio
You may choose from a variety of Speech Agents in Adobe Captivate. You may choose from any of the available speech agents. Select the speech agent from the Speech Agent dropdown in the Speech Management box to access the speech agents. If you don't want the project's background audio to play after it's been applied, go to the Property menu and choose the Options tab. Stop Background Audio is a checkbox that may be found. To activate or disable the audio, choose the checkbox. Text-to-speech. This is beneficial when providing a learning session to an audience when the information is in the form of text. For a better understanding, you can use the text as the voiceover.
PIP Mode
You must capture the activity on your screen in a seamless and easy-to-follow manner. Take a practice run before your record to ensure you know exactly what you're doing.
Zoom and Pan Effect
The track containing the video clips may include Zoom indications in the Pan/Zoom state (which is the default status of the timeline, as shown in the Screenshot photos thus far) (loupe icon). When you apply a zoom and/or pan effect, they appear. The width of the shadow triangle before the zoom indication represents the length of the zoom/pan transition.
Under the timeline tracks, the buttons 'Split,' 'Pan and Zoom,' and 'Trim' are active in this Pan/zoom condition.
Effect of Transition
When you've finished recording and returned to the Captivate interface, double-click the clip in the timeline and choose Edit Video Demo from the Properties Panel, then apply the transition effect. From the Video Effects tab, you can build a transition that will show in the correct docking station automatically. The color of the diamond turns orange once you add a transition. A transition may be added at the beginning of the first clip, which is why the half-diamond appears at the beginning of the Video/Audio Track.
Effect of the Mouse
Edit, Edit Mouse pointers may be used to activate the mouse status (follow the same steps to revert to the Pan/Zoom state). The 'Pan and Zoom' button will be darkened and disabled, but the 'Split' and 'Trim' buttons will remain functional. The beginnings of mouse trails are displayed as mouse icons on the video/audio track in this state (screenshot below): you may pick them individually and modify or remove the mouse object.
Trim and Cut Video
To remove a section of a video clip, place the play head near the area you wish to remove it from. Two black triangles, the Trim markers (In and Out), will display when you press the Trim button. When you click the Trim button again, the space between them will be greyed out and eliminated. Trim In and Trim Out markers may be dragged to precisely choose the section to be trimmed. After the trim operation, you'll have two video clips with a transition point (diamond marker) between them.
Video Projects Publishing
You have two options for inserting your MP4 video if you have released your Video Demo as an MP4 movie. In both circumstances, you would pick the Video Icon from the Adobe Captivate toolbar's Media drop-down menu.
Upload Your Video to YouTube
Finally, you may use this program to upload your Demo video to YouTube.
Part6. The Best Alternative to Adobe Captivate - DemoCreator
Showing someone, something is one of the most effective methods to educate them about it. Make a video demo if you're teaching about software and don't have the luxury of having all of your pupils sitting in a classroom. You may make video demonstrations using a variety of items available on the market. Although Adobe Captivate has a lot of capabilities, it can be too difficult for someone who only wants to share a basic screen recording. DemoCreator is a wonderful alternative to Adobe Captivate for this.
DemoCreator by Wondershare is a robust alternative to Adobe Captivate. It allows you to record any activity on your computer's screen. It can effortlessly capture video in HD quality, such as HD and FHD. You may also record in full screen, region mode, or with your webcam. Because it can record the system sound, microphone, or both, it's also ideal for capturing video demonstrations. These are the basic steps for using this program.
How to Record Video with DemoCreator
Step 1: Launch DemoCreator and Anireel Add-on
To begin using the DemoCreator to record your screen footage. You must first open the app and choose the screen recorder option; this will also start Anireel on the fly, as illustrated here:

 Secure DownloadSecure Download
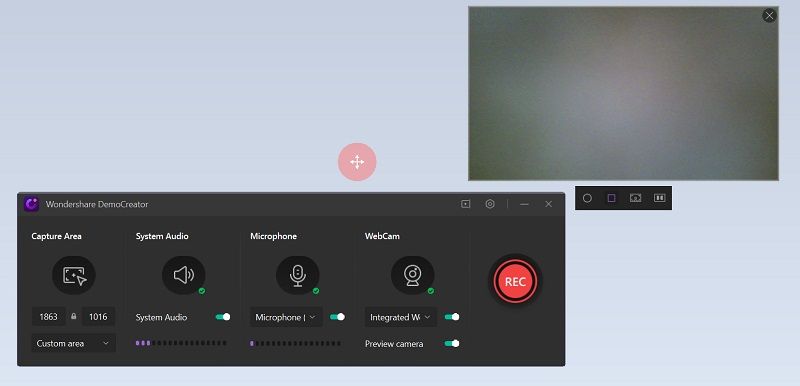
Step 2: Record your Video
Customize the recording interface in the DemoCreator green screen recorder window and start recording immediately.
Step 3: Modify with Effects
To begin with the animation effects, open Anireel and drag and drop your recorded video clip into the timeline and then go directly to the Effect menu to pick your favorite effect, you can this much simply implement the animation with Anireel.

Now you'll see the video's Chroma Key effect, which contains the modification options for the exact video clip you wish to chroma key. You may also change the Offset to alter the appearance of the background and then export the video to import it to DemoCreator for the final touch.
Conclusion
When it comes to screen recording, Adobe Captivate is one of the greatest options. The absence of editing tools, on the other hand, is the main drawback. DemoCreator comes in helpful here, since it offers a broad variety of video editing and screen recording tools. The greatest Adobe Captivate screen recording guide may assist you in easily recording your screen.


