
Top 9 Best Screen Recorder for Computer, Mobile and Online

Recording your screen whether you are recording gameplay or a tutorial should be easy. The level of difficulty you will experience when trying to record the screen can be informed by a number of issues. Perhaps the most important of these issues is the tool you use to record the screen. The tool should not only be compatible with the device you are using, but should also be easy enough to use to make the process as seamless as possible.
In this article, we take a look at the best screen recorder for the different platforms including Windows, Mac, iOS Android and Chromebook. Each of the tools we recommend on this list are the best that we could find in terms of ease of use and effective features.
Best Free Screen Recorder- Windows Game Bar
If you are going to use a free tool to record the screen on Windows 10 PC, you might as well use Windows own built-in solution. The pre-installed Windows Game Bar comes with Windows 10 and is quite easy to use. It can however only be used to record apps, which means that you may not be able to use it to record the whole screen or a pre-determined section of the screen.
It is also important to note that your computer’s video cards will have to meet the minimum hardware requirements if you want to use Game Bar. Otherwise, it is completely free to use and is easily accessible. It also will not limit the duration of the video you can record.
Step 1: Open the Xbox Game Bar:
First, open the window that you want to record. Then, hold down the Windows + G keys at the same time to launch the screen recording tool in Windows 10.
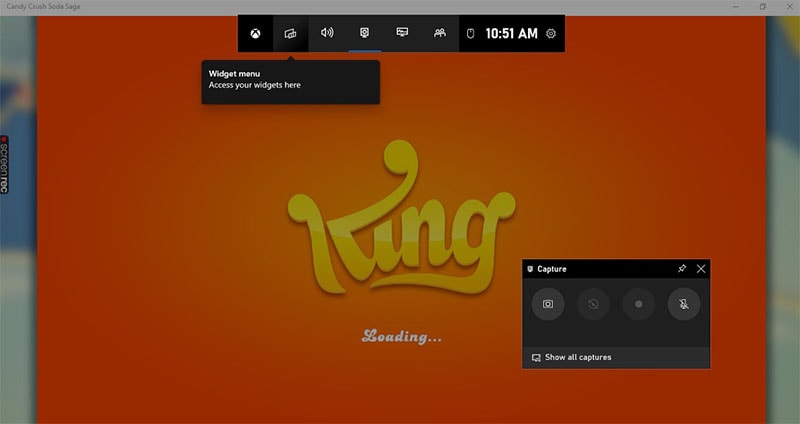
Alternatively, you can use the search function in the taskbar to find the program. To do this, type in “Xbox Game Bar” and open the application.
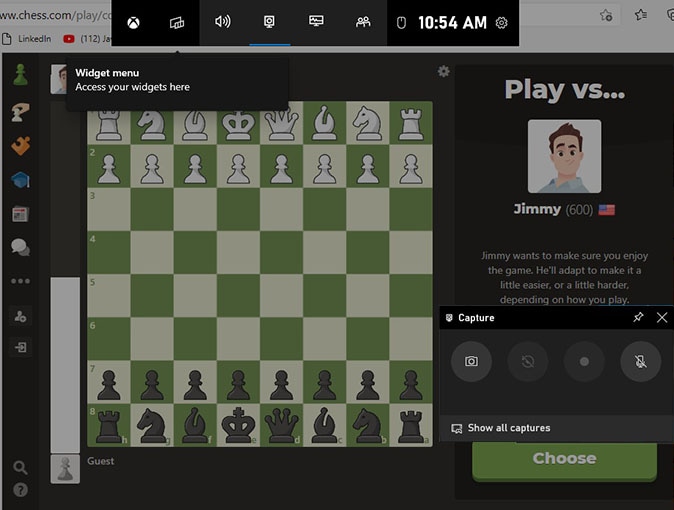
Step 2: Start Screen Recording
To start recording your Windows 10 screen, open the Capture window by clicking on the camera symbol in the Xbox Game Bar. You can now begin recording by selecting the record button.
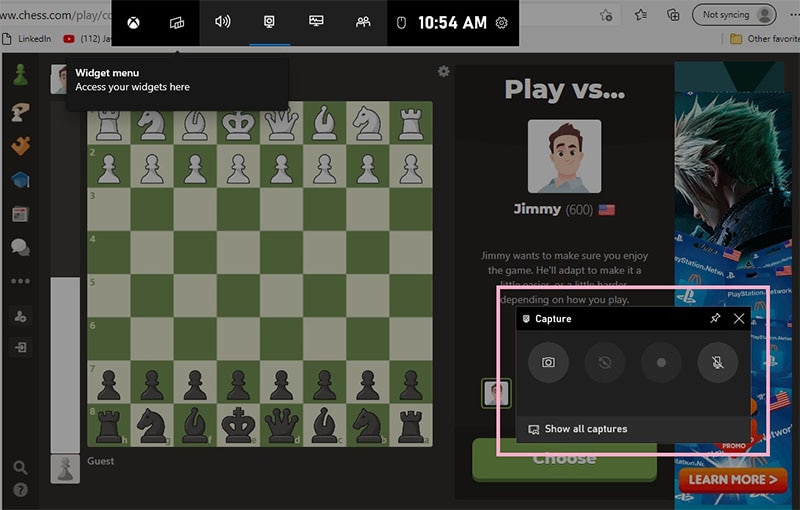
Step 3: Customize Game Recording
Once you’ve started recording, available options in the capture window will automatically adjust. To stop the recording, click on the square. In addition, you also have the option to turn audio and microphone recordings on and off.
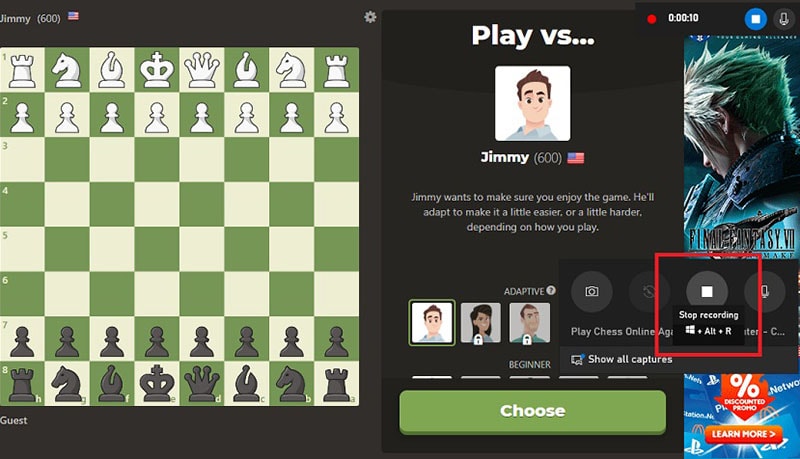
Step 4: Stop Recording
As soon as you start screen recording in Windows, another window will automatically open. Here, you’ll find further options at your disposal, including the option to stop your recording or to turn microphone recording on or off.
Best Screen Recorder for Mac – QuickTime
If you are a Mac user, you may already know about QuickTime and how it works. This is the in-built screen recorder for Mac users. Like its Windows counterpart, its appeal is that it is very easily accessible, not to mention free and screen recoding using this tool is very easy.
You may not be able to comprehensively edit the video after recording, but QuickTime is a quick and easy way to record any video of any length on your Mac. It also doesn’t hurt that you can use it to record the screen of any connected iPhone or iPad.
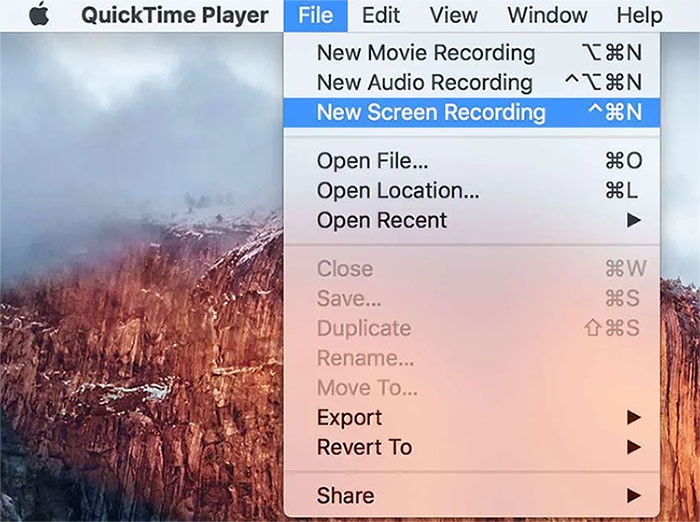
Step 1: Launch QuickTime Player
Open QuickTime Player from your Applications folder, then choose File > New Screen Recording from the menu bar. You will then see either the onscreen controls described above or the Screen Recording window described below.
Step 2: Customize the Recording Screen
Before starting your recording, you can click the arrow with the red-circled button, to change the recording settings: To record your voice or other audio with the screen recording, choose a microphone. To monitor that audio during recording, adjust the volume slider. If you get audio feedback, lower the volume or use headphones with a microphone.

Step 3: Start Recording
To start recording, click the red-circled button and then take one of these actions. To begin recording the entire screen click anywhere on the screen or drag to select an area to record, then click Start Recording within that area as shown below:
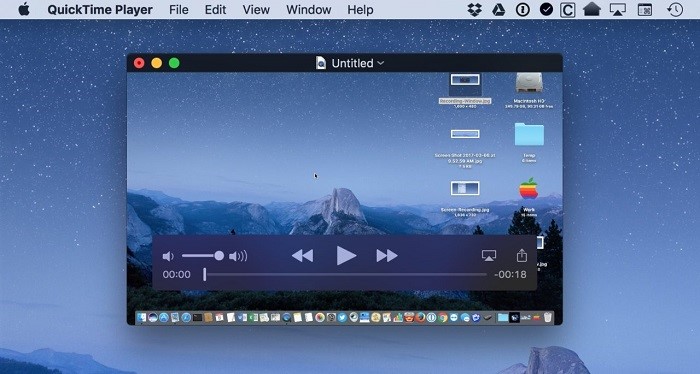
Step 4: End the Recording
To stop recording, click on the square-shaped button in the menu bar, or press Command-Control-Esc (Escape). Just after you stop recording, QuickTime Player automatically opens the recording. You can now play, edit, or share the recording.
Best Screen Recorder with Video Editing
The two solutions above are ideal when you want a quick and easy way to record the screen on your computer, but they are both seriously lacking when it comes to editing options. If you want a program that can easily do both, we recommend using Wondershare DemoCreator. This third-party screen recorder can be installed on both Mac and Windows computer and it comes with features designed to help you easily record and edit videos on your screen whether they are gameplay videos or simple screen flow tutorials. You can also very easily include audio and webcam recording into the same project.
Then once the recording is complete, you should be able to use the editing features this program has to edit the videos in numerous ways. You can cut, trim and even crop the video and you can also choose to edit the audio in numerous ways. All of these adjustments are easy to make and you can easily navigate DemoCreator from recording the video to editing it and saving even if you are a beginner user.
 Secure DownloadSecure Download
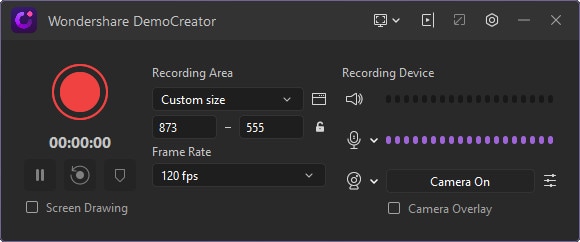
Step 1. Download and install DemoCrerator on your Windows or Mac computer, launch the software and choose the recording option.

Step 2. Now you are allowed to set up the screen region, audio and webcam settings. You can do this at your desired parameters or use the default.
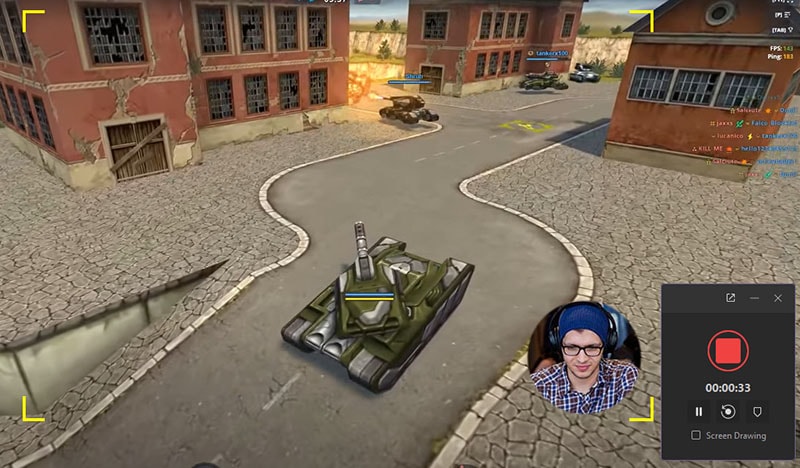
Step 3. Click on the red button to start screen recording. Press F10 to end the process at any time you want. The recording will be opened in the editor; you can do the basic editing.
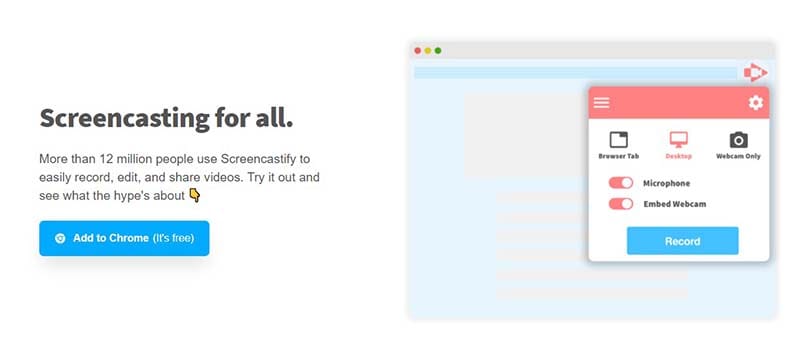
Best Online Screen Recorder No Download – Screencastify
If you would rather not download a program on to your computer, we recommend using the web-based screen recorder Screencastify. This tool is easily accessible on most web browsers although we found that it works so much better on the Chrome Browser. Like most online tools it is completely free to use, but we must point out that Screencastify is designed to be used by students. This means that you will not find it useful when you want to record high intensity gameplay for example.
If your goal is to record the screen, Screencastify is a useful tool. It even comes with basic annotation features that facilitate simple editing. You can even choose if you would like to include audio in the recording. It is also worth pointing out that there are some features of Screencastify that are not available on the free version and you may have to pay to access the full program.
Step 1: Launch Screencastify
Visit screencastify.com or go to the Chrome web store to install the extension. Make sure you are using a Chrome web browser. Click the Add to Chrome button and then click Add extension in the dialog box that comes up.
Step 2: Customize the options
Now in the app, you can choose either you want to record your Browser Tab, entire Desktop, or Webcam Only. Here we will go to capture PPT slides with voice and webcam and for that, turn on the toggle next to Microphone and also turn on the toggle next to "Embed Webcam."
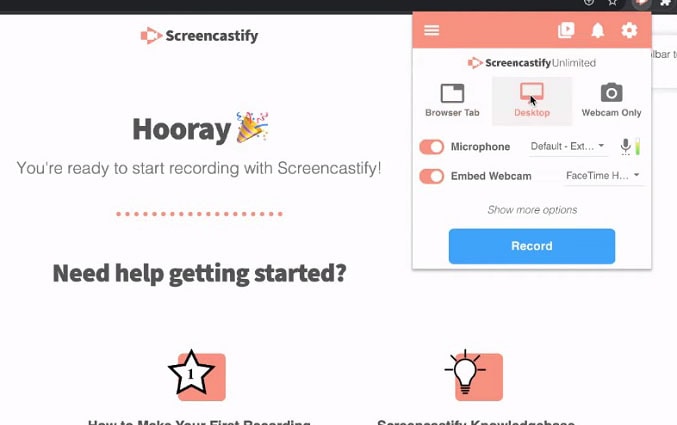
Step 3: Setup Audio Source
To capture audio from an application, like PowerPoint or Windows Media Player, enable the toggle next to "System Audio."
Step 4: Start Recording
Click the blue "Record" button. You'll see and hear a countdown if you have one enabled, and then your recording will begin. To end a recording, click the extension icon again and click the stop button as shown below:
Best Screen Recorder App - AZ screen recorder
The AZ screen recorder is a screen casting tool specifically designed to be used on the Android OS platform. It can be installed on Android devices running Lollipop and above and comes with numerous features designed to make the screen casting process easier. Unlike other similar apps with similar screen casting features AZ Screen recorder is completely free to download and the free version is fully functional. This free version of the app will however have ads that you can easily remove by upgrading to the paid version.
One of the best things about this app is that it offers very useful features without needing to root the device. It will also not have any limitations on the recording process and won’t add a watermark to the recorded video. It is also one of the easiest and most effective mobile screen recorder solutions in the business. One of its most notable features is that it is perhaps the only mobile screen recording tool that allows for the recording of the internal audio.
Step 1: Install and Open AZ Screen Recorder
To start using this android screen recorder app with internal audio you need to launch the A-Z Screen Recorder app from your app drawer.
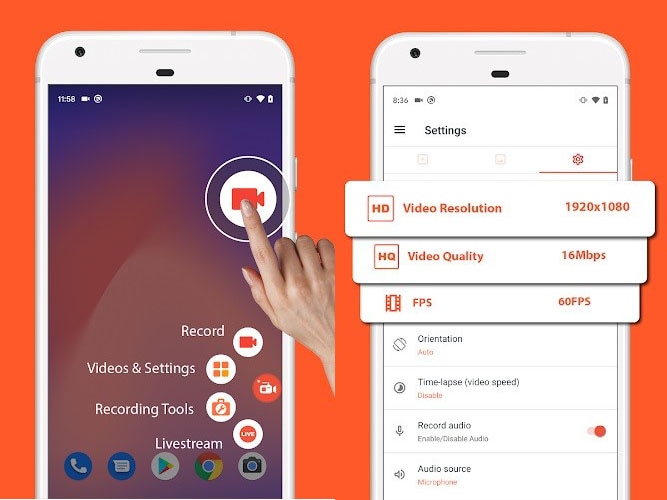
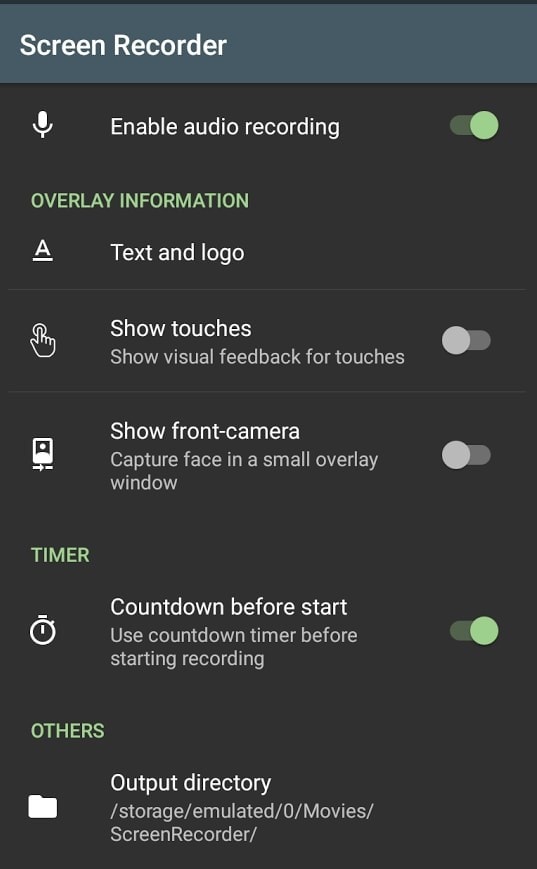
Step 2: Customize the Recording
You’ll see an overlay with four buttons appear. Tap the gear icon to tweak video recording settings including recording resolution, frame rate, and bit rate. When you’re done, press Back to return to the home screen. Simply, open the app or navigate to the screen you want to record.
Step 3: Start the Recording
Tap the red camera shutter icon in the A-Z overlay. The video will begin recording. Use your phone like normal until you’re ready to stop recording.
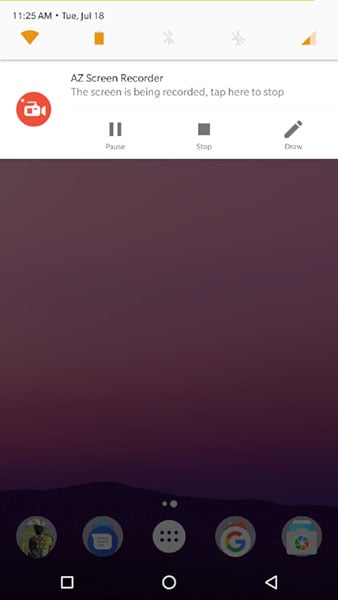
Step 4: Save Recording
When you’re finished, pull down the notification shade. In the A-Z notification, you can either pause or stop recording.
Best Screen Recorder for Games - ShareX
ShareX is said to be the best screen capture and file sharing tool. It supports a wide range of video capture methods, including full screen, active windows, active monitor, customize region and more. After capture, it offers a lot of tools to edit and share the videos, like copy to the clipboard, upload to the host, and edit images. Another great feature of ShareX is there are many upload options in this software, users can upload the files, folders, upload from URL, drag and drop upload and more.
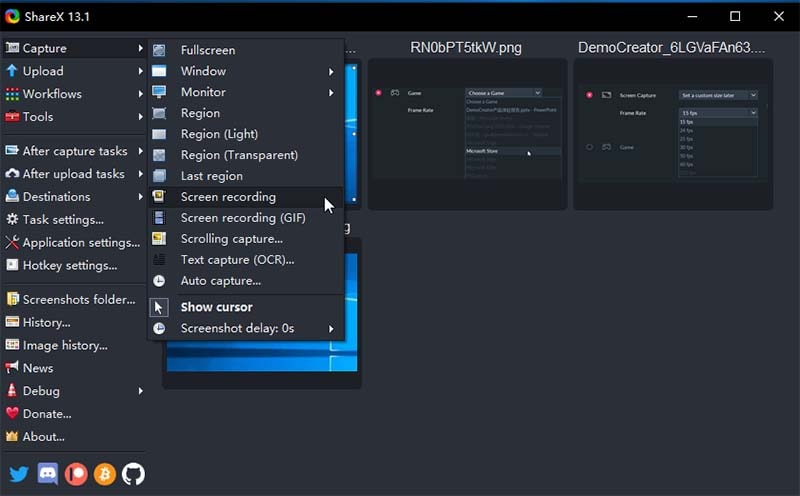
Step 1: Open ShareX Screen Recorder
In the Main window, refer to the “Choose Task settings” and then, In the Task Setting Window, Choose Capture -> Screen recorder. Choose FFmpeg as the output format from the output drop-down menu.
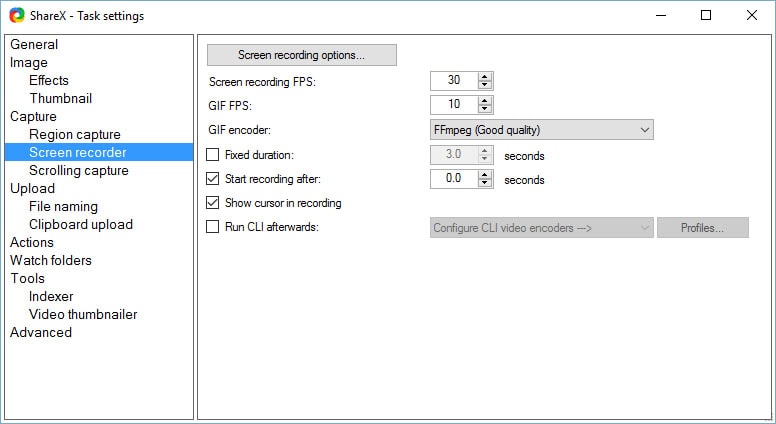
Step 2: Customize the Recording Setting
Users can record a selected area on their screen or the entire screen. FFmpeg allows the user to record the screen including sound and compress it in real-time using x264, VP8, XVID, etc. Choose the Screen recording (FFmpeg) option to record the screen including sound. Plugin the Microphone into your system to start Recording.
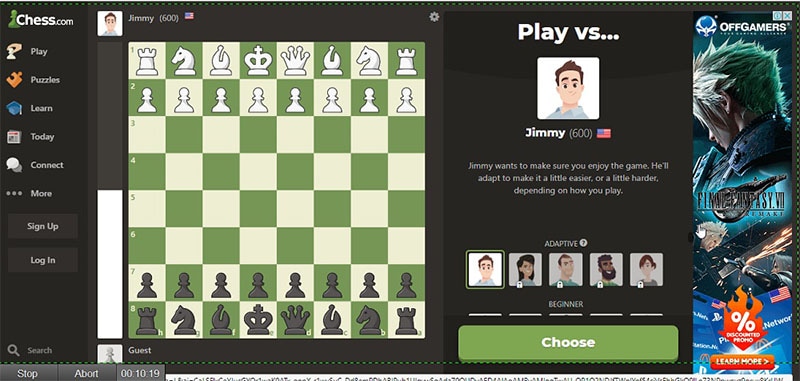
Step 3: Start Recording
Once you choose the recording region, the screen will start recording automatically. You can view the recording time in the bottom right corner of the screen. The red color Dotted Circle indicates the screen recording, you can view the screen recording time.
Step 4: Finish Recording
Once you have finished your recording click the Stop button to stop recording. Then, click the Abort button while you recording the screen to abort the recording process.
Best Screen Recorder for Tutorial– Screencast-O-Matic
Screencast-O-Matic is of the best online video recording extension that enabled screen, webcam and audio capture at the same time. It is available on Windows, Mac, Ios, Android and Chromebook. This tool is widely used in education, work and personal to create video tutorials, guide, gameplays and more.
Step 1. Launch the Screen Recorder
Click on ‘Launch Screen Recorder.’ A pop-up notification will appear indicating that the recorder is being launched. If it doesn’t appear, you have the option to download the app onto your computer. Any time you need to record, you can click on download. This is great for those who want to screen record while offline.
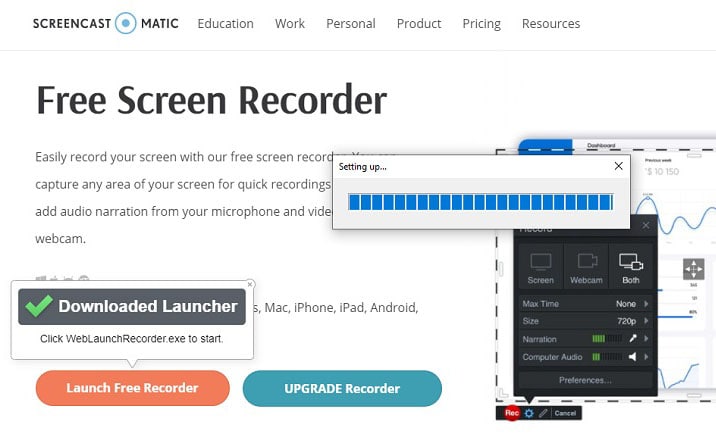
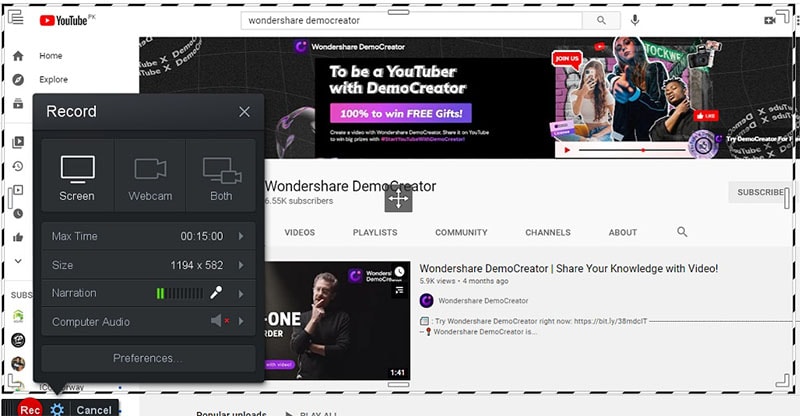
Step 2. Start Recording
Within seconds, you’ll notice the screen recorder on your computer and you can start recording. Once you have the recorder set up and ready to go, click on the red ‘Rec’ button to start recording. A 3-second countdown will appear. That will start recording after ‘Go’ appears in the countdown.
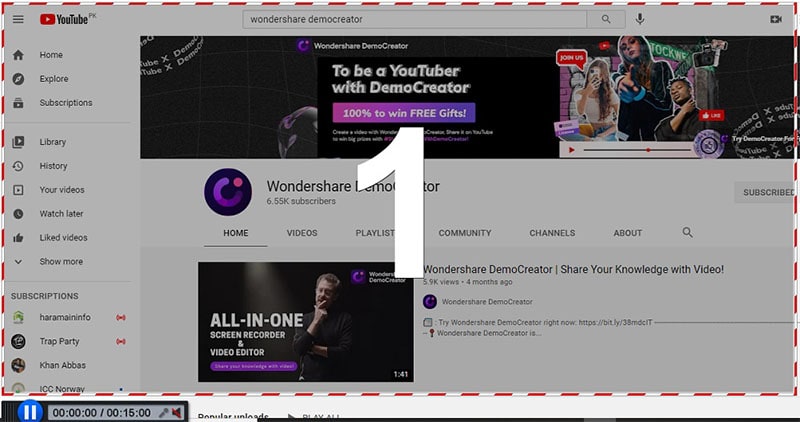
Step 3: Hold YouTube Recording
You’ve got a ton of flexibility while you are recording your screencast. If you need more time to prepare or accidentally made a mistake, just pause the recorder. You can pause your recording at any time. The red ‘Rec’ button will turn blue while you are recording. By clicking on the blue button, you can pause your recording. You can take this time to adjust the recording frame before continuing to record again.
Step 4: Stop Recording
When you are done recording, click the blue Stop button. Click Save As Video File to save your recording to your computer as an MP4 file.

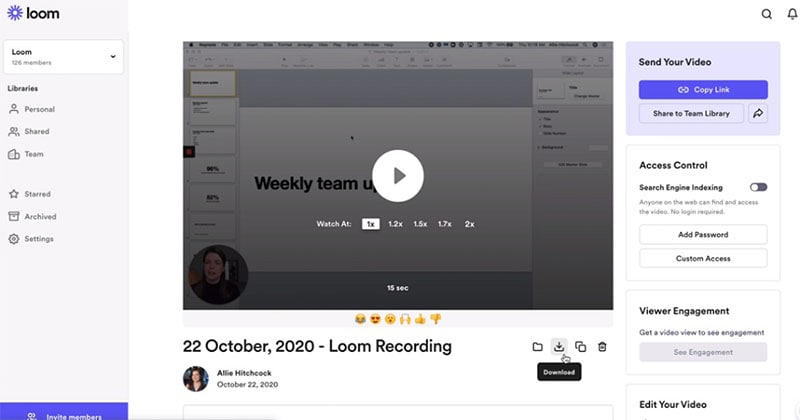
Best Screen Recorder for Chromebook – Loom
The Loom is another sort of work communication software that helps you communicate through instantly shareable videos. With Loom, clients can record their screen, voice, and face and immediately share their recordings rapidly. Regardless of whether you need to assist a client, install a video tutorial on your site or YouTube channel, share recordings for online media, or need to record a definite video reaction to an email, Loom is there to get you out with all your business issues.
Aside from video accounts, you can likewise screen catch recordings and have the choice to include your face in it in a little bubble at the lower part of the screen. These sorts of recordings are ideal for making how-to guides and instructional exercises. Loom has collected over 1.8 million individuals across 50,000 organizations and is an extraordinary apparatus for visual correspondence and screen recording.
Step 1: Install and Launch Loom
After you install the Loom desktop app, click on the desktop app icon to open the recorder.
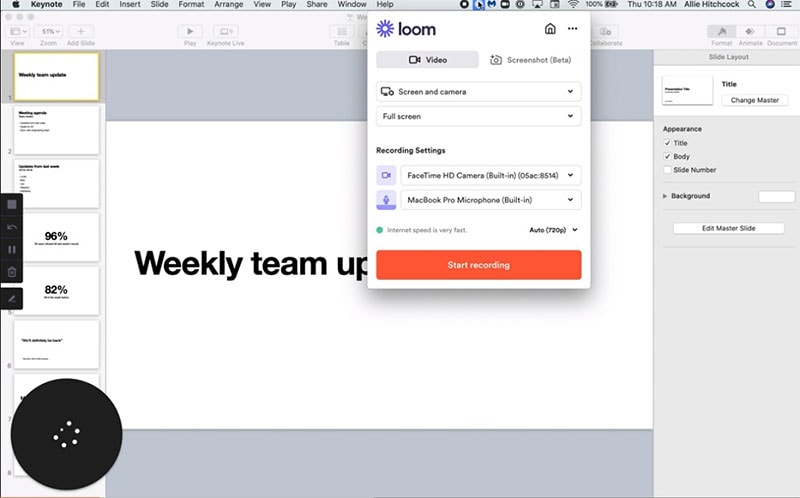
Step 2: Customize the Recorder
If you choose to record your camera and audio with your screen, you can select any camera or microphone connected to your computer. Check the audio indicator to tell if your microphone is enabled and capturing audio before you hit the record button.

Step 3: Click Start Recording
Once ready, hit Start recording, then launch your PowerPoint or Keynote presentation into Full-Screen Presentation mode.
Step 4: Finish the PPT Recording
To stop recording, use the stop button on the Control Menu or click the Loom app on your desktop. You can also quickly restart, pause, or delete your recording from the Control Menu.
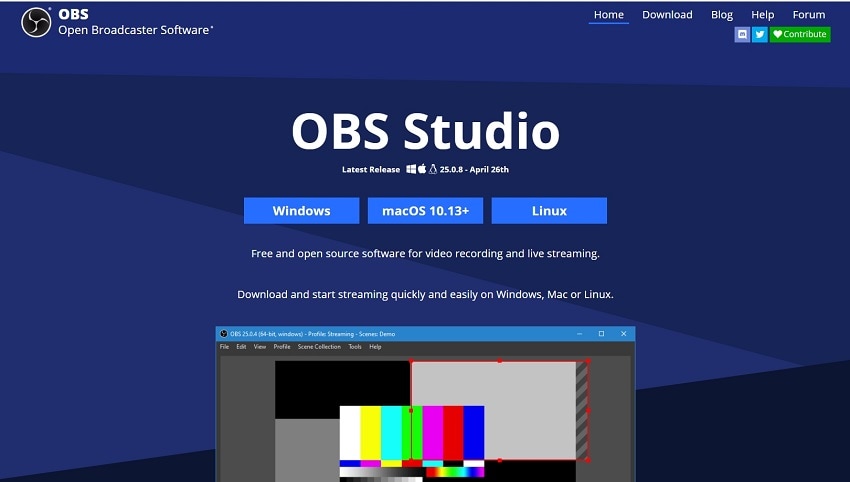
Best Screen Video Recorder for Live Streaming - OBS Studio
If your goal is to stream live video from your computer, then we recommend using OBS studio. Open Broadcaster Software (OBS) is an open source gameplay recording program that many gamers find very useful. While it may offer a lot of options when it comes to screen recording, OBS does have the disadvantage of a very complicated user interface. It may therefore not be the ideal solution for beginners or if you want to record the screen fast and in a seamless fashion.
It can however be used to record high quality videos in MP4 and FLV formats. It also works with your system's GPU to make the live streaming of gameplay much easier and more streamlined. It also offers additional other features including the ability to add custom watermarks and push to talk mode. One of the things we love about using OBS is that you can directly and very easily stream to many video sharing sites including Twitch, YouTube, DailyMotion, Facebook and many more.
Step 1: Download and install OBS Studio.
Visit the official OBS website and download the OBS studio from the official links to embed inside your system.
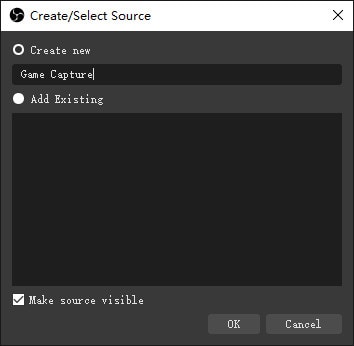
Step 2: Customize the Game Screen
Inside the OBS studio click the + from the Sources part, and then choose "Game Capture" Leave it labeled as Game Capture and click OK.
Step 3: Start the Recording
The properties of Game Capture will appear with different modes, for Game recording, Select the first mode ‘Capture any full-screen application’, and Click OK. ‘Game Capture’ now appears in the Sources list.
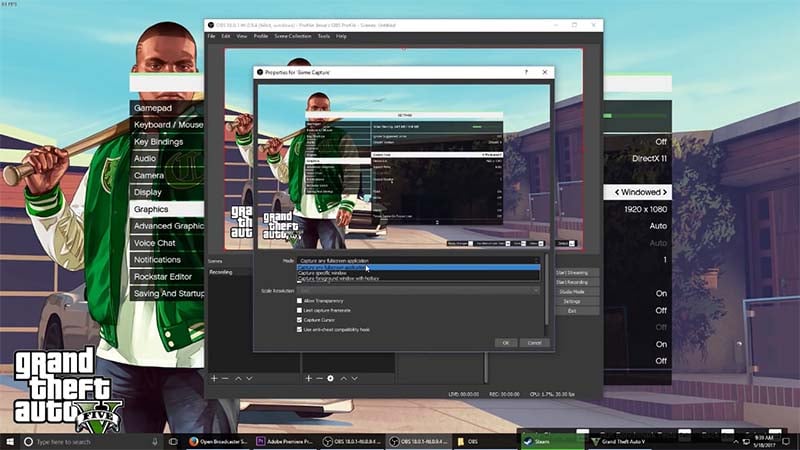
Go to OBS. The game will appear in the window that means OBS recognizes it and is recording it.
Step 4: Save the Recording
When you’re done with the recording, simply hit the stop button and save your game recording.
Related FAQs
1. What screen recorder do most YouTubers use?
Numerous individuals make a vocation out of recording their interactivity and transferring it to YouTube. It's an extraordinary chance for those intrigued by growing YouTube channels. Out of the so many, usually, OBS studio is the choice of YouTubers. The best game chronicle application gives you the likelihood to catch recordings in various techniques, save them to different document types, take screen captures, and even make a couple of alters before transferring the recordings to YouTube.
The absolute best YouTube game chronicle application offer highlights like an implicit video proofreader to alter the interactivity, two-way (screen and webcam) recording, up to 120 FPS interactivity recording backing and text/illustrations properties, and so on for making the best game screen recordings.
2. What is the safest screen recorder app?
Free screen recorders have progressed significantly lately, and there are currently some great apparatuses accessible that can catch all that is occurring on your screen-free, and with no disappointing limits. The safest one is the OBS Studio. It has a variety of features that depicts the safe and secure recording well according to the extent.
A wonderful program with a list of capabilities that adversaries those of the more exceptional instruments, it can record everything occurring in your work area, yet additionally catch the film from your webcam and use it for picture-in-picture video, and even record sound from a mouthpiece. It additionally gives you the choice to save your preferred outcomes in an organization, or transfer them through your preferred assistance.
3. What’s the Best Screen Recorder for Low-End PC?
When it comes to low-end PC, it is the best screen recording software to help users with their needs. DemoCreator comes loaded with powerful features to help you with video tutorials and professional demos through its inbuilt tools. The application purely focuses on meeting the screen recording requirements of users.
It is an amazing screen recorder for low-end PC-free that can help turn your ideas into reality. You can fulfill all your video recording, sharing, and editing needs through this useful tool. DemoCreator is an easy-to-use tool that does not require any special skills. Moreover, it is loaded with multiple features that can make your task easier. You can download this tool without any cost and avail of the benefits of its excellent features.
The above are different best screen video recording software for different devices and platforms. Each of the solutions is an ideal choice when you want to create a video that you can proudly share with the world. Choose one based on your current project and we hope to see your video online soon.


