
Record, Convert And Stream Audio And Video With FFmpeg

Screen recording and video streaming have become a common utility in many industries.
Students, educators, online course creators, gamers, marketers, and many other professionals need to record their desktop screens or stream videos online.
Many screen recording tools are available on the internet and one such software is FFmpeg – a unique screen recorder in terms of how it looks and works.
This article entails overview of FFmpeg screen capture tool, its functionalities, a perfect alternative.
FFmpeg Screen Capture
At its core, FFmpeg is an open-source cross-platform software project having a bundle of libraries and programs. The libraries and programs are mainly built to handle audio, video, and multimedia streaming.
You can use it to encode, transcode, stream, play, and record audio & video on computers. Everything is controlled from the command line including screen recording, video format conversion, streaming, and more.
Depending on your OS, you can download Windows, Mac, or Linux package from FFmpeg website.
Windows users need to download DirectShow filter as well. Download and extract both programs in the same folder.
How to use FFmpeg to record screen
Once you have downloaded and installed FFmpeg and DirectShow, you can follow the below steps to activate FFmpeg screen capture tool.
Make sure you add FFmpeg to system environment variables.
Step 1: Open Command Prompt
Go to the folder where you installed both programs, then right click and select Open command window here.
Step 2: Discover Devices
Now, you need to discover your microphone and camera.
Use the following and note down the devices.
Step 3: Start Recording
Now, you can start recording the screen using the following command.
Hit Enter after typing the above command and your screen recording will start.
How to convert your video with FFmpeg
Several open source tools are available online for editin and converting vidoes from one to another format. Audacity is one example of such tools. However, sometimes you need something that can do that task quickly. Enter FFmpeg.
You can use FFmpeg through its command line tool ffmpeg to convert the video format.
The below is how you can do a basic conversion in FFmpeg. You can use the same method to convert your video to other formats as well.
For example, you have a video in MP4 format and you want to convert it into WebM format, you’d use the following command:
The above command has input file named “aaa.mp4” and output file named “ccc.wmv”.
The command will execute to find the input file (mp4 format) in the computer and convert it into the output file (wmv format).
How to stream audio and video with FFmpeg
FFmpeg can capture video and audio on your system and stream it over a network. Here’s how you can do this:
- Firstly, you need to discover camera and microphone using the following command in the command prompt.
This will show the microphone and camera name; note them down.
- Now discover the IP address using the command and note it down.
- Open the Command Prompt and type the following command.
- When you execute the above command, the stream starts. It can be watched on the destination computer using VLC media player.
FFmpeg screen capture tool alternative: Wondershare DemoCreator
While you can record your screen using FFmpeg, it’s not the most convenient option. If you want an intuitive and professional alternative with lightweight video editing capabilities, Wondershare DemoCreator is the perfect option.
Wondershare DemoCreator is a powerhouse when it comes to screen recording capabilities for both beginners and professionals. It’s now available as a 3-in-1 software with a screen recorder, animation video maker, and online screen recorder for your browser.
Whether you’re a gamer who live streams on YouTube, a course creator, or a marketer, you got to have Wondershare DemoCreator.
How to record screen
Wondershare DemoCreator is exceptionally easy to use. Unlike FFmpeg, you don’t need to write any commands to capture the screen; everything is available at the click of buttons.
Follow the below-mentioned four steps to record your screen with DemoCreator.
Step 1: Launch the software and select recording mode
Firstly, you need to visit the Wonderhsare DemoCreator website to download the setup for your Mac or Windows computer. Install the software after downloading it on your device.
Once installed, you need to launch the program. You can see a variety of options available in the interface.
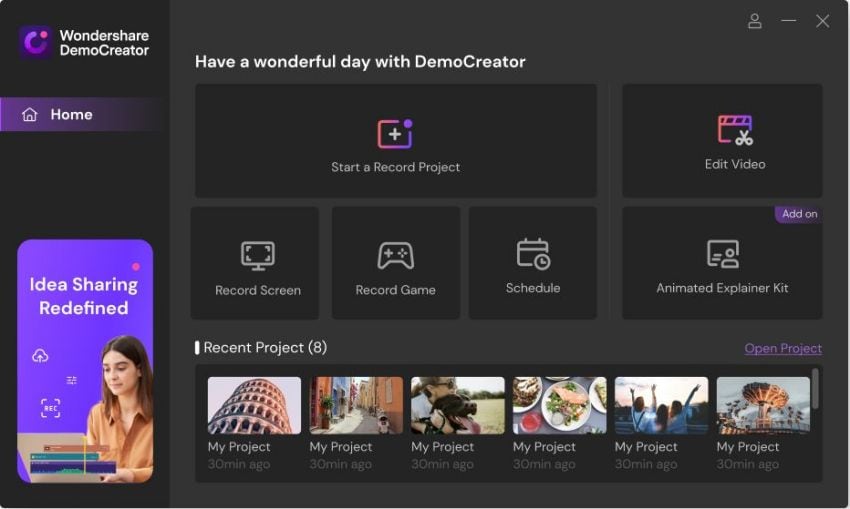
 Secure DownloadSecure Download
When you choose Select a Record Project, you can adjust everything as per your requirements. Record Screen option has some pre-defined settings to capture the entire screen.
Record Game option can be used when you need to record your gameplay.
Step 2: Adjust the screen size
When you click Start a Record Project, a dropdown menu appears; select Capture Area.
Now, set dimensions of the screen record area according to your requirements – drag the frame inward or outward from its edges.
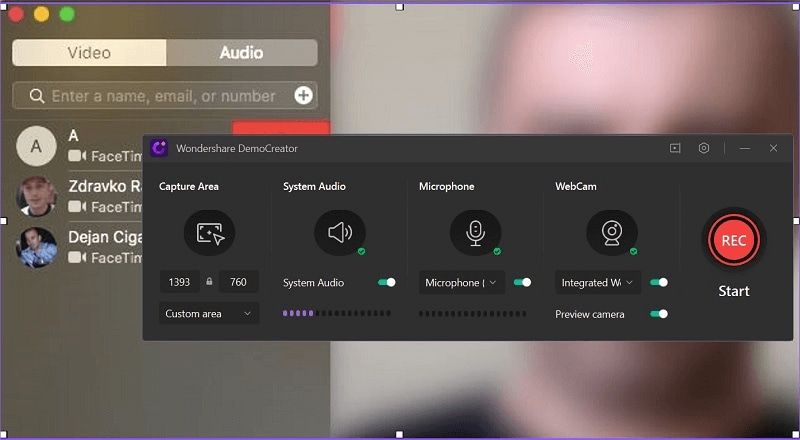
Step 3: Set up Audio and Camera Settings
DemoCreator record the system sounds and microphone sound by default. You can choose to disable them using the toggle switch – or select a microphone of your choice.
Also, you can enable WebCam recording to include your facecam video in the recording.
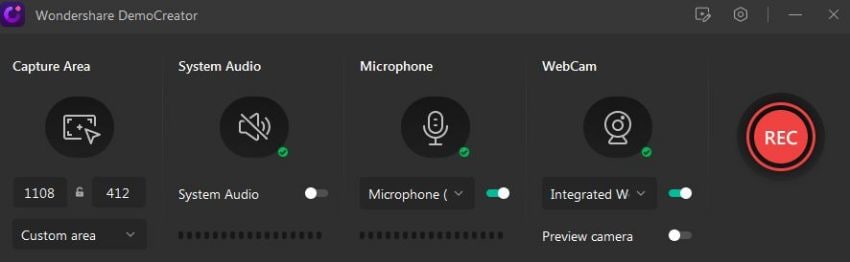
Step 4: Start recording
To start screen recording, click the REC button. The recording will begin after a countdown of three seconds. you can also press the F10 key on your keyboard to begin the recording.
If you want to pause/resume the recording, press the F9 key or use the pause button on the control panel. Click the Stop button or press F10 to stop/cancel the recording.
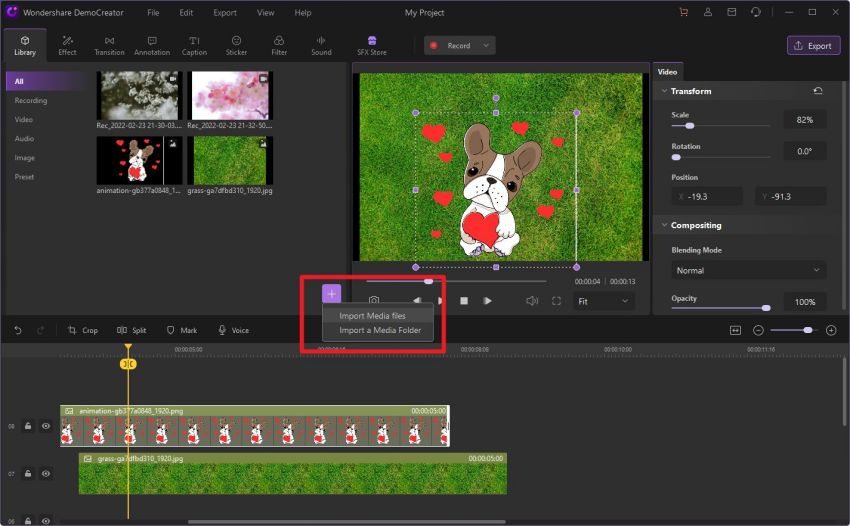
Once you stop the recording, it opens in the DemoCreator editor where lightweight video editing can be performed.
How to edit
Apart from screen recording, Wondershare DemoCreator has a video editor as well. You can use a range of video editing tools to add appeal and style to your videos. Some basic editing such as trimming, cropping, merging, and splitting make your videos professional.
Once you stop screen recording, the video opens in the editor. You can import videos from your local storage as well.
Here’s how to import the video:
- Open Video Editor.
- Click the Library tab from the top left of the screen.
- Double-click on the Add File icon in the empty space.
- Select the file from the Browse explorer and click Open.
Cut
Your screen recording video might have some unwanted or unnecessary parts. You can use the Cut tool to get rid of them.
- All you need to do is place the marker at that instance you want to cut.
- Select the Cut tool from the bar just above the video timeline.
- Select the area and click OK.
Trim
If you want to trim a specific portion of the video, you can use the Trim tool.
- Open the video and set the cursor to the edge of the clip in the timeline.
- Drag the cursor and select a specific length of the clip in the timeline to Trim that part.
Crop
You can crop your video easily to remove something unwanted from a specific frame.
- All you need to do is select your clip and click on the Crop button just above the timeline of the video.
- A window will open where you can resize the visible area. Keep that area out of the markers that you want to remove.
- Then, click OK to crop the video.
You can add custom dimensions as well.
Split
You can easily split a clip in DemoCreator.
- Open the video in DemoCreator Editor.
- In the timeline, move the marker to the position where you'd want to split.
- Then, click on the Split button.
- After that, rearrange the clips.
Merge
It’s very simple to Merge two or more videos in DemoCreator.
All you need to do is to add the videos to your timeline.
When you have them added to the timeline, the video clips are merged into one.
You can add a transition between them as well
How to add video effects
If you want your video to be more engaging and professional, you can add different effects from the Effect tab in DemoCreator Video Editor.
To apply any Effect, drag and drop it to the video timeline.
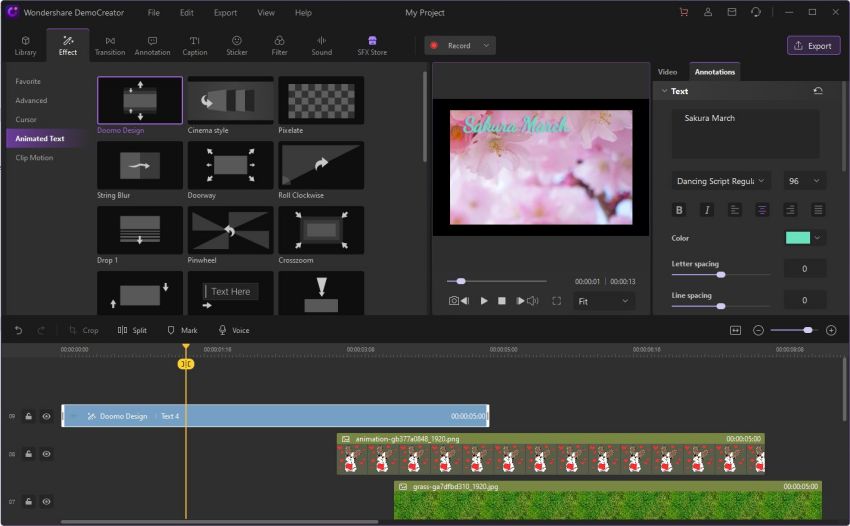
These include effects for your video, cursor, text, and clip.
Facial Recognition
Facial Recognition is a premium feature available in paid version only. It identifies your face and melts it into the video, giving your video a more lively and engaging outlook.
Remove Background
This is another premium effect that’s available in the paid version. It’s effective when you’re using a green screen and want to add a custom background to your video.
Mirror
Have you ever recorded your screen with facecam video where your face looks weird? It might be because the facecam video is not mirrored. However, you can later apply the Mirror effect to your video and flip your facecam video. It’s available in the DemoCreator’s Video Editor.
Cinema 21:9
If you want to change your video’s layout to cinema dimensions, apply the Cinema style effect. This effect is available in the Effects tab of the editor.
Mosaic
Your video might have some parts where personal information is visible or anything that you don’t want others to see. Applying the Mosaic effect makes such parts unrecognizable.
Conclusion
FFmpeg is an open-source multimedia tool used extensively. However, its non-intuitiveness is a huge turnoff for many users.
On the other hand, Wondershare DemoCreator is a complete screen recording tool that offers ease of use, a wide variety of features, easy video editing, and more.
If you want to capture your desktop screen easily, you can’t go wrong with Wondershare DemoCreator.


