Movavi is a famous screen recording brand. However, there's a lot of misinformation about different screen recorders, including Movavi. You probably clicked on this post because you want to get objective information about the Movavi screen recorder for Mac and whether it's worth your time.
Don't worry—you've come to the right place. Today, we'll discuss all the crucial features, useability, user experience, user interface, and pros and cons of the Movavi screen recorder for Mac. We will also go through detailed steps to help you learn how to use Movavi to record your screen on Mac successfully.
Ultimately, we'll also share a similar alternative you should try if you feel Movavi isn't the right option. So, let's start.
Table of Content
Movavi Screen Recorder for Mac: General Overview
The Movavi screen recorder for Mac is a paid recording software. Luckily, it has a free option you can use to get to know the tool and see how it works for yourself. We feel that this software balances functionality and simplicity.

During our review, we will highlight all the features of Movavi that stand out. The recorded videos have high-quality video and audio output, making the recording process straightforward. Advanced users have many customization options, but beginners won't have any trouble using it either.
We'll leave you on this note if you don't want to read the whole review. Try Movavi for yourself and check what it's about. Here's a table with general information about Movavi screen recorder for Mac, including technical specs.
| System requirements | 1 GHz CPU, 2GB RAM, 300 MB of disk space, at least 2 GB of free space for use, 1280 × 768 screen resolution, 32-bit color; |
| Latest version | Version 24 (Released in 2023) |
| Available languages | English, French, German, Spanish, Italia, Portuguese, Dutch, Turkish, Polish, Chinese, Japanese, Korean; |
| Device compatibility | iMac, MacBook Pro, MacBook Air, etc. |
| Supported video formats | 3GPP, AVI, MPG, FLV, SF, MOV, WMV, MKV, MP4, MOV; |
| Supported video codecs | H.263, H.264, MPEG-2, MPEG-4, XVID, DIVX, QuickTime Video, HD MOV Video, WebM, MJPEG; |
| User reviews | G2 - 4.5/5 (52 reviews) Software Advice - 4.5/5 (26 reviews) TrustRadius - 7.8/10 - (9 reviews) Trustpilot - 4.6/5 - (20k reviews) |
Main Features of Movavi Screen Recorder for Mac

The main feature and function of Movavi screen recorder for Mac is the recorder widget. When you start the program, the widget appears, and you will get a camcorder and camera icon. One is for recording your screen, while the other captures screenshots. Many other options complement screen recording, including:
- Video Recording
- Video editing
- Screencasting
- Screenshots & scrolling screenshots
- Screenshot editing
- Real-time drawing
- Scheduled recording
- Instant video/image sharing
- Different video exporting options
- Customizable video recording shortcuts
- Show mouse clicks and keystrokes
- Advanced hardware acceleration
Movavi is capable video recording software for Mac that lets you capture all screen activities. The scheduled recording feature is very convenient when you want to prepare for recording future events. You can capture audio from different sources, including the system, screen, and microphone.
Video Screen Recording
The video recording function is very flexible. You can record a specific part of the screen or the whole screen. That's very useful when you want to record specific web browser areas, like reels on social media. It does a good job of recording all the activity on your screen.
Users can customize the frame according to their needs, ranging from 5 to 60. One annoying thing about the screen recording mode is that the recording panel will show in your videos unless you've hidden it in the basic settings menu.
Screen Recording Scheduling
The scheduled recording feature is convenient for users who can't be in front of the computer the whole time or can't make it on time to turn on video recording. In these situations, you can schedule recording and leave your computer alone. It's a good option if you want to record live streams or other events to watch later.
Webcam Capture

You can turn on your web camera and capture screen video and webcam footage. That's a great option if you want to record instructional videos, tutorials, or game streams. The webcam capture can be adjusted with different webcam shapes, frame rates, and recording resolutions.
Make sure to adjust the webcam settings before you start recording. Using the webcam footage on the screen as an overlay or as a separate video stream is possible.
Annotation and drawing
Drawing and annotation tools in Movavi screen recorder for Mac do an excellent job. These features can add drawings, arrows, shapes, and text to recordings. They are handy for emphasizing the specific aspects of the recording and guiding your audiences throughout the video.
For example, you can pinpoint the vital part of a screenshot or highlight the metrics you're talking about during a video presentation. Drawing and annotation tools can help you create more engaging and interactive content.
Movavi Screen Recorder for Mac User Interface

Movavi has a modern, minimalistic, clean user interface that's easy to use. It's very intuitive, and even people without experience with screen recorders can easily find their way around it. The design is perfect for individuals who want to use the tool at home, but it's also suitable for professionals who want to use it daily.
The majority of the design is black, designed to reduce eye strain. When you start the Movavi screen recorder on Mac, you see a small capture widget with several icons. You can drag the widget anywhere that works for you and start recording directly.
The settings icon on the widget opens up an extensive menu where you can change recording preferences and adjust the tool. You can change webcam settings, schedule video recording, change audio settings, customize video recording, change the save directly, and much more.
Pros and Cons of Using Movavi Screen Recorder for Mac

Every screen recorder has pros and cons, and Movavi is no different. Even though it's one of the best screen recorders for Mac currently available, there are also some downsides you need to consider. At the same time, we'll also share its most significant strengths:
How To Use Movavi Screen Recorder on Mac
Movavi is a desktop screen recorder, so you must download and install the tool on your Mac. Go to the official website, download the free version, and install it on your device. Once you've done that, follow these steps to record your screen on Mac:
- Launch Movavi screen recorder for Mac.
- Click on the camcorder icon.

- Select the part of the screen you want to record. Drag and drop the edges of your recording screen. You can adjust recording settings such as system audio, microphone audio, webcam overlay, mouse click highlight, highlight cursor, and record keystrokes. When ready, click the Record button.

- Your recording will start. When you've finished recording, click the Stop button. Then click Export and Save to save your video to your device.

As you can see, the Movavi screen recorder for Mac is simple to use. When selecting the screen, if you have any windows open, you can simply click once on the window you want to record. Movavi automatically detects what you have on screen and makes selecting anything simple.
You can also use shortcuts to start or stop recording and activate different sound recording settings while recording.
Movavi Screen Recorder Pricing for Mac
Movavi screen recorder for Mac has a single free option and three paid plans. Here are the available options and what they offer:
| Plan | Free | Screen Recorder | Screen Recorder + Video Editor |
Video Suite |
| Price | With watermark | $44.95 per year | $59.95 per year | $89.95 per year |
| Features | Custom screen recording, full-screen recording, real-time drawing, webcam capture, keystrokes, and mouse cursor highlighting; | Free plan + no watermark, more video recording customizations and modes; | Screen Recorder plan + cutting, trimming, automatic video creation, special effects, keyframe object animation, AI noise reduction, AI background replacement; | The latest editions of screen recorder, video converter, and video editor; |
Please note that prices are subject to change. Visit the official website to check the current prices of the Movavi screen recorder for Mac.
Who Should Use Movavi Screen Recorder for Mac?

The Movavi screen recorder for Mac is available to any Mac user. Try it out whether you want to use it professionally or for personal needs. However, here are some types of people who will benefit significantly from using Movavi:
- People who want to record business videos: If you work in marketing or sales, you can benefit greatly from creating and sharing high-resolution videos. You can record your presentations and instructional videos or simply share ideas through videos.
- Educators: Educators who want to deliver more engaging learning content should consider videos. Tools like Movavi make it easy to create video instructions or online courses. The webcam option and user-friendly interface make it easy to deliver meaningful content quickly.
- Content creators: Movavi is ideal for content creators like streamers, YouTubers, marketers, and influencers. It lets you record videos, make edits, and annotate content.
Best Alternative to Movavi Screen Recorder for Mac - Wondershare DemoCreator

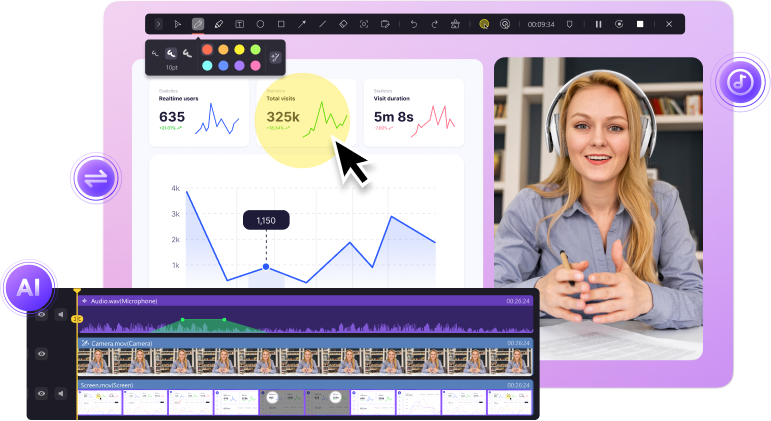
Wondershare DemoCreator is another powerful video recorder and editor that also has a free version that leaves a watermark. It has a sleek and modern look similar to Movavi but with different color palettes. What makes DemoCreator stand out is that it offers multiple screen recording options.
It can record certain parts of the screen, the whole screen, live stream footage, or specific windows. Unlike Movavi, it has a scheduler for recording videos. Besides being a full-blown video recorder, DemoCreator is also a video editing tool.
It has comprehensive editing features like auto-subtitle generation, video denoise, video templates, text-to-speech conversion, AI object removal, etc. Users can also create virtual avatars within recorded videos designed for instructional, educational, and marketing videos.
How to Record Your Screen Using DemoCreator
Here's how to use Wondershare DemoCreator to record your screen on Mac:
- Download and install Wondershare DemoCreator on your Mac.
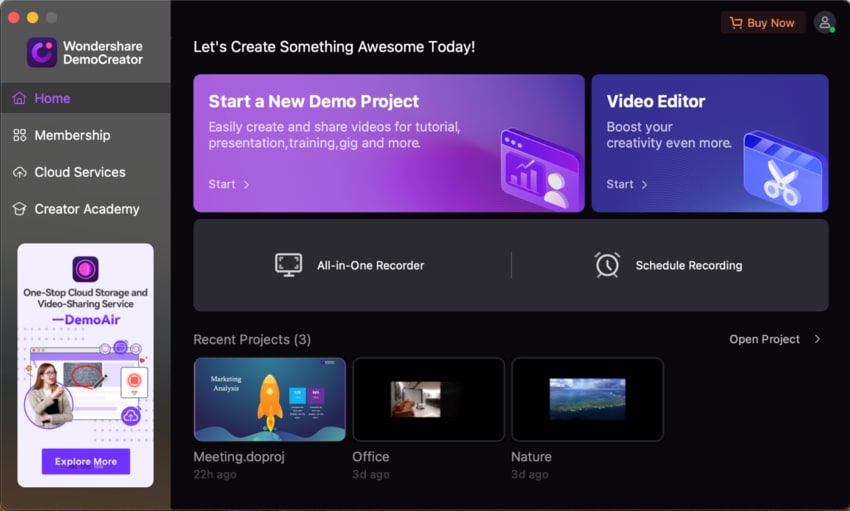
- Launch Wondershare DemoCreator and select All-in-One Recorder.

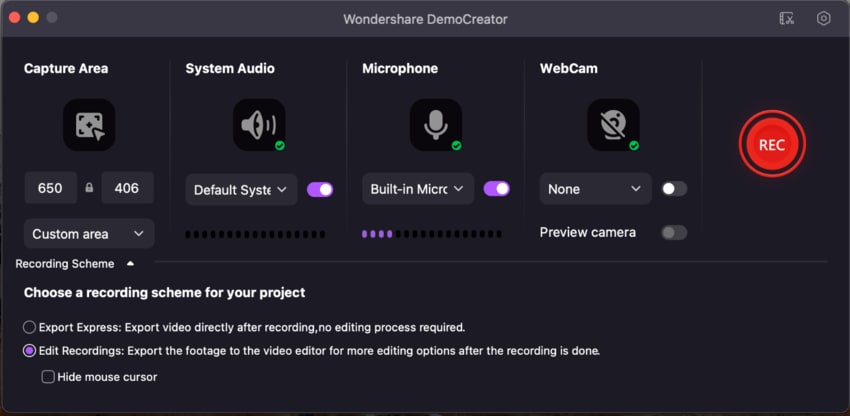
- Adjust the recording settings, including Capture Area, System Audio, Microphone Settings, and WebCam Settings.

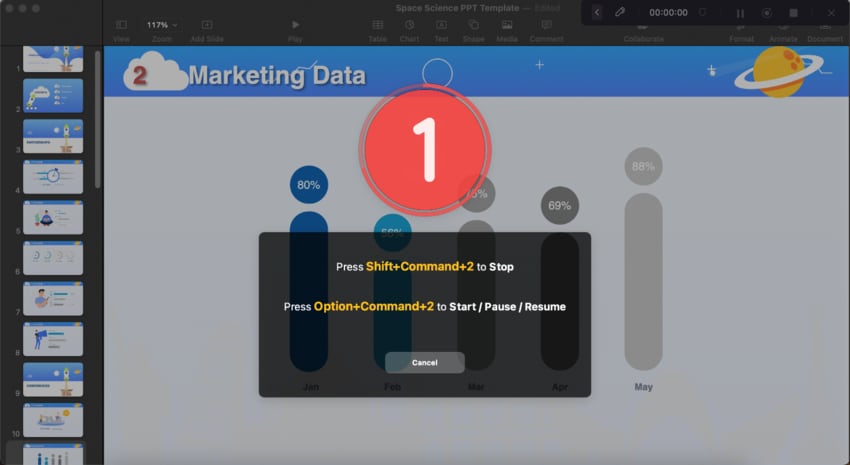
- Click the REC button to start recording.

Conclusion
Movavi video recorder for Mac is a handy software for professional and personal purposes. It lets you record all kinds of videos and take screenshots with ease. Professionals and beginners can use it equally effectively, and this tool has no significant issues.
However, better options with more advanced features are available if you want the latest cutting-edge video recorder. It's a great tool; try the free version before subscribing.


