
Are you in need of a good screen recorder for your Mac? OBS Studio for Mac is a choice. We'll help you learn everything you need about screen recording with OBS. Additionally, we'll show you how to download OBS on Mac and install it properly.
With our help, you can screen record with OBS on Mac in just a few clicks. Lastly, you'll find the best alternative for OBS Studio for Mac users.
Table of Content
OBS Studio for Mac - Overview
OBS, or Open Broadcaster Software, is a free program that allows you to stream from your PC to any streaming service. OBS Studio is compatible with macOS, Windows, and Linux OS, making it perfect for streaming on any device. It can easily stream to numerous platforms like Twitch, YouTube, Facebook, etc.
OBS Studio can stream a live video from your webcam or external camera, record audio from a microphone, or screen record your desktop. It offers many options and functionalities that can be useful to streamers. Moreover, you can combine several videos and stream a split-screen video to your viewers.
However, OBS Studio isn't as intuitive and user-friendly as other screen recorders, so users will need some adjusting to get ahold of its true potential. Because of this and its advanced features, mainly professional content creators use OBS for video recording.
OBS Studio offers various incredible features to its users. Some of the main features of OBS Studio for Mac include:
- Live streaming videos
- Audio mixer for two simultaneous audio sources
- Smooth transitions between videos
- Various video filters and effects
- Option to create shortcuts using quick key combinations to access certain features.
How To Download OBS Studio for Mac
As mentioned, OBS Studio is an open-source app. In other words, you can download OBS Studio for free and use it to record your screen. It's highly popular among more experienced users. We've prepared a step-by-step guide to downloading OBS Studio on Mac if you want to try it yourself.
Follow these steps to download OBS on your Mac device:
- Go to the official OBS download page using a browser on your Mac computer.
- Click the Apple icon to select Mac as your operating system.

- Download the most recent version by clicking on Download Installer. Select the download option next to the Mac version you have, either Intel or Apple Silicon.

- Select the destination for your downloaded installer and wait for it to finish downloading on your Mac.

How To Install OBS Studio on Mac
Once you've downloaded the OBS Studio installer for Mac, it's smooth sailing from there. The process of downloading and installing OBS is relatively straightforward. Most importantly, it's completely free to download and use.
Follow these steps to install OBS Studio on your Mac:
- Once the Installer is downloaded, it will automatically open a window.
- If the pop-up window doesn't appear, open the OBS Studio installer by clicking on it.
- Click and hold onto the OBS icon, drag it to the Applications icon, and drop it on it.

- That will install the OBS Studio app on your Mac in just a few seconds.
- Open the OBS app on your Mac by double-clicking on it.
- You'll be asked to review the App Permissions when launching the app.

- Set the permissions according to your preferences and click Continue.
- OBS Studio will open up. The Auto-Configuration Wizard will appear, asking you to set configurations. Set the properties as you wish and click Next.

- When you finish setting up configurations, click Apply Settings.

- Once you've done that, you can freely use OBS Studio on your Mac.
How To Use OBS for Screen Recording on Mac
Downloading and installing OBS Studio on your Mac is a quick and simple process. However, OBS Studio is a bit of a challenge for novice users. If you don't have experience with video recording and streaming apps, OBS Studio may be a bit difficult initially.
Thus, we've prepared a step-by-step guide to help you record your screen on your Mac using OBS Studio. Once you get a hold of it, you can screen record with OBS whenever you want.
Follow these steps to use OBS Studio for screen recording on your Mac computer:
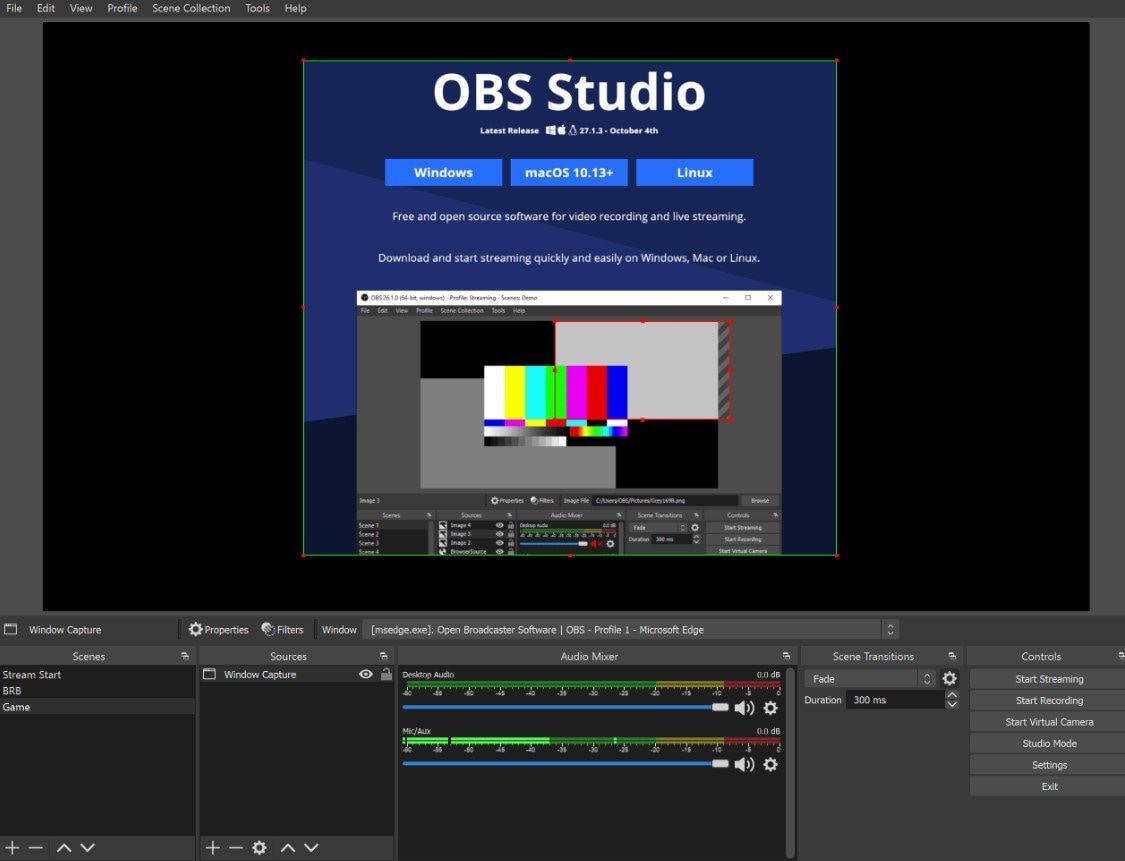
- Open the OBS app on your Mac.

- In the lower-left corner, find the Sources box. Click on the + icon to open a menu.

- That will open an options menu. Select Display Capture to record your screen.

- That will open a new panel. Name the recording and press OK.

- Confirm the display you want to record. If you have more than one display connected, select the one you want to screen record. Press OK.

- Now that you've set that up, you must set the audio. OBS captures sound from your mic by default. If you want to change that, go to the Audio Mixer section and click the Volume icon to turn your sound off.

- Once you've set everything right, it's time to start recording. Go to the Controls section in the bottom-right corner and select the Start Recording option.

- Once you're done, stop the recording in the Controls section by pressing Stop Recording.
Pros and Cons of OBS Studio for Mac
A Simpler, Yet Powerful Alternative to Consider - Wondershare Democreator
While OBS Studio is an excellent Mac screen recording solution, many users find it too complicated to use. We found an alternative solution to help you record your screen with ease and hassle-free. Wondershare DemoCreator is a perfect screen recorder for beginners and inexperienced users.
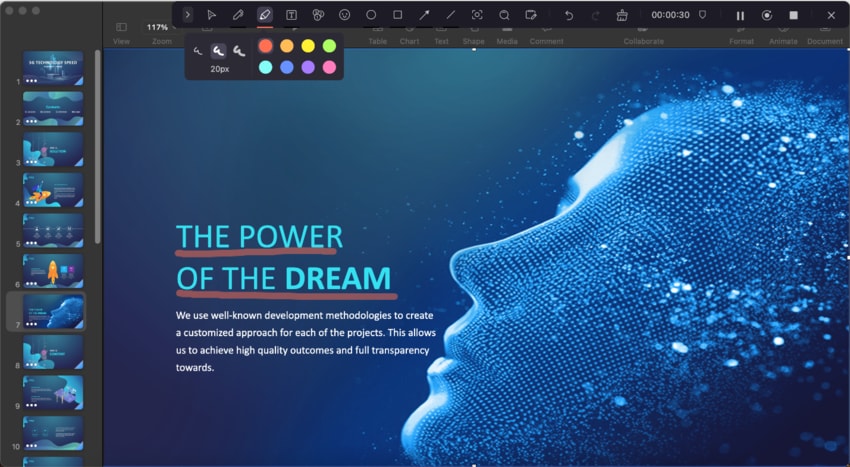
Wondershare DemoCreator has a clean and modern interface, making it easy to use and intuitive for novice users. It can perfectly record demos, instructional videos, demonstrations, presentations, or any other screen recording. Moreover, Wondershare DemoCreator allows you to record multiple screens simultaneously and create a split-screen video recording.
Its high-quality recordings and perseverance of high resolution make it the top choice of many users. You can screen-record your business presentations, gameplay, or tutorials and never worry about the quality of your videos.
Some of the main features of Wondershare DemoCreator include:
- Scheduled screen recording
- A built-in array of video effects and filters
- AI-powered editing tools
- Record screen and audio tracks separately
- Automated caption support
- Support for eight languages
How To Use DemoCreator for Screen Recording on Mac
If OBS Studio is too complicated to use, try Wondershare DemoCreator. Wondershare DemoCreator is simple and easy, providing a quick recording process. To show you how simple it is to record your Mac screen with this versatile video recording tool, follow these easy steps:
- Download and install Wondershare DemoCreator on your Mac.
- Open Wondershare DemoCreator and click on All-in-One Recorder.

- All-in-One Recorder allows you to record your screen, system audio, microphone, and camera at the same time. Select the capture area, system audio, mic, and camera you want to use.

- Choose the recording scheme. You have two options: Export Express and Edit Recordings. Export Express allows you to export your screen recording as soon as you finish recording it without editing. Edit Recordings enable you to export and modify your screen recording in the video editor.
- Press the red REC button on the right when you want to start filming.
- Once you want to stop recording, click the End button or press the Option+Command+2 keys.
Conclusion
OBS Studio for Mac is an excellent solution for recording your Mac screen. It's primarily used for streaming to popular streaming services like Twitch and YouTube. However, you can screen-record almost anything, from job interviews to presentations. OBS Studio is a free, open-source app used by experienced video creators.
It's easy to download and install OBS on your Mac but can be tricky to navigate and use for screen recording. If you want a simpler solution, you can try Wondershare DemoCreator. This video recorder and editor lets you record your screen and edit your videos easily. Its simple yet advanced processes and modern, intuitive interface make it a perfect alternative for OBS Studio.


