
In the recent past, there’s been an explosion in the usage of video conferencing.
But do we really have no choice but to go with those old-fashioned methods of online meetings? No way, we are using those outdated meeting styles.
People are desperately looking for some third-party tools to make fun but professional-looking meetings through Microsoft teams, an excellent video conferencing tool.
If you are also one of those searchers then hunt no more because we are going to show you how to make an impressive combo of Snap Camera and Microsoft Teams. And as icing on the cake, we’ll also reveal a mind-blowing video presentation-making tool that will take your video conferencing experience beyond your expectations.
So why are we still waiting?
Let’s start our guide by seeing how we can use the magic of Snap Camera on Microsoft Teams.
In this article
How to use Snap Camera in Microsoft Teams
Before we dive into the step-by-step guide, let’s first see what is Snap Camera and why we need to use Snap Camera in Microsoft Teams.
What is Snap Camera?
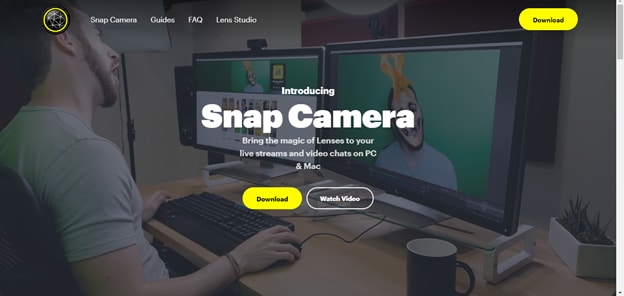
Snap Camera is a software for Windows and Mac that was created after Snapchat lenses and filters made a big hit among users worldwide. It is a library of stunning lenses and face filters that can easily give any type of video a professional look.
Why Do You Need to Use Snap Camera in Microsoft Teams?
Most of our Microsoft Teams meetings are just boring with the same outdated style. But you can easily transform them using Snap Camera. Just add those cool, funny, and funky lenses to your videos and improve your experience within seconds. You can also use some fantastic face filters to hide your face while maintaining the attention of viewers, all by the virtue of the Snap Camera.
Now that we have a brief overview of Snap Camera, let’s move forward and see a stepwise guide on how to use Snap Camera in Microsoft Teams.
Steps to Use Snap Camera in Microsoft Teams
Step 1Download Snap Camera Application
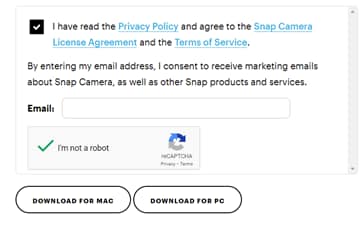
First of all, you have to download the Snap Camera application. For this, go to the Snap Camera official webpage and hit the download button.
After that, you have to agree to their terms & conditions and give an email ID. Then once you clear the reCAPTCHA, download the Snap Camera for Windows or Mac, depending upon your operating system.
Step 2Install the Snap Camera Application
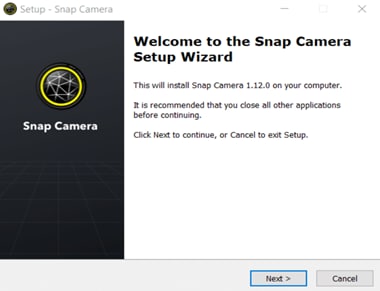
After the download has been completed, open the setup and follow the steps of the setup wizard to install the Snap Camera.
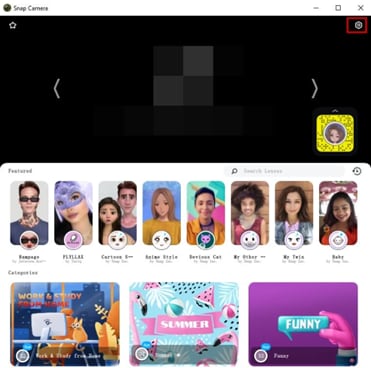
Step 3Open Snap Camera and Select Webcam
Once the Snap Camera has been successfully installed on your device, launch the tool right away. Now go to Settings and select “Integrated Webcam” or “USB Camera” that is connected to your device as the camera input of the software.
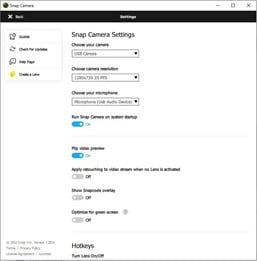
Now when you go back to the main interface of Snap Camera, you’ll see your video with a myriad of cool and funny lenses that you can apply to your video.
Step 4Choose Snap Camera as Video Input in Microsoft Teams
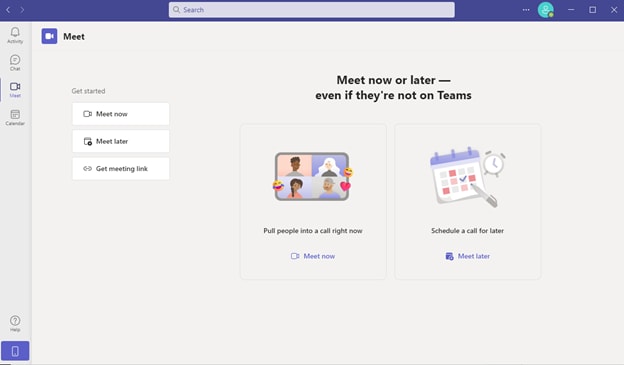
Finally, it’s time to add Snap Camera to our Microsoft Teams meetings. Open Microsoft Teams and click on “Meet” from the left vertical bar.
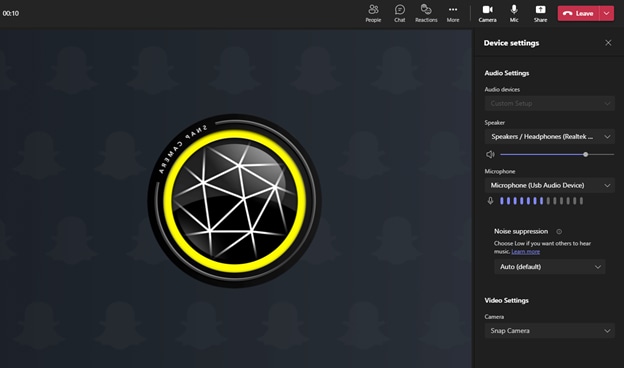
Now go to the “More” section, and hit the “Device settings.”
You’ll be able to see “Video Settings” at the bottom. Select “Snap Camera” from there to integrate Snap Camera with your Microsoft Teams meeting.
So this was how you use those classical lenses and filters of Snap Camera on Microsoft Teams meetings. Now your meeting must be somewhat better than before but are you really content with only this?
You didn’t forget about our big reveal, right?
We are now going to show you spectacular software that will help you further improve your Microsoft Teams meeting.
Let’s move into the world of Wondershare DemoCreator.
Improve Your Microsoft Teams Meeting with DemoCreator
What is DemoCreator?

Wondershare DemoCreator is a top-notch video-making tool that is widely pursued making fun but refined videos from screen recording or by importing media like images and presentations.
You are going to be surprised by looking at the user base of DemoCreator. It’s more than a whopping 85 Million users worldwide. And these users are scattered in 190+ countries of the world. That’s what shows how great of a video maker DemoCreator is.
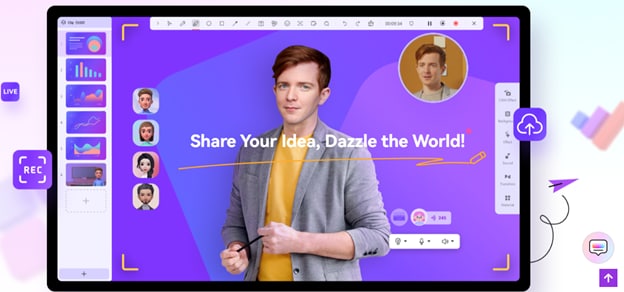
An essential demo-making tool that helps learners, educators, freelancers, and gamers to take idea-sharing to the next level.

So what kind of videos can be made with DemoCreator? Let’s have a look.
- Online learning courses and tutorials.
- Business presentation videos.
- Gameplay recordings.
- Live streamings.
- Professional demos and documentaries.
Now that you have an overview of DemoCreator, let’s have a look at the specific features that will be extremely helpful in improving Microsoft Teams meetings.
How can you improve your Microsoft Teams Meetings with DemoCreator?
CAM Effects
DemoCreator comes with a CAM effect feature that will automatically create a great portrait of your image and will place it on your meeting to create a more visually pleasing presenter.
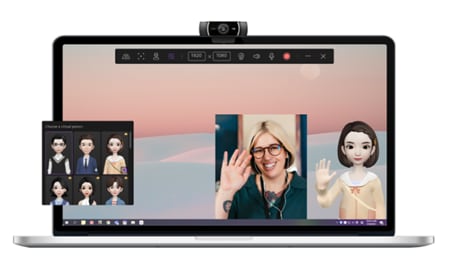
Classical Virtual Avatars
What? Don't like your portrait. No worries. There are multiple 3D as well as 2D virtual presenters that will skillfully capture your every move. So spice up your video presentation with these amazing metahumans.
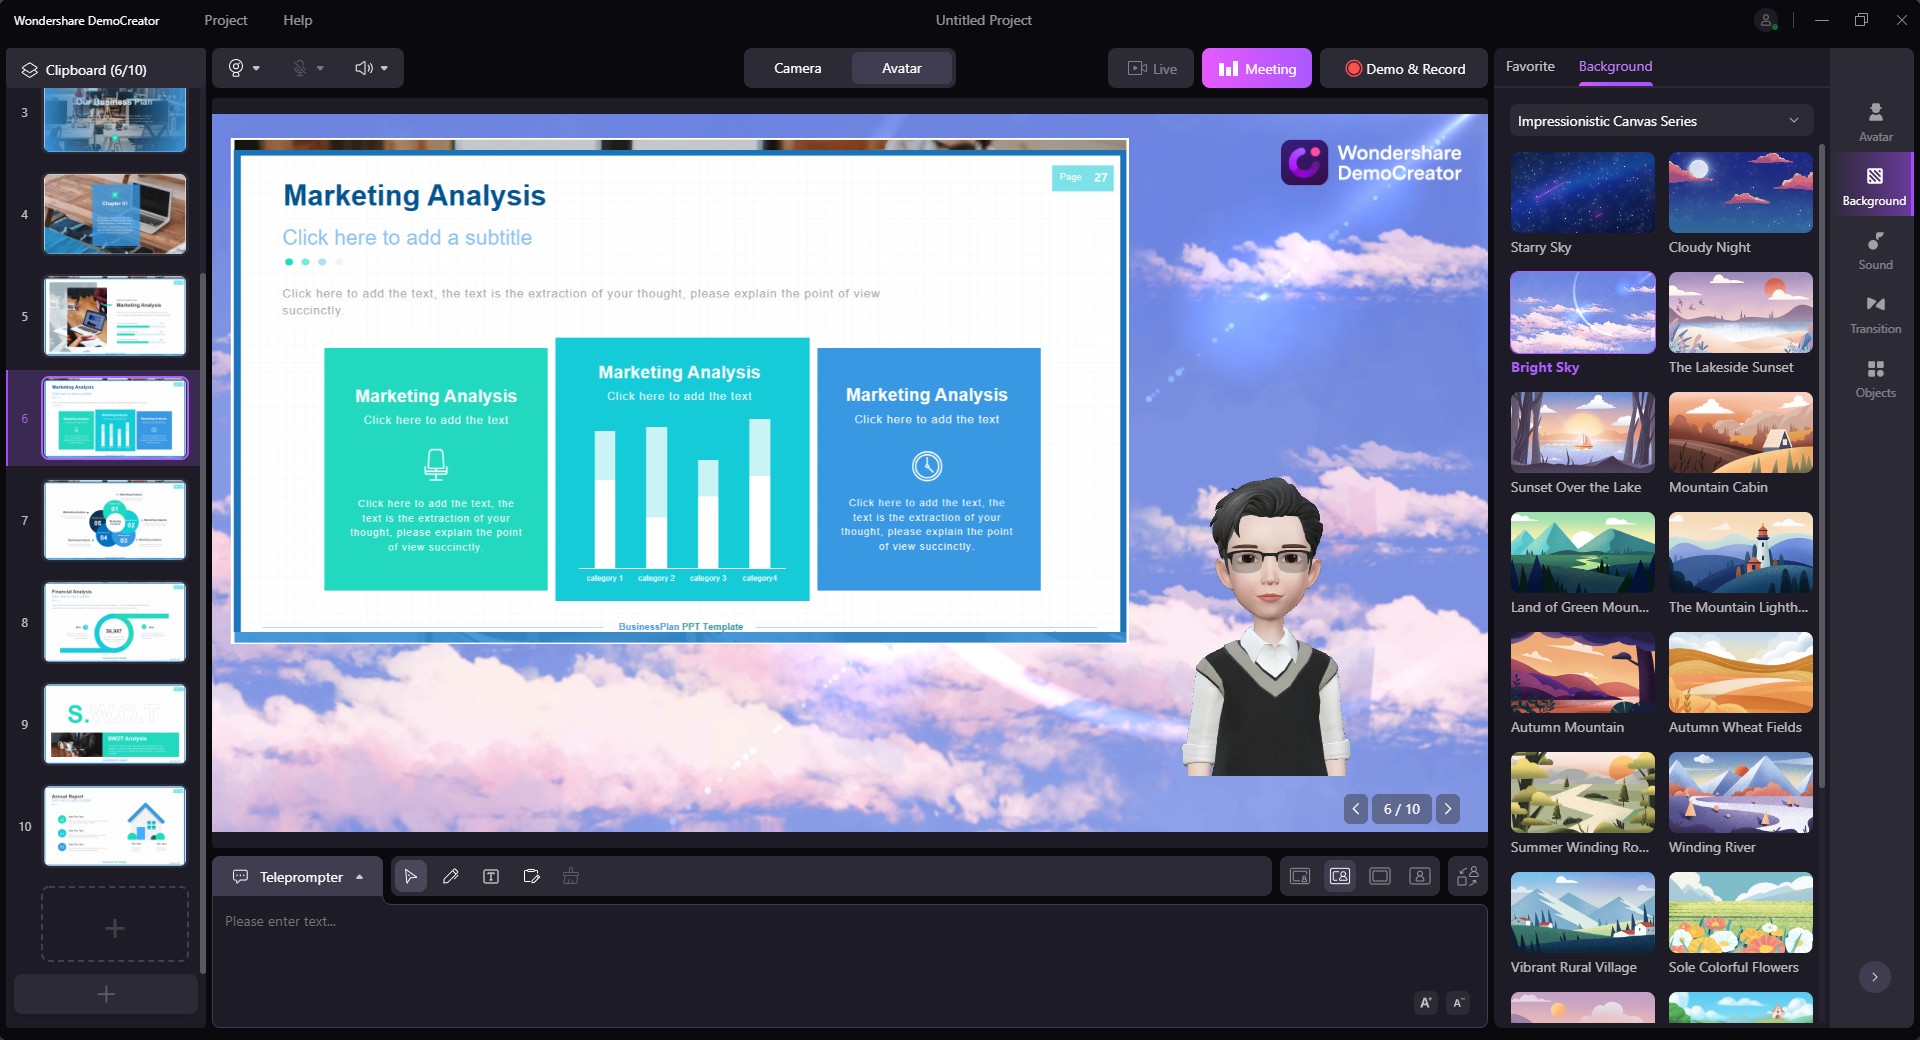
Custom Backgrounds
You can also improve your Microsoft Teams meetings by changing your video background. Now travel around the world without moving a single inch by selecting an appropriate background. Or you can make unique gaming, or learning environment by simply selecting a related background.

Cool Annotations
Now comes the fantastic annotation tools. You can effortlessly make your videos more meaningful and attractive by using captions, elaborative text, attractive stickers, or shaping materials like arrows, squares, and many others.
A doodling pencil tool is also provided.
Visual Elements
Wanna add some music, sounds, or video clips? No need to look far, just open the extensive visual element library and capture the hearts of your viewers with these studio-like visual elements.
Fascinating transitions
Add some fascinating transitions to your video and make it as exciting as possible.
So utilizing these astonishing features, let's have a look at how we can make studio-quality Microsoft Teams meetings with Snap Camera and DemoCreator.
Steps to connect Snap Camera & DemoCreator with Microsoft Teams
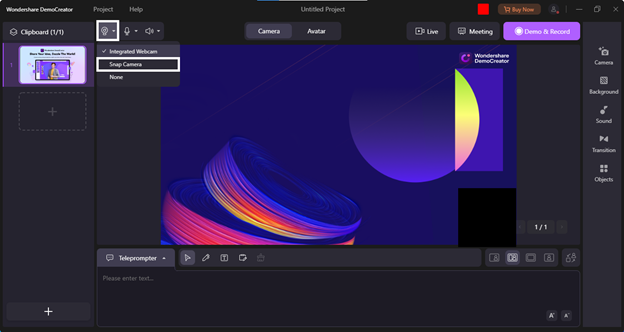
Step 1Set Snap Camera as Webcam Input
First of all, you have to make sure that the Webcam of your PC or the USB camera you are using is integrated with the Snap Camera. For this, launch the Snap Camera and go to Settings there. Now choose "Integrated Webcam" or "USB Camera" as the camera input.
Step 2Prepare Meeting Content in the Demo Mode of DemoCreator
- Start a New Project
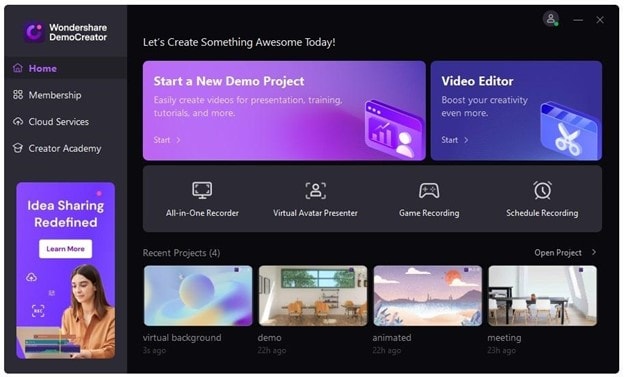
Now it’s time to move towards DemoCreator. Launch the Wondershare DemoCreator and from the opening interface, click on “Start a New Demo Project.”
- Make Preparations for Your Meeting
After you’ve created a new project in DemoCreator, put together all of your special ideas and start preparation for your video. You can add images, music, and video clips to set the mood for your video. Try adding some exceptional background and refine it further with the first-class annotation tools. Choose from the unique virtual avatars or just go with the CAM effects.
Nevertheless, just try everything you want until you’ve made a perfect model for your video.
- Input Snap Camera from the Video Settings
Now navigate to the webcam source options on the top left of the interface and hit the camera icon to select Snap Camera as the video source of your video. In this way, you’ll be able to use those incredible lenses of Snap Camera on top of your DemoCreator video presentation.
Step 3Start Meeting and Connect to Microsoft Teams
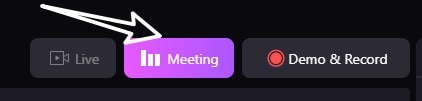
- Start the Meeting
We are all set to go, folks! Hit the “Meeting” button on the top right corner of the interface to start your meeting.
- Integrate with Microsoft Teams
Finally, it’s time to complete the trio we want.
- Enjoy Your Meeting
So there we go, we’ve succeeded in joining the magic of Snap Camera lenses and the world-renowned video-presentations tools of DemoCreator with Microsoft Teams. Now enjoy your Microsoft Teams meetings like never before.
Sit tight everyone because we are nearing the end of our guide. Let’s just have a quick look at the other meeting platforms that are supported by DemoCreator.
DemoCreator and Other Meeting Platforms
We have already seen DemoCreator integrating with Snap Camera and Microsoft Teams. But is that the end of it?
Of course not!!!
Just like the jack of all trades, Wondershare DemoCreator can not only merge with many third-party tools like Snap Camera, OBS studio, and Nvidia Broadcaster as the video input source, but you can also link its video presentation with many other great names as the output source.
And what are those?
From live streaming platforms like Facebook Live, Youtube Live, and Twitch to popular video conferencing and screen recording software, everything can be effortlessly connected with DemoCreator for exporting video.
Final Words
So this was the mind-boggling combo of Snap Camera, Microsoft Teams, and Wondershare DemoCreator. Now you can also make stunning Microsoft meetings and surprise your viewers with the charm of Snap Camera lenses & filters as well as the powerful video-making features of DemoCreator.


