

Is your QuickTime screen recording not capturing audio? You can quickly resolve the problem whether the player doesn't record your microphone, system sounds, or both.
We'll walk you through the six tried-and-tested fixes, but let's first see what causes the frustrating "QuickTime Player screen recording no sound" problem. We'll also introduce an excellent alternative, so keep scrolling.
Table of Content
Why Does My QuickTime Screen Recording Not Have Sound?
If your QuickTime player screen recording has no sound, the following reasons may be the culprits.
- Restricted microphone access - QuickTime Player needs permission to use your microphone. Otherwise, it can't pick up your voice.
- Incorrect sound input - Your built-in microphone may be the default audio input device, preventing QuickTime Player from capturing your external microphone.
- No audio input in QuickTime settings - The default microphone setting in QuickTime Player is "None," meaning it can't record your voice if you don't choose a microphone.
- No plugin to capture system audio - QuickTime Player can't record system sounds without a kernel extension.
- Outdated QuickTime Player - If the program needs an update, it can cause system incompatibility problems and software glitches, including the inability to capture audio.
- Obsolete sound drivers - Your Mac installs the latest versions when updating macOS software. Therefore, QuickTime Player may be acting up because you haven't updated your macOS.
Regardless of the cause, you can quickly resolve the problem and record your Mac screen with audio. Here's how.
QuickTime Player Screen Recording No Sound - Top Fixes
Here's an overview of the causes and proven fixes for QuickTime screen recording no audio.
| Causes | Fixes |
| Restricted microphone access | Give QuickTime Player permission to use your microphone. |
| Incorrect sound input | Check sound input settings. |
| No audio input in QuickTime settings | Check QuickTime Player settings. |
| No plugin to capture system audio | Install a kernel extension to record system audio. |
| Outdated QuickTime Player | Update QuickTime Player. |
| Obsolete sound drivers | Update sound drivers. |
Fix 1. Give QuickTime Player Permission to Use Your Microphone
Follow these steps to enable QuickTime Player to record your microphone:
- Go to the Apple menu > System Settings (macOS Ventura or newer) or System Preferences (macOS Monterey or older) > Security & Privacy.
- Switch to the Privacy tab, click Microphone in the left sidebar, hit the Lock in the bottom left corner, provide your admin password, and tick the QuickTime Player checkbox.

Related: how to allow screen recording on Mac
Fix 2. Check Sound Input Settings
This method is helpful if you have more than one microphone. Otherwise, your built-in microphone will be the default sound input device. Here's what to do:
- Go to the Apple menu > System Settings or System Preferences > Sound.
- Switch to the Input tab, select the desired microphone, and increase the volume if necessary.

Fix 3. Check QuickTime Player Settings
Have you followed the steps above, but QuickTime Player still doesn't capture your voice? Its microphone settings will default to "None" if you don't select a microphone. The process differs slightly depending on the macOS version, so here are the steps for newer and older editions.
QuickTime Player Settings on macOS Mojave and Newer
Here's how to select a microphone in QuickTime Player settings on macOS Mojave or newer:
- Launch QuickTime Player and go to File > New Screen Recording.

- You'll see the Screenshot toolbar, so click Options.

- Choose the microphone you've previously set as the default sound input source.

QuickTime Player Settings on macOS High Sierra and Older
If your Mac runs on macOS High Sierra or older, follow these steps to select a microphone in QuickTime Player:
- Go to QuickTime Player > File > New Screen Recording.

- Click the Chevron or Arrow button (depending on the player's version) to expand the options and choose your default microphone.

Fix 4. Install a Kernel Extension to Record System Audio
macOS prevents QuickTime Player from recording internal audio. That's where a kernel extension like Soundflower or BlackHole comes into play. It extends QuickTime Player's capability, letting you create a virtual audio device to route system sounds.
It doubles as an audio input and output device, capturing your microphone, system sounds, or both and redirecting the audio to QuickTime Player. Here's how to make that possible:
- Download and install Soundflower for macOS.
- Go to the Apple menu > System Settings or System Preferences > Security & Privacy > General. Click the Lock to make changes and hit Allow to enable Soundflower installation.

- Return to the System Settings or Preferences, go to Sound > Output, and choose Soundflower (2ch).

- Switch to the Input tab and select Soundflower (2ch).

- Launch QuickTime Player and go to File > New Screen Recording.

- If you use macOS Mojave or newer, expand Options in the Screenshot toolbar and select Soundflower (2ch) under Microphone.

- If you use macOS High Sierra or older, hit the Chevron or Arrow button and click Soundflower (2ch).

These settings mean you won't hear audio output while recording. That's ideal for avoiding echo, but what if you're recording a game or app that requires hearing all sounds?
In that case, you must create a multi-output device in Audio MIDI Setup. That will route all system sounds through Soundflower and your speakers or headphones, letting you hear the output.
If you also wish to capture your microphone, you must create a virtual aggregate device, letting your Mac know you want to record your mic and system audio simultaneously.
Here's how to set up everything:
- Launch Audio MIDI Setup, hit the Plus button in the bottom left corner, and click Create a Multi-Output Device.

- Check Soundflower (2ch) and the Built-in Output device (or other speakers or headphones).

- Click the Plus button to Create an Aggregate Device and record your microphone with system audio.

- Tick the Built-in Microphone checkbox (or choose another microphone) and check Soundflower (2ch).

- Go to the Apple menu > System Settings or System Preferences > Sound > Output and select your Multi-Output Device.

- Switch to the Input tab and select Soundflower (2ch) for a QuickTime screen recording with audio (no microphone) or your Aggregate Device to capture your voice and internal audio.

- Control your sound input volume in Audio MIDI Setup (the only way when using aggregate and multi-output devices). You can change it for Soundflower and your microphone.

- Adjust the output volume for your chosen speakers or headphones and Soundflower.

- You're ready to record your screen with internal and external audio, so launch QuickTime Player and click File > New Screen Recording.

- If you use macOS Mojave or newer, click Options in the Screenshot toolbar and select your Aggregate Device under Microphone.

- If you use macOS High Sierra or older, expand the options by clicking the Arrow or Chevron button and click Aggregate Device.

Fix 5. Update QuickTime Player
If you still witness QuickTime screen recording no sound, your player may be ripe for an update. The latest version may address software glitches and other issues, eliminating your audio problem.
Here's how to update QuickTime Player:
- Go to the Apple menu > App Store.

- Click Updates in the left sidebar and hit Update All.

If QuickTime Player isn't on the list, you have the latest version, meaning something else may prevent you from capturing audio when recording your screen. One possible culprit is outdated sound drivers.
Fix 6. Update Sound Drivers
Updating your Mac's built-in sound drivers will eliminate all audio-related problems. You can do it by installing the latest macOS software updates. Here's how:
- Go to the Apple menu > System Settings or System Preferences > Software Update. Click More info if you see that "Another update is available" or "Other updates are available."

- Tick all the checkboxes and click Install Now.

Once your Mac updates its software and restarts, try recording with QuickTime Player to see if the problem is gone.
QuickTime Player Still Not Recording Sound? Try Different Software
If QuickTime Player stubbornly refuses to capture audio, you can try third-party screen recording software. Wondershare DemoCreator is an excellent choice because it doubles as an audio/video recorder and editor with many AI-powered tools.
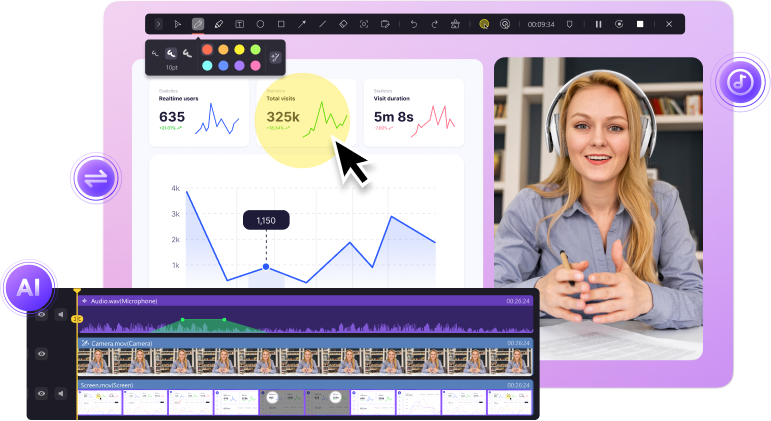
It lets you generate automatic subtitles across 90+ languages with a 99% accuracy rate. It can also denoise your recordings, change your voice, remove backgrounds, transform text into lifelike speech, and fine-tune your videos with many other tools.
As for recordings, it has different recording modes. You can record screen, webcam, system audio, and microphone simultaneously or separately. Furthermore, you can choose to record the screen and audio with separate tracks to make editing a breeze.
Furthermore, you can enjoy screen drawing tools while recording. You can add shapes, mouse effects (click rings or a cursor highlight or spotlight), annotations, dynamic stickers, transitions, and sound effects. You can also add them in post-production, leveraging the Visual Assets of 50,000+ creative assets.
Here's how to use it to record your screen with sound on a Mac.
- Download and install Wondershare DemoCreator for macOS.
- Open the All-in-One Recorder.

- Specify the capture area and choose your system audio device, microphone, and camera (for a webcam overlay). Finally, click the REC button or hit Option + Command + 2 to start recording.

- Expand the screen drawing tools with Command + D to highlight various elements. Use Option + Command + 2 to pause and resume, and hit Command + Shift + 2 to stop recording.
Conclusion
QuickTime Player recording the screen without sound can be frustrating, but the problem is usually fixable. The fastest fix includes giving the player permission to use your microphone.
You can also set a preferred mic (if you have multiple) as the default audio input device and change QuickTime microphone settings. If those methods don't work, updating the player and sound drivers should resolve the issue.
However, you must install a kernel extension like Soundflower to capture system sounds with QuickTime Player. The setup may be extensive, but the plugin should eliminate all audio problems.
If the issue persists, you can always use third-party software. Wondershare DemoCreator is your best bet, transforming your recordings with top-notch features and AI tools. Try it for free to see how it fits your needs.


