

Record iTunes Movies

You may already be aware that iTunes can be the best way to purchase the latest movies and watch them at your own time on your computer or iOS device. But most of the content on iTunes is DRM protected.
But this doesn’t mean that it is impossible. In fact, there is a simple way to do it; just record the iTunes movie and then share the recorded movie. But as simple as this solution is, it presents another problem; how do you record iTunes movies and make sure that the recording is of very high quality?
Part 1 Use Mac QuickTime Player
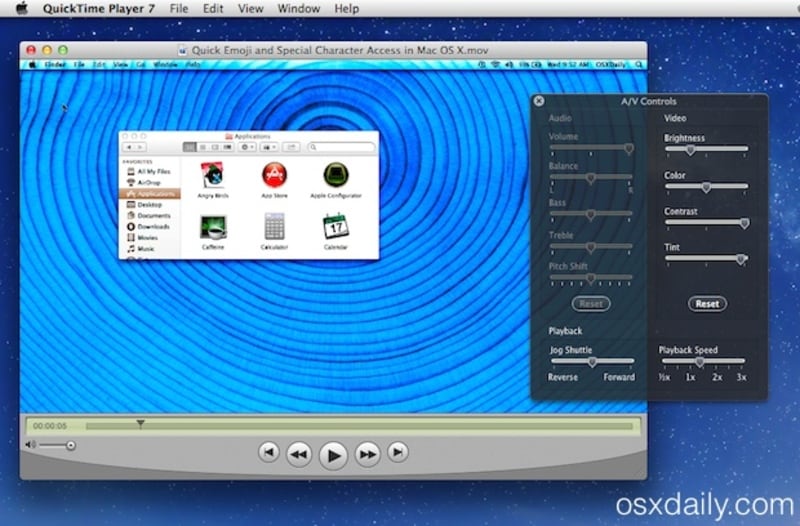
If you are watching the movie on your Mac and you would like to record it, one of the best ways to do it is to use QuickTime Player. This is a built-in solution, meaning that you will not need to download any program to your computer to record the video. It is also a very reliable recording tool, allowing you to record the iTunes movie in very high quality and in a few simple steps.
Follow these simple steps to record the iTunes movie using QuickTime Player;
Step 1: Begin by opening the iTunes movie that you would like to record. Then open QuickTime and in the menu bar, click on “New Screen Recording.”
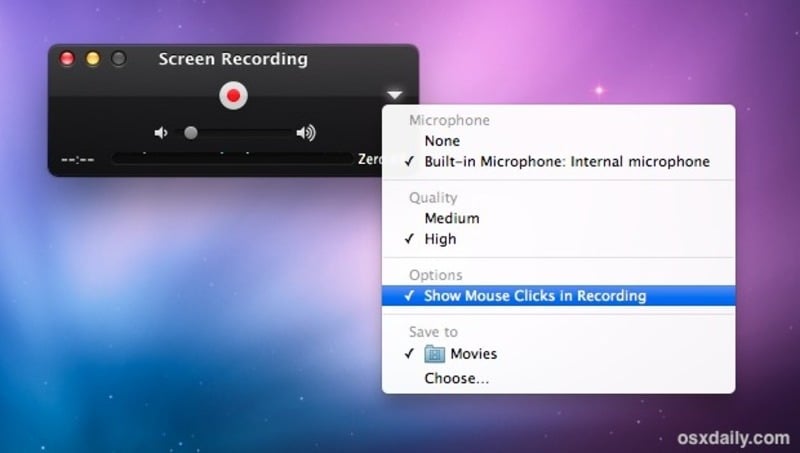
Step 2: The screen recording window will appear. Click on the drop-down arrow next to the red recording icon to choose the presets you would like to use in the recording.
Step 3: Play the iTunes movie that you would like to record and then click on the recording icon to start the recording. When the recording is complete, click on the stop recoding icon at the top menu bar to end the recording. The recorded iTunes movie will be saved to your computer and you can then share it with as many devices as you want.
Part 2 Use Wondershare DemoCreator
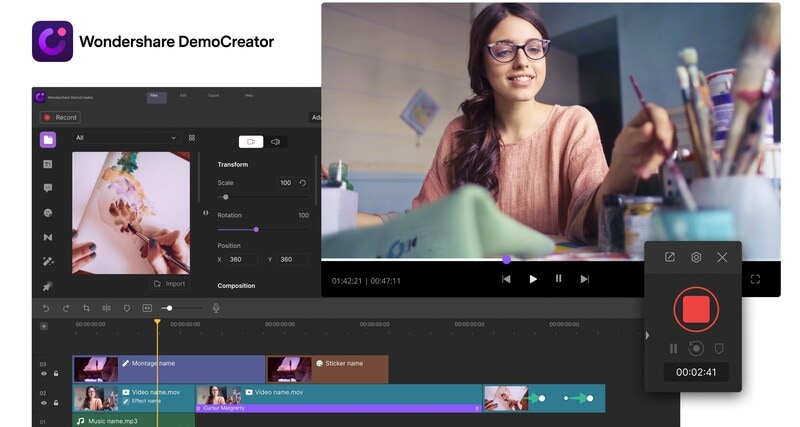
While QuickTime can be a great solution, the recoding process that we’ve describe above can often result in low-quality sound. This is because QuickTime will record the sounds in the computer’s environment, along with the system sound. If you would like to end up with a recording that is as close to the original movie as possible, we recommend using Wondershare DemoCreator.
DemoCreator is a third-party screen recording tool that is designed to capture crisp quality video and audio. It is available for both Windows and Mac and has long been the go-to solution for most people looking to record how-to videos, gameplay videos, screencast videos and even product demos.
The program works differently on Windows and Mac. Here’s how to use it to record the iTunes movie;
Use DemoCreator on Windows
Step 1: Install the Program and Configure the Settings
Download and install DemoCreator on to your computer. After installation, run the program and then click “Capture” in the next window to begin the process.
In the next window, you will see a number of settings that you can configure according to your needs.
The “Screen” section is the most important in this sense as it will allow you to choose if you want to record the whole screen or a customized section of the screen.
The “Audio” section is also important if you want to capture the sound of the streaming video that you want to record. If you would like to add your own voice to the recording, you can set the “Microphone” option to “Capture.”
The “Camera” tab is only important if you want to capture webcam footage as well.
Step 2: Start the Recording
When all your settings are as you need them to be, open the iTunes movie that you would like to record and then click on “Start Capturing” to begin the recording. You can also use the “F10” hotkey to begin the recording.
You will see a 3-second countdown appear on the screen, after which DemoCreator will begin recording both the screen both the webcam and the screen at the same time.
During the recording, you can press the “F9” key to pause or resume the recording as required.
When you’re done with the recording, press the “F10” key again to finish the recording.
Use DemoCreator on Mac;
Step 1: Install the Program
To begin, you will need to first of all install the program on your Mac. The official download links can be found on the program’s main window. Follow the setup instructions to install the program on to your computer.
Step 2: Set up the Program
Once installation is complete, launch Wondershare DemoCreator on your Mac and then click on “New Recording.”
 Secure DownloadSecure Download
By default, the program is set to record the entire screen. If instead, you would like to record only a section of the screen, click on the dropdown arrow next to “Full Screen” to choose the area you want to use.
Step 3: Choose Input Devices
Then, you need to choose the microphone and camera that you will be using to record the movie.
DemoCreator will use the built-in microphone and the FaceTime camera by default. If you had a different input device in mind, select it from the dropdown menu next to “Recording Device.”
To include webcam footage in the recording, select “Camera On” below “Recording Device.”
Step 4: Start the Recording
When you are ready, click “Start Capturing” or use the “Shift + CMD +2” keyboard shortcut to begin the recording.
A 30-second countdown will appear on the screen before the recording begins. You can then use the same “Shift + CMD +2” shortcut to finish the recording.
DemoCreator also has an editing tool that you can use to make as many changes to the video as you would like. Once the recording and editing process is complete, the video will be available on your computer and you can share it with any other device.
Part 3 Bonus: Use Keyboard Shortcuts to Record the iTunes Movie
If your Mac is running macOS Mojave and later, you can use a series of keyboard shortcuts to record the iTunes. This is the ideal solution when you don’t want to use QuickTime or you don’t want to invest in a third-party recording tool like DemoCreator.
The process is relatively simple, just follow these steps to do it;
Step 1: Use the Shift+ CMD + 5 Command
Press the Shift+ CMD + 5 on your keyboard to begin recording the screen. This will open an on-screen menu with various recording options for you to choose from. You can choose if you would like to record the entire screen, a section of the screen or the whole window.
You will also get a dotted border line that you can use to capture and image. This line is adjustable as needed.
Step 2: Record the Entire Screen
To record the entire screen, click on the fourth button from the right (it is the outline of a window with a circle).
The pointer will change and become a camera icon. Click on the screen you want to record and an icon will appear in the menu bar, indicating that the recording process has begun.
To end the recording, press the “Ctrl + CMD + Esc” and the video will be saved on the desktop.
Step 3: Record a Section of the Screen
If you want to record just a section of the screen, such as an application, select the third button from the right (it is the dotted box with a circle).
A box will appear, showing the area of the screen to be recorded. You can click and drag the edges of the box to expand or shrink the recording area as desired. You can also click inside the box to move it to the desired location.
When you’re happy with the selected recording area, click on “Record” in the options that appear at the bottom of the screen.
Step 4: Save the Recording
When the recording is done, you should see a thumbnail of the video at the corner of the screen. Simply swipe to the right and the video will disappear. In a few minutes, a saved file of the recording will appear on the desktop.
You can then move or share the file as desired. All files that you create using the process above will be in MOV format.
Conclusion
The solutions above present the best way to record iTunes Movies or any other DRM protected content on your computer. Select a solution that works best for you and your particular circumstances and then use the comments section below to let us know how it worked out for you. Any questions you may have on the processes above are also welcome.


