

The Complete Guide on Tunefab Screen Recorder

If you are in the business of using video content to communicate, you may need a good screen capture tool. Screen capture tools are useful for a variety of different types of videos including instructional videos, how-to-videos and product demos.
One such tool is TuneFab Screen Recorder. This program is designed to be useful when recording all types of screen activity, including the gameplay.
Part 1 Key Features of TuneFab Screen Recorder
The following are some of the key features that you can expect when using TuneFab Screen Recorder;
Choose the Screen Capture Area
With this tool, you can choose the area of the screen that you would like to capture or you can choose to record in full-screen mode. The program is easy to operate so you can start and stop the recording at any time. The videos that you record using this tool will be saved in MP4 or WMV format.
Record Audio
It is also one of the best ways to record audio on your computer, making it a good solution to record music, audiobooks and other types of audios. The audio you record using TuneFab will be of very high quality and can be saved in a number of formats including MP3, WMA, M4A or AAC.
Capture Screenshots
This program is also one of the best ways to take screenshots on your computer. You can make the screenshot capture process very easy by using predetermined hotkeys.
Choose the Video Output Quality
You are also given the option to configure numerous options to select the video quality, codec, audio codec, frame rate, output format and a variety of other options. TuneFab can record up to 60fps, making it a great choice for gameplay recording.
Built-in Editor
Another great thing about this program is that it comes with a fully featured editing suite that you can use to edit various aspects of the recorded video and even add notes and other annotations.
Supports both Mac and Windows
This program supports all versions of the Mac operating system as well as all versions of the Windows operating system from Windows XP to Windows 10.
Part 2 How To Use Tunefab Screen Recorder
This program is also easy to use with a simple user interface that is ideal even for the beginner user. To use it to record the screen on Windows 10, follow these simple steps;
Step 1: Install the Program on your Computer
Go to Tunefab to download the set-up file for this program. Open the setup file and then follow the on-screen instructions to install the program on to your computer.
Open the program when installation is complete and you will see a registration window popup up. Use it to register for an account or purchase the premium version of the program.
Step 2: Choose the Recording Mode
You should see a number of options in the main screen including “Video Recorder”, “Audio Recorder”, “Screen Capture” and “More.”
Since we want to record a video of the screen activity, click on “Video Recorder” to begin the process.
Step 3: Choose the Recording Area
In the nest window, choose the area of the screen you want to record. If you would like to record the screen in full, select “Full.” But if you want to record only part of the screen, click “Custom” and specify the area of the screen that you want to record.
Here, you can also choose to include audio from the microphone or computer system sound as well as we webcam footage.
Step 4: Select the Recording Settings
There are some settings that you would like to use during the recording. To do that, click on the Gear icon to the right. This will open various “preferences” that you can configure according to your needs.
Some of the options you have include the output folder, video quality, frame rate and output format among others.
Click “OK” to save your selections.
Step 5: Start the Recording
When you’re ready to begin, click on the “REC” button on the right or use the pre-configured hotkeys to start recording the screen.
If you would like to annotate the video during the recording, click on the “Pencil” icon to open the editing panel.
Step 6: Save the Recording
When you’re done, click on the red stop button to end the recording process. You can use the built-in video player to preview the recording and then click “Save” to save the recording to your computer.
Part 3 Pros and Cons of TuneFab

Pros
- You can adjust the recording area to record the full screen, a window or a customized area of the screen
- The user interface is very easy to use; you don’t need technical skills to record video
- It offers basic editing features such as the ability to add annotations, highlight the video, change the audio volume and add shapes
- You can pre-configure hotkeys that can simplify the recording process very easy
- Screen capture tool is available for free with no restrictions
- It is compatible with all versions of Windows and all versions of Mac
Cons
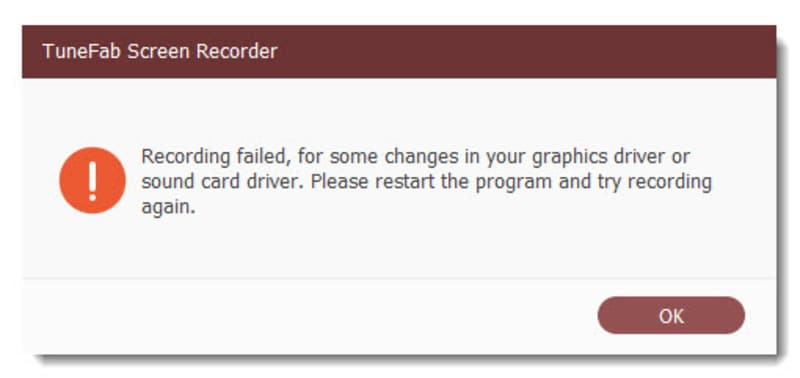
- The free version will only allow you to record up to 3 minutes of video
- You cannot use the editing tool to trim videos
Part 4 TuneFab Screen Recorder Alternative
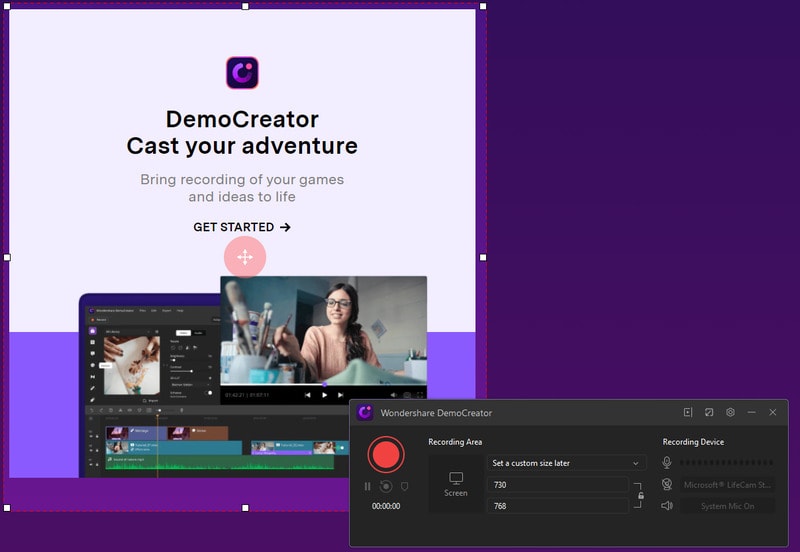
If TuneFab is not the best screen recorder for you, we recommend using Wondershare DemoCreator. This is the most ideal solution to use if you want a program that offers more options in terms of quality and features. For example, DemoCreator outperforms TuneFab when it comes to recording gameplay videos as they require a much higher frame rate. The audio and video quality that you would get with DemoCreator is also much better as compared to TuneFab and other similar solutions.
 Secure DownloadSecure Download
To use DemoCreator to record the screen activity on your computer, download and install the program on to your computer and then follow these simple steps;
Step 1: Open the Program and Configure the Settings
Run the program after successful installation and in the main window, click on “Capture” to begin the process.
You will see a number of settings dedicated to each section of the video you would like to record.
The “Screen” tab controls the screen recording. Here, you can choose whether you want to record the whole screen, a custom section of the screen or you want to record a game.
In the “Audio” tab, you can choose whether you want to capture the computer audio along with the microphone audio. If you want to include narration in the recording, you will need to set “Microphone” to “Capture.”
In the “Camera” tab, under “Camera” choose to “Capture” in order to turn on the computer’s webcam and capture both the screen and the webcam.
Step 2: Start Recording
When you are ready to begin recording both the screen and the webcam, click on “Start Capturing”. You can also use the “F10” hotkey to begin the recording.
The program will countdown 3 seconds and then begin recording the screen and webcam. At any time during the recording, you can press the “F9” key to pause and resume the recording as needed.
When the recording is complete, press the “F10” key to stop the recording process.
DemoCreator also has a much superior editing tool that you can use to trim the videos and even edit the audio. The completed video will be saved to your preferred output folder.
Comparison
Here’s how these two programs compare to one another;
|
Tool |
Operating System |
Price |
Capture Screen |
Webcam Recording |
Capture Audio |
Capture System Audio |
Editing Tools |
|
Wondershare DemoCreator |
Windows and Mac |
$29.99 |
Yes |
Yes- you can record audio, screen and webcam at the same time |
Yes |
Yes |
Complete Editing Suite |
|
TuneFab Screen Recorder |
Windows and Mac |
$34.95 |
Yes |
Yes, but cannot be included in a screen capture video |
Yes |
Yes |
A fairly basic editing suite that is only useful for annotations |
Conclusion
TuneFab Screen Recorder is one of the many screen-recording tools in the market. As our review shows, it is a simple solution that is very easy to use. But it lacks some of the advanced features that can make it an ideal choice for high-quality gameplay or marketing videos. The best solution when you want to make sure that your videos are of the highest quality is Wondershare DemoCreator, a tool whose features are designed with this in mind. It also doesn’t hurt that is has a very useful and highly functional editing suite.


