How to Use FFmpeg to Combine Videos

Merging loads of short video cuts into one longer video document can be a good thought. Be that as it may if you've attempted to physically blend recordings before using FFmpeg merge audio and video, you may realize how troublesome this can be. No more! joining different short recordings in one long document is generally done by a portion of the product accessible on the web. Some working frameworks give essential altering applications to free, for instance, Windows 10 has an implicit video supervisor in their Windows Media Player that performs FFmpeg combine videos. Mac has a QuickTime player and iMovie which joined the working framework free of charge.
Web gives us every day a large number of tools for FFmpeg to merge audio and video techniques, with an expanding measure of video sources: digital broadcasts, video-sharing sites, addresses, etc. FFmpeg is a helpful library, a very valuable to do numerous things with it like changing over recordings, resizing recordings, and so forth It can accomplish more than that whenever utilized appropriately. With the assistance of this article, you won't online figure out how to join or connect MP4 recordings in FFmpeg yet also find out about the best FFmpeg combine audio and video ways to consolidate recordings effectively on Windows and Mac here.
Part 1. Detailed Solutions about FFmpeg Combine Videos
Merging or consolidating downloaded YouTube videos and sound records is basic and direct. Even though there are a few projects that can be utilized for this reason, we will utilize FFmpeg as it is an open-source and incredible application. There are different approaches to connect MP4 recordings with FFmpeg, yet we will give you a straightforward and powerful cycle here. So that if you are new to this, you will not feel that it's difficult to follow.
1. How to Concatenate Two Mp4 Files
You can utilize an online video consolidation that can blend video documents and link different video cuts, like MP4, AVI, FLV, MOV, 3GP, MKV, WMV and that's only the tip of the iceberg, join and consolidate various video records into one record. These documents will be associated individually with the request you entered. The yield design is the most famous MP4 video. It tends to be utilized as a video joiner or video combiner.
Steps to perform:
- Select at least two .MP4 format videos you want to concatenate.
- Click the button "Converge" to begin to transfer your documents.
- Once the transfer is finished, the converter will divert a page to show the connected outcome.
2. FFmpeg Combine Videos Side by Side
FFmpeg also can combine two videos side by side. To ease your research, we’ve enlisted the working command that will create a video from two input files and place them side by side using the hstack filter.
Command:
FFmpeg -i s1.mp4 -i s2.mp4 -filter_complex "[1:v][0:v]scale2ref[wm][base];[base][wm]hstack=2" final.mp4
There are few things to notice about this hstack filter through which FFmpeg combine videos side by side:
- hstack inputs both the videos horizontally.
- All input streams must be of the same pixel format and the same height.
3. Combine Videos in Folder/Directory
However, to combine the videos in a specific folder or directory inside your system, then you can also do that. All you need to do is follow the steps below to accomplish this task as well:
Step 1: First of all, put all video records to be join in one document envelope and name it MP4;
Step 2: Then visit the following web address to download the FFmpeg on your computer:
Step 3: After that, get into this MP4 document and open the "container" record organizer. You need to duplicate the FFmpeg.exe record to the MP4 document organizer;
Step 4: Now, if it's not too much trouble, right snap the Windows symbol or press Windows + R on the console and type cmd.exe to open Command Prompt on your PC;
Step 5: After entering Command Prompt window, you should change the way of the MP4 document envelope;
Step 6: Now, type the following command in order:
for %i in (*.mp4) do @echo file '%i') > mylist.txt
Upon pressing Enter, you will get a mylist.txt record that covers all MP4 documents on this envelope;
Step 7: Lastly, type the following command to begin to consolidate recordings with FFmpeg.
FFmpeg -f Concat -i mylist.txt -c copy output.mp4
If nothing unforeseen occurs simultaneously, these recordings will be immediately converted into a document named output.mp4 in the MP4 document directory.
4. Concatenate Mp4 Files of Different Codecs | Resolutions
On the off chance that your documents have distinctive video codecs, or pixel arrangements, or stature and width, at that point, you need to re-encode them before you can concatenate the video documents together.
- Re-encode the records before going along with them
This is a straightforward procedure where you re-encode every one of the documents to the necessary organization and afterward utilize the Concat order to consolidate them all. I track down this helpful if I have a huge arrangement of recordings and I need to accurately control their quality before consolidating them.
- Concat video channel
This is the subsequent choice where you end up re-encoding your substance and you likewise safeguard the choice for sifting the recordings before linking them.
5. Concatenate mp4 Files Using Intermediate File Formats
Now, if you want to concatenate MP4 files having intermediate formats, then follow the steps below to ensure the concatenation.
- Give both the files the same name without changing the format of both files.
- Here, right-click while holding the Shift key and select the choice "Open Command window here." On Windows 10, you will see the PowerShell alternative. That will work as well.
- When the Command Prompt window has been opened, copy the following command and paste it under the command prompt window exactly.
FFmpeg -i videoplayback.mp4 -i videoplayback.m4a -c:v copy -c:a copy FILE.mp4
- When the order has been executed, FFmpeg will perform consolidation or join both the video files and saves it in a similar directory with the name "FILE.mp4."
6. FFmpeg Merge Audio
Now, for the merging of audio files, In the request, we needed them consolidated and executed the Concat activity of FFmpeg to finish our assignment. The subsequent order was accompanying and with the help of the following command, you can merge two audios using FFmpeg:
Command:
FFmpeg -i "Concat: First_File.MP3|Second_file.MP3" -acodec copy Merged_File.mp3
Note: Remember to give the names of your first audio file instead of First_File.MP3 and for the second file instead of Second_file.MP3 respectively.
Part 2. An Easier Way to Merge Videos than Using FFmpeg
Frequently, you might need to consolidate the recordings you've recently shot or caught to make a film or expanded video cut. Assembling recordings and making entertaining short movies or video montages is an incredible method to invest energy, yet to make it truly charming, you need a basic and viable video combiner. When utilizing FFmpeg to join recordings, numerous clients can't have intellectual fulfillment and think this is too mind-boggling utilizing this program. For this situation, possibly you should attempt some simple and speedy video manager to join recordings.

The Best Video Combiner & Video Editor
 Secure DownloadSecure Download
On the off chance that you endure any issue to link or union or consolidate any video cuts with FFmpeg, you can take care of this issue by utilizing Wondershare DemoCreator. Better than FFmpeg Combine Videos, this is the best FFmpeg elective that can give a straightforward and speedy approach to join recordings together. FFmpeg is a useful instrument to join recordings. However, for novices, working FFmpeg isn't so straightforward. Along these lines, the DemoCreator toolkit is presented here. It is an outfitted consolidating toolkit with complete usefulness, supported by most clients. With its assistance, you can join, cut, and alter recordings effortlessly. It well backings a wide range of video/sound information/yield designs and can change them over to be viable with different gadgets.
Steps to Use DemoCreator:
Below is a step-by-step guide to mix two or more videos using this masterpiece software.
Step 1: Install and Launch Wondershare DemoCreator
Before you begin the merging of two clips via this software, here’s the deal as you need to download and install it to your system which will take few moments at their best to be installed.
Step 2: Import the Files
After the installation finishes, now launch the software from the Desktop and go straight to the video editor option from the starting interface of DemoCreator. Here you can see the Import section where you need to hit that Import button to import both the video files which you need to merge into a single file.
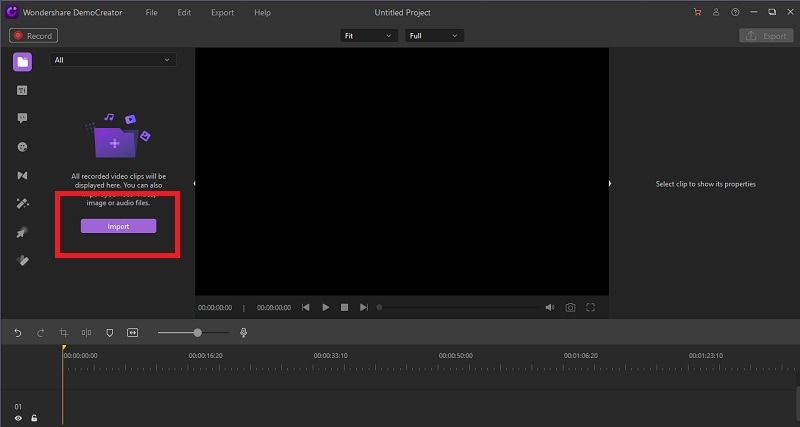
Note: You can import any format of videos and audios at the same time as DemoCreator allows you to merge any format of videos simultaneously.
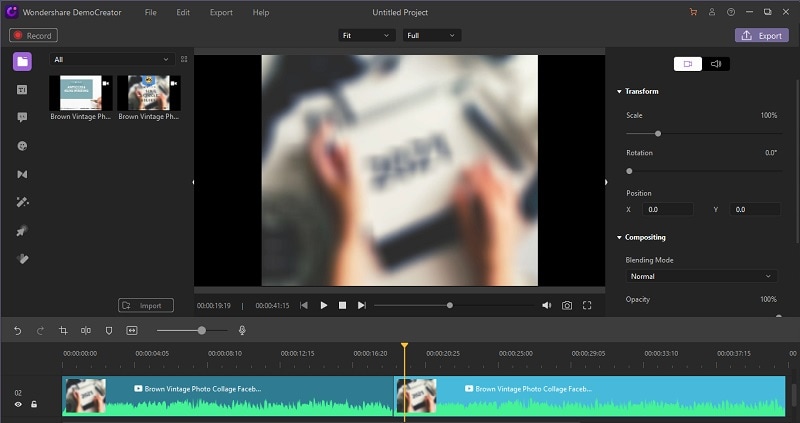
Step 3: Merge Videos
In this step, you need to add both the added files to the timeline and join them by simple drag and drop into the timeline, you can also preview the files inside the preview section of this software, and then you can find the effective time scale of where you need to merge both the videos accordingly.
Step 4: Edit the Merged Video
Here’s the kicker with the DemoCreator as you can easily and intuitively edit the merged video file with your requirement and it makes it easier than you thought. All you need to do is refer to the different editing sections of the toolbar and pick your favorite one to introduce into the timeline over your merged video.
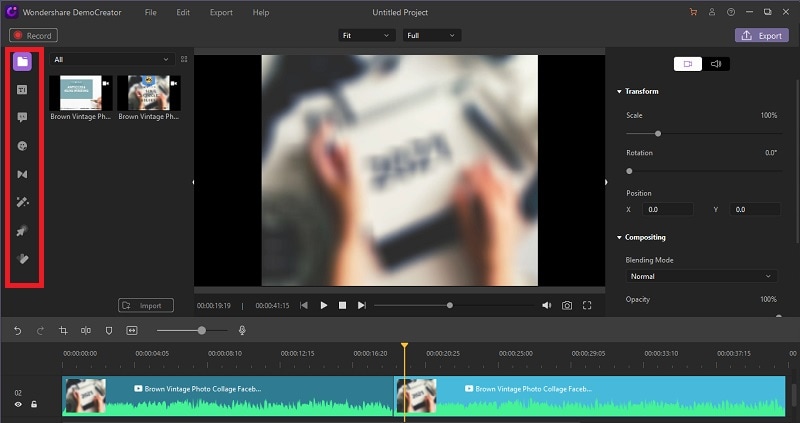
You can frequently add Titles, Transitions, Effects, Annotations, Stickers, and much more with a simple drag and drop.
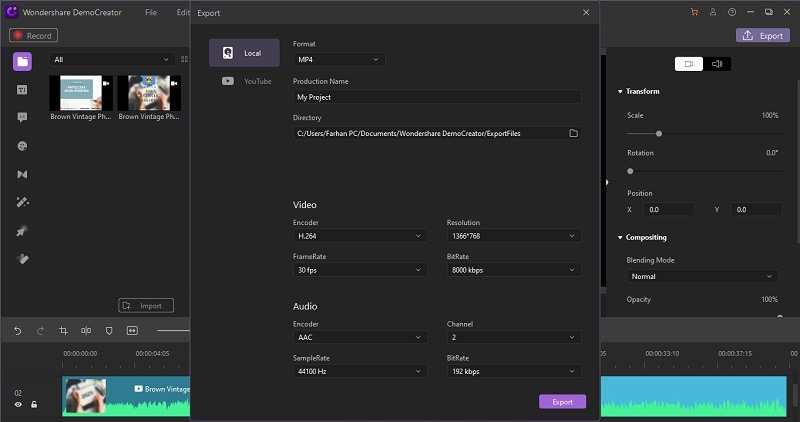
Step 5: Export and Save
In the final step, you need to save your masterpiece to the system so you can use it afterward. Wondershare DemoCreator lets you export your video file in your desired format as it has a variety of formats and it doesn’t matter what formats were your videos before as it has all the codecs information installed built-in. Hence all you need to do is customize the Export window well-according to your requirements and be with it.
 Pro-tip
1. Merge two video clips into one, placing them next to each other
To do this specific task, you can use Wondershare DemoCreator for easiness. You can perform this special assignment with simple drag and drop inside the timeline of the DemoCreator which intends you to do that more effectively with the preview window it offers.
2. How to merge videos with FFmpeg with smooth transitions
With that being said, you can merge videos in FFmpeg and introduce smooth transitions or crossfades inside the final video output. The command to perform this operation is below:
Command:
FFmpeg -i 1.mp4 -i 2.mp4 -filter_complex "xfade=offset=4.5:duration=1" output.mp4
Note: You can effectively set the duration time for the transition effect of the final output video.
Conclusion:
Contrast every one of the techniques with FFmpeg join videos, we can find that, DemoCreator is the best video combiner as compared to the FFmpeg merge audio and video. The main reason for simplifying this concatenation article is that it is utilized by numerous global organizations for making introductions as it bolsters practically all configurations of media documents and that too without any coding and extra skillset to implement. Hence you can say that a beginner with no


