How to Resize Videos Using FFmpeg
How do you resize a video to make it smaller with FFmpeg?
Short raw video with a resolution of about 1920x1080 may take GBs of storage space. Therefore having a couple of videos means that your storage space is at risk of getting depleted.
Usually, we don’t want to account for space in this manner. Therefore, for you to optimize the disc space, you need to resize your videos. You can resize your video and still maintain its quality – This is by using FFmpeg. FFmpeg is a free command-line tool whose static role is to convert both video and audio file formats.
Part 1. How to Use FFmpeg to Resize Videos
In your computer device, you can change the resolution or the aspect ratio by using FFmpeg. FFmpeg uses a series of commands to resize videos and audio. You can change your video resolution and simultaneously retain its aspect ratio (The aspect ratio of a video is its ratio of width length, i.e., x:y)
Here below are the steps for changing your video resolution using FFmpeg video resize
Step 1. Download and Install FFmpeg to Your Computer

First, download the latest version of FFmpeg to your computer. Install FFmpeg to your computer. To install, you need to have an administrator account. It is easier to install FFmpeg on a Windows computer than on a Mac computer. On a Windows computer, you can install it via the terminal, which is part of the Homebrew package manager. Conversely, the Homebrew package manager is absent on Mac computers.
Step 2. Determine your file format and name

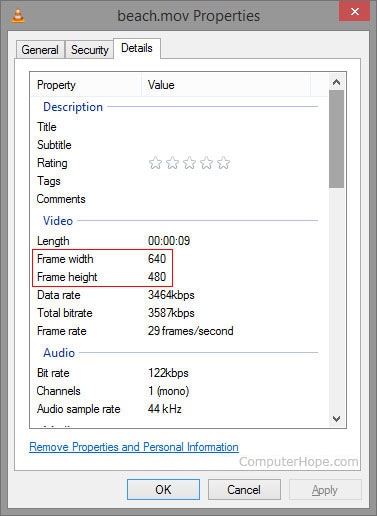
Before you use FFmpeg resizes video tool, you need to determine the format and name of your files. To determine your file format, right-click and head over to properties. Also, try to determine the file name since you will have to input it in FFmpeg. Rename it to a shorter one to make the conversion process more manageable.
Step 3. Open your computer’s command prompt

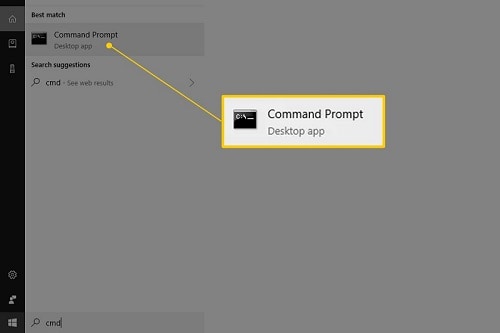
The command prompt is usually pre-installed on every computer. To open, click on the start menu on your computer. Then type ‘Cmd’ in the search bar and open the command prompt.
Step 4. Switch the command line
To switch a command line, type ‘cd Desktop’ and then hit the ‘Enter’ button.
Step 5. Input your new video width
FFmpeg uses a scale filter in resizing. To retain the aspect ratio of your video, you first need to input your video width specifics.
ffmpeg -i input.mp4 -vf scale=480:-1 output.mp4
Here, your resized video will have a resolution of 480 x 320. 1920 / 480 = 4, Your video width will therefore scale down to 1080 / 4 = 270 pixels.
Step 6. Input your new video height
To maintain the aspect ratio, you also need to designate your video height.
ffmpeg -i input.mp4 -vf scale=-1:720 output.mp4
With this command, your resized video will attain a new resolution of 1080 / 720 = 1.5, Your height will scale down to 1920/1.5 = 1280p.
Step 7. Convert your video files
After being sure of your new video specifics, hit the ‘Enter’ button. The conversion process will begin effectively. Wait until the conversion process is complete.
Step 8. View your converted files
Once the conversion process is complete, it will appear in your selected file location with the new name you changed to.
Part 2. An Easier Way to Resize Video - Most Recommended
FFmpeg also has some disadvantages. Using FFmpeg resize video tool is a bit challenging – Professionals mostly use it. A beginner might find it too demanding. Disadvantages of FFmpeg to resize videos.
- It is not easy to use
- It does not always ensure consistency of bitrate in files
- It requires a lot of time and dedication to understand how to use it fully
You also don’t need to stress out to use FFmpeg to resize the video with the same quality. There is an easy way out. And that is by using Wondershare DemoCreator.
Wondershare DemoCreator is an easy-to-use professional video resizing software with tons of other editing features. It is a trusted software and has more than half a million active users.

The Best Video Resizer & Video Editor
 Secure Download
 Secure Download
Here are the simple steps of using Wondershare DemoCreator to resize and change resolutions in videos.
Step 1. Import your videos to Wondershare DemoCreator Video Editor
First, download Wondershare Democreator to your computer device. Install and allow it to run. Click on the ‘Video editor’ option.
To import your videos, click on the ‘Import’ option. Select your video files from your computer and add them to Wondershare DemoCreator. Drag and drop them into the timeline.
Step 2. Resize your video

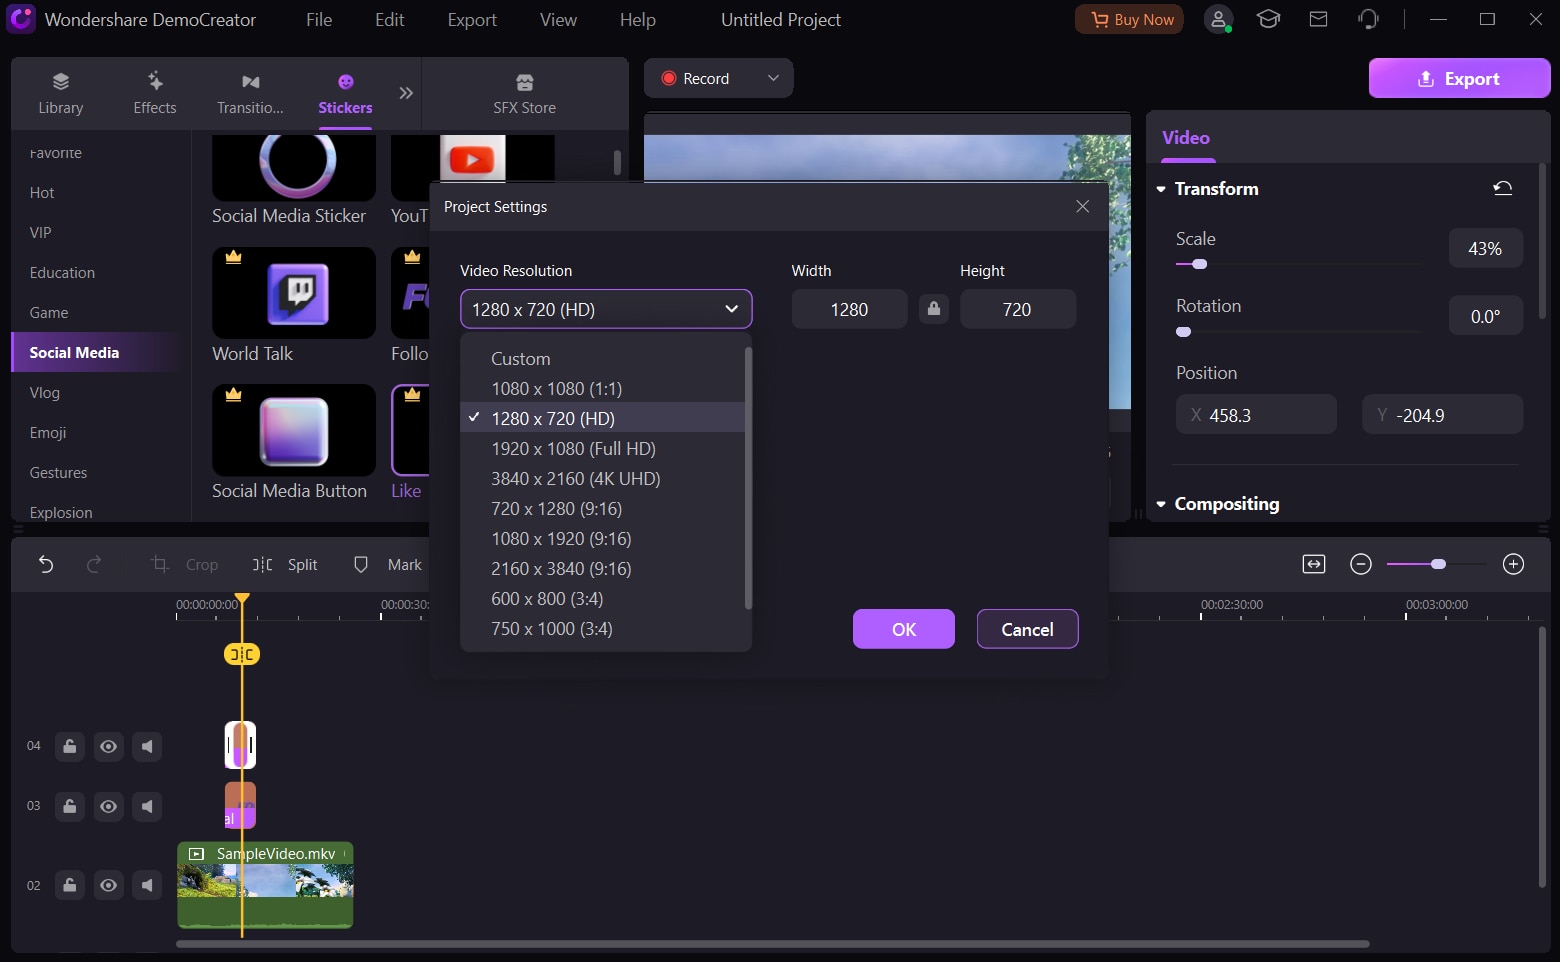
To use FFmpeg to resize the video, click on the ‘File’ menu at the top-right corner of your interface. Then select ‘project settings.’
A new window will open. Click on the ‘width’ box, and key in your preferred video width. Go to the ‘Height’ bar, then input your new video desired height. Click ‘OK to confirm.
Step 3. Export your video in high quality

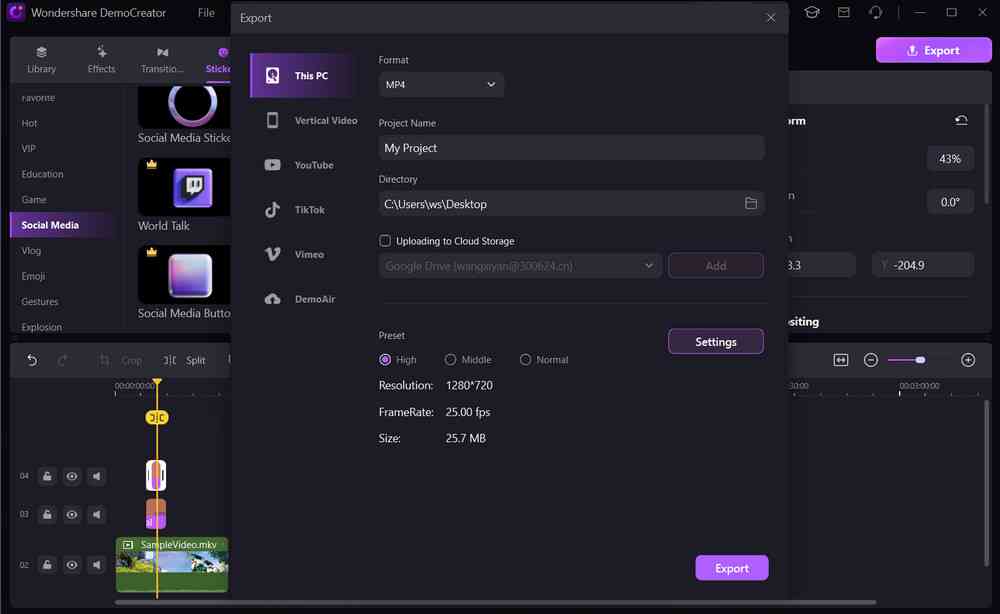
When you have successfully resized your videos, it is that time that you export them to your social media platforms or save them on your computer. There are some customizable settings for high-quality videos, such as the Encoder, Frame rate, Bitrate, and resolution.
Select ‘High resolution’ under the Resolution bar and ‘High frame rate’ under the frame rate. When done, hit the ‘Export’ icon to save your video. Select the folder you want to keep your video.
 Secure Download
 Secure Download
Conclusion
And that is it. Follow the above simple steps and use FFmpeg to resize your videos. When you find it challenging to use FFmpeg to resize video, there is a backup plan – Wondershare DemoCreator. DemoCreator is a fast and easy-to-use tool in resizing videos.


