How to Resize Video in Premiere Pro

Do you have a project involving multiplevideos from different cameras, as every camera usually has different resolutions or frame rates? Well, most likely, you know what to expect from such a scenario. However, other times, you may face a difference in frame rates or resolution when sharing videos over platforms. Or importing multiple videos to a platform, but their dimension doesn't match the main scale recommended. To avert this issue, you should have a premiere pro resize video.
A video resizer tool will also help if you are working on multiple videos or images from different people. But you don't have to worry! Today, you in for luck. Read on and find out how to resize the video to have the same frame rates or resolution perfect for your project. Learn how to resize a video in premiere.
Part 1: Why Video Resizing Important?
Resizing a video helps reduce the original file size. As a result, you get more storage space in your device. You'll get more storage space to store more videos again; it helps improve your device operating speed. When much space is filled, your device tends to lag.
You want to share videos with friends or with any other person, well resizing a video, and you get to use fewer data. The internet consumption that you would have incurred sharing the original video is cut. Lastly, when you have a video capturing everything that is not needed in the film, you can resize it to remove the unwanted parts from the final film. You don't have to worry about quality; regardless of the tool you use to resize your video, an excellent video editor program will not compromise quality.
Part 2: How to Resize Video in Premiere Pro
Today in this article, we will show you the different ways how to resize video in premiere pro. So take a look at this crucial step-by-step guide and decide on the best option that suits you.
Scale to Frame Size
This is the first step in the premiere pro resize video guide.
Step 1: Import video to Premiere Pro
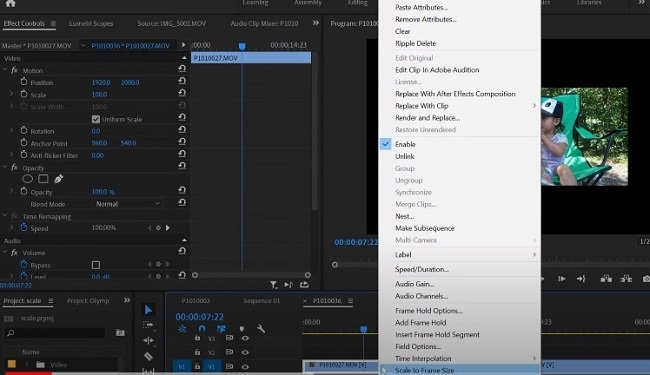
Add your video to Premiere Pro. Then, proceed to click and drag it to the timeline. You will note that the scale size is 100 before setting the Scale to Frame size. Now here, right-click on the clip that you want to Scale to Frame Size.
Step 2: Set Scale to Frame Size
A pop-up menu prompts and scrolls through to locate the Scale to Frame Size option. Click on it to continue. After you click it, there you have it. You can customize your scale settings manually after choosing your option.
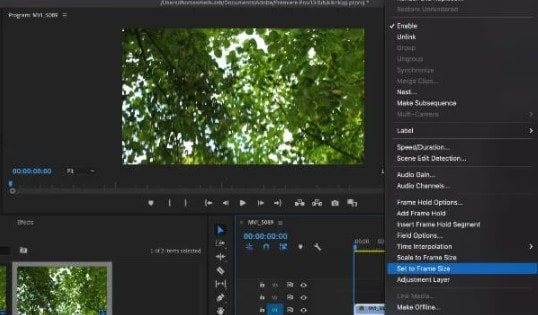
Set to Frame Size
This is the other way for premiere resize video. It is the simplest;however, it is also the most effective method to resize videos.When setting the Scale to Frame Size, you also click on your clip in the editor and scroll down and locate 'Set to Frame Size.'Immediately you hit the option, Premiere Pro will automatically adjust the dimensions of your chosen clip.
What is the difference between the two methods of resizing in Premiere Pro?
Scale to Frame Size is when your computer resizes the video to 100% of the sequence. Usually, this is not what you want for your video. However, this method helps you fast shrink a large video down. And you must adjust to 200% to certain that the video fits perfectly.
Set to Frame Size is when the program sets the frame size to match the sequence automatically. This method, most of the time, gets the sizing correct.
Part 3: An Easier Way to Resize Video than the Premiere Pro*

The Best Video Resizer & Video Editor
 Secure DownloadSecure Download
Not every program for resizing videos is easy to use. A professional video editor will find Premiere Pro easy to navigate and resize videos to bring out the perfect results. However, if you lack the necessary training in the software, you won't resize your videos correctly.
Video resizing is a basic feature in video editing. As such, you don't need a heavy program or tool for this purpose; therefore, navigating to Premier to resize a video is quite tedious, considering the program is also heavy on most machines. In addition, the software uses more RAM to run therefore slowing other tasks and the entire device.
To avoid such issues and find a video editing tool that is loved even by beginners, Wondershare DemoCreator is a suitable program. This is a powerful video editing tool that you will find capable of resizing your videos in simple steps. As editing videos has constantly improved over time, Wondershare DemoCreator lets you get results in a few minutes of resizing videos.
You get to resize videos for sharing or easy management from large videos to smaller videos and all these with just the free version of DemoCreator. Read on and find out how to resize your videos in three simple steps.
How to Resize Videos with Wondershare DemoCreator Without Quality Loss
Step 1: Import Video
Download and install Wondershare DemoCreator to begin resizing your videos. Next, run the program and click on the blue 'Import' button to add your video. The program will open a folder where you browse where your videos are located. Next, click on the video and hit 'Open' to add the video. Next, proceed to drag and drop the video onto the timeline.
Secure DownloadSecure DownloadStep 2: Customize the Resolution
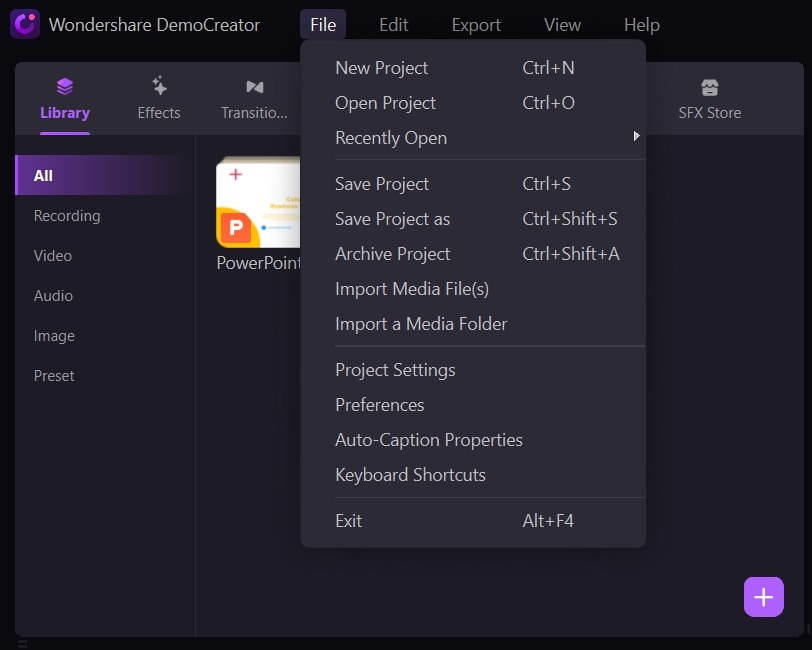
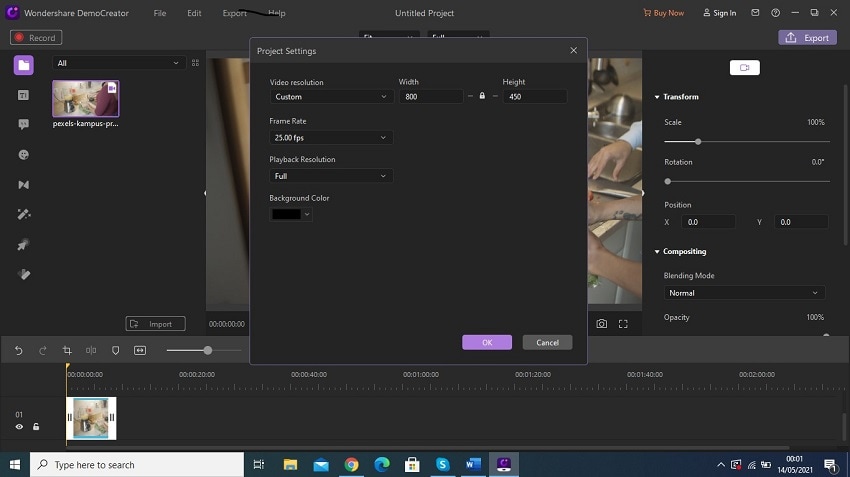
Now you can alter the resolution to suit your needs. Hit the 'Export' tab and from the resulting window, choose your resolution. The higher the video resolution, the bigger the video file. Hence it's better to opt for a lower resolution. Alternatively, use the 'File' button on the menu bar. Scroll down to 'Project Settings .' From here, you can customize, including the frame rate and resolution. For the resolution, it the drop-down menu and select the resolution you want. Remember, you can customize the 'Width' and 'Height' depending on your needs.
Step 3: Export the video file
On the 'Export' panel, select the file format you desire for your video in the 'Format' menu options. Again, here you can select the video's frame rate, and bit rate, change the encoder, and many more. Finally, click the 'Export' button to save your video in the selected folder and share it.

Secure DownloadSecure Download Related FAQ:
Related FAQ:
- What file types do Premiere Pro support?
Premiere Pro supports the common container file formats; however, this depends on the codecs installed by the user.
- How to change the aspect ratio in Premiere Pro?
You have to set a new sequence to change the aspect ratio. Have a new sequence. Select File> New> Sequence
- Proceed to the 'Settings' tab
- In Video, add your Frame Size (Height) and Horizontal(Width)
- After filling out your values, add a name for your sequence and hit 'OK.'


