How to Split Video into Parts

How to split video into several parts?
Splitting video is one of a basic video editing features. Occasionally, all you want is to fast split video files into numerous split scenes or multiple files into short clips to come up with a more dynamic video. Depending on what you want, splitting your files is made easy.
Today, many tools are advanced, and splitting your videos is simple with the Wondershare DemoCreator tool. This powerful tool offers many features other than splitting video files. You can edit, add texts, edit the audio, combine video files, add transition effects, and many more features, making video editing more exciting. You won't want to be left behind when you produce your video. Bring out your video ideas into reality using DemoCreator.
Part 1. How to Split Video into Parts with DemoCreator
DemoCreator has numerous video editing features you will like. This tool is an exemplary video editor program able to transform your amateur videos into professional videos. The split feature offers a smooth edit to your videos. Furthermore, it is easy to use. Here a step-by-step guide on how to split video into parts.

The Best Video Splitter & Video Editor
 Secure DownloadSecure Download
Step 1. Download DemoCreator
To begin, you will have to download and install Wondershare DemoCreator according to your system. The Win and Mac are both supported. You can opt for the Free Download or Buy Now to get the paid version and unlock all the features.
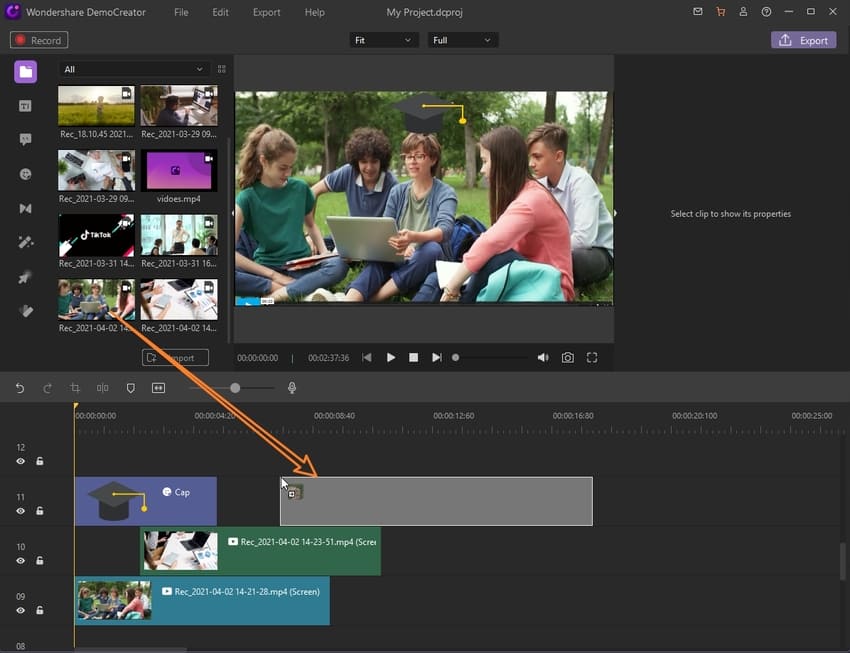
Step 2. Import Media Files and Drag to Timeline
When you've finished the installation, then launch the DemoCreator, and select “Video Editor”. From the interface, click “Import” to import the media files that you like. Then drag the videos to the timeline ready for splitting.
Step 3. Split Video
To split video into parts, DemoCreator gives you two options. The two options depend on how better you want your video to look and a method you deem easy and fast for you. Read on, and know the different options DemoCreator presents to you.
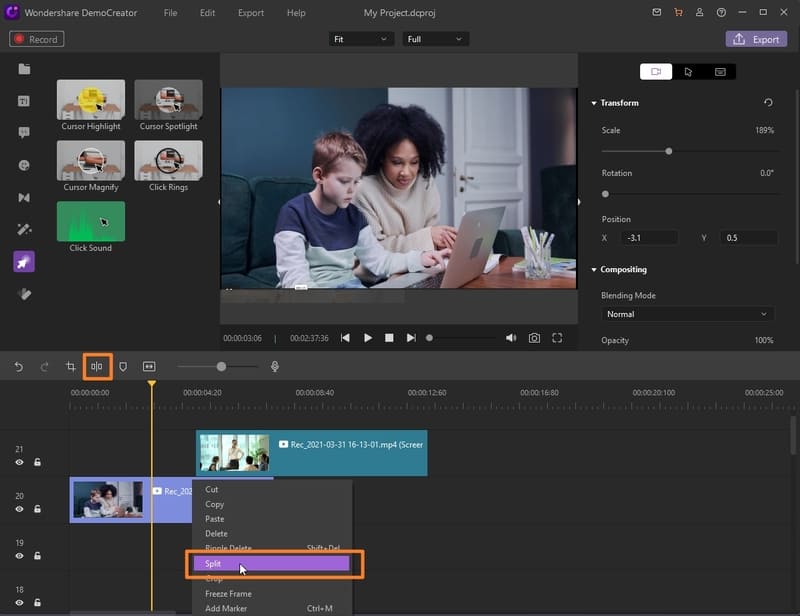
Method 1. Split in the Timeline.
Once your video file is on the Timeline, you can move the yellow play head to the position you want to split video into parts. Once you have the play head paused on the mark, right-click and select the 'Split' option from the menu to separate your file. This is the first option you can use to get several parts when editing your long video file.
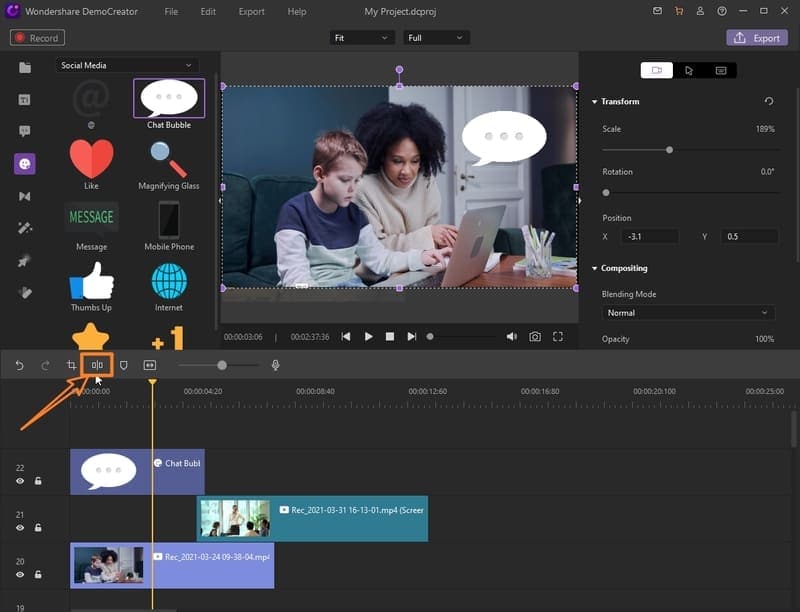
Method 2. Using Split Cursor
Alternatively, you can split your video files using the keyboard shortcut 'Ctrl+B.' to carry out this function. Drag the yellow play head cursor to where you want to break your video. Above the Timeline, there is a scissor icon (Split button) immediately above the Timeline. Click on it once, and you DemoCreator will split your video. Drag the play head to several parts you wish to cut your video. You will get to produce an attractive and professional video through this option also.
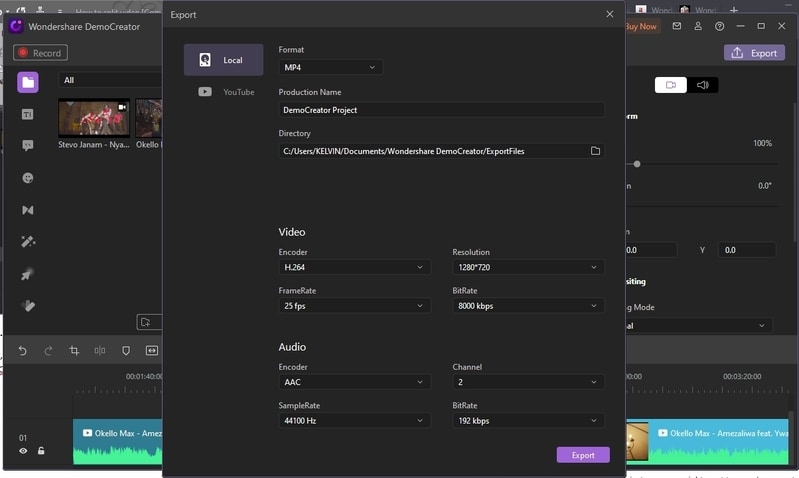
Step 4. Export High-Quality Video
Finally, you can save the split video files in the proper format that you want. Click 'Export' at DemoCreator's top right interface, and a window will launch with the Format tab option. On the export window, you can select the output format. There are many formats from MP4, MOV, WMV, FLV, 3GP, GIF, to MKV, and many more options to choose from. Add a title to your project, and select the destination folder.
Under the video options, to produce a high-quality video, select the highest resolution and frame rate possible and the encoder. Proceed to click 'Export' to save your split video file. Also, you can upload your split video directly online to either YouTube or any platform you intend to.
How to Delete Unwanted Video Parts
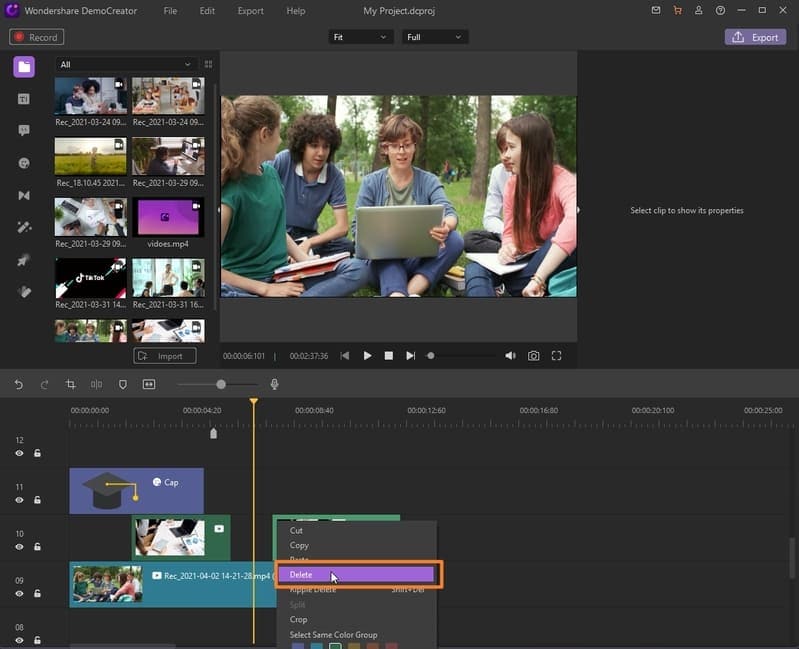
You can remove scenes and apply changes to the video to make it look professional. Here is how to delete unwanted segments from your video.
Add markers using the keyboard shortcut, 'Ctrl+M,' or use the marker's icon immediately above the Timeline to mark the parts you want to be edited. At the marked parts of your video, right-click on each marker and select 'Split' to cut out the video's region. Use the listed guideline about automatically split video into clips.
How to Add Music to Video
You may want to add music to your video and glue your audiences’ attention to your video. Do that by importing your theme music onto the Media Library and detach the video's current audio to add the new song.
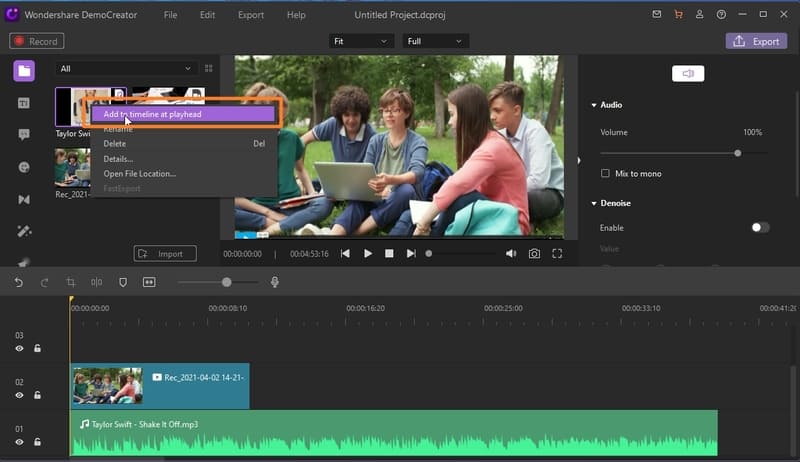
1. Import Your Audio File
Using the 'Import' button on the Media Library, click it and browse through your files to add your music. Then right-click the video, select “Add to timeline at playhead”.
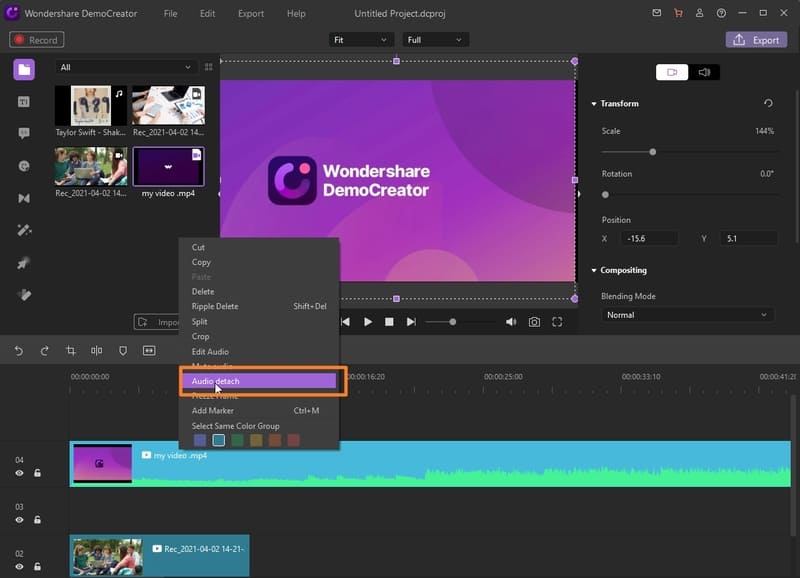
2. Using the Audio Detach
If your video was attached the audio together, but you want to get the separate audio and edit it. Then you can do according to this way. First import your video, then drag it to timeline. Right-click the video, then select “Audio detach”, then you'll get the separate audio to edit.
Part 2. How to Make Your Video with High Quality After Split
Everybody would want to create a captivating video to catch the audience's attention and relay information. Imagine marketing a product, and you want your clients to know how to use it. Simple, you can create a tutorial video demonstrating how to use your product, and Wondershare DemoCreator lets you do that. DemoCreator has tons of features that you can use to record your screen or edit your videos to produce a smooth flowing video file.
Everybody would want to create a captivating video to catch the audience's attention and relay information.
Add Tittles to Your Video
If you are a teacher looking to make videos on your courses or guide your students on carrying out their practicals? Wondershare DemoCreator lets you make course videos or just standard class videos and edit them accordingly before having them online for students.
With DemoCreator, you can split out video files into different segments and have each for a different class or for use at another time. Furthermore, to make your video more captivating, you can introduce clips and merge them with your video. To let your students or audience get right in the video, you can add captions after splitting it. Here is how you can add captions for every split video.
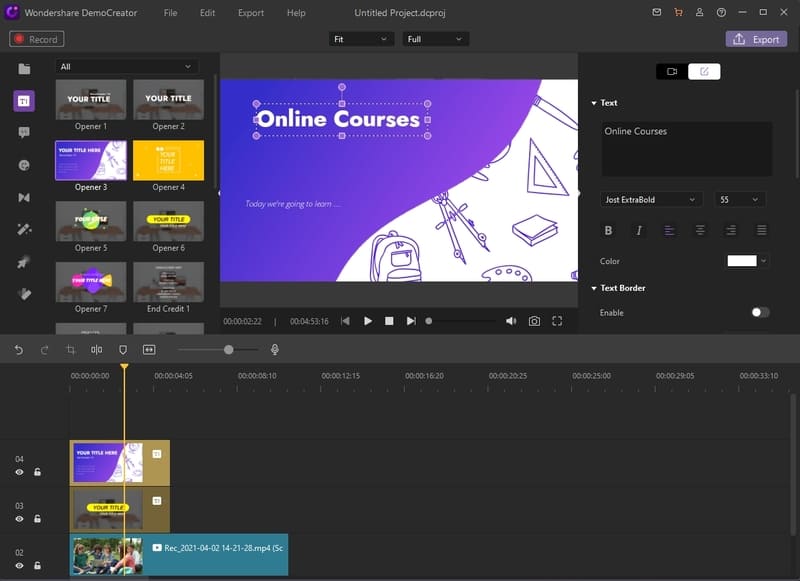
Alongside the Media Library, there you have a captions button. Click the button, and choose your preferred caption style option. Find the 'Text Editor' and customize your text with the information you want to relay. You will add your titles and even go ahead and choose the 'Subtitles' option from the drop-down menu for adding subtitles.
Add stickers and Annotations to Your Video
If you're a youtuber, after splitting your videos, you want to keep your YouTube audience engaged and love your video. You can add annotations and stickers to enhance your video's vividness. We can be sure through using the numerous features from DemoCreator, your subscribers' number will increase. Here is how you can add annotation and stickers to your video.
- Add Annotations
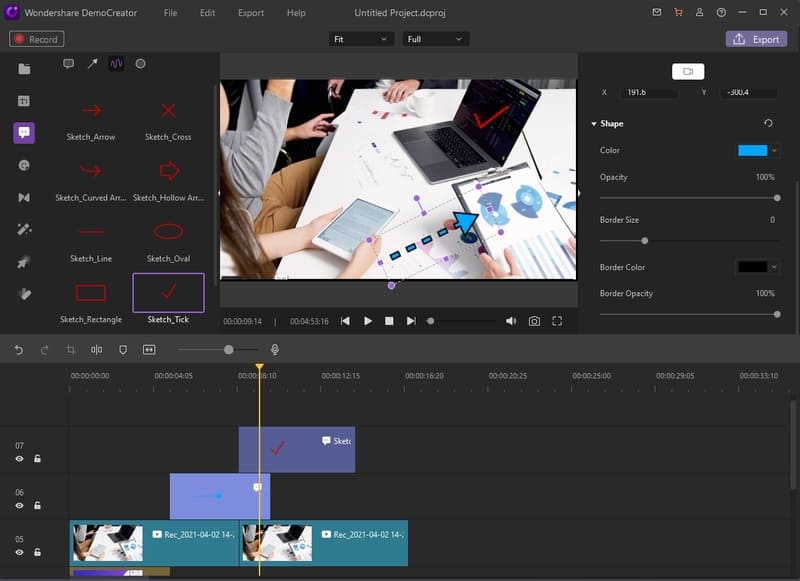
DemoCreator lets you add an annotation to your video. On the left of the Media Library, hit the 'Annotation' button. The resulting window has several annotation effects that you can use. You can add dialog boxes, lines and arrows, sketches and animations, and shapes. From the effects, you can choose where to add them to the video and even customize the texts explaining the different elements on the video.
- Add Stickers
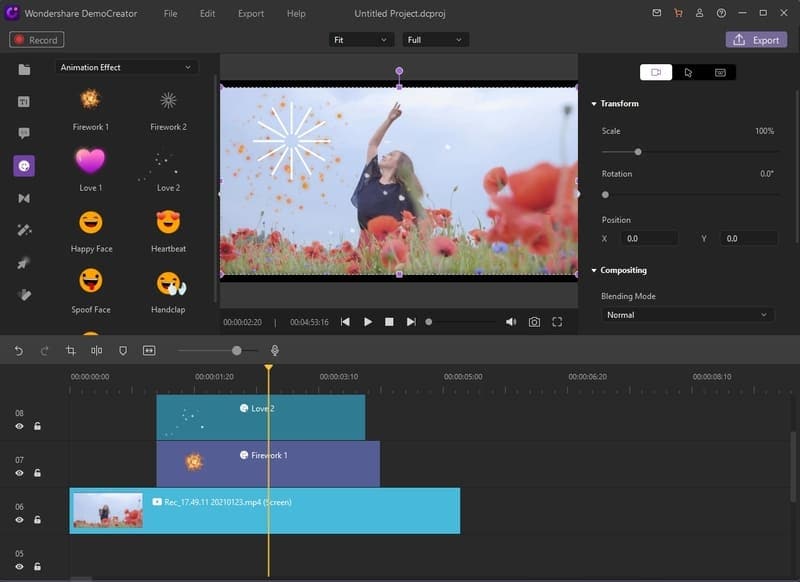
You can add emojis on top of your videos or other stickers to make your video lively. For example, to add effects to a celebration video, you can add fireworks or clapping emojis. All these stickers are animated, and the viewers will love them. Hit the 'Sticker' button, and you have plenty of sticker options to select.
On the drop-down menu, you have many options that you can use according to your video. Depending on your video, you cannot miss stickers that fit your video. Click on each sticker and drag it to where you want it on the video. You can have them at the beginning, end, or any point of the video.
- Share to YouTube
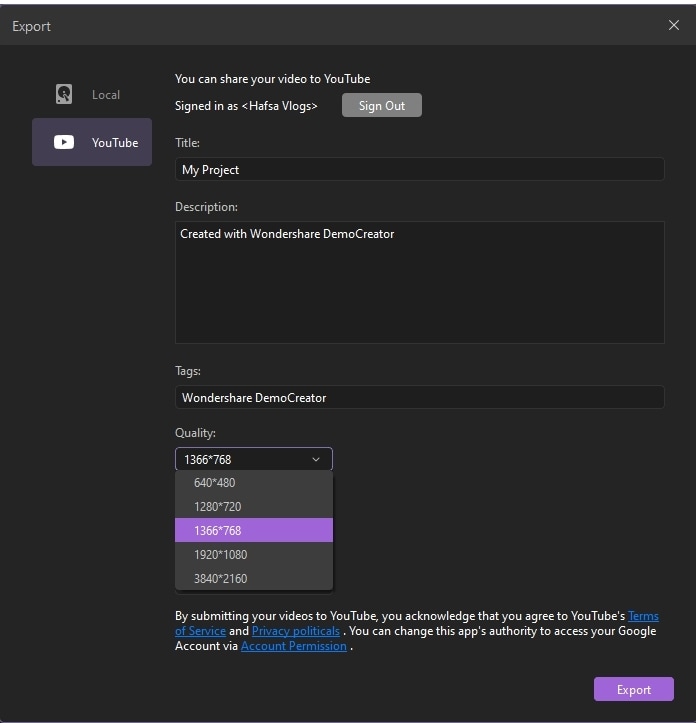
If you're a YouTuber, you will want your video to be loaded directly online for your audience. Wondershare DemoCreator lets you upload your video after editing it to YouTube. Click the 'Export' button, then proceed to 'YouTube' on the Export window. Sign in to your YouTube channel, then add the correct tags, title, video description, and quality resolution. Finally, click the 'Export' button, and there you have your video on YouTube.
Conclusion
Wondershare DemoCreator is an advanced video editing and recording tool. After recording, you can edit out the unwanted parts from your videos and go ahead to split the video into parts. A long video can be split into many short clips for different purposes or uploading. Also, you can merge many different clips into one and alter their audio. Through these features, you will develop an influencing video that your learners and YouTube audience will love and get them to stick to your videos for tutorials or courses. Wondershare DemoCreator has simplified your video recording and editing.


