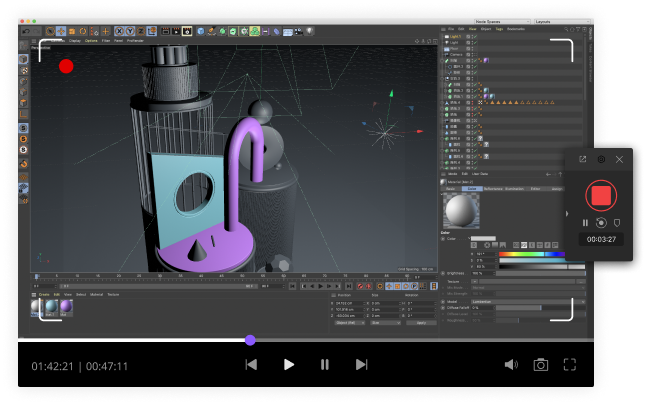
- 1. Record your computer screen and webcam simultaneously.
- 2. Allow you to customize screen capture and frame rate .
- 3. Powerful editing tools and effects to enrich your video clips.
[Solution] 7 Common Reasons for Freezing And Lagging reasons in OBS
This is a quick tutorial to show you how to make OBS (Open Broadcasting Software) not lag or freeze. We cover the settings for both 1080p and 720p computers, so if you don't know, use this screen resolution tool to check that out before you get started.
In this article
Part 1: What are the reasons behind the lag experienced in OBS
The occurrence of lag in OBS while streaming can be perplexing. Delving into the root causes of this issue is crucial for finding effective solutions. This insight helps users comprehend the underlying factors contributing to lag during streaming activities such as shows, movies, webcasts, music videos, and more.
-
Outdated Network Adaptor Drivers: One major cause of OBS lag is the usage of outdated Network Adaptor drivers. These outdated drivers can lead to network connection instability, affecting the smooth functioning of videos.
-
Network Connection Instability: Unstable network connections can directly hinder the normal playback of videos, causing lag during streaming.
-
High Bitrates: OBS uses higher bitrates to maintain video quality, which can lead to slowdowns in performance, resulting in lag while streaming.
-
High Video Resolution: Streaming videos at high resolutions can strain the system's resources, contributing to lagging issues in OBS.
-
Wireless Connections: Depending on wireless connections for streaming can introduce latency and instability, leading to lag in OBS.
-
Installed Security Software: Security software running in the background can consume system resources and interfere with OBS, causing lag during streaming.
-
Enhanced GPU Load: An increased load on the Graphics Processing Unit (GPU) due to other applications or processes can impact OBS performance, resulting in lag.
Part 2: How to fix freezing and lagging in OBS
Fixing OBS video freezes is pretty simple. All you have to do is detect the right reason, follow these instructions and you're good to go.
- Update Network Adapter Driver
- Check your network connection
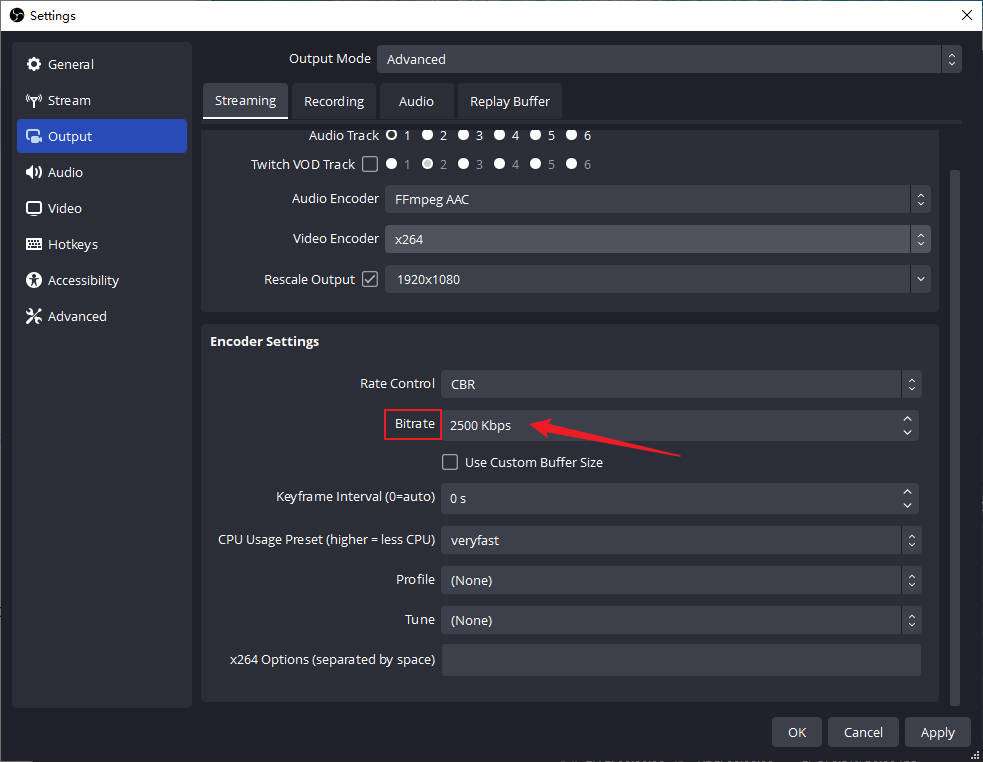
- Lower bitrate
- Change OBS setting as per your computer
- Stream on a wired connection
- Check your firewall and security software
- Reduce GPU usage by OBS
1. Update Network Adapter Driver
- In Windows search box, type Device Manager and select Device Manager from the list of results.
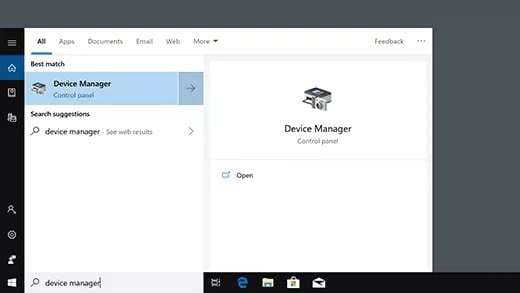
- Select Network adapters. Scroll to the network adapter name.
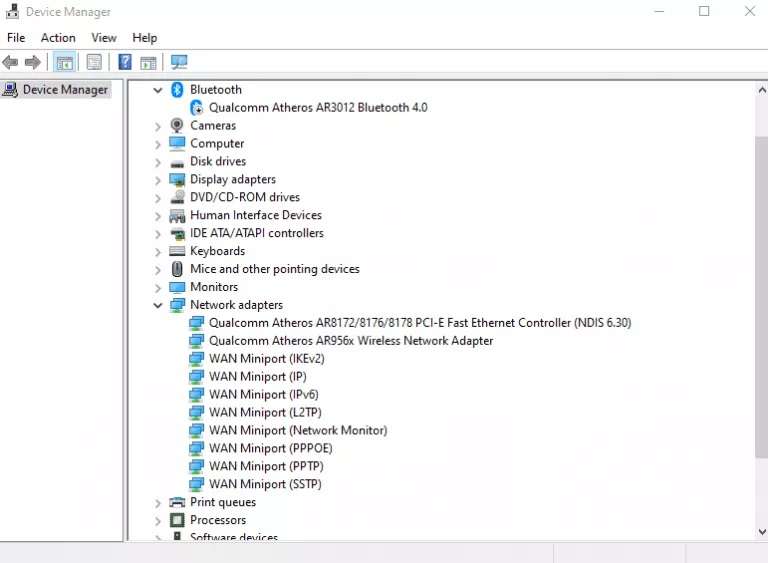
- Right-click the network adapter, select Update driver > Search automatically for updated driver software. Follow the steps, then select Close.
- After installing the updated driver, you may be asked to Restart your system.
2. Check your network connection
To prevent video lagging or freezing problems in OBS, a reliable and high-speed Internet connection is crucial. The occurrence of dropped frames indicates an unstable connection. It's recommended to assess your connection speed using available speed test tools. If issues are identified, reaching out to your service provider to rectify speed and network-related problems is advised.
3. Lower bitrate
A reliable approach to address this concern is by reducing the bitrates. Bloggers, vloggers, and streamers often utilize higher bitrates to elevate video quality, yet this can trigger frame drops. To mitigate such issues, we recommend lowering the bitrates. This adjustment ensures the system operates smoothly, free from lagging problems.
4. Change OBS setting as per your computer
OBS settings should differ from one computer to another. It is necessary to identify the optimal configuration for your system. Here are the recommended settings for 1080p and 720p computer resolutions, which can be implemented to address OBS video freeze and lag problems. These adjustments are particularly relevant when dealing with player resolutions of 720p or 1080p. Carefully adhere to the provided guidelines for best results.
Settings to change for resolution adjustment:
- Visit Settings > Output.
- Select video from the sidebar menu and adjust Custom settings according to the output scale in the table.
- Update the FPS field to 60. (If you continue to experience lagging, lower the FBS to 30.)
| Output scale | Range of FPS | |
| For 1080p | 1920 x 1080 resolution | 30-60 |
| For 720p | 1280 x 720 resolution | 30-60 |
An alternative strategy involves adjusting your game's settings to alleviate the situation. Additionally, it's advisable to shut down any unnecessary applications while streaming or recording, as these applications consume considerable resources even when minimized.
5. Stream on a wired connection
It's advisable for users to opt for a more reliable approach. Disconnecting from the router and directly connecting the system to the modem via an Ethernet cable is recommended. This wired connection guarantees consistent and uninterrupted service throughout the session, providing a viable solution to the issue. By transitioning to a wired connection, streaming experiences are enhanced, ensuring a steady and unbroken network connection.
6. Check your firewall and security software
- How to allow Firewall to play OBS video
-
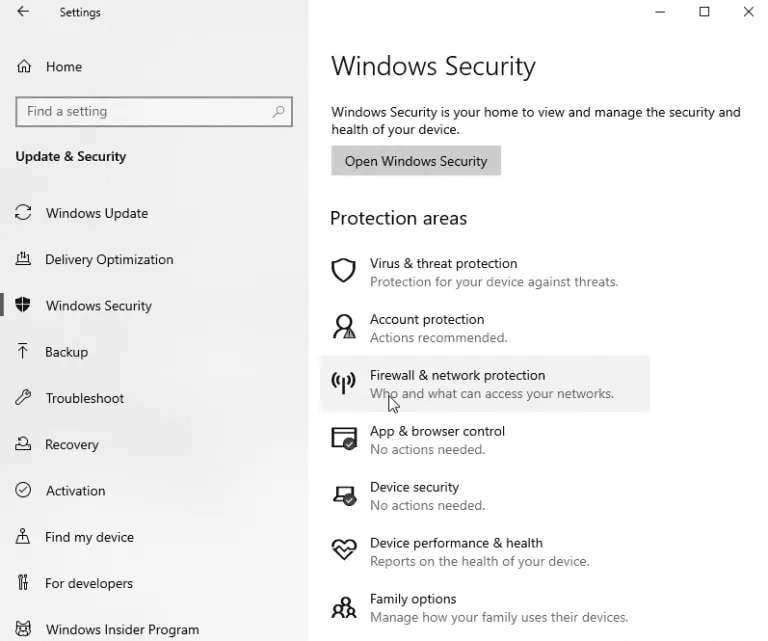
- Select the Start > Settings > Update & Security > Windows Security and then Firewall & network protection.
- Select Allow an app through firewall.
- Select the OBS from the listed apps.
- Select OK.
- How to disable Firewall on your computer to allow OBS
-
- Select Start > Settings > Update & Security > Open Windows Security.
-
- Click on Firewall & network protection.
- Select a network profile.
- Under Microsoft Defender Firewall, switch the setting to Off. This could make your system or network to access any app that’s being blocked.
Note: It’s recommended to allow OBS through firewall instead of turning off the firewall.
7. Reduce GPU usage by OBS
The OBS program relies on the GPU for rendering your game scenes, but it's essential that the GPU isn't fully engaged to avoid frame drops. If your OBS-based games exhibit stuttering, FPS drops, or streaming issues due to lag, ensure that your system's GPU usage remains below 90%. Monitoring your GPU load through tools like GPU-Z can provide insights.
Should the GPU load fall within the 91-100% range, consider capping your in-game frame rate (fps). Set your in-game fps precisely at 30, 60, 90, or 120 fps, as needed.
However, if the GPU load remains below 90%, it indicates the game is experiencing limitations due to the CPU.
Steps to limit capture framerate in OBS
- Open OBS.
- Go to your sources at the bottom.
- Right-click on your game capture, and hit Properties.
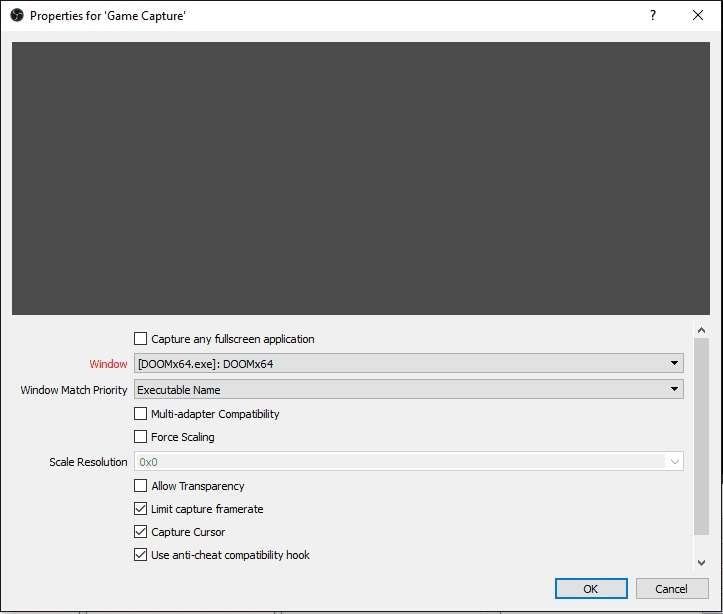
- Select ‘Limit capture framerate’ checkbox.
- Click OK.
Remember, reducing in-game details or buying a high-end GPU will not fix game lags in OBS, unless you don’t limit your fps.
Best Alternative Options to OBS - Bonus
While Wondershare DemoCreator boasts a dominant position in the screen recording landscape, it's important to highlight its key comparative points against the competitor, OBS Studio.
The following points contrast these two screen recorders:
A Versatile Choice
Wondershare DemoCreator stands out as a versatile choice for screen recording, catering to a wider range of user communities with diverse recording requirements. In contrast, OBS Studio is more user-specific, offering somewhat limited recording functionalities compared to the comprehensive capabilities of DemoCreator.
Streamlined Process
When using DemoCreator, the process is streamlined – everything you need is immediately available upon selecting the Capture button. On the other hand, OBS necessitates a preliminary test drive to confirm the functionality of your microphone and camera.
Uninterrupted Gameplay Recording
For gamers, Wondershare DemoCreator ensures uninterrupted gameplay recording, free from disruptions. In contrast, OBS Studio may require careful preparation to prevent interruptions when conducting tasks like webinar recording or overlay screen captures. This cutting-edge technology enables the seamless recording of games at a remarkable 120 frames per second (fps), completely devoid of any lag. As the demand for high-quality and immersive gaming content continues to soar, Democreator's integration of ultra-smooth frame rates and lag-free recording has redefined the parameters of what is achievable. This introduction delves into the realm of Democreator's capabilities, highlighting its profound impact on game recording and its pivotal role in reshaping the landscape of content creation, particularly within the gaming community.
 Secure Download
 Secure Download
 Pro-tip
If you want to get a comparison of Wondershare DemoCreator vs OBS, please check DemoCreator vs OBS.
If you want to get more alternatives to OBS, please click here to learn more details.
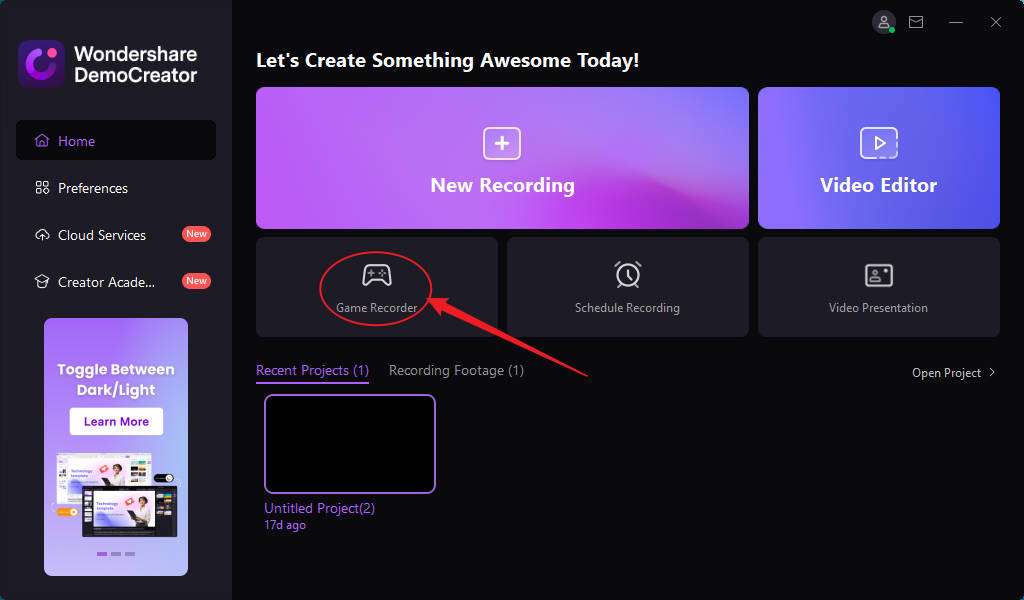
How to Capture Game with DemoCreator
To record your screen open DemoCreator and click 'Game Mode' You will then be prompted to set up the screen you want to record. It enables you to capture the full screen or a partial screen.
- You can open the screen you want to capture, and set up the recording area, frame rate, and audio settings.
- The next step is to set up audio from your computer and or a microphone. If you don't want audio, select don't capture.
- Select a file location you would like to store your video recording
- Check the GPU Acceleration field
- When you are happy with your settings click to capture. To stop recording press F10
Games that DemoCreator supports right now are Minecraft, League of Legends, Overwatch, Dota, CS GO, Genshin, and so on. Expect more games not to lag or freeze, and features to be added shortly.
 Secure Download
 Secure Download
