Bandicam Screen Recorder Review [Features | Pros | Cons]

Being a desktop recording software, Bandicam screen recording software is used to get your all videos and games recorded with ease. The tool unlike other software available in the market provides various recording modes as well to fulfill every user’s screen recording needs. The different recording modes are device recording mode, game recording mode, screen recording mode, and video recording mode. All these four different recording modes are discussed in the below Bandicam screen recorder full review.
The Bandicam free screen recorder is specifically designed to record and capture video tutorials, gaming sessions, educational walkthroughs, and online academic tutorials. The software is also recommended for professionals to get their presentation work required for businesses done with the tool’s numerous features.
1. Bandicam Review: Download and Install
Bandicam can easily compress your file to a smaller size along with maintaining the video quality. It uses Nvidia’s codec for recording videos which help in the compressing process. The software along with having a very understandable use interface has the ability to capture screen, audio, and video which help its users to make out-of-the-box videos of high quality. The tool can be used for its numerous features to the fullest with Bandicam screen recorder serial key. Before that let us see how to free download Bandicam screen recorder for PC and install it.
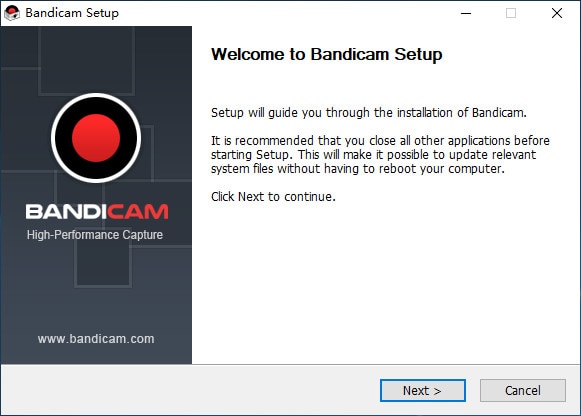
Step 1: Visit the Bandicam site. Click on “Download ” for the Bandicam screen recorder full version. Once downloaded, you now have to execute the "bdcamsetup.exe" file.
Step 2: Choose the language from the provided list and click on the option “Next” when the setup window is displayed. Accept all terms by clicking on the “I Agree” button. Select all the components to be installed and tap the “Next” button to continue.
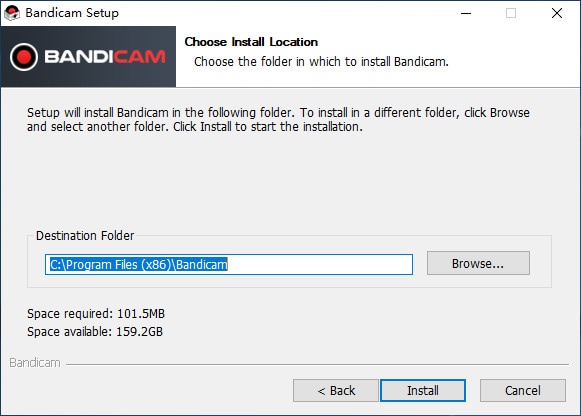
Step 3: After you provide the location where the tool is to be installed, click on the “Install” option. In case you get error message an "Error opening file for writing", from Task Manager restart the "bdcam.exe" procedure. Click “Finish” in the setup window.
Note: Bandicam is only available for Windows. If you want to record a video on a Mac, you need to download a Bandicam alternative for Mac.
2. Bandicam Review: How to Use it?
The Bandicam screen recorder for Windows 10 has different recording modes namely device recording mode, game recording mode, screen recording mode, and video recording mode. Let us now discuss each one of them in detail.
Screen Recording Mode
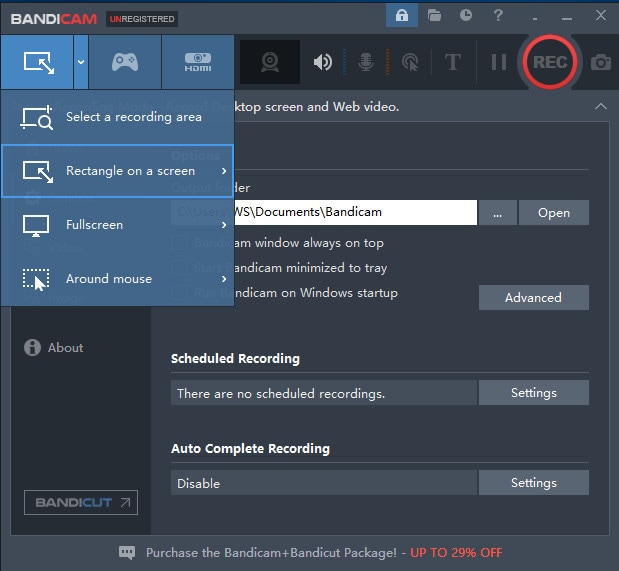
The screen recording mode of the tool helps one to record anything on the screen. In this mode, users can capture whatever is going on their screen—may it be any PowerPoint presentation, the entire screen, any web browser window, Excel spreadsheets, various games, and so on.
Step 1. Launch Bandicam and click on the left upper corner, choose the screen reocrding mode. You can select the full screen or select a recording area.
Step 2. You can also choose the video and general settings to set up the basic settings of this software.
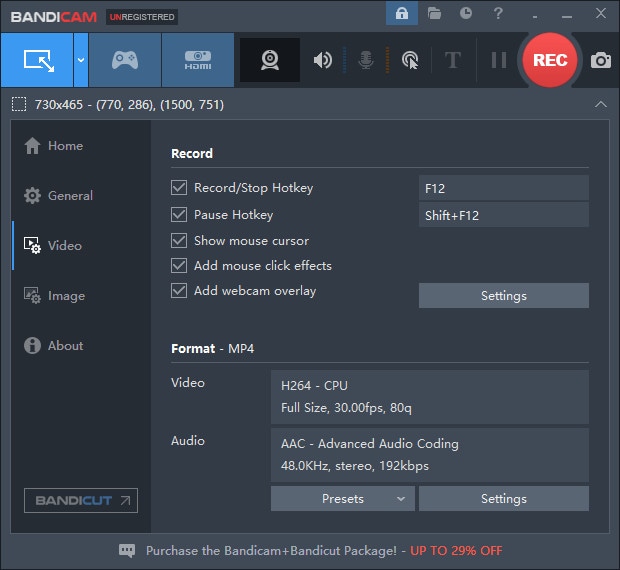
Step 3. Clcik on the "REC" button to start screen recording. You can end the process any time.

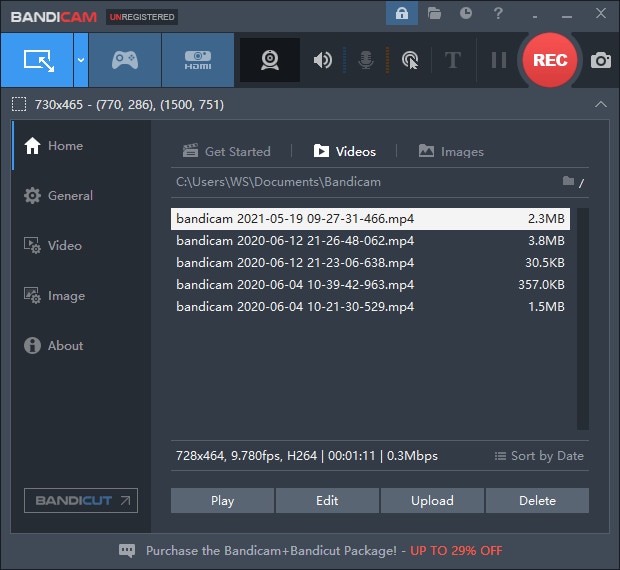
Step 4. After recording, you can select the "Videos" option from the Home and the software allows you to play, Edit, Upload or Delete your videos.
Well, if we compare screen recording mode with the tool’s game recording mode, the quality is a bit on the lower side. However, this mode is way easier to use compared to other modes. We do not recommend to use screen recording mode if you wish to record videos and games having high framerates.
Game Recording Mode
The next mode of Bandicam game recorder is the game recording mode. As the name is self-explanatory, it is very clear that users can capture their gameplays and also display their frames/second, with zero latency. The game recording mode is specifically designed for games’ recording and particularly works best with the ones that use Vulkan, OpenGL, or DirectX graphic technologies.

Though this mode gives you the freedom to record from all the external sources that too in high quality, on the other hand, it requires you to have that extra hardware with you. When it comes to recording game consoles, for best results you need to buy a PCI-E/PCI capture card. You can also go for a USB capture card which is compatible with your computer’s requisite port and with USB 3.0. Besides, you require the necessary drivers installed on your PC and other external sources.
|
Pros |
Cons |
|---|---|
|
Has different modes for recording as per the user’s need |
You cannot record PC screen and other applications in-game recording mode |
|
With screen recording mode, you can record the entire screen or just a part of the screen |
The screen recording mode is not good for capturing high-quality videos with high frame rates |
|
You can record an XBOX, PlayStation, webcam, and IPTV (high quality) in device recording mode |
A webcam or other recording hardware devices are required in device recording mode |
|
You can record 4K Ultra HD videos along with audio recording |
|
|
It is a well-known game recording tool that is hardware-accelerated |
|
|
The tool also allows video editing |
3. Best Alternative to Bandicam
Though Bandicam is an all-in-one package for recording your screen, the different modes of the tool come with some of the other limitations. And hence, as the requirement for recording of screen changes every time, you need to switch the mode entirely to get the best results. The best solution to overcome this issue is DemoCreator Video Recorder. DemoCreator has all the features similar to that of Bandicam along with the major advantage of it being a free-to-use software. No matter what you wish to capture, an online high-paced game, another web browser, some application running on your screen, another video on your PC. You can record each and everything on your PC seamlessly with no limitations.
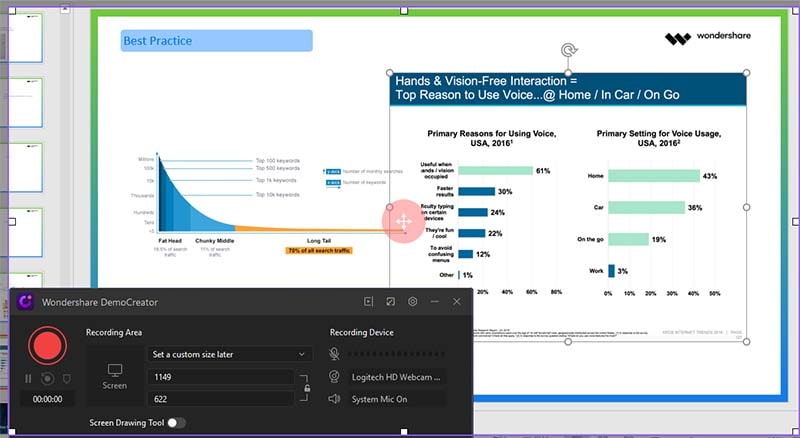
It is a very easy-to-use software and has the dual functionality of the recording screen as well as it is a video editor. A few of the major features of DemoCreator are capturing online high-paced games (up to 120 frames/second), recording webcam and screen at the same time. In addition, DemoCreator is also a very easy video editor tool having numerous editing features such as basic editing, adding text, annotations, callouts, and so on.
 Secure DownloadSecure Download
Conclusion
Though Bandicam screen recorder suggests that it provides less latency as compared to other screen recording tools , however, there seems to be a perceptible lag at the end and beginning of every recording. On the other hand, no doubt it provides extremely high-quality videos. In case, you face any kind of issues with the software, DemoCreator is always there for your rescue. We highly recommend this screen recorder for its wide range of features.
![[2024] Top 7 Secret Screen Recorder for Android, iOS, PC, Mac](https://images.wondershare.com/democreator/article/secret-screen-recorder.png)