
How to Make Live Screen Capture

Capturing your screen as a video is a valuable tool for content creators, gaming channel administrators, making tutorial videos. Having the ability to create videos quickly and easily from your desktop beats having to look for resources online. Screen capture can also prove to be useful for cataloging and note-taking when learning through electronic media.
How to Record Your Online Screen Content with DemoCreator
WonderShare DemoCreator is a free-to-use video recording and editing software for desktop and laptop computers. You can use DemoCreator to record video from your internal screen, as well as the webcam on your computer. You can create customized videos with specified areas of your screen and custom resolutions, meaning you can produce content perfectly suited to your set of needs, be it presentations, gaming channel videos, or software demonstrations.
Now, to capture your screen in real-time using DemoCreator, you will have to follow the following steps:
Start a Record Project
Once you have downloaded and installed DemoCreator for both Windows and Mac OS),
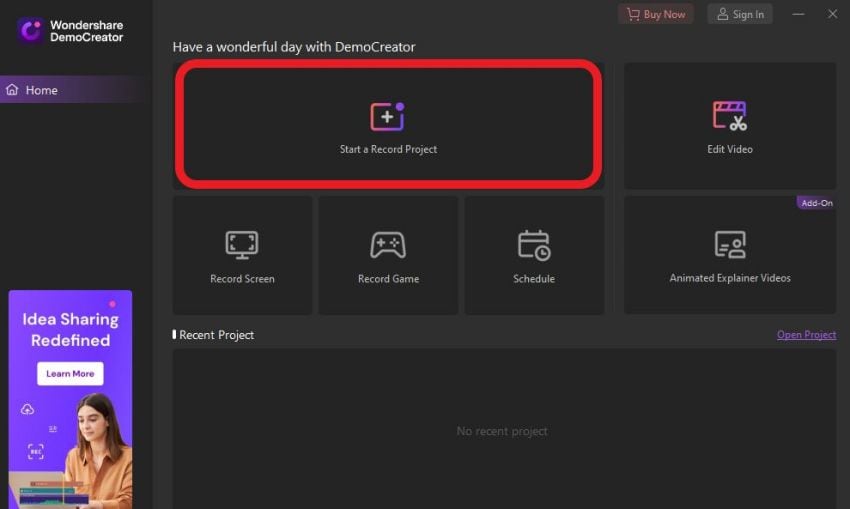
launch DemoCreator. This will bring you to a screen that looks like this:
 Secure DownloadSecure Download
From the available options, choose “Start a Record Project”. Keep in mind that you can choose “Record Screen” and that will indeed let you record your screen, but recording a project will allow you better control over your recording, since initiating a recording project will allow you to insert a window containing the feed from your webcam into the recording, as well as internal and external audio.
Setup Your Recording Parameters
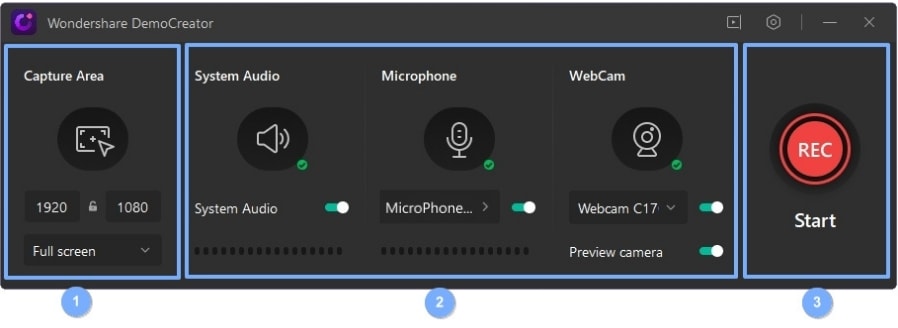
Once you have chosen “Start a Record Project”, a floating menu will pop up with settings allowing you to manipulate various aspects of your recorded video. You can alter the area of the screen that is captured, as well as audio sources, captured video resolution, and whether the webcam turns on. This menu will look something like this:
You can set a custom screen resolution, or pick one from the available presets. You can also choose a single screen to record if your desktop has multiple screens. Moreover, you can choose if either or both system and microphone audio are included in the video and whether the webcam turns on.
Use Drawing Tools While Recording
Once you are done setting up the various parameters of your recording, click the red record button to start recording. The recording will start in three seconds, and you can press F10 to stop the recording at any time. Hitting F9 will let you pause and resume recording.
Once the recording has started, there will be a set of controls at the top right corner of the screen which will look something like this:
Within this control panel, you have a variety of controls. These include controls for pausing, resuming, and stopping the recording, as well as retaking the recording. The other set of controls to the left are for adding lines, text, shapes, and captions to your videos. You can draw lines, arrows, circles, and other shapes, as well as spotlight and highlight parts of your video. You can also insert a marker in the recorded video for later reference. And lastly, there are options to undo and clear changes made by drawing tools to your video.
An important thing to note is that you can also initiate screen recording while already working on a project. To initiate recording, press the record button at the top of the screen and follow the previously mentioned steps to record your screen. Once recorded, the video file will be available for import to the media library and you can add it to your project.
How to Edit Your Video with DemoCreator
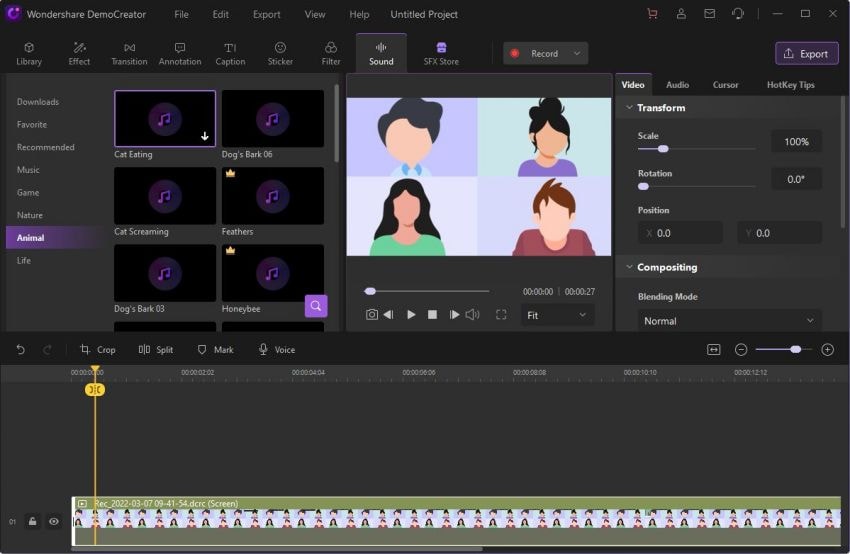
Having recorded your screen, you will now want to edit your video. Once you stop recording, you will be led to the editing video, where you will see all the controls for editing your video. This window will look a little like this:
Import Media
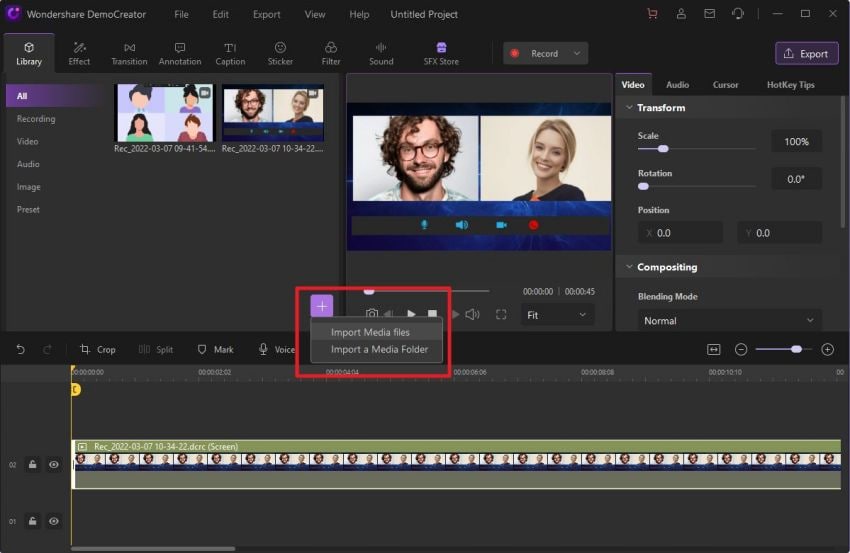
If you feel the need for additional media, simply click the plus sign in the library tab, which will pop up a menu. You can use this window to browse your computer for media and add it. Once added to the library, drag and drop files onto the timeline track to add them to the video. You can preview your edits as you move along using the preview window.
Cut, Trim, and Crop Your Video
Cutting and trimming your video is an easy way to cut out extra and useless content from your video, adding conciseness to your edits.
To cut your video, simply drag the yellow marker along the video to the desired point, and click split. This will cut your video into two separate clips.
Trimming your video is very simple in DemoCreator. Just drag the tabs at either end of the video on the timeline track to exclude the unneeded portion of the video, and you’re all set.
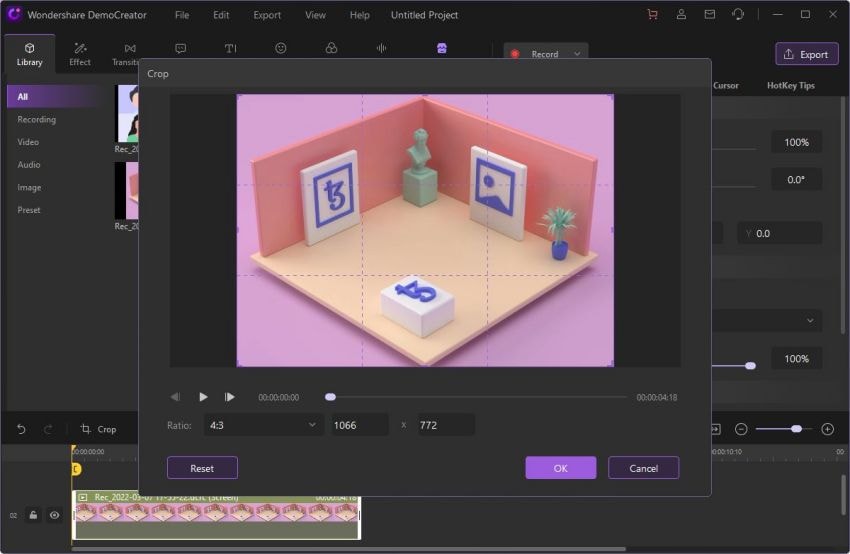
To crop your video, click the crop button found in the toolbar atop the timeline track. This will pop up a menu with controls that you can use to crop your video. Once done making changes, click “OK” to crop your video.
Add Text Captions, Annotations, and Transitions
Text captions, annotations, and transitions are a fun and easy way to give your viewer more context and understanding of your video. Here, we will see how to apply these using DemoCreator.
To add captions, choose the captions tab. In that tab, you can look for caption styles that are suitable for your taste and the nature of the application. Once you have chosen a particular style, Simply drag and drop the caption onto the video in the timeline track. You will then see a set of controls to the right of the preview window that you can use to alter the size, location, and style of your text captions.
Similar to captions, annotations get their own tab in the upper toolbar. Open the tab to browse the selection of annotations. You can have text as well as lines, shapes, and arrows. Once chosen, drag the annotation onto the timeline track, and you will once again be provided with controls to fine-tune your annotation.
Transitions allow you to make your videos more fun and engaging for the average viewer since variable visual cues can help capture the attention of your audience for longer. To apply transitions, open the transitions tab. You can then drag and drop your desired transition onto the video on the timeline track to apply it to your video.
Stickers and Other Effects
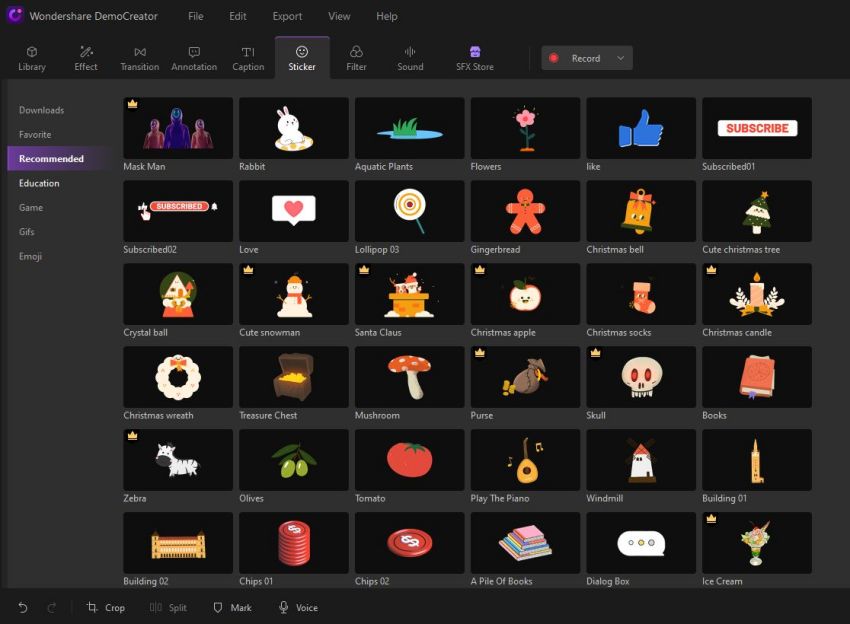
Stickers are easy to add and bring some flair to your video, ultimately making your content more engaging. To add stickers, use the stickers tab to find, drag, and drop a sticker onto your video on the timeline track to apply it to your video.
You can also add filters, special effects, and sound effects to your video. Controls for all of these can be found in the tabs below the top toolbar, where you can browse, choose, and use edits for your video.
Export Your Video
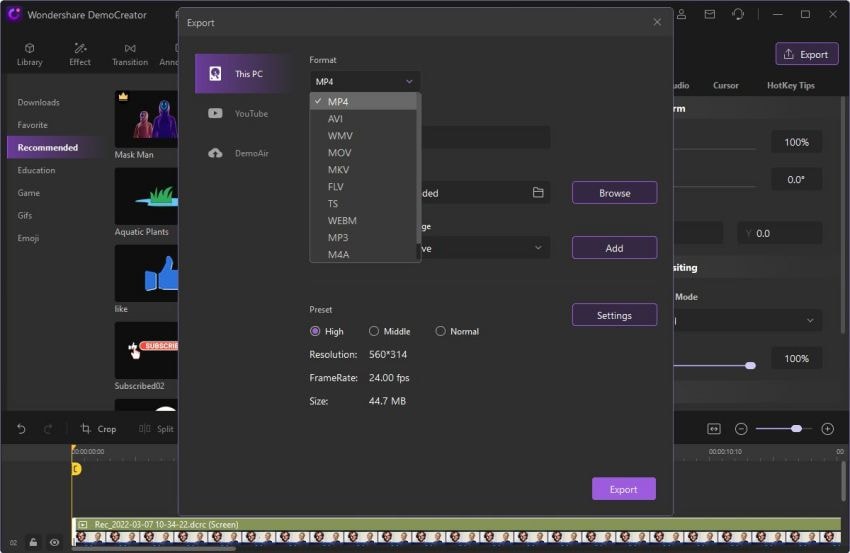
Once you have finished editing your video, you will need to export it to obtain a useable file that can be shared and uploaded. To export your video, click the export button at the top right of the screen. There will be a pop-up window with various controls such as file format, resolution, and destination folder. You can then choose a file format to export your video in. Once you are done making changes, click “Export” to export your video.
You will need to purchase the full software if you want to export your video without a watermark, as well as access some premium features.
Conclusion
DemoCreator is free to download and use for video editing and offers rich features as well as options for recording video and audio using your device’s system and external devices. Video captured from the device’s own display is seamlessly integrated into the editor for easy access. If you create screen recording-based content such as gaming videos, demonstrations, tutorials, or other types of content, DemoCreator can be a valuable and effective tool for you. It is easy to use, quick, intuitive and does not have massive hardware resource requirements.


