Screen recording seems like an easy enough process. You just download a reliable tool, prepare your content, and start making your video. But what happens when you hit the record button, and nothing happens? Did you do something wrong? Download the wrong tool?
In all likelihood, the problem simply lies in the screen recording permissions on Mac.
To ensure your privacy and security, macOS imposes strict restrictions on all third-party software that could capture your screen - even reputable browsers like Google Chrome. Fortunately, navigating those restrictions is easy enough.
Learn how to enable screen record on Mac and start creating captivating video content.
Table of Content
Understanding Screen Recording Permissions on Mac
While it doesn't always seem like it, screen recording potentially carries a certain level of risk. Primarily, you'll have to be very selective about the tools you're using for it. Far too many malicious apps and tools could share your personal information with third parties and even start screen recording in the background when you're not even aware of it.
Secondly, user error with reputable apps could cause issues. You could accidentally capture and share sensitive emails, alerts, and notifications you receive. You could stay logged into your bank account and accidentally share private financial information with your audience. You could expose your passwords and more.
Considering these risks, it's not surprising that macOS imposes strict restrictions on screen recorders by default in an attempt to improve your privacy and security. Most commonly, you'll be required to manually enable screen recording on Mac if you want to use both built-in and third-party tools for it.
How To Allow Screen Recording on Mac
As a general rule of thumb, the first time you download and launch a new app on your device, you should immediately get a popup asking you to allow some permissions to use it. However, you could still manually enable permissions if you forgot to do it the first time after launching the app or if the popup never appeared.
How to turn on screen recording on a Mac varies slightly based on the specific operating system you're using.
To enable screen recording permission on macOS Ventura, you'll need to follow these steps:
- Go to the Apple Menu > System Settings;
- Go to Privacy & Security > Privacy;

- Scroll down the Privacy tab and select Screen Recording;
- You'll see a list of apps that can record the screen. Next to the app you want to use for screen recording, toggle the slider On;

The process is only slightly different if you're using macOS Monterey, Big Sur, or Catalina. Here's how to grant screen recording permission on Mac if you're using these operating systems:
- Go to the Apple Menu > System Preferences;
- Go to Security & Privacy > Privacy;

- Scroll down to find Screen Recording and click the padlock icon if the screen recording options are grayed out;
- Tick the box next to the app you want to grant permission to record the screen.

After you allow screen recording on Mac, you should have no further issues with capturing video and audio on your Mac and preparing content for sharing with a broader audience.
How To Test Screen Recording Permissions on Mac
While things should work flawlessly with your screen recorder after you've given the app all the necessary permissions, you'll always want to double-check. The easiest way to do so is by testing out your app of choice.
Testing on Built-in Software
While QuickTime is somewhat light on features, it does support screen recording. As a built-in tool, it requires no software downloads or lengthy installations, so you can start using it immediately.
Here's how to record your screen with QuickTime and check if you've granted all the necessary permissions:
- Open QuickTime and go to File > New Screen Recording;

- Click the arrow by the Record button to adjust recording settings (select microphone and show mouse clicks, if needed);
- Click the Record button to start recording;

- Click the Stop button to stop recording.
As soon as you've captured your screen, QuickTime will automatically open the recording for you to review it. If it all works, you've properly granted all the necessary permissions and can start recording the actual video you need.
Testing Permission on Third-Party Software
As a rule, macOS is much more apprehensive about third-party apps than built-in ones. So, you'll want to ensure that all the necessary permissions have been granted to your third-party screen recorders and test them out thoroughly before you commit to using them for an important project.
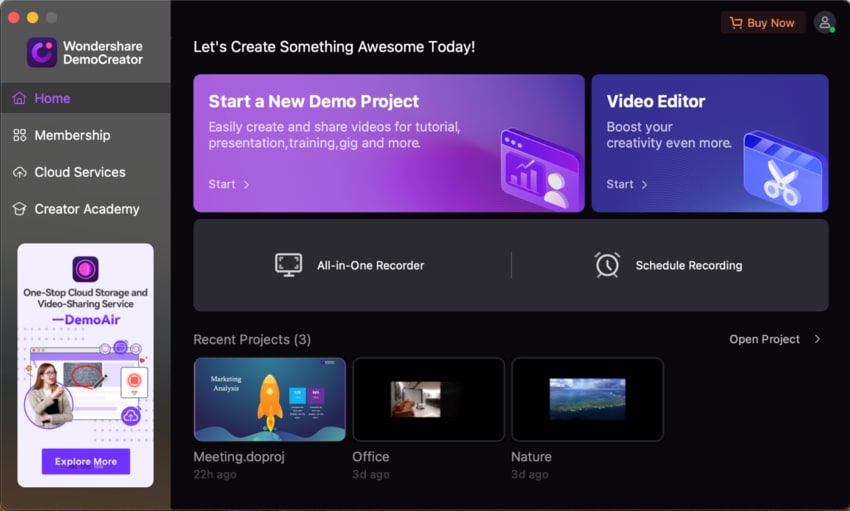
Among the most popular screen recorders for Mac users, Wondershare DemoCreator stands out. With comprehensive recording and editing capabilities, extensive AI-powered tools, and countless valuable features, it lets you perfect your recordings with the utmost ease.
Whether you want to capture your gameplay, create an educational video presentation, or have fun with virtual avatars and AI voices - you can do it all from a single app.
- Record desktop screen, audio, and webcam simultaneously
- Various annotation tools to emphasize important points
- Edit videos quickly with a wide range of professional tools
- Export to MP4, MOV, MKV, GIF and multiple formats

Here's how to test permissions and check if Wondershare DemoCreator works as it should on your device:
- Download and launch Wondershare DemoCreator on your Mac;
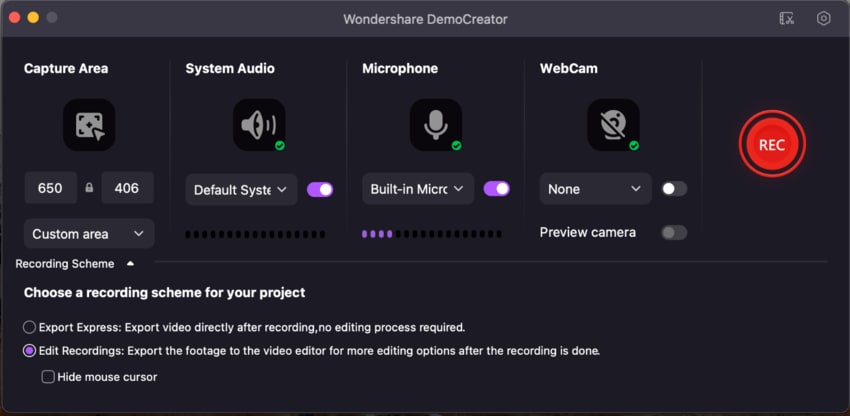
- Select the All-in-One Recorder;

- Customize your recording settings. Set the recording area and enable/disable system audio, microphone, and webcam;
- Choose your recording scheme. Export Express to immediately save the recording or Edit Recordings to be taken to the built-in editor;

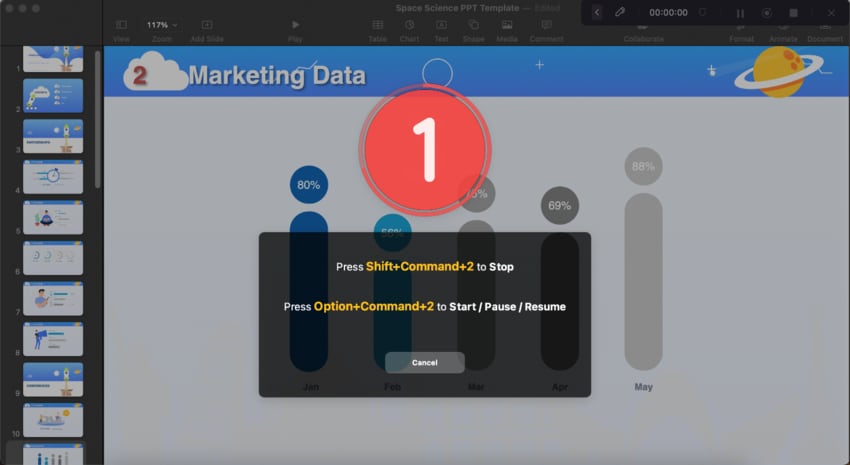
- Click the red REC button to start recording;

- Click the white End button to stop recording.
After you've finished, open the video to ensure that DemoCreator had all the necessary permissions and captured precisely what you wanted.
Troubleshooting for Screen Recording Permission on Mac
On paper, granting all the screen recording permissions on your Mac should be easy enough. In practice, it's not always so. Take a look at the following troubleshooting tips for common issues that might occur with your screen recorder permissions on Mac.
App not listed under Screen Recording permissions
If you've accessed the screen recording permissions through Privacy & Security settings and don't see the app you want listed, there's an easy fix. Simply click the small + icon under the list and add your desired app.

Permission prompt not appearing
A permission prompt should appear when you download and launch an app you want to use. If it doesn't appear, go to Privacy & Security settings, access Screen Recording, and check the box by the app to grant it permission. If the app isn't listed, try adding it via the abovementioned method (click the + icon). If this fails, try uninstalling the app and downloading it again.
Screen recording not working despite granting permission
If you've granted the app permission, but it still isn't working, try uninstalling and deleting the app, then downloading it again, reinstalling it, and granting permissions again. If it still fails, there could be a problem with the app. Try using a different app to see if it helps.
Inability to record specific apps or windows
If a screen recorder has all the necessary permissions, it should be able to record everything happening on your screen, regardless of the specific app or window you have opened. Try opening the app/window first, then launching the screen recorder.
Screen recording apps not working after macOS updates
If your screen recording apps don't work after an update, you might want to check whether its permissions have been removed. Grant the necessary permissions again if needed.
If they still don't work after an update, try reinstalling the screen recorder.
Conclusion
Screen recording on Mac is usually a simple enough process - you just have to ensure that the apps you're using have all the necessary permissions. Whether using built-in apps like QuickTime or third-party apps like Wondershare DemoCreator, access your privacy and security settings, grant all the required permissions, and start capturing screen recordings without obstacles.
FAQs About Screen Recording Permission on Mac
-
Why is Mac not allowing screen recording?
To improve user privacy and security, Mac requires that you manually grant permissions to certain apps before using them to screen record. If you cannot capture your screen, double-check that you've granted all the necessary permissions by accessing your Privacy and Security settings. -
Why won't my Mac allow screen recording for Zoom?
You might have denied permission to Zoom to record your screen when you first installed it. You can grant permission for screen recording by going to your Privacy and Security Settings. If Zoom isn't listed as one of the apps you could use for screen recording, add it by clicking the + icon. -
How do I allow screen recording with restrictions on Mac?
If you cannot grant an app permission to record because the option is grayed out in your Privacy and Security settings, you simply need to click the Padlock icon in the lower right-hand side of the window to enable changes. Then, grant the necessary permissions to the app you want to use. -
How to give Discord permission to record the screen on Mac?
Go to Apple Menu > System Settings > Privacy & Security > Privacy > Screen Recording. Then, toggle the slider by Discord to its On position (or check the box by Discord) to enable the necessary permissions. -
How do I screen-record a video that is protected?
The easiest way to screen record a protected video is using third-party solutions like Wondershare DemoCreator and a capture card. The capture card will capture the video output, while Wondershare DemoCreator will record it.


