
Best Software to Record Lectures

Many institutions, colleges, and universities have adopted lecture recording practices to record classroom action for students to review later in their studies.
Many educational institutions are becoming hybrid or fully remote due to COVID-19. The recording of lectures for students is one method that schools strive to adapt to remote learning and hybrid learning.
With recorded lectures, students can learn and review content more efficiently, and teachers can share recordings with students.
With the ongoing need for Recorded lectures, if you are a teacher, you need to use a Screen recorder to record your lectures so you can assist your students in reviewing them later on. This article will discuss some of the best screen recorders to capture your lectures.
Recording lectures with DemoCreator
 Secure DownloadSecure Download
You can capture video demos, tutorials, presentations, and games using Wondershare DemoCreator and edit them like a pro. Everyone may easily record a clip thanks to the user-friendly UI. You have the option of recording the system sound, microphone, or webcam, depending on your need. Additionally, you can choose the settings before recording to ensure that the films are excellent.
To enhance your recorded lectures, captions, banners, Overlays, Arrows, and other Annotation options are available to use. To record your lectures, follow the simple guide below.
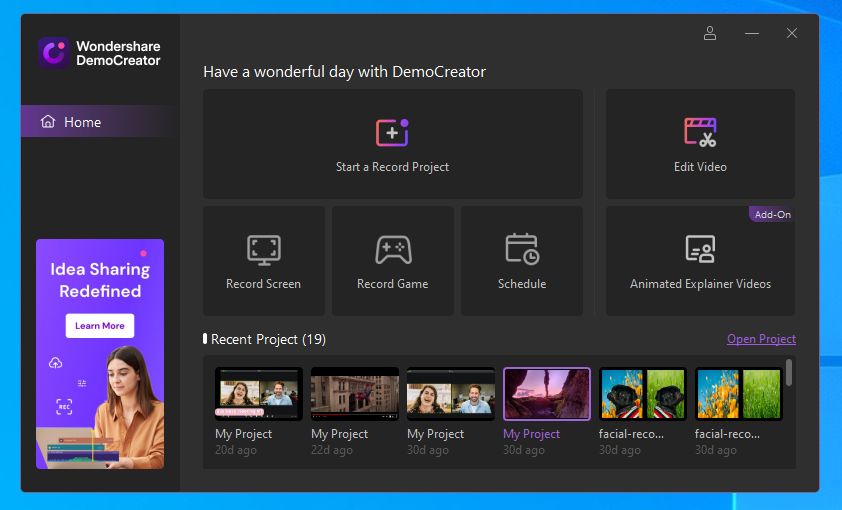
Download and launch DemoCreator
Download the DemoCreator software from its official website and then launch it.
Secure DownloadSecure DownloadCustomize Powerpoint presentation screen
A black dotted box is available in the interface; click on it. The dimensions of the box can easily be customized to fit your Powerpoint presentation slides. Alternatively, you can detect the frame if you choose the recording area to select a target size later.
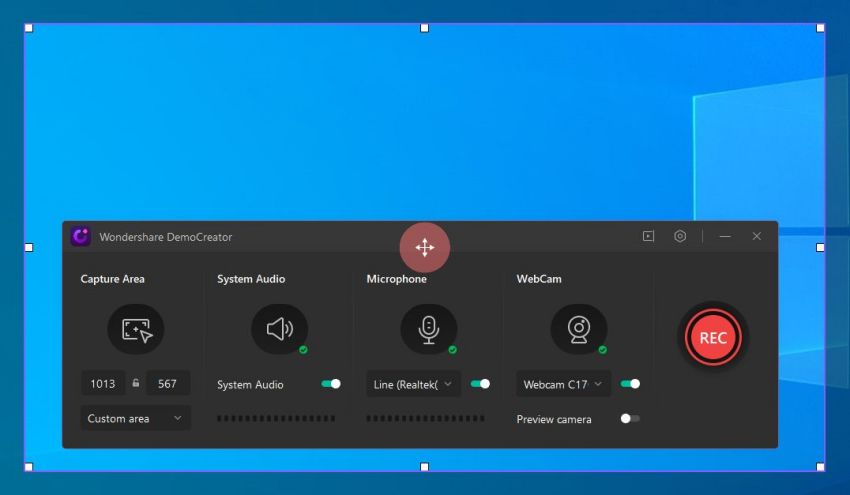
Record your Powerpoint Screen
Once everything is set up, begin the recording by clicking on the “Rec” button. After some seconds, the software will start recording your screen.
Export the recorded lecture
When you are done recording, it's time to export it into the desired folder.
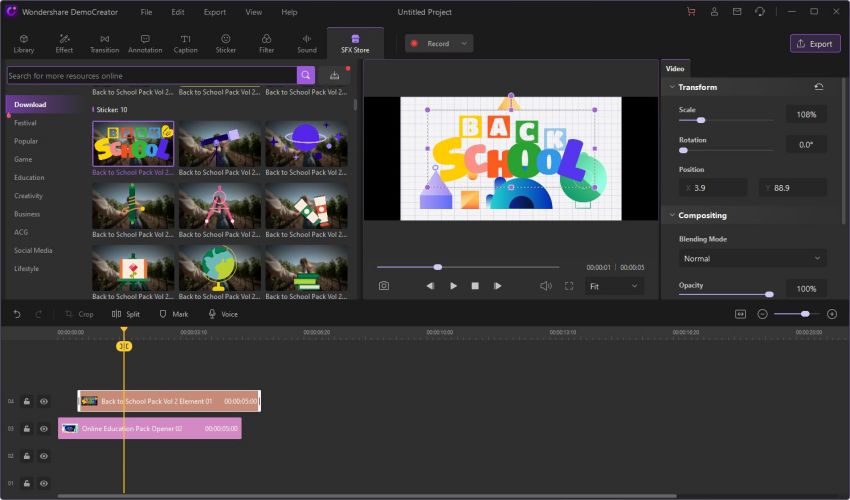
Editing recorded lectures with DemoCreator
After recording your lecture, you can edit them to make lectures more interactive, engaging, and professional; follow the simple steps below;
Add Annotations
Annotations consist of a few small comment areas. You can explain the many elements depicted in the lecture. This function can highlight any part of the topic to make it more exciting and engaging. You can add text, graphs, captions, and overlays to the recorded lectures by annotating them.
Denoise
This application allows you to play the video concurrently with the sound to appear clear and natural. You can choose any audio clip you've recorded. Then, in the top right corner, select the Denoise option. It will remove all background noise from the audio clip recorded.
Crop video clips
You can crop the lecture video to the size and aspect ratio you desire by clicking on the crop button.
Cursor Effect
Highlight effects, left-click sounds, and rings can all be added.
Clip Speed
To speed up or slow down media, select it in the timeline and adjust the speed in the properties section to achieve the desired effect.
Markers
Important frames can be marked with markers. To add a marker to the timeline, click the marker symbol in the toolbar.
Compositing
You can use Blending mode to access a variety of effects, such as Darken and Color Dodge. A superimposed image's opacity can also be changed. To use this feature, go to the Property Area and select Compositing.
Making Quick Video Assignments with DemoAir
Secure AccessSecure AccessDemoAir is a simple tool that allows you to record your screen and webcam to produce a video message for better communication.
DemoAir allows you to capture presentations with narrations quickly, report data to your team or demonstrate a product to customers, create online courses or training videos for blended & flipped classrooms, student assignments, and professional development, provide support using video, record your screen or webcam to share your expertise, and much more.
To make quick video assignments with DemoAir read the guide below;
Add DemoAir Chrome extension
First of all, add the chrome extension of DemoAir Open. After that, you'll notice the DemoAir symbol has been added on the top-right corner of your chrome screen, enable the icon.
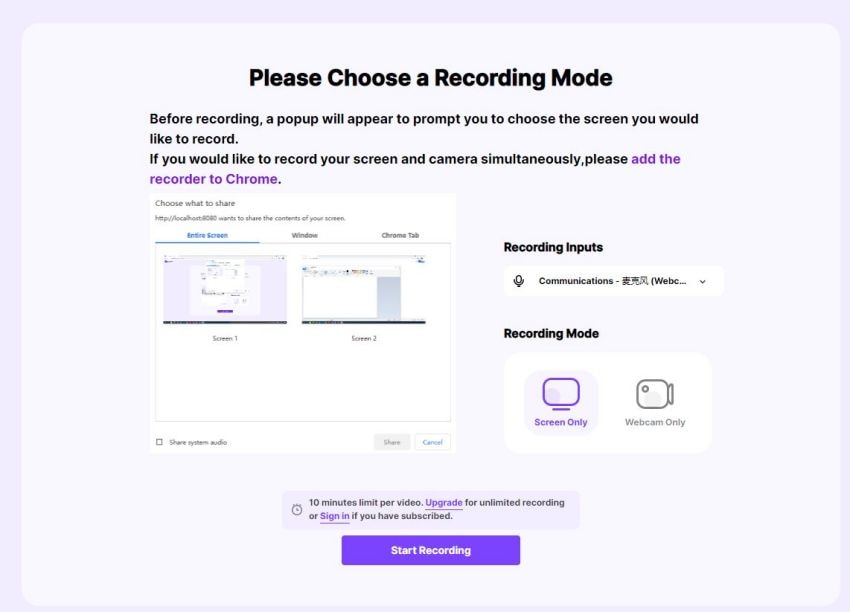
Select a Mode to Begin Recording
Select the DemoAir icon from the extension bar whenever you wish to record a demo video. You can choose between recording your desktop, browser, or webcam in the modes provided.
Here you may also configure the microphone or webcam input and turn on/off the system's audio for recording. Click the "Start Recording" button after you've finished configuring everything.
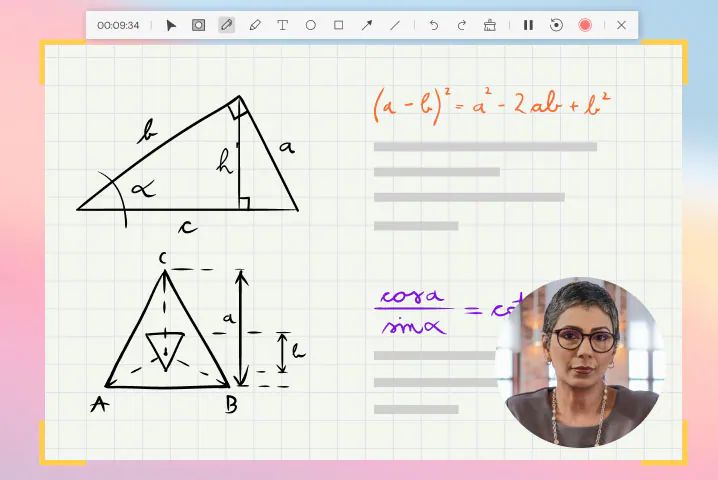
Drawing Tools
While recording video assignments with DemoAir, you'll notice a drawing toolbar at the bottom. You may access its numerous capabilities from here, such as focus mode, mouse highlights, and pen.
You can use your pointer to focus on any location with the help of the focus mode. The Pen tool allows you to choose a color to draw on the screen, whereas the mouse highlight mode highlights mouse clicks.
Export and share via DemoAir
To stop or pause the recording, click the DemoAir icon in the extension tab.
You can navigate to the "My Videos" option by clicking on the DemoAir icon. You can choose any clip, rename it, or download it directly to your computer from here.
The option to share the video with others by generating a unique link may also be found in the sidebar. You can also easily upload it to YouTube, Google Drive, Google Classroom, and other platforms using the embed code generated here.
Creating Educational Video with Anireel Animated Video Maker
Wondershare Anireel makes it simple to produce animated videos or colorful films for marketing, knowledge sharing, eLearning, and more! We raise the bar for everyone when it comes to video animation. Capabilities that will make your creativity come alive.
Characters, actions, objects, text, and audio are all included in the rich animation templates. To apply, drag and drop. Overlays practically all formats and supports imported photographs, videos, and audio components.
Deep mastering technique allows for simple text-to-speech conversion. You can choose from various voice styles and hire professional voice actors or studio recording services. Anireel can animate both integrated and imported assets.
Anireel will immediately convert your script into rich animations, convert the text into voice-over, and create complete, colorful, and exciting explainer films.
Follow the simple guide below to create educational videos with Anireel;
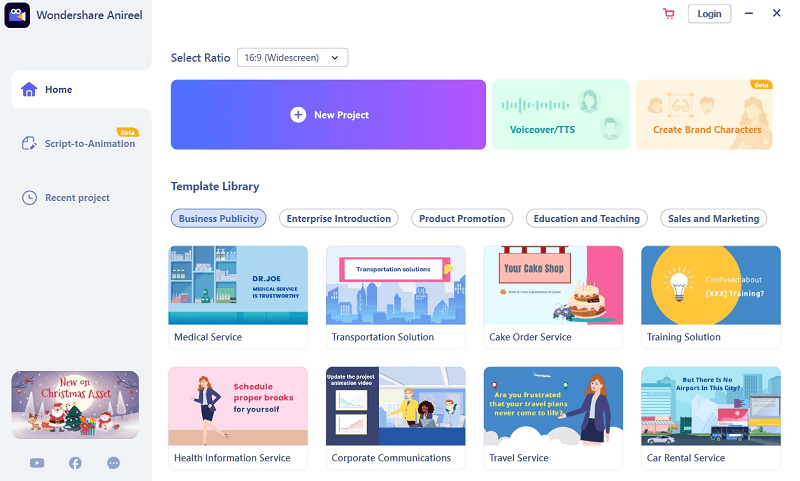
Download and launch the application
Launch the application, and this will bring up the "Get-Started" page, where you can choose from four options available there. Click on "Create Project."
Prepare a powerful script
Before moving forward, it’s essential to prepare a powerful script that must be engaging and insightful. So focus more on the script part to deliver what you want to deliver through educational video.
Create Storyboard for animation
The next crucial step is to create a perfect storyboard that aligns perfectly with your story or script; you can also use pre-designed templates available in Anireel if you are a newbie.
Select style for your animation video
Now it's time to choose the style of animation. To create an animation, you can either choose whiteboard animations or Infographic animations which is enough to create an educational video; let's discuss each;
- Whiteboard animations are great for explainer videos.
- Infographic animations are excellent for creating visually appealing graphs, animated charts, and other educational content with faultless graphics.
Animating the Video
After working on the script, storyboard, and animation part, it's time to animate by bringing them all together.
Add Sound or voice-over
Pay attention to your video; after animating it, is it now delivering a powerful message that you planned before? If not, add your voice-over or add a perfect and soft background message that fits with the topic of the educational video.
Export and Share
Once your educational video is completed, it's time to export it in your folder and afterward to share it with your audience to whom you want to deliver your message.
Conclusion
So far, we have discussed the three most potent softwares of Wondershare. These are enriched with unique screen recording features and editing to record your lecture. The three softwares differ in their features, pricing, and working mechanisms.
If you are a school or college professor looking for fantastic software that can create a perfect video lesson for your students or your audience, then using one of these softwares would be a perfect choice.


