[5 Steps] How to Crop Video in Premiere and the Tips & Tricks

How to crop video in premiere?
How do I resize a video in Premiere?
If you also have the same problems, then you can come across the article. Videos are much more appealing and engaging. But when it comes to cinematography or filmmaking, it's not only about shooting a video. Editing is a significant part of the process as well. Applying different editing tools can make a film or video a thousand folds better, and for that purpose, you need to know about the best video editors out there.
Adobe Premiere Pro is the top leading video editor with intelligent tools and features that help you make the most amazing videos. Now, if you need to change your video’s focus or get rid of the extra background, you have come to the right place! In this article, we will guide you through the steps of using the crop effect in Premiere Pro.
Part 1. How to Crop Videos in Premiere Pro?
Cropping is an essential part of the video editing process. The dimensions of a video can make or break it. So to make your videos aesthetically pleasing and eye-catching for your viewers, use Adobe Premiere Pro’s Crop effect.
Adobe Premiere Pro is one of the best video editing softwares for professional video editing. It has a wide range of features that help you transform your video completely. It allows you to play around with different features to express your creativity as best as you can.
Step to Crop a Video in Premiere Pro:
To crop a video in Premiere Pro, use the guide given below.
1. Add your footage in Premiere Pro
The first step is to browse through your computer to import your video to Premiere Pro so that you can start working on it. Go to Files > Import Files. Select file and click on the “Import” button to add your footage to the Project Panel.

2. Create a new composition
To create a new composition of your clips, drag them to the composition button at the Project Panel’s bottom.

3. Open the Effects Panel
Once you have added the clip to the timeline, select it and click on the Effects panel at the top. In the Effect panel, click on Video Effects, then Transform and select Crop. Another easier way of finding the Crop Effect is to type “Crop” in the search bar.

4. Add the Crop Effect to a Clip
Since you selected the clip in the 3rd step, all you have to do is double click on the Crop effect to add it to your clip. However, if you have not selected your clip, drag the Crop effect to add it to the clip on the timeline. The Effects Control Panel will load the Crop Effects on the left of your screen.

5. Use Crop Effect in Different Ways
The Crop Effect can be used in three different ways.
- Use Percentages: Write the percentage of the footage you want to crop in front of the desired direction (e.g. half of the footage from left so write 50% in front of Left).

- Use Sliders: Open the slider using the drop-down arrow on the left of crop directions. Manually set the crop percentage anywhere between 0%-100%.

- Use Crop Handles: Place the player head on the clip you want to crop. Click on the clip and select Crop Effect to enable the handles. The Preview Window will show you the handles. Adjust them manually to crop the footage.

Once you are done cropping your footage, place it anywhere you wish on the screen. To do that, use the Position controls in the Effects Control Panel. The Position effect works similarly to the Crop effect. Trial and testing with the controls is the best way to find the most suitable settings for yourself.
Part 2. The Tips and Tricks About Cropping Videos
When using Adobe Premiere Pro, you ought to know a few tips and tricks to crop your videos perfectly.
Tip 1: Use Scale effect instead of Zoom effect
When cropping your video, if you wish to zoom in or make the screen bigger, do not use the Zoom effect. The Zoom effect stretches your footage and distorts it. Use the Scale effect from the Effects Control Panel. Increase the scale to fit your footage to screen. This will not distort your original footage.
Tip 2: Set your Sequence Settings at the beginning
If you wish to edit your video in some specific dimensions, it is better that you set the Sequence settings before you start editing. This way, everything you do after that will conform to that setting. You won’t have to manually crop the video and only use the Scale effect to chop out anything undesirable.
Tip 3: Use the Crop Effect as a Transition
You can also use the Crop effect to transition between two footages. To do that, set the second track at the center of the first one and use the directional sliders to and keyframe it to start without making any changes. Then move forward three to ten frames and set the slider to 100%. In the Preview Window, you will see a smooth transition between the two footages.
Part 3. More Advanced Cropping and other Features You Should Know
Now that you know the basics, it's time to learn some advanced techniques and features to up your video editing skills. Here we will be discussing three exciting features: Split Screens, The Cinematic Look and Vertical Video Background.
The Basic Letterbox Cinematic Look
Another thing you can do with the Crop effect creates a Cinematic Look for your footage. One of the basic features of a Cinematic Look is in the letterbox look. To create that look, follow the steps below.
- Add the Crop Effect: Go the Effects Panel and type “Crop” in the search bar. Then Video Effects > Transform > Crop. Add the effect to your footage by dragging and dropping it on the track.
- Access the Effects: In the Effects Control Panel, click on the drop-down arrow before the Crop effect to access different editing options.
- Set your Percentages: Since you need a distinct letterbox look, set your Top and Bottom crop percentages to 10%. However, you can change the percentages as per your requirement.

Create A Split Screen Effect
The Split Screen effect is useful if you want to combine a few shots in a fun way. The Crop feature allows us to split our screens into videos.
- Grab the Footage: Add the footage to the Project Panel and then to the timeline. Once you have done that, you need to assess how to split the screen, either horizontally or vertically. This will depend on the type of footage you have.

- Choose the Base Footage: Choose the clip you want to show first and place the second clip above it at the point where you want it to transition in.
- Adjust the Footage on the Screen: Remove the extra space in the clips to fit them side-by-side on the screen. Use the Crop effect to do that. The Preview Window will show you the adjustments as you make them.
- Set the Positions: Once the clips are cropped, set their positions as you like.
Change Vertical Videos to Horizontal Videos
There are times when you shoot a vertical video from your phone. In such a case, on the left and right of the screen, black bars are displayed. To remove the black bars and apply a blurred background, follow the steps given below.
- Duplicate your Footage: Add your footage to the timeline and then press the Alt key and drag your footage to the track below. A duplicate will be created.

- Access the Motions Effect: Select the clip below and in the Effects Control Panel, click on the drop-down arrow of the Motions effect.
- Change the Scale: Increase the scale of the clip till it fills out the frame in the Preview Window.
- Add Fast Blur Effect: In the search bar at the bottom left of your screen, type “Fast.” Go to Video Effects > Blur and Sharpen > Fast Blur. Drag and add it to the second footage.
- Increase Blurriness: In the Effects Control Panel, increase the blurriness to whatever percentage you find suitable and check the “Repeat Edge Pixels” box.
And you are done! Your video now looks more appealing and the black borders are gone.
Part 4. Other 6 Key Features in Premiere Pro
Now that you have gone through the steps involved in cropping a video in Premiere Pro, it’s time we gave you a few reasons for choosing Premiere Pro over other video editors. Here’s a rundown of the six key features of this video editor.
1. User Interface
A friendly and flexible interface makes it easier to work with video editing software. Adobe Premiere Pro has a customizable interface with a four-panel layout. It allows the users to add or remove panels or create a customized workspace, with all the regularly used options displayed right in front. You can also drag around the windows to create a clearer interface.
2. Editing during Playback
Adobe Premiere Pro has added a relatively new feature that allows you to make edits to your project during playback. It has five basic edit types - roll, ripple, slip, slide and regular trim. All these options are displayed on the left of the timeline for easy access. You have to double-click the point where you want to make an edit and apply the desired effect.
3. Transitions and Effects
Adobe Premiere Pro has 38 transition options and almost all sorts of effects required to create a stunning video, including lighting, keying and colorizing. Applying any transition or effect is relatively easy, as you simply have to double-click on it to apply. Also, you can quickly search for the required effect by typing the name in the search box.
4. Warp Stabilize
The Warp Stabilize feature in Premiere Pro is basically for smoothing out a video. However, it works on one frame at a time, so it’s a time-consuming process. Nevertheless, it lets you adjust cropping and smoothness and auto-frame the borders for a neat finish.
5. Collaboration Feature
The collaboration feature includes the Creative Cloud and Team Projects options. You can use Creative Cloud to store your projects online. The Team Projects offers real-time collaboration between editors and graphic editors; however, this feature is only available in the business-level accounts.
6. Multicam Angle Editing
The multi-camera angle editing feature is one of Adobe Premiere Pro’s standout features, as it allows you to work on unlimited camera angles, unlike other video editors. You have to select the “Create Multi-Camera Source Sequence” by right-clicking on the clip, choosing a syncing method, and carrying out basic editing tasks from the available tools.
Part 5. An Easier Way to Crop Video than Using Premiere
If you are a professional video editor and have been in the business for some time, Premiere Pro would be suitable and easy to use. However, if you are a beginner and looking for something simple yet resourceful, Wondershare DemoCreator is also an excellent option. It is accessible, user-friendly and effortless to use. You can use DemoCreator to record your screen and audio and edit it as per your liking.
If you have shot a video that has some additional space that makes your footage less appealing or wish to change your video's focus, DemoCreator’s crop feature is your choice.

The Best Video cropper & Video Editor
 Secure DownloadSecure Download
Steps on How to crop Video in DemoCreator:
Follow the step-by-step guide given below to crop your video in DemoCreator.
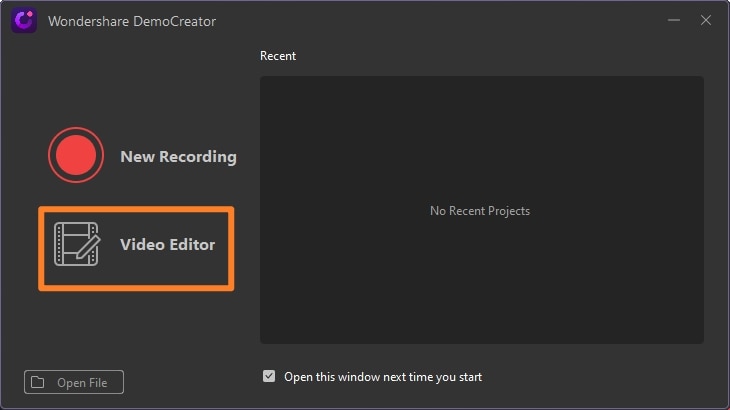
Step 1: Open DemoCreator Video editor
Launch DemoCreator and a pop-up window will open. Click on Video Editor.
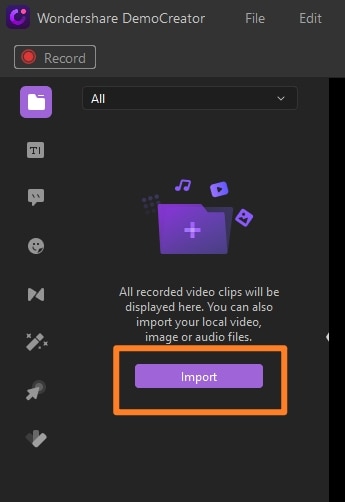
Step 2: Import Video that you want to crop
At the left of your screen, in the Media Library, you will have the option to Import footage from your computer. Click on Import and choose the footage, then press OK.
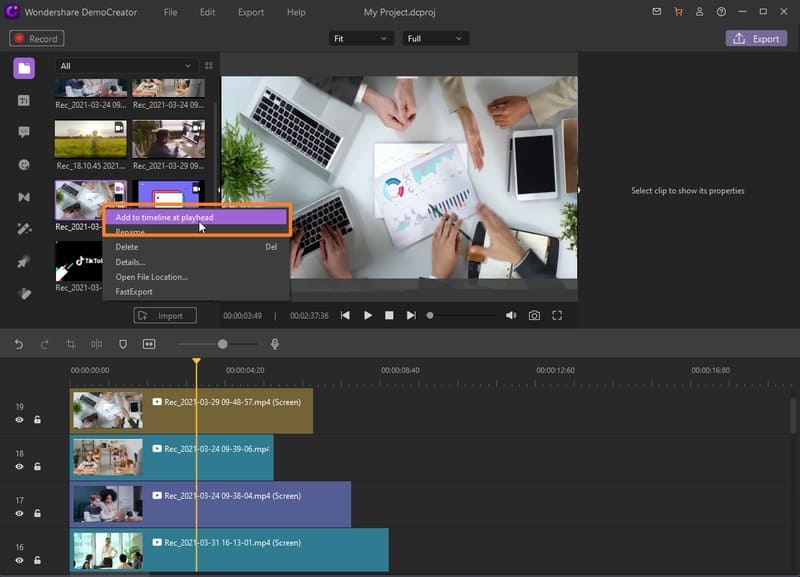
Step 3: Drag and drop the video in the timeline:
Once the video is added to the Media Library, drag and drop it on the timeline to start editing it.
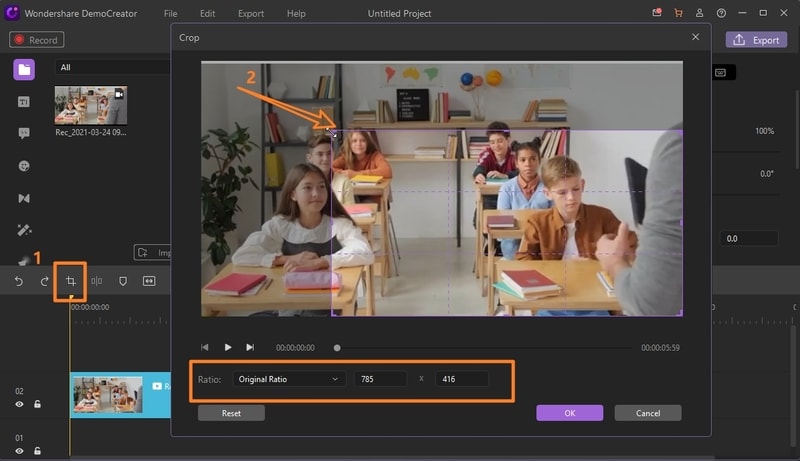
Step 4: Select Crop option:
Just above the Timeline, on the left, a Crop icon will be present. Click on it. A pop-up window will open from where you can crop the video. Drag the crop handles to adjust the dimensions manually.
You can also adjust the dimension ratio by clicking on the drop-down arrow. You can set the given ratios or add your own custom ratio as well. Hit OK when you are done cropping.
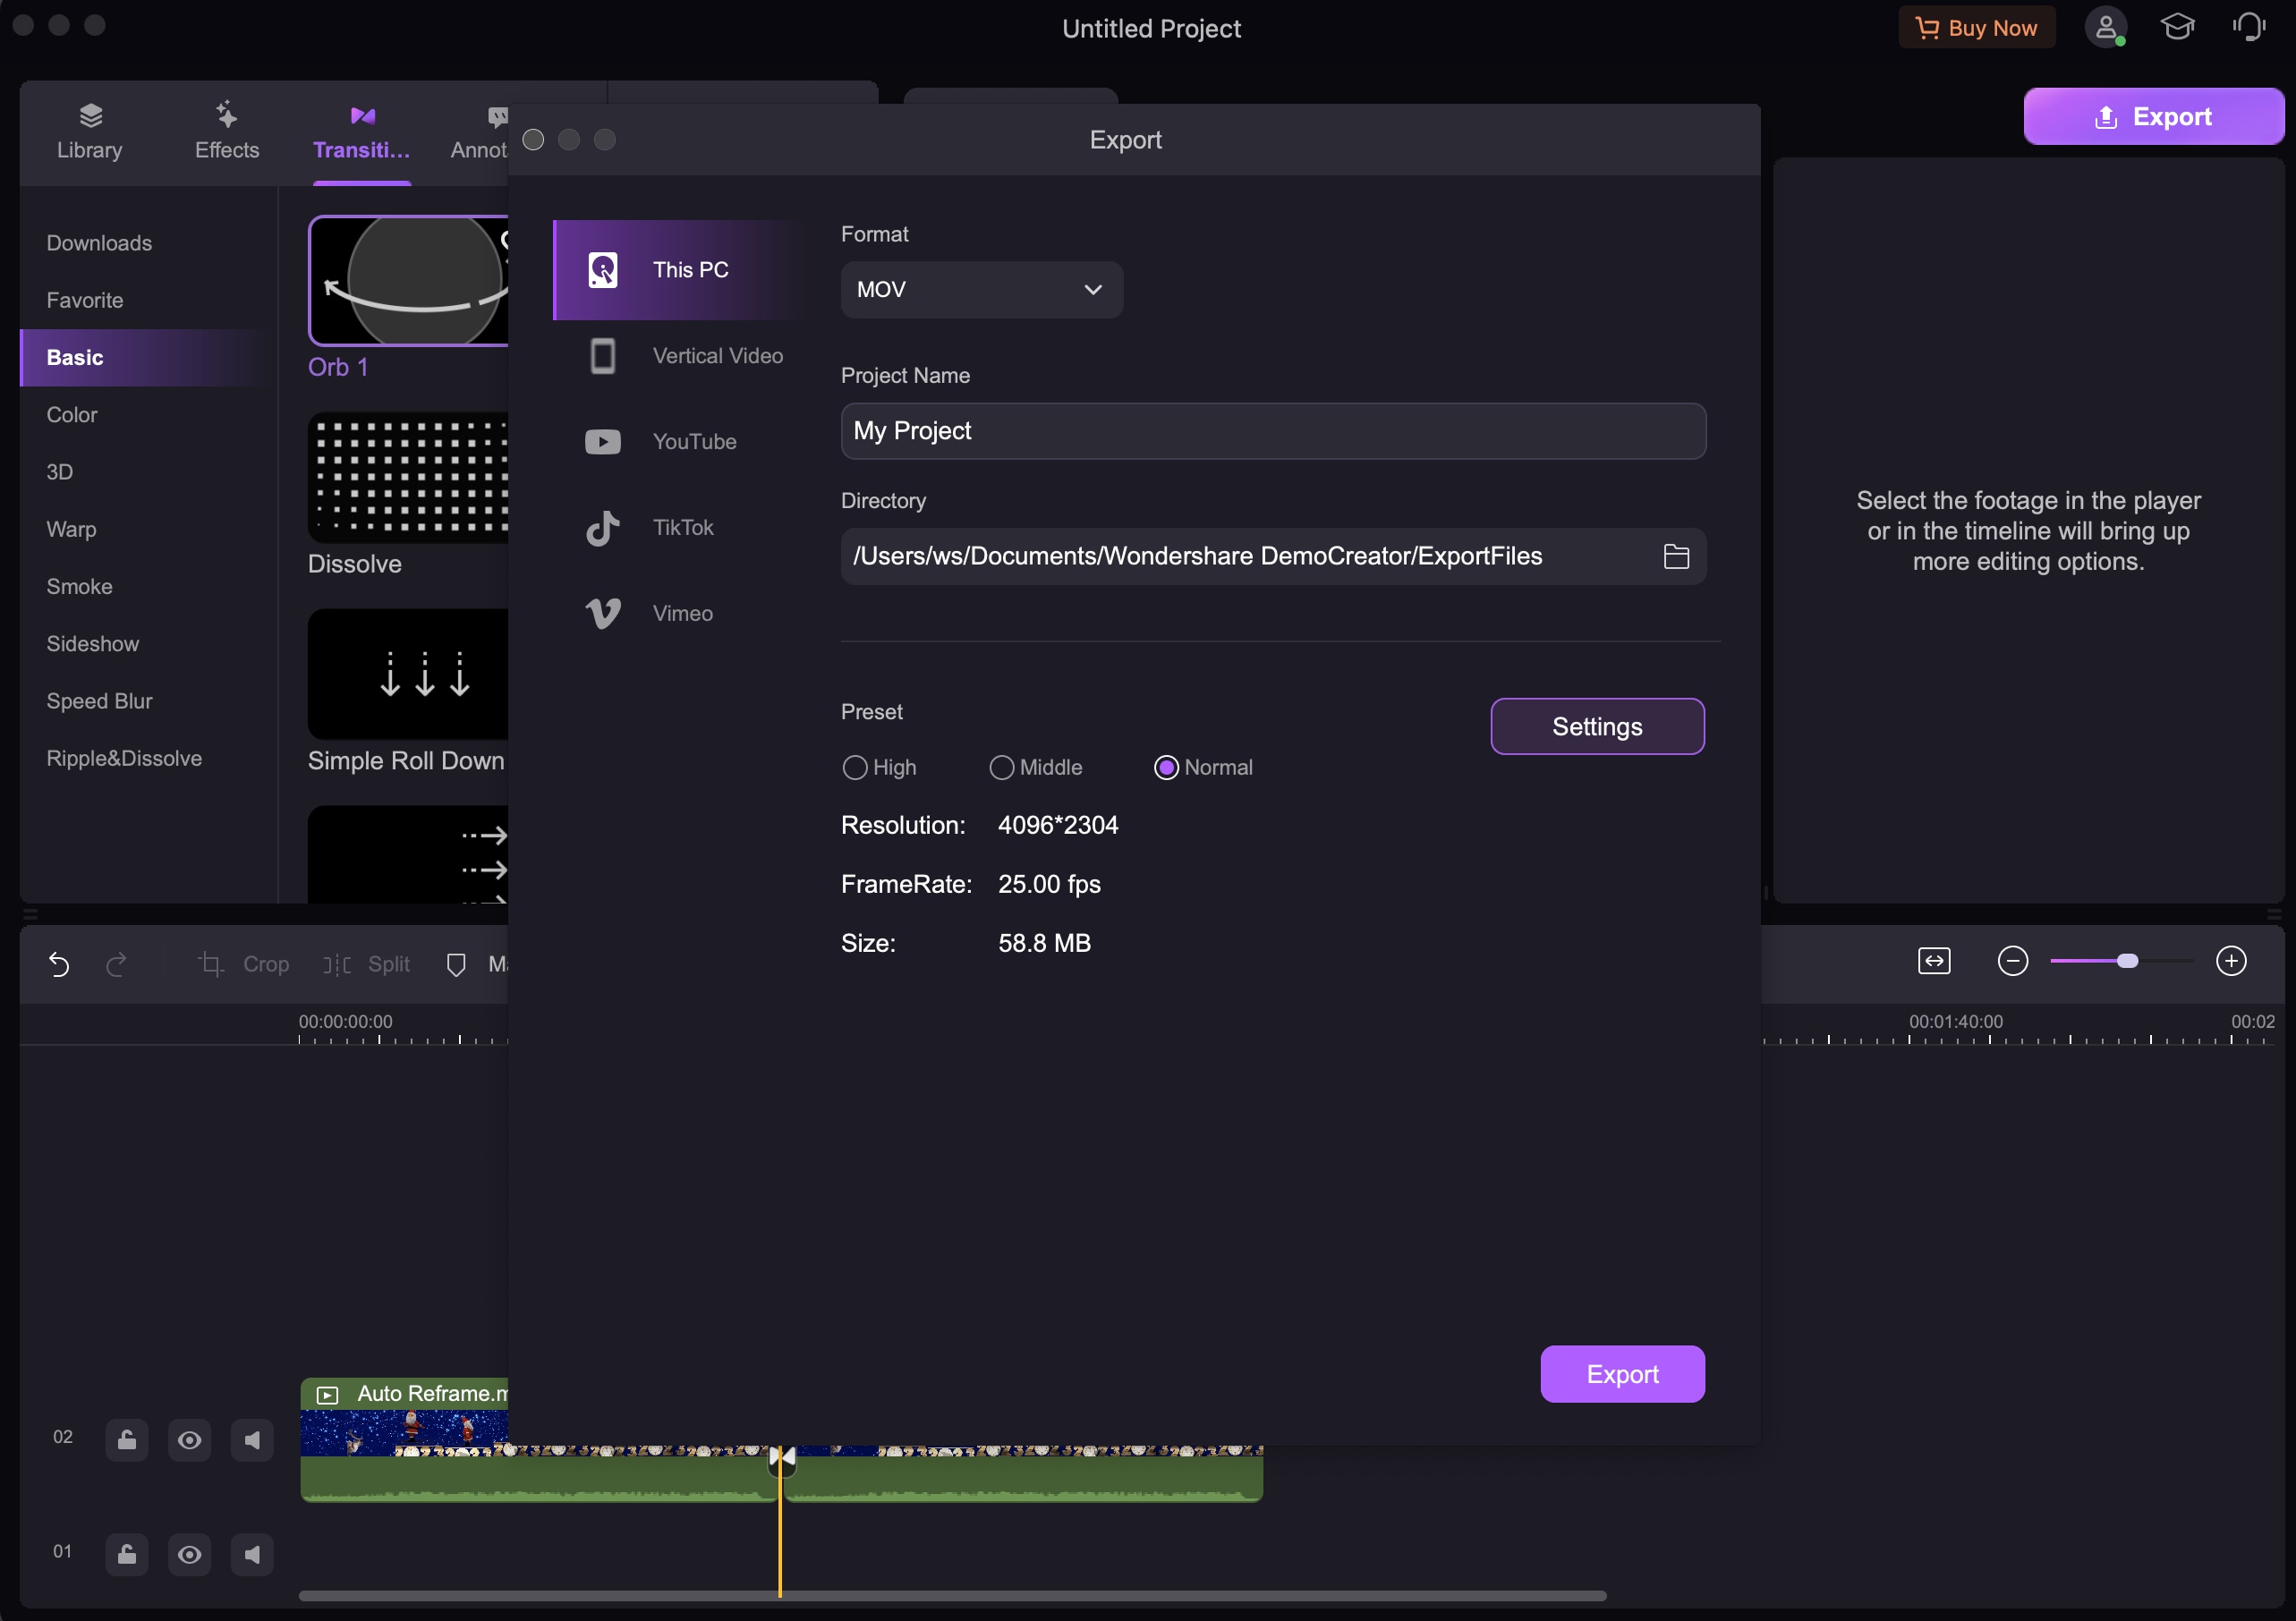
Step 5: Save the cropped video
To save the cropped video, go to the top right corner of the window and hit the “Export” button and save the file to your desired location.
The Difference between the Cropping Video and Trimming Video
Cropping a video allows you to remove any unnecessary space in your video or change your video's focus. It helps you to adjust the frame of your video after you have shot the video. On the other hand, the trimming feature allows you to shorten a clip. It helps you to cut the start or end of the video.
 FAQ:
FAQ:How do I crop aspect ratio in Premiere?
To crop aspect ratio in Premiere Pro, all you have to do is change the Sequence settings. To do that, go to Sequence at the top of your screen and then click on Sequence Settings. A pop up will open. In the Video tab, set the desired Frame Size and Premiere Pro will automatically adjust the aspect ratio.
Conclusion:
All in all, Premiere Pro and DemoCreator are two of the best video editors. However, there are major differences between both of them. Premiere Pro is more suitable for professional video editing and more up to speed for people with a higher level of editing skills. Whereas Wondershare DemoCreator is the go-to video editor for anyone who wishes to tweak their videos a little.


