How to Record Windows 10 PowerPoint Screen

PowerPoint presentation is an essential part of the corporate sector. Many employees add in a great amount of effort to present their PowerPoint presentation. These presentations are not only used in corporate sector but are also used in different industries such as executive communications, business and sales presentations, product demos, training and tutorials, student assignments, and educational lectures. Hence, to record your screen in PowerPoint for different reasons has become an essential part of daily lives for many people. Recording your PPT presentation offers you different benefits. You can make your dull, boring, and lifeless presentation much more interesting by recording it and then presenting it to your viewers. This also boosts confidence while presenting your presentation.
Since recording PPT presentation has a lot of significance, here are some methods that you can use for PowerPoint record screen purpose. These methods are easy to understand and simple to use. Read below to know more.
If you need to capture your screen to show PowerPoint presentation, you can always utilize the in-built recorder in the Microsoft app. PowerPoint has an in-built, which can be used by the users to their screen and record screen windows 10 PowerPoint. Here is a detailed guide for using the recorder. Follow the given steps below:
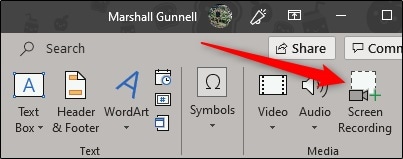
Step 1: To begin with, start PowerPoint and go to Insert tab. Next, you need to tap Screen Recording option.
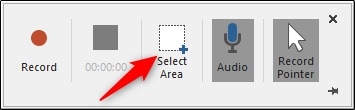
Step 2: Clicking on the option will show the screen recording dock on your screen at the top. The dock will offer you 5 options, which are very easy to understand and simple to use. By default, the app will record your cursor and audio. You can change the settings to turn them off if you wish. When you are all set to record, tap on Select Area option.
Step 3: As soon as you do this, your cursor will become a crosshair. All you need to do is select the area that you wish to record on your screen.
Step 4: After you have selected the area, you need to tap the Record option presented to you on the screen recorder dock.
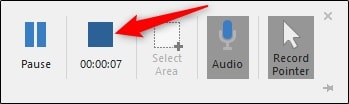
Step 5: When you press the Record button, a 3-second timer will start. Once the timer sets off, PowerPoint will start recording the screen. In addition to this, there is not PowerPoint screen recording time limit while using the in-built recorder. When you are done with recording everything, click Stop option in the dock.
If you are not fond of using the built-in recorder, you can always opt for third-party solutions that can suffice your recording needs. In this case, you can use TechSmith Camtasia. Here are the steps that will help you with recording your screen.
Step 1: Download and install the app on your device. Next, you need to add the PowerPoint Add-in. This add-in lets you to begin, pause, and manage your recordings right inside the PowerPoint, thereby evading the need to toggle between different apps.

Step 2: For adding the add-on, you need to open the PPT that you wish capture. Next, below the Add-ins section, open the add-in toolbar. If the toolbar is not visible, go to File >> Options >> Add-ins >> Manage >> Disabled Items >> Go. Click on the If the Camtasia Add-on and tap on Enable.
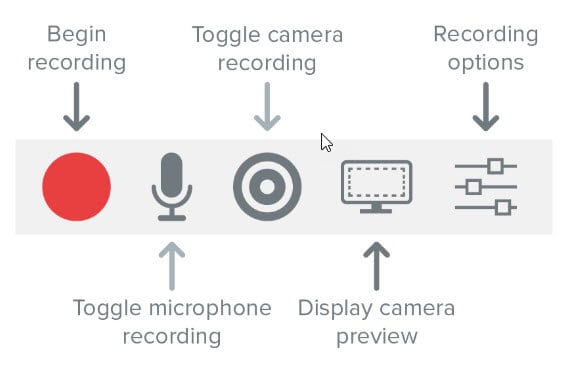
Step 3: The add-on provides different options such as start recording, record microphone, record camera, display camera preview, and different recording option.
Step 4: Tap the Record option in the dock to open your PPT in the presentation mode and begin capturing. When you end the PPT mode, you can stop and save your file.
Loom is one of the popular apps in the market that can be used to record PowerPoint presentation, Google slides, or Keynotes. The app is simple to use and understand. Below are the steps that you need to follow in order to record your PowerPoint presentation using the Loom software.
Step 1: When using PowerPoint, it is suggested to use the desktop app. The app also comes with Chrome extension, which is ideal for recording Google slides. Since, we are recording PowerPoint presentation, a desktop app seems to the ideal choice, as it will you to record with your camera bubble across any app.
Step 2: Download and install the app on your desktop. Now, open the presentation that you wish to record.
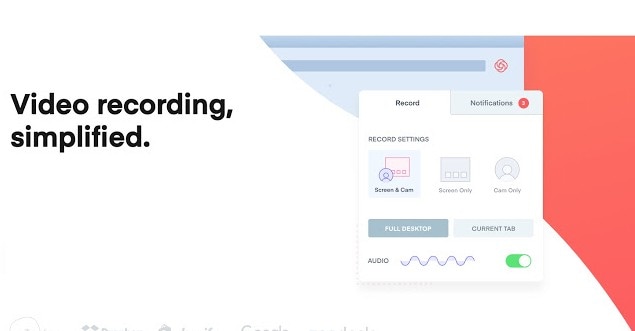
Step 3: Now, you need to start open the Loom Desktop App. Once you have opened the app, choose the Screen + Cam option with Full Screen as your default setting for capturing the screen.
Step 4: When you are ready, tap the Start Recording option.
Step 5: Next, you need to open your PPT presentation on the screen to capture it.
Step 6: Now, record your slides as usual. When you are finished, tap the Stop option to finish the recording.
Step 7: Your clip will be saved to your video library.
Wondershare DemoCreator is by far the best screen recorder in the market. The app allows you to capture your on-screen activities and creates an interesting demo videos. With this app, it is simple for users to make interactive software simulations, presentations , product demonstrations, and tutorials . Here are the detailed steps that will help you understand the PowerPoint record screen process very easily.
Step 1: Download and install the Wondershare DemoCreator app. Now open it and tap on the New Record option. You can also click on the Record option present in the toolbar.
 Secure DownloadSecure Download
Step 2: Once you do this, choose the recording region by tapping and dragging the green rectangle. Users can alter this to Full screen capturing or modifying the recording region to fit the specific app window.

Step 3: The app provides users with 3 modes of recording. The Full Motion mode can capture all activates on the screen. The Screen Shot mode can record the on-screen activity on the basis of keystrokes and mouse clicks. Lastly, the Manual recording mode allows you to take screenshots by tapping the F7 key during the recording.
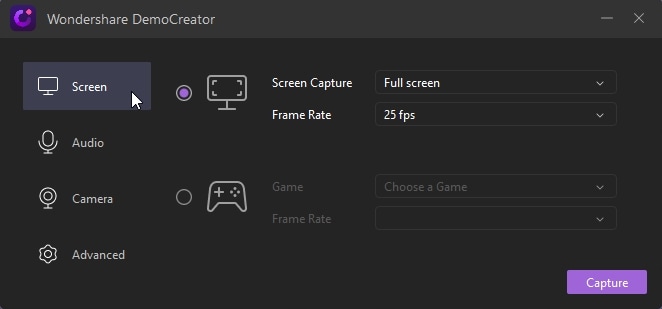
Step 4: Tap the drop down arrow next to Audio option. This will show a menu where you need to select the audio resources that you will be recording during the screen capturing. To test the audio, tap on the Audio logo to launch the setting menu.
Step 5: When you are all done with adjusting the settings as per your requirements, tap on the red REC option to begin screen capturing. Once you tap the option, a 3-second timer will start. As the timer goes off, the recording will begin.
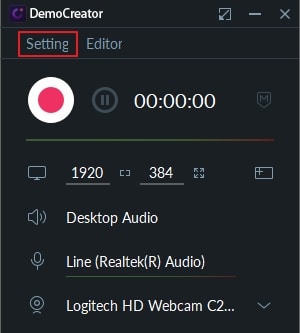
Step 6: To end the recording, double click on the DemoCreator logo or click the F10 on the keyboard.
Step 7: When you end your recording, a window comes into view where users can preview their recording, edit it, and save it.
AI Presentation Maker
Conclusion
Summarizing the article, you had a look at the top 4 options that can be used to record screen on Windows 10 PowerPoint. The in-built PowerPoint recorder is simple to understand and easy to use. But the main disadvantage of the recorder is that if offers limited and basic features.
TechSmith Camtasia is third-party software that can be used. But the file is too expensive for the features it offers and has limited file sharing options. Hence, users need to think twice before investing in it. Next, we saw Loom, which has an extension for Chrome as well as a desktop app. The software seems ideal for recording in the browser, but when it comes to the desktop app, it is super buggy. In addition to this, there is no way to censor sensitive information such as email addresses, names, and phone numbers while recording.
Wondershare DemoCreator is stands out as the best among all options, overcoming each and every drawback. This PC screen recorder is simple to use and does not need and technical background to operate it. In addition to this, the software offer free version and easy affordable if you wish to purchase the free version. In simple words, Wondershare DemoCreator is the perfect and ideal option to use for recording PowerPoint presentations and as well other onscreen activities.