Selected Area Screen Recorder

Screen Recorders are helpful instruments used to record the PC's screen, i.e., record the progressing exercises on the screen. Sometimes, people may need to save the games, videos calls or lecture but only want to capture the specific part, then a selected area screen recorder is usually needed.
Gamers, YouTubers, telecasters, or guides all need open media handling apparatuses. Either video recording, live real-time, VoIP call recording, webcam reconciliation, or straightforward screenshots coordination, all need a great HD partial screen recorder Windows/Mac.
1. Wondershare DemoCreator
Screen Recorder buttons video, sound, and pictures of anything you see on your screen. Any area of the screen, any window on the screen, or the whole work area can be recorded. With that being said, with the utilization of DemoCreator, you can capture your Webcam meetings, most loved games, any product on your work area, video shows on your screen, record sound of what you hear from your speakers, plan video introductions, instructional exercises and much more. This toolkit makes it easier to use its feature-rich platform for beginners as well as pro-level editors.
DemoCreator partial screen recorder is a straightforward instrument to make motion pictures and introductions by recording your screen exercises and live meetings. Overall, more than numerous video templates and formats are upheld to import, which moves the weight of discovering viable content off the shoulder. Eventually, if you're here to utilize this intuitively selected area screen recorder for pc, then you need to follow the below steps to perform in the best and effective way.
 Secure DownloadSecure Download
Steps to Perform Specific Area Screen Recording with DemoCreator
Step 1. Install and Launch DemoCreator
To embark on recording your screen with specific area formatting, you need to install this software inside your PC to get started.
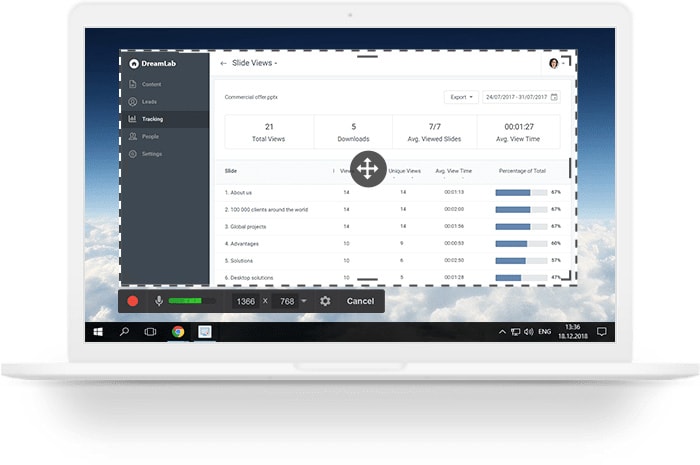
After you've successfully installed and updated the software with the latest version, make sure you launch it from the Desktop icon and opt for the New Recording button within the launching interface as shown below:

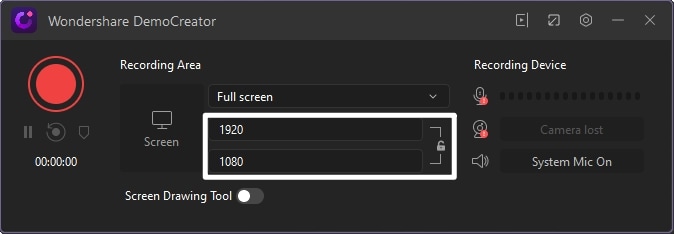
Step 2. Select Specific Area of Screen
Now as you're inside the DemoCreator screen recorder, you can select the specific area of your screen which is to be recorded. To do that, drag and release the recording area of the screen which is contrasted from the normal screen as shown below:
You can also select the auto-selection of your screen application with the other built-in menu of the screen. It gives you the flexibility to select your screen at the very best precision.
Step 3. Start/Stop Recording
After you've done selecting the area of your screen to be recorded, now is the time to start the recording after the other customizations within the DemoCreator screen recorder.
After the recording has been done, you can hit the Stop button that will eventually stop the recording at that moment.

Step 4. Edit/Save the Recording
Now as soon as the recording has been stopped, you'll be directed to the DemoCreator video editor to edit the video further. You can use a variety of editing features to your recorded content with DemoCreator's built-in video recorder as well as you can also crop the recording screen in the post-production process.
Lastly, when you're done the editing as well, now you can save or either share your recording to the social platform with the Export button at the top-right corner of the screen as follow:
2. Bandicam
Bandicam selected area screen recorder is a simple to-utilize recorder fit for buttoning a particular territory or the full screen. It allows you effectively to record streak games, web-based recordings and the sky is the limit from there. The product offers a few modes like gaming mode, screen recording mode, and gadget recording mode for wonderful chronicle. Bandicam with its brilliant 4K UHD and higher fps recording is all you need. It upholds 3 primary chronicle modes including game, screen, and gadget. Viable with numerous codec and encoding choices, it no uncertainty gives top-notch recording practically no deficiency of value.
Bandicam is a convenient application program that permits you to screen-button easily. Bandicam will help you do a screen button with high-pressure proportion while keeping the video quality nearer to the first work and gives execution far better than other screen button application that gives comparative capacities. To screen your situation viably, a correct apparatus is obligatory. To do this, Bandicam can help you. It can record anything occurring on the screen. It can record all activities that occurred on your screen when you are there or when you are away. It very well may be utilized to screen a PC and to record video course, games, and so on
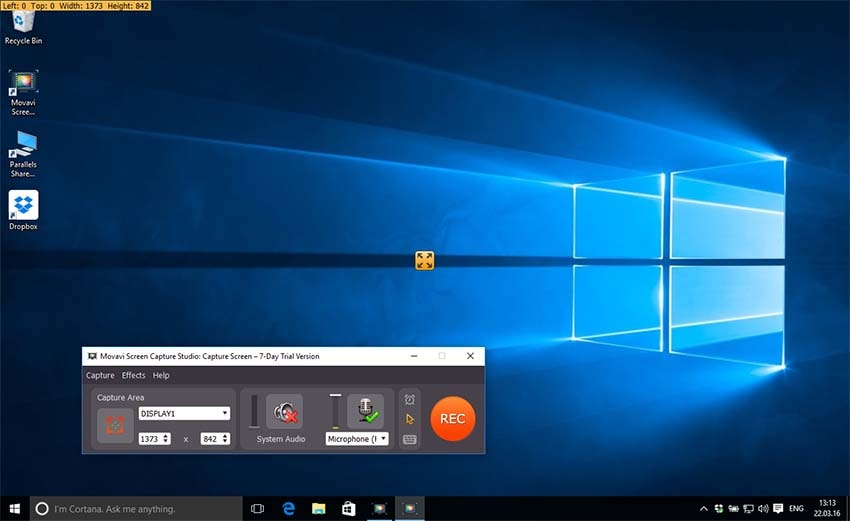
Step 1. Start Bandicam and choose the 'Rectangle on a screen' mode.
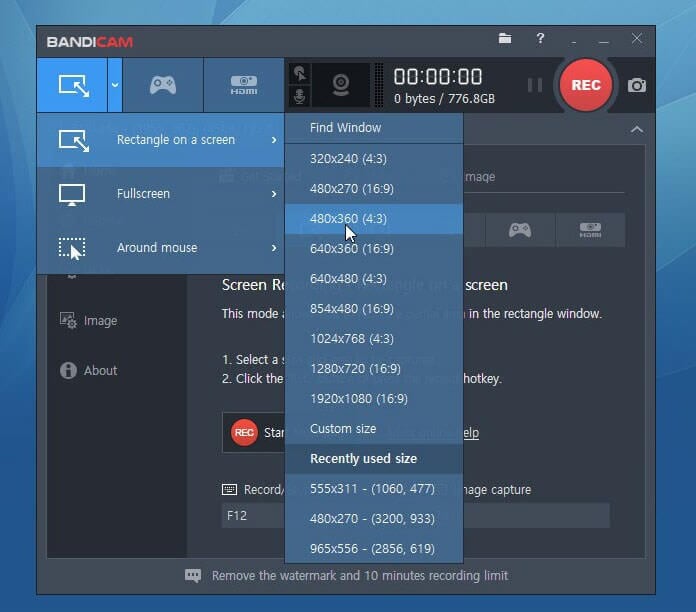
Step 2. Select Area and Record as shown above.
Step 3. Select the area of the screen you want to record and start recording right away.

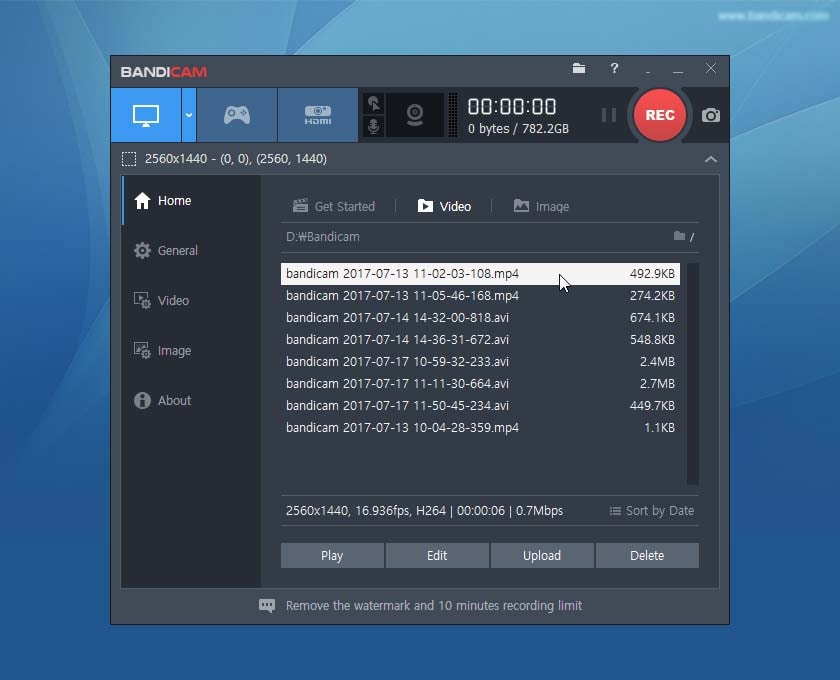
Step 4. Lastly, go to the 'Home -> Video' to play, edit or upload the captured videos.
3. Freecam
Utilizing Freecam, another software that allows you to record a certain part of your screen, you can undoubtedly make screencasts, record recordings, sound, transfer recordings to YouTube without a period limit. This product likewise upholds clients to adjust the recorded video, for example, erasing pointless parts, eliminating foundation commotion, and others more. Freecam is a selected area screen recorder for pc that is made for effectively making, altering, and sharing lovely screencasts. With Freecam, you can record all the on-screen movement, lock recording to a particular application, introduction slide or record the whole screen.
When you start the Freecam application, you will see a high contrast line around the zone to record and a toolbar that shows up under the accounting zone. Free Cam buttons the activity on the screen and records sound (amplifier and framework sound). You can incapacitate both mic and framework sound in the Settings window with this selected area screen recorder for pc. Here's how you'll perform it.
How to Record Part of Screen on Windows Using Freecam:
Step 1. Launch this software, and click the "New Recording" button to create a new recording file.
Step 2. You can make a chronicle of your whole screen, a chose zone of the screen or a solitary window. on the principal screen, select the "Select zone" button to choose the zone you need to record on the screen. At that point click the red circle to begin recording.
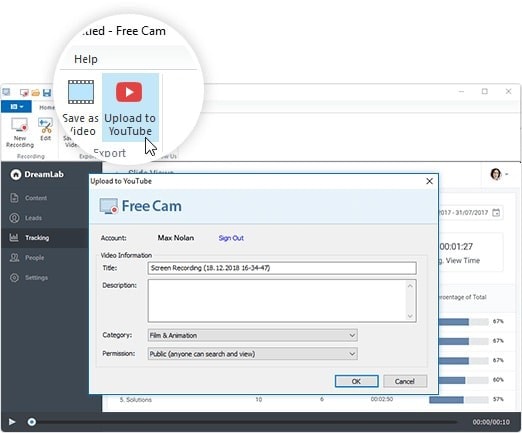
Step 3. When you finish recording videos, click "Stop to Record" and save the video on your computer or share it to YouTube directly.
4. Movavi
If you need a partial screen recorder windows/mac for your specific area screen recording necessities, you can decide to record the framework sound or sound through a receiver. Movavi partial screen recorder is an across-the-board recording device that can help you button what you need from your screen. This software permits you to record portrayals and other voice work, for example, digital broadcasts or book recordings. Here's every step you need to know for how to record a certain part of your screen with Movavi partial screen recorder.
Step 1. Launch Movavi and click the "Record region" button on the main interface.
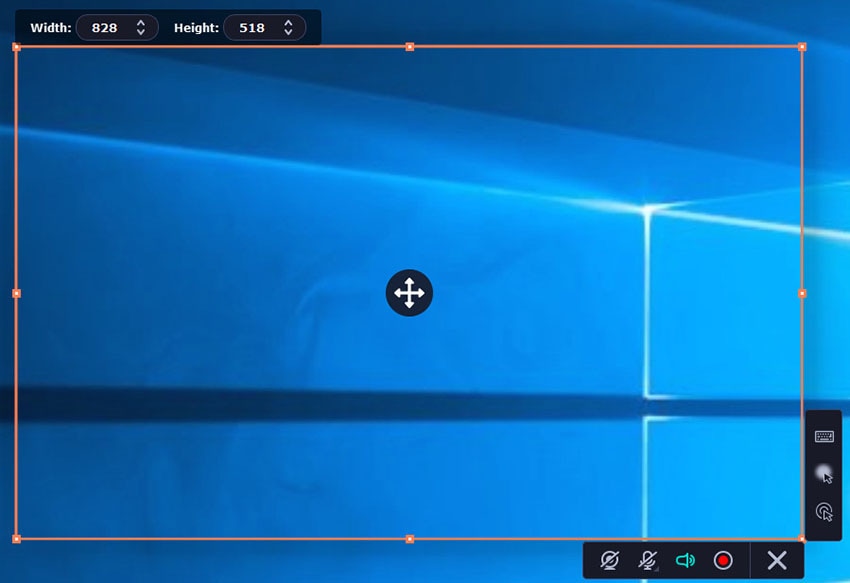
Step 2. When your cursor turns into a recording symbol, click and drag it diagonally to choose the part of the screen where you want to record.
Step 3. Snap the red "REC" button to begin the chronicle. Following a 3-second commencement, what occurs concerning the screen will be recorded as a video. At the point when you button every one of the contents you need, click the "Stop" button to complete the account. You can alter the recorded video if it's vital. At long last, you can save the chronicle on your PC.
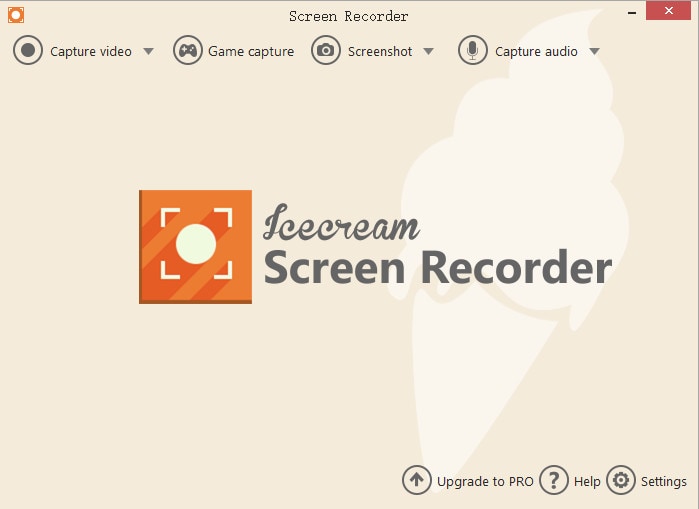
5. Icecream Screen Recorder
Icecream Screen Recorder is a simple to-utilize free selected area screen recorder. This product upholds clients to record video, sound, webcam, and use other additional account capacities. What's more, for screen recording capacities, this product additionally upholds recording full screen, recording custom zone, and recording zone auto-location. Now, if you want to utilize this selected area screen recorder for PC to the best extent, here are the steps involved in doing so.
Step 1. Download and install the application: You can download Icecream Screen Recorder from the authority site of the program. Save the setup.exe document on the hard drive. From that point forward, open the saved document and complete the establishment as proposed by the Wizard. Upon finish, it's feasible to begin utilizing the program immediately.
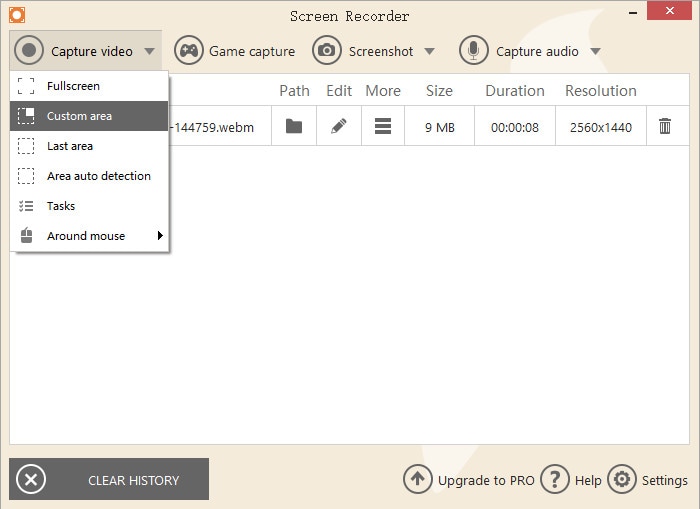
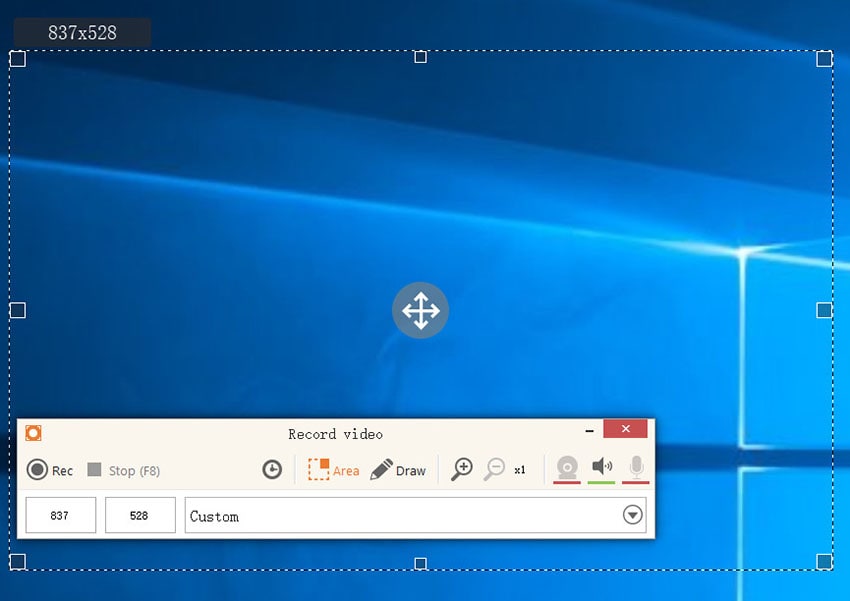
Step 2. Select Recording Area: On the main screen, click the "Capture video" button and select the "Custom area" button. After that, select the area of your screen you want to record.
Step 3. Start/Stop Recording: Then click the " Rec" button to start the recording. If you want to finish recording, click the "Stop" button to stop recording and save the file on your computer.
Conclusion
Possibly it being downplayed, live streaming, online class, or instructional exercises, practically all items in this selected area screen recorder for PC list can do that and have brilliant apparatuses like cropping window, bit rate, fps, goal, and arrangement customization, altering devices and sound/video blending. A top-of-the-list among them is surely the most recent 1080p screen recorder for Windows 10, DemoCreator. A straightforward yet proficient selected area screen recorder, which can record up to 120 fps is something difficult to overlook. Not just this, an underlying video editor and synchronous webcam recording for PIP is additionally present after your recording process. Hence, here in this article, we've enlightened you on how to record a certain part of your screen solutions, either Windows or Mac-based PC software applications.


