All About Adobe Audition Audio Recording
Adobe is one of the most prestigious software brands out there that produce almost all sorts of editing software. Whether you want to play around with videos, photos, or audio, there’s an editing tool offered by Adobe for all purposes. The Adobe Audition Audio Recording software is what most professionals are utilizing these days since it features waveform, spectral, and even multitrack display that significantly helps in editing and mixing audio files.
Surely, Adobe Audition can actually improve the quality of content you create if you know how to use this powerful tool properly. Although the tool is not free to use, you can still download the free trial version. Undoubtedly, the Adobe Audition Audio Recording software is highly useful, but it requires you to have a good skill set and understanding of the features. That said, if you want to use the Adobe Audition to Record audio from the computer and do voice-overs, we will guide you through the complete process in this article.
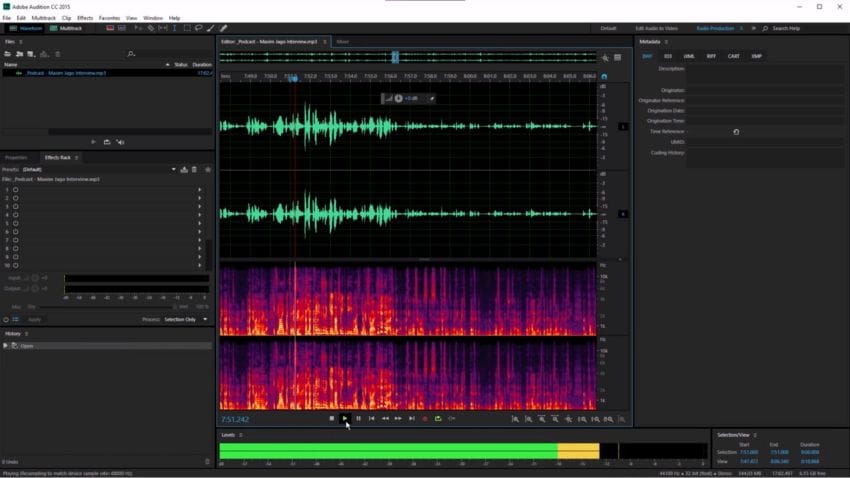
Adobe Audition Tutorial: Voice Over
As we said earlier, you can use Adobe Audition to record sound and tweak audio files in whichever way you want. But, for a new user, navigating and finding the right features to use can be slightly daunting at times. However, you will get comfortable using it with time; until then, you can take help from helpful tutorials like this one. Using Adobe Audition to record audio from a computer is quite simple if you follow these steps properly:
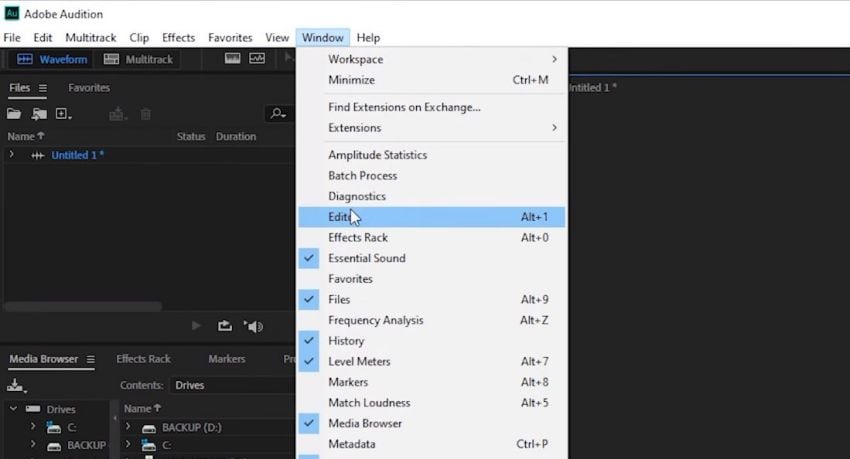
- To record a Voice-over in Adobe Audition Audio Recording Software, you simply need to launch it, and head to the Window Tab, and access the Editor from there.
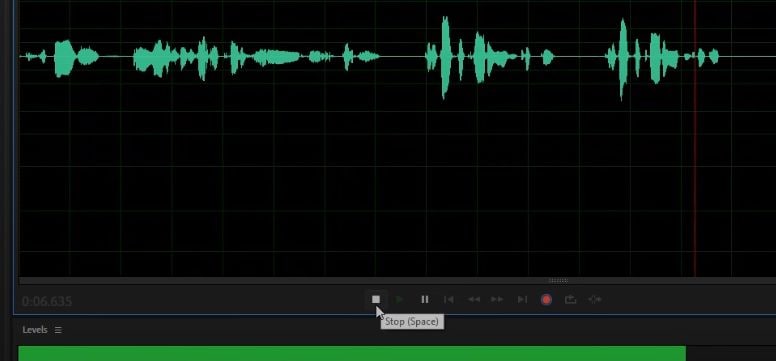
- Once you tap on Editor, it will open a blank Audio track on which you can record your own voice. Beneath it, you will find a bunch of controls such as Play, Pause, etc. By clicking on the Red button, Adobe Audition will start to record your voice.

- Now, once you are done recording the voice-over, simply click on the Stop button, as shown in the picture. That’s it!
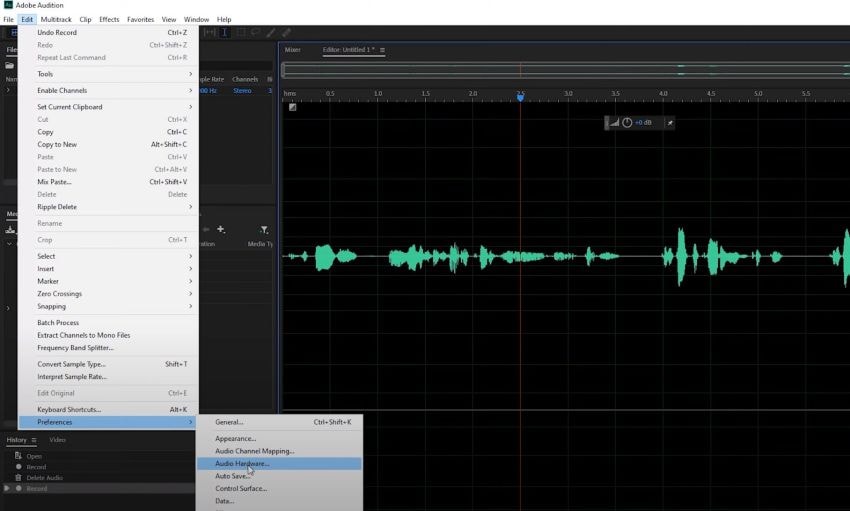
- In case, you want to use a different microphone with your computer to record the voiceover, you will have to select it as the audio input device in the software as well. To do that, head to the Edit Tab, and click on Preferences. Here, you can click on the Audio Hardware option to choose the desired audio input device.
Adobe Audition Alternative to Record Audio on Mac
Although using the Adobe Audition Audio Recording software seems pretty easy as you can look in the tutorial mentioned above. But, things start to get a little complicated when you dive into post-processing.
For a beginner, using Adobe Audition to record sound is not at all recommended, since the user interface is pretty confusing. In such cases, you should look out for some other good alternatives that could help you do your work, more conveniently. That said, one of the most easy-to-use and feature-rich software that you can use for doing voice overs is Wondershare DemoCreator.
Well, the Wondershare DemoCreator software is basically designed for screen capturing to create video demos. It’s not at all like an audio production application or anywhere similar to Adobe Audition, that’s the biggest reason it’s not that complicated to use as well. Apart from that, it’s one of the simplest screen recording software out there. Thankfully, it allows audio input so that you can record your voice also, which makes it a great alternative for doing voice overs. Want to know how? Have a look!

The All-in-One Screen/Audio Recorder & Video Editor
 Secure Download
 Secure Download
How to Record Audio with Wondershare DemoCreator?
Since you seem a little interested in Wondershare DemoCreator software, we feel glad to mention that it also has some other hefty features like an in-built editor, transition effects, support for multiple export formats and much more. That said, it’s a pretty handy software to use for both screen recording and audio recording purposes. Sticking to the topic here, let’s quickly check out how you can use Wondershare DemoCreator for recording audio. Moreover, please note that we are using a Mac device for this tutorial, but since it’s available for Windows OS as well, the steps will remain the same for both platforms.
- Before you start recording voice overs using the Wondershare DemoCreator, you should prefer adjusting a few settings to get the results you desire. That said, go to the Settings, and ensure that the right settings for audio recording are set.
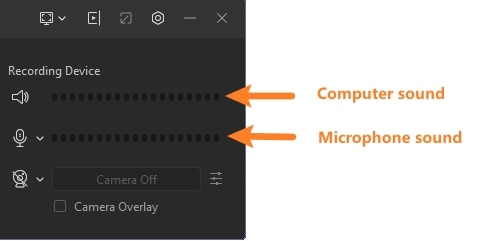
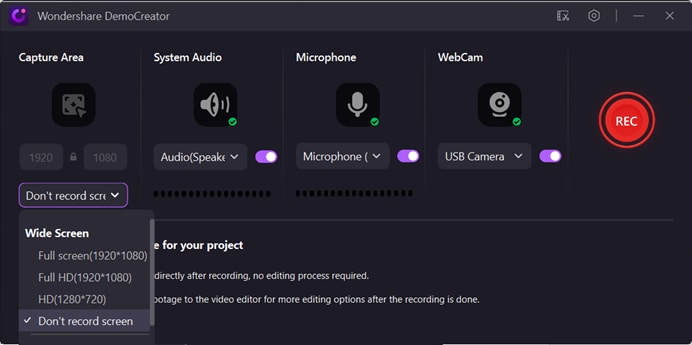
- After adjusting the settings as per your requirements, you can proceed to record audio by clicking the Record button. As soon as you hit the record button, you can start doing the voice over, Wondershare DemoCreator will record it for you via the microphone.
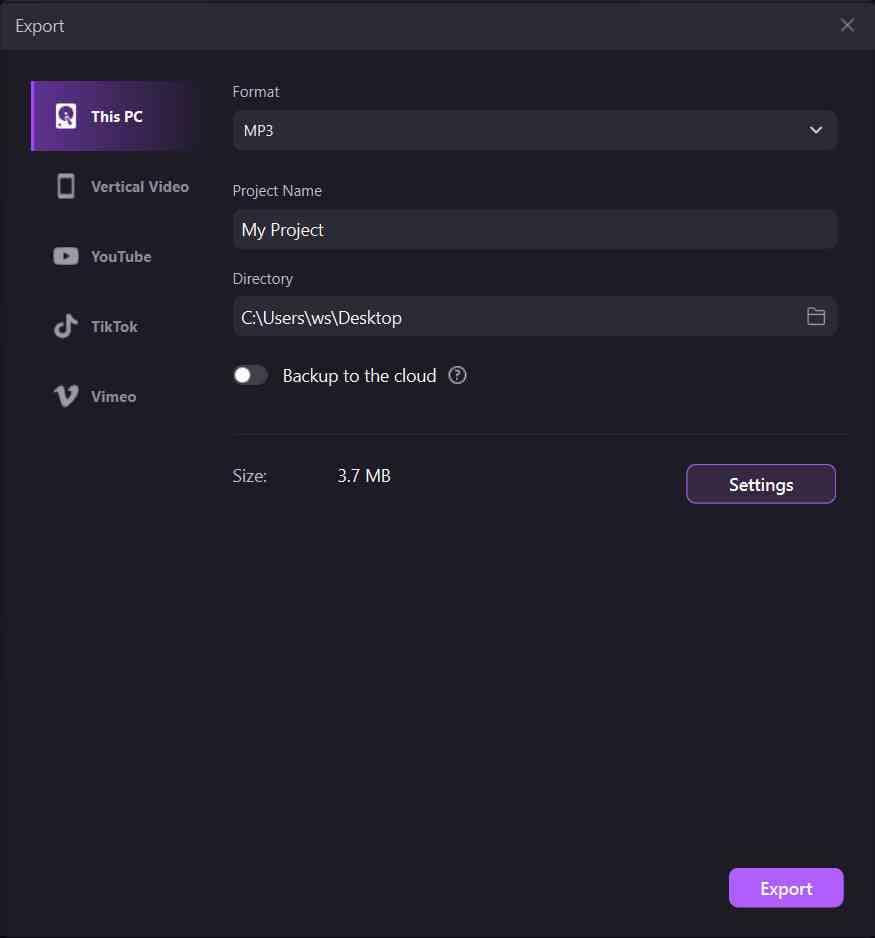
- Whenever you wish to stop recording the audio, click on the capture once again, it’ll stop right away. From here, you can directly take your recorded audio to the editor mode, or you can directly export it to your computer. In Wondershare DemoCreator, you get a choice to export the file into various formats like MP3, MP4, AAC, MOV, and others.
Conclusion
Although Adobe Audition is such a popular audio production software out there. When it comes to simplicity, Wondershare DemoCreator seems to be a clear winner for recording audio. We agree that Adobe Audition is an extremely powerful tool for audio processing, but the fact that it needs much expertise to use makes it an inappropriate option for beginner creators. That said, if you are looking for a simple tool that you can use to do voice overs, using DemoCreator will be a much better and convenient option for you. Although, if you want to go professional, it’s not late to start learning to use Adobe Audition, good luck with that!


