
Need to capture a brilliant idea on your iPad? Want to record your favorite game moments? This guide will show you exactly how to screen record on your iPad, with step-by-step instructions and tips for getting the best results.
Table of Content
IPad's Built-in Screen Recording: The Quickest Way to Start
Here's what you need to do to enable Screen Recording on your iPad:
- Go to Settings from your iPad's Home Screen and open Control Center.

- Click on Customize Controls.

- If Screen Recording is not already in the include section, scroll down to the more controls section and find it there. Tap the green + button next to it.

- Now, go back to your Home Screen and swipe up or down to access the Control Center. Look for an icon that looks like a dot inside of a circle.

- When you're ready to start recording your screen, simply tap this button.
After you activate Screen Recording, you'll see a countdown instead of the dot and circle buttons. When the time is up, your iPad will start recording everything on your screen.
How To Screen Record on iPad With External Sound
The Screen Recording feature on your iPad will record audio and pictures, giving you a full video recording of your screen. But what if you need to capture your voice on top of that? If you're creating tutorials or sending instructions to someone, they should be able to hear your commentary.
Apple has thought of that, too, so they included the option to record the screen with an external sound in addition to the sound coming from your iPad. This function is part of Screen Recording, so ensure you've enabled it according to the instructions above. Here's what you should do next:
- Open the Control Center and find the Screen Recording button.
- Click on the Screen Recording button to start recording.
- At this point, you'll see a red Microphone button. Turn it on.

Important: To capture external sound with Screen Recording, you must have iOS 11 or later on your iPad. If you're unsure which iOS version you have, you can check that right now in Settings. This information is available under General > About > Software Version.
How To Stop Recording Your iPad Screen
The Screen Recording feature on your iPad will keep recording until you turn it off. Here's how to stop the screen recorder for iPad when you've captured everything you need:
- Tap the red Screen Recording button in the top right corner of your screen.
- You'll see a pop-up window with two options - Cancel and Stop. Tap on Stop.

But wait, shouldn't you save your screen recording first? Don't worry about that. Once you tap Stop, the recording will be automatically saved to your Apple Photos app.You may also be interested in how to stop screen recording in Quicktime Player
Limits of Built-in iPad Screen Recorder
Let's explore why frequent screen recorders should use third-party tools, since the limitations could be less or more crucial for your creative process:
-
No Live Streaming: If you're a teacher recording lectures for online classes or a team leader holding presentations, you might need to live stream. The iPad's built-in recorder doesn't offer this capability.
-
Limited Editing Tools: Unedited video recordings can appear sloppy. Basic tools for trimming, cutting, adding text and effects, and adjusting speed and sound are essential for posting polished videos online.
-
Average Quality: The iPad's screen recorder offers decent video and audio quality. For use cases requiring a crystal-clear picture and sound, third-party apps provide tools for denoising and sound editing.
In short, the built-in tool allows you to record screens quickly and easily, with no involvement of third-party apps. To some users, this is more than they need. However, if you record your screen often for tutorials, presentations, gaming videos, etc, you might need more functionality.
Third-Party Screen Recorders for iPad to Consider
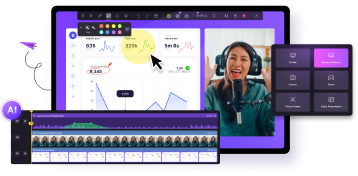
DemoCreator is a superior solution for screen recording and video content creation that includes everything you need to create professional-looking videos - and then some:
- Screen recording with presets for YouTube, TikTok, and other video platforms;
- Versatile capture options, including cross-screen;
- The ability to capture screen, webcam, and audio with separate tracks for post-production;
- Screen & Camera mode with portrait masking, matting, and mirroring;
- A variety of screen drawing tools;
- The ability to schedule recordings;
- High-quality recording modes for games, video presentations, and more;
- Exclusive Avatar recording mode with expression and motion capture;
- Instant social media sharing with YouTube, TikTok, Vimeo, and more;
- The ability to live stream screen on conference platforms like Zoom and Skype;
- Tools for creative editing - annotations, transitions, effects, stickers, and more;
- AI Teleprompter that allows you to read the script while recording;
- AI tools for denoising, adding voice, generating titles, editing sound, etc.
Despite its extensive list of advanced features, DemoCreator is very easy to use - even for beginners. If you want to start recording your ipad screen, just follow these steps:
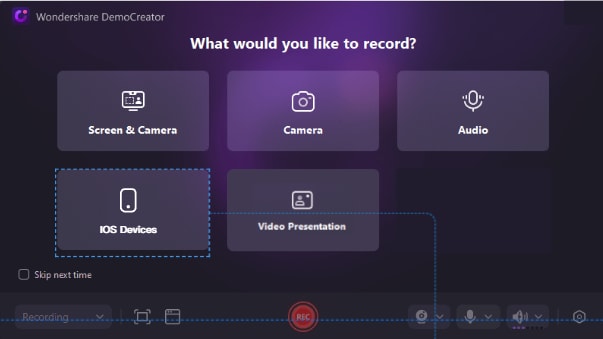
- First, Download DemoCreator on your pc and connect your iPad or iPhone to your computer with a USB cable. Launch Wondershare DemoCreator and select the "iOS Device Recording" mode from the main menu.
- Select iOS Devices.
- Customize your recording settings according to your needs.
- Create Engaging Tutorials (Or Gameplay Videos!):As you play the game or navigate the app, DemoCreator captures everything in high quality. You can even add voiceover narration using your computer's microphone for crystal-clear explanations.
- Once you're done recording, your video will automatically open in DemoCreator's powerful editor. Here, you can: Trim out any mistakes or unnecessary footage,Add annotations, text, and callouts to highlight key areas,Enhance the visuals with effects and transitions,Add a Virtual Avatar for engagement!,Upload directly to YouTube, share on social media, or save to your computer for later use.
Conclusion
Whether you choose the iPad's quick and easy built-in screen recorder for simple captures, explore the world of third-party apps for more advanced control, or take your iOS recording to the next level with Wondershare DemoCreator's computer-connected recording and powerful editing tools, the power to create is in your hands! From capturing game moments and producing insightful tutorials to showcasing your app and sharing creations with the world, the possibilities are endless. Don't wait – start exploring your options and unlock your iPad's full-screen recording potential today!
FAQ
-
How To Edit Your Screen Recordings On iPhone?
Your first option should be to use the iPhone’s built-in Photos app. Once you’re done recording, go to the file, tap on it, and click “Edit” at the top right section of the app. Proceed to trim it and add filters, stickers, etc. Click “Done” once you’re through. -
How Long Can You Screen Record On iPad or iPhone?
Well, that depends on the amount of storage you have in your device and how long your battery can last. A screen recording will continue taking up space and battery until your device runs out of either or you manually stop it. Storage is one of the things you should always be mindful of as you know more about how to screen video on an iPad. -
Does the iPad Have a Built-In Screen Recorder?
Yes, it does. You can access it by going to Settings, tapping “Control Center,” and then “Customize Controls.” From there, add “Screen Recording” to the Control Center. To launch the screen recorder, swipe down from the top right section of your iPad’s screen to access your Control Center. Then, tap the circle within the circle icon (the screen recorder) you see. -
Can You Screen Record On iPad With Voice?
Yes, it’s easy to learn how to take a screen video on an iPad with voice; you’ll use the device’s built-in microphone. Open the Control Center and long-press on that circular screen recording button. A menu will open up. Tap on the Microphone icon to enable it. Proceed to start recording your screen, and your device will capture audio from both the speakers and your voice. -
How Do I Enable Screen Recording On iPhone If the Option Isn’t There?
It’s simple. Just go to “Screen Recording” in the Control Center. You’ll see “More controls.” Tap the Green plus icon [+] you see, and it will be added to your controls. You can now access the screen recording feature to begin iPad screen recording. -
Is There A Way To Fix Screen Recording Issues On iPads and iPhones?
Yes, there are several ways. The most likely reason you’re facing issues like the screen recording failing to start, the audio not being recorded, or the recorder suddenly stopping or crashing is that you may be out of storage space. So, check and make sure you have enough space. Secondly, there are also possible restrictions stopping the iPad screen recording. So check “Content & Privacy Restrictions” to see if this is the case. If you haven’t already, update to the last operating system, regardless of whether you’re running OS or iPadOS. Lastly, simply reboot your device because that often solves minor issues.


