Apowersoft free online screen recorder
Do you want to record your screen and are on the lookout for a screen recorder?
There are a lot of screen recorder makers, and Apowersoft is one of the known names in the space.
Apowersoft free online screen recorder is exactly what it sounds like; a web-based screen recorder, which runs on your internet browser. Apowersoft has a desktop screen recorder that can be downloaded from the same site.
This article will introduce Apowersoft screen recorders in detail, so you can set your expectations accordingly.
Let’s get started.
What is an Apowersoft online screen recorder?
Apowersoft online screen recorder is a web-based easy-to-use tool with no time limitations and watermark on the recording. However, you still need to download a launcher application, enabling you to use it online.
Once you have the launcher application (browser plugin) installed, you can simply click the “Start Recording” button and record the screen activity.
Apowersoft Screen Recorder Pro
Apowersoft also offers a Pro version for desktop users, which is its paid tool but comes with free trial access.
It’s a full-featured screen recording program with additional video editing capabilities to make your videos crisp and appealing. It’s an easy-to-use tool with a real-time editor, which lets you annotate on-screen during recording.
Whether you want to record the entire screen, a specific app, or just sound, it meets all needs.
It’s ideal for product videos, software tutorials or walkthroughs, gameplay videos, employee training videos, and so on.
Pros & Cons of Apowersoft Screen Recorder Pro
Pros
- Multiple screen recording options are available.
- Full video editing of the recording.
- Real-time editor to annotate during recording.
- Intuitive interface for users.
- Real-time screen monitoring capabilities.
Cons
- Respond slow when editing videos.
- Doesn’t record secondary monitor.
Features of Apowersoft
Apowersoft free online screen recorder is a complete screen recording tool with a bunch of useful features. Let’s discuss each.
● Multiple recording modes
Screen recording needs of user differs from one another. For example, some users may need to record the entire screen while others need to record one window only. Similarly, some users may need to record facecam as well. Apowersoft has a solution for everyone.
It offers multiple recording modes, which includes:
Record Screen
This mode is perfect when you want to record the entire computer screen activity. For example, if you’ll be navigating between different windows to complete a task, your screen recorder should be capturing all the time. In such scenarios, Record Screen mode is suitable.
Record Window
If you want to record activities occurring on a specific app or software, Record Window mode is ideal for you. This mode works perfectly when the recording is about doing something in an app or software only. It’ll save you from extensive editing afterward.
Record Wabcam
In some instances, you want to record yourself via Webcam and use the recording in the intro and outro parts. Apowersoft’s Record Webcam mode is suitable for this.
Record Audio
Record Audio is an underused mode of Apowersoft. You can use it to record system sounds, microphone, or both.
● Record video & audio simultaneously
It might be a hassle if you’ve to record the screen activity and add narration to it separately as a voiceover. In addition to that, you’d want to add system sounds in the recording. Apowersoft screen recorder lets you just do that.
Apowersoft allows you to capture both audio and video simultaneously – you can choose to add system sounds, microphone, or both.
● Various output formats
Apowersoft online screen recorder gives you the freedom to choose your desired output format from the available options. It’s a key feature of any screen recorder, allowing users to view screen recording on different devices.
You can export your video to WMV, AVI, MP4, MOV, MKV, FLV, MPEG, VOB, WEBM, and iOS & Android supported formats.
● Edit in real time
Apowersoft offers a real-time screencast editor to add more clarity to your videos. It’s a useful way as you don’t have to pause the video or do afterward editing to annotate or highlight something. Here are some features of real-time screencast editor:
Annotation
Annotation during screen recording can help you clearly demonstrate step-by-step how to navigate a product or execute a solution. Using the annotation tool, you can draw, write, or point out something.
Highlight
Highlighter is a useful tool to have during screencasting as it can keep the viewer focused on a specific location.
Screenshot
You can also capture a screenshot from the screencast real-time editor. It lets you capture something noteworthy from the screen recording to use for purposes such as your video title.
● Edit after recording
An impressive feature of Apowersoft is its professional video editor. Once your recording is complete, you can open it in the editor to perform some mid-level editing using its tools.
Apart from basic features like trim, crop, and dubbing, its editors allow you to do add the following to your recording:
Music
Music can put soul into your screen recording. However, it shouldn’t disrupt the listening experience. That’s why there’s a range of music to select from so you can add suitable music.
Text
There are around 30 text templates for opener, title, and subtitle. You can use an attractive text template to match the style of your video.
Transition
Transitions make your video dramatic, exciting, and appealing to viewers. There are around 60 different styles of transitions to choose from.
Overlay
You can add an additional layer of other images or videos to your screen recording using overlays. Apowersoft video editor has over 55 overlay templates.
Filters
Filter can be applied to your video to make it look stylish. There is a range of attractive filters such as Film, Jitter, Lut, and some basic filters too.
● Schedule Tasks recordings
Some people may need to record something repeatedly. Apowersoft has a remarkable feature in the form of “Schedule Tasks”. It allows you to use its Task Scheduler to preset recording initiation time and the customized duration.
With its help;
- You can record live streamings of your favorite TVshows and Twitch gaming channels for later viewing.
- You can screen record the activity of your kids if they use your computer or laptop.
- You can record webinars in case you can’t attend or want to share with others.
- You can capture your screen on a weekly or daily basis.
● Save directly to cloud storage and upload on YouTube
After you’ve completed the screen recording, you can select one of the nine output formats depending on where it’ll be watched. You can also upload it to cloud server, YouTube, and Showmore.com.
How to record screen and audio With Apowersoft
Download Apowersoft
Follow the below steps to download Apowersoft Screen Recorder Pro on your computer:
Step 1: Launch your browser and visit Apowersoft website and go to its Apowersoft Screen Recorder Pro page.
Step 2: From the two options: ‘Download’ and ‘Buy 1, Get 1 Free’, select ‘Download’.
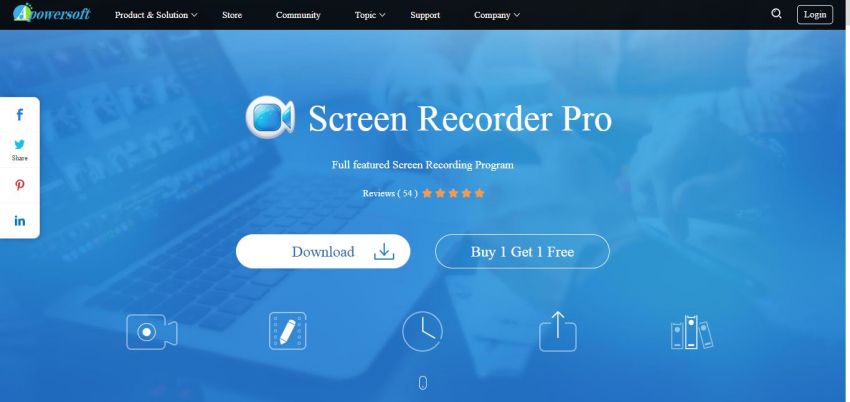
Step 3: Run the .exe setup file after download completion and follow the default settings to successfully install it on your computer.
Record with audio
Once you have installed Apowersoft Screen Recorder Pro, follow these steps to record screen with audio.
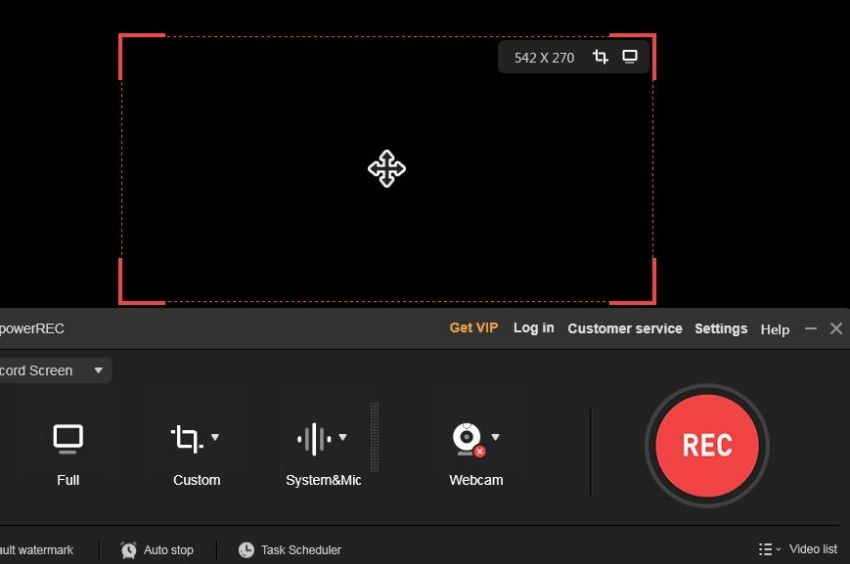
Step 1: Launch and select recording mode
Apowersoft Screen Recorder Pro allows you to record the entire screen or a specific window too.

In the above image, you can see Record Screen selected as our recording mode. You can click the down-arrow to open the dropdown menu and select some other mode.
Step 2: Select audio
There are different sound recording options available as well. You can choose to record system sound, microphone, or both. Click the down-arrow next to the Sound tab and select “System sound and microphone” from the dropdown menu. It’ll record both system sounds and your voice via microphone.

Step 3: Select recording area
Setting the recording area is a key part of the process. You can choose to record the full screen or select a custom area depending on your needs.
Click the Full tab if you want to capture the full screen. To select a specific area, click on the Custom tab or the down-arrow right next to it. You can select from a variety of “Fixed region” options or click “Select region” to select a custom area.
Drag the edges of the red frame toward the inside or outside to select the area of your choice.
Step 4: Start recording
At this point, you should hit the REC button to start recording. Since we selected the Record screen mode, whatever we do during the recording duration will be captured.
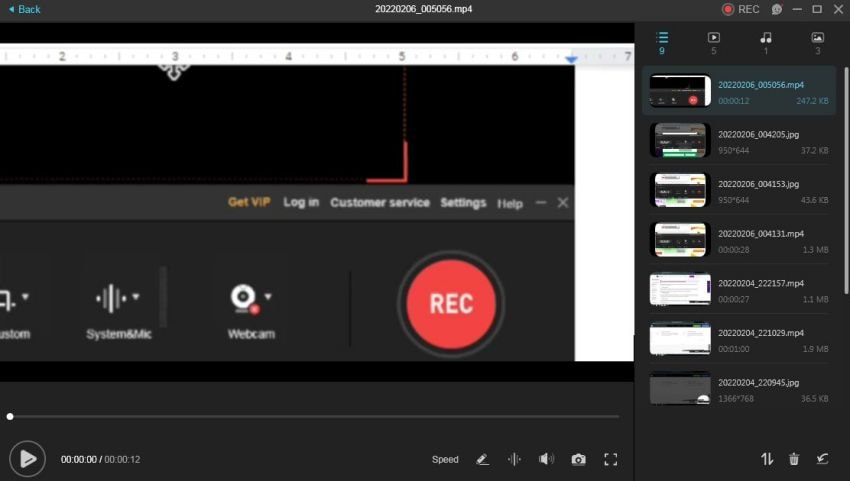
Press the red Stop button or hit F7 key to stop recording. The video will open in the viewer right after your stop recording.
What is the output format of Apowersoft
A screen recorder should offer a range of output formats so videos can be viewed on all sorts of multimedia-supported devices.
Apowersoft screen recorder offers nine output formats, which include MP4, AVI, WMV, FLV, MKV, MOV, MPEG, VOB and WEBM. Such a range of formats is helpful when it comes to needing to export videos to devices besides computers or laptops.
What kind of scenario can be used to record online screen:
The usefulness of screen recorders is almost endless. While you can use them for recording tutorials, they can also be used to capture presentations, online streaming, produce demos, and so on.
● Demonstration videos
You've probably heard the phrase "show, don't tell." It's a good rule for e-commerce and social media, as well.
Do you know a consumer needs many touchpoints before he/she make the decision to purchase your product? Explainer videos, walkthrough, how-to videos, etc, are all part of an effective product demonstration strategy.
In sales, demonstration videos are a great way to show customers how your product functions. An online screen recorder like Apowersoft can make it easy to create videos of your computer screen and share them on YouTube, Vimeo, social media sites, and privately with consumers.
● Tutorials
Tutorial videos make a great tool for businesses, content creators, and online course creators to showcase their products and services or teach something. Whether you want to create short, informative clips that are easy to share on social media or full-length online courses to publish online, a screen recorder is the answer.
An easy-to-use screen recorder makes tutorial-making a piece of cake because you only need to adjust the screen size, select voice input device, and click the record button.
● Live chat sessions
If you're selling a product online, it's important that you respond to customers promptly and courteously. Online customer support is an essential part of running a successful e-commerce venture.
Getting video and audio recordings of your live chat sessions can be a great way to learn from past mistakes and build a better future. You can simply use a screen recorder to screencast the live chat sessions to later review the activity.
● Video games
If you’re a video gamer who spends hours playing video games, you can turn it into a profit-making hobby. All you need is to record your gameplay and upload the content on your YouTube channel. For that, you can use screen recording software.
Screen recorders allow for screencasting as well as picture-in-picture recording so you can show your face to viewers. It’s an effective approach to making your gameplay videos more engaging.
● Onboarding videos
When a company hires new employees, getting them up to speed takes time.
The onboarding process requires a lot of in-person training. However, many remote companies can’t give in-person training so the onboarding process needs to be done differently.
A screen recorder can use be used to record training videos – such as screencasting of software walkthroughs the company uses, policy documents, and workflows.
Apowersoft alternative
Apowersoft offers two types of screen recorders; Apowersoft free online screen recorder and screen recorder pro. Both versions offer a variety of screen recording features to meet your needs. However, it suits beginners only and is slow to respond when editing.
If your screen recording needs extend beyond beginner-level and you want to use a comprehensive and more intuitive screen recorder, Wondershare DemoCreator is the best alternative.
With its superior and intuitive interface, it makes screen recording and editing a breeze to work with.
Wondershare DemoCreator: What makes it better?
Wondershare DemoCreator has been updated recently, turning into a powerhouse when it comes to screen recording for beginners and professionals. It now combines the powerful Anireel Animaker Add-on, online screen recorder, and screen recorder for Windows or Mac.
3-in-1 leading screen recording software
It’s a 3 in 1 software. You can use it to make excellent animation-based explainer videos, record your browser online, and record & edit screen on the computer.
DemoCreator is one of the leading screen recorders, which is equally popular among video makers, content creators, gamers, marketers, and educators. In a nutshell, it’s for everyone.
How to use Wondershare DemoCreator?
Here’s the step by step process to record your screen with DemoCreator:
Step 1: Launch the software and select recording mode
If you don’t have DemoCreator installed on your device, visit the Wondershare DemoCreator website to download it for your device. After installation, launch the program and select from available options. You can select Select a Record Project to adjust everything according to your choice or select Record Screen if you want to capture the entire screen activity.
Record Game option is to capture your gameplay.

 Secure Download
 Secure Download
Step 2: Adjust the screen size
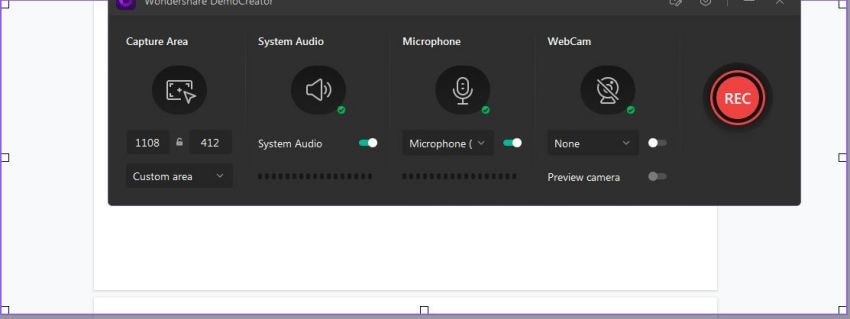
After selecting Start a Record Project, select from one of the options in the dropdown menu of Capture Area.
If you want to record a specific area, select Custom Area and select the screen size using the dragger.
Step 3: Set up Audio and Camera Settings
Now, you need to set up audio, microphone, and webcam settings. DemoCreator captures your System Audio and Microphone sound by default. You can disable them by switching off the toggle button.
Also, you can enable webcam recording to capture your facecam video.

Step 4: Start recording
Click the REC button to start capturing the screen activity of the specified area. You can also press the F10 hotkey to begin the recording.
The recording will begin after a count down of 3 seconds. At any time during the recording, you can press the F9 key to pause and resume the recording. Click the Stop button or press F10 to step the recording.
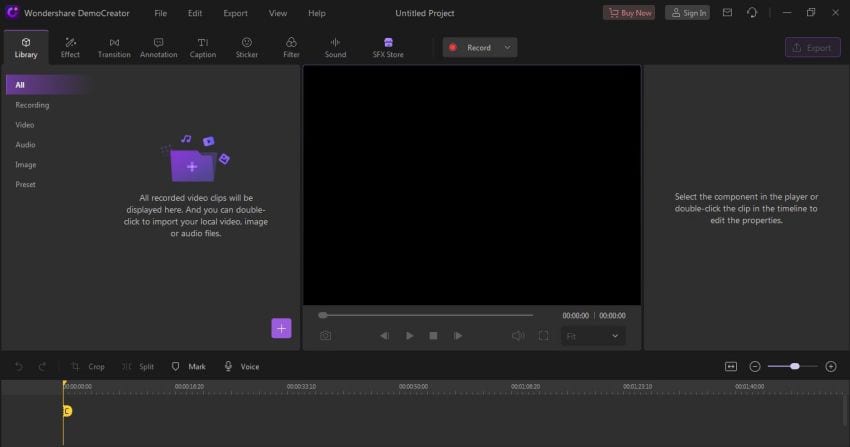
The recording video will open in the DemoCreator editor where you can do professional-level editing.
Conclusion
Apowersoft Free Online Screen Recorder and its Pro version both can work well if your project calls for a quick and short screen recording with little to no editing afterward.
In this article, we explained how easy it’s to use Apowersoft screen recorder, its features, different use cases of a screen recorder, and its alternative. However, Apowersoft and similar screen recording tools are limited in functionalities and features.
It has also been reported to have slow performance, lagging, and other similar issues. You’d want to avoid these issues if your needs extend beyond short and quick recording. Wondershare DemoCreator is a complete solution and saves you from all of these issues, making it a go-to screen recorder for discerning users.


