How to Screen Record with Snipping Tool in Windows 11/10 (New)

Screen recording has become an essential tool for content creators, educators, and professionals. Whether you want to capture your gaming highlights, record online lectures, save video calls, or create tutorial videos, having the right screen recording software is crucial.
Microsoft’s Snipping Tool has recently introduced a powerful update that allows you to record videos directly on Windows 10/11. In this guide, you’ll learn how to use the new Snipping Tool for screen recording, its limitations, and why it might not be the best option for advanced users. We’ll also introduce you to the best Snipping Tool alternative that offers more features, flexibility, and high-quality recording.
In this article
Part 1. How to Use New Snipping Tool to Record Video?
If you're a long-time user of Windows 10, you need no introduction to Snipping Tool. It's a built-in screenshot tool that comes with the Windows operating system. With it, you can capture screenshots of your computer screen and save them as an image file. But you can also use Snipping Tool to record videos. Yes, the new Snipping Tool update allows users to record videos before saving them as video files. This makes Snipping Tool an essential program for recording presentations, demos, and tutorials for free on your Windows PC.
But note that you may need to update your current Snipping tool version to enjoy this feature. In addition, this program only supports video recording, meaning you cannot capture audiovisual content with Snipping Tool.
So, without further ado, below are the steps to use Windows' new Snipping Tool to capture a video on Windows 10/11:
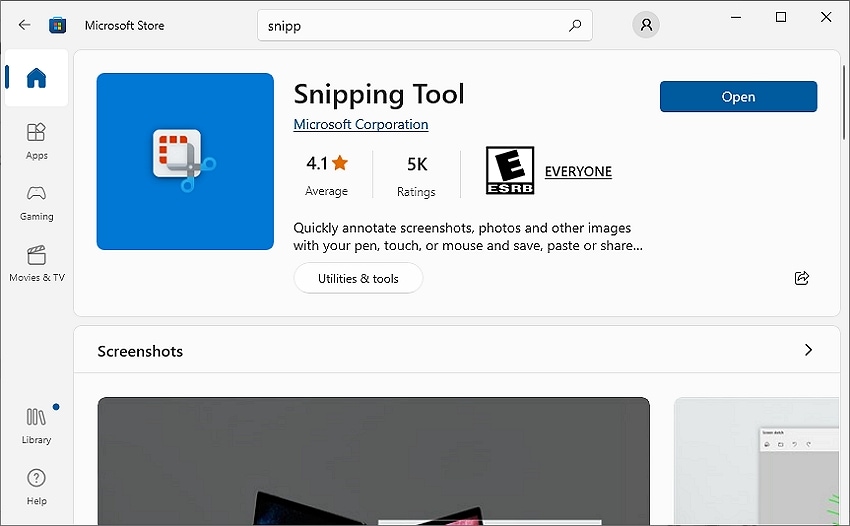
Step 1: Open your computer's search engine at the start menu and type Snipping Tool to launch the program. The new Snipping Tool will automatically launch on your system. You can also update your Snipping Tool if the current version doesn't have a screen recording feature.
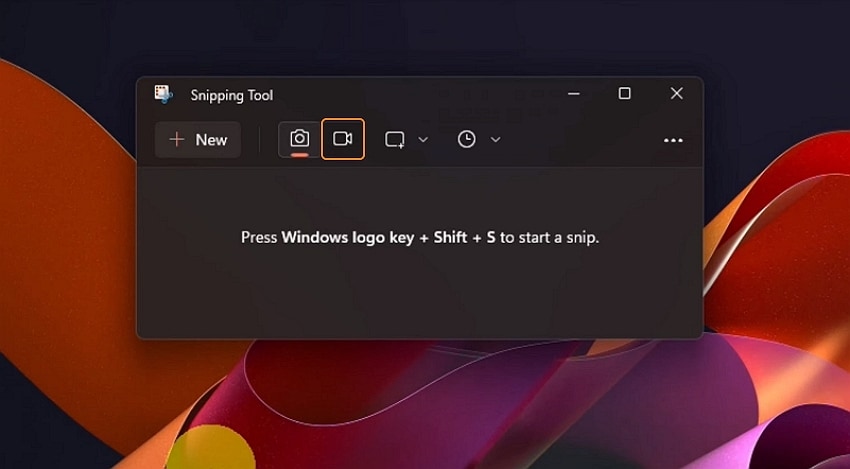
Step 2: Once the program launches, tap the Camcorder icon before clicking New. Then, long-press the left button on your mouse and drag it out to set a capture area on your screen.
Step 3: If satisfied, hit Start to record the view after the five-second countdown. Once you've recorded enough content, click the "Save as" icon at the top-right corner to save the video. Remember, you can preview the video on Snipping Tool before saving it.

Limitations of Windows 11 Snipping Tool screen recorder:
Windows 11 Snipping Tool is definitely an excellent addition to the Windows operating system. It's free, simple to use, and you can record unlimited videos. But as expected, the Snipping Tool new version has some drawbacks to be aware of before using it to record videos. Below are some of them:
- No Audio Recording: This is a major disappointment on the new Snipping Tool. If you want to capture a video with microphone narrations or system audio, Snipping Tool isn't the program for you.
- No Annotations: Again, Windows Snipping Tool isn't designed to record videos with annotations like shapes, lines, drawings, texts, etc. Keep reading to know the best alternative for recording videos with annotations on Windows 11/10.
- No Webcam Recording: Sometimes, you may want to capture a video with a picture-in-picture effect for sharing on YouTube, Vimeo, and other platforms. Hopefully, Snipping Tool will add this feature in the future.
- No Inbuilt Video Editor: Post-production is a necessary process when making videos. You may want to remove parts with unnecessary noise, silence, objects, and more. Snipping Tool for video recording doesn't offer this feature yet.
- Only MP4 Outputs: With Windows 11 Snipping Tool, you can only capture videos in MP4 format. This can limit your ability to record a video in MOV, MKV, AVI, and other standard video formats.
- Limited OS support: Only Windows 10/11 users can record their computer screens using the Snipping Tool screen recorder. Even Windows 10 users may struggle to install the updated version of this program.
Part 2. Alternative Way to Record Screen for Windows 11/10 [More Complete]
As promised earlier, we will introduce you to the best alternative to the Snipping Tool newer version. With Wondershare DemoCreator, you'll enjoy a well-rounded and professional video recording experience on your PC. It's a desktop program that works smoothly on Mac and Windows operating systems. DemoCreator can record your PC screen in full screen on partial mode alongside webcam overlays, microphone narration, and system audio. In addition, this program lets you capture videos with annotations like texts, shapes, lines, drawings, and more. And yes, you can edit the video directly on DemoCreator before exporting to standard formats or platforms like YouTube and Vimeo.
 Secure DownloadSecure Download
DemoCreator key features:
- Compatible with Windows and Mac operating systems.
- Record the computer screen in full-screen or custom mode.
- Capture background apps like games, browsers, and more.
- Capture videos with picture-in-picture overlays.
- Record videos with annotations like texts, shapes, drawings, etc.
- 10+ fully-customized 3D/2D avatars.
- Intuitive video editor for trimming, merging, muting, etc.
Below are the steps to record videos with DemoCreator on Windows 11/10:
Step 1: Launch the video recorder function.
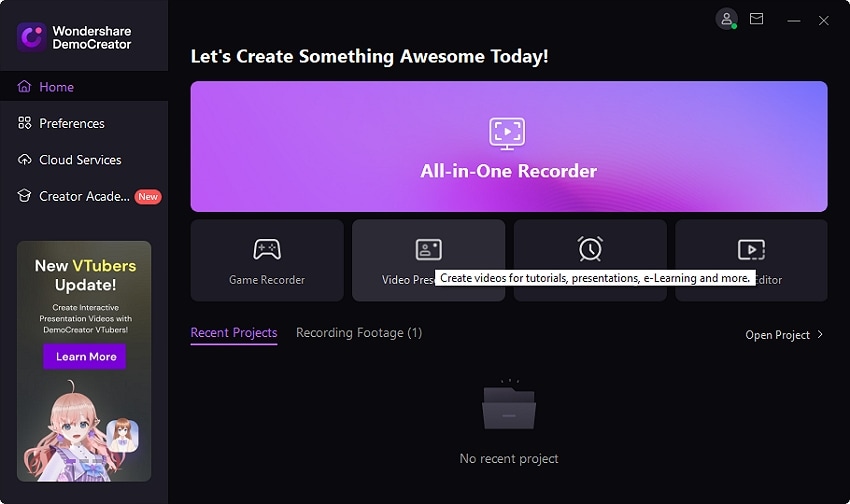
Secure DownloadSecure DownloadInstall and run DemoCreator on your PC, thank tap the All-in-One Recorder button. The screen recorder feature will launch automatically.
Step 2: Set the capture area on your screen.
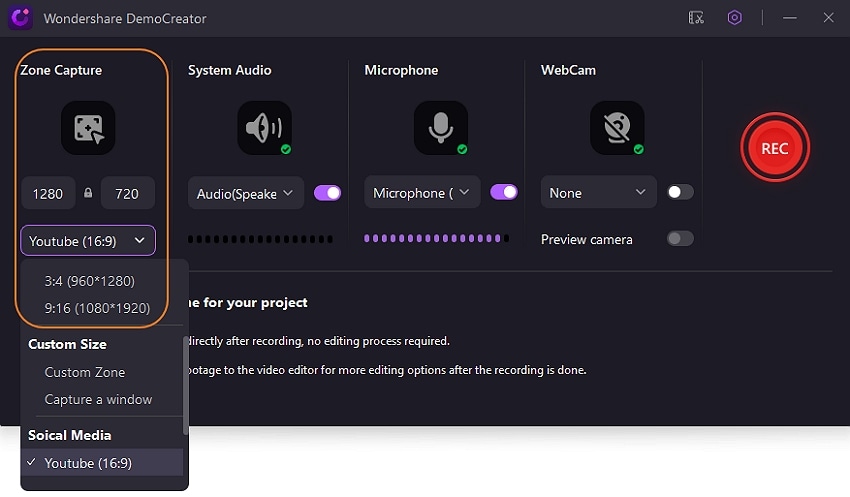
Next, click the Zone Capture button to choose an area to record on your computer screen. You can also set the aspect ratio for the video if you want to record for social media apps like YouTube or Instagram.
Step 3: Choose the recording devices.
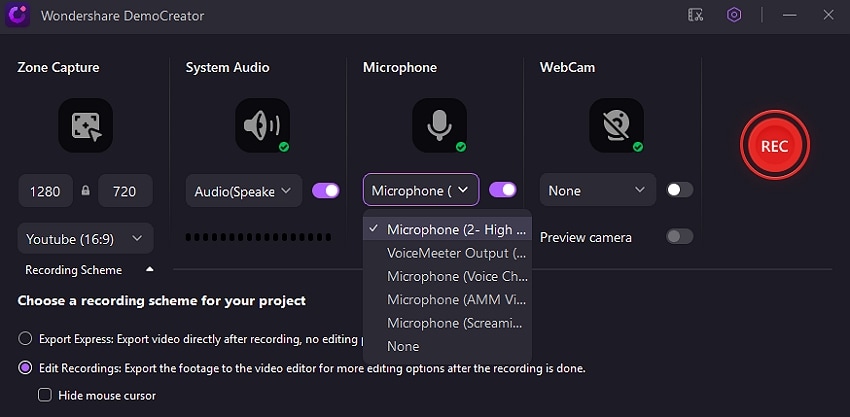
Do you want to capture the video with microphone narrations and system audio? Choose the devices before selecting your webcam for adding a picture-in-picture overlay.
Step 4: Record the video on Windows 11/10.
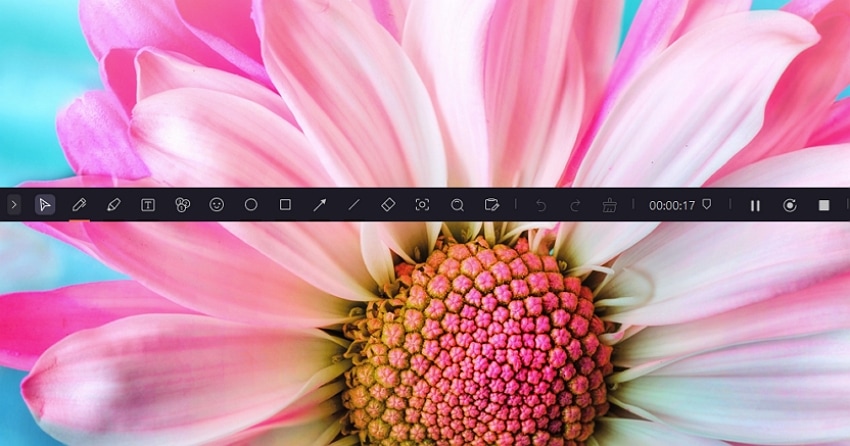
Secure DownloadSecure DownloadNow you should be ready to record the video. Tap Rec to start capturing the video. To use annotations like drawings and shapes, tap the pencil-like icon before clicking Stop to finish capturing your computer screen.
Step 5: Edit the video and export it.
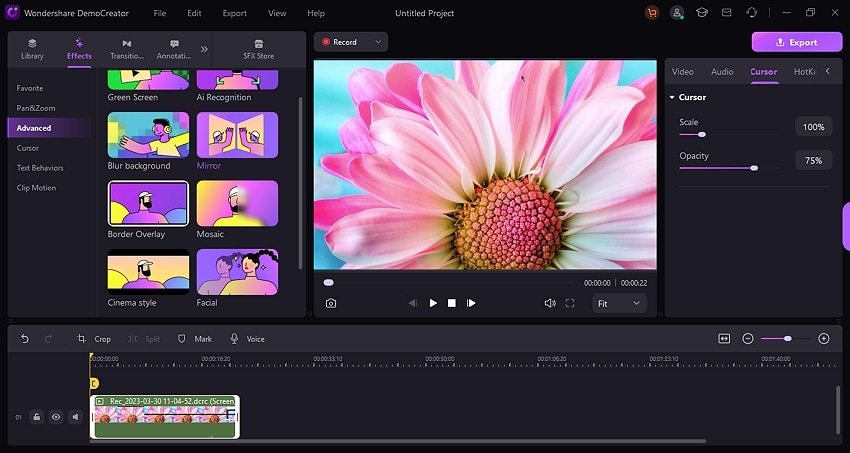
Your video will now launch on DemoCreator's inbuilt video editor. From there, you can trim, split, merge, mute, and retouch your video anyhow you like. Lastly, tap Export to save your video in various formats.
Conclusion
So, what are you waiting for? Start exploring the new Snipping Tool for Windows 10/11. But remember, this tool has limited screen recording capabilities, like a lack of voice narration and annotation. So, use Wondershare DemoCreator for a more professional screen recording experience of Windows 10/11.
Secure DownloadSecure Download


