
How to Take Screenshots and Record Your Screen on Your Device

While reading something important, most people tend to take a screenshot or screen record the critical content. Screenshots will help them come back to it and review it later. Whether doing school work, attending an online meeting, or creating content for social media, screenshots and screen recorder tool is a necessity.
Apple, Google, and Microsoft have developed suitable screenshot and screen recording tools right into their operating system. But most can do basic stuff and can’t delve into the details of screen recording. Here, we’ll review some robust third-party tools for use on various systems, including Windows, Mac, and Chromebook.
What is a Screenshot and Screen Recording
A screenshot is a captured image showing information on a computer display. Screenshots enable you to take an exact picture of what you see on your screen. Screenshots are created to share the information with others or for later review.
On the other hand, screen recording is when you record a video of what’s happening or doing on your screen. While screenshots are equally good, they often don’t allow you to capture more details. That’s why a screen recording is more effective. It’s useful for saving online streaming videos from different platforms or recording a video call with a loved one.
Video recording can also help submit a technical support request if you have issues with your computer. You can quickly get assistance by recording the points and sending them
However, how you take these screen recordings varies with the device you are using. For instance, screen recording on an Apple device is different from screen recording on an Android device. Depending on the system you’re using, there are various screenshots and screen recorder software you will need for that purpose.
Why Do You Need a Screenshot and Screen Recorder?
Before we check some reliable screenshots and screen recorders, here’s why it’s crucial to have these software on your computer.
Keeping Important Content for Future Use
If you are a business person, you will need these tools for various reasons. You can use the tools to record a meeting with your clients for future use. This software helps you set a scheduled recording option; therefore, no critical information will go missing. Some software like the Apowersoft screen recorder is the best choice for you.
Make Troubleshooting Process Simpler
At times one may have issues with their device, requiring quick troubleshooting. It is a bit hard to explain the problems you are having with your device to your IT specialists. This is where screen capturing software comes in handy. These tools help record your screen or make a clear screenshot, and you can easily send save and send it directly to your specialist; this will help save time, and you will not have a hard time explaining the issues. You will get a quick response and will fix the problem first.
Help in Providing Effective Training
In recent years, people have done almost everything online, including training o even tutorials. A screen recording software comes in handy to capture important video lessons for future reference. For instance, business people use this software to train new staff. Employers use screen recording tools to introduce the staff’s primary duties and responsibilities. This method will eliminate time wastage, training costs, and effort in operation costs.
Provide Security to Sensitive Content Recorded
The screen recording tool provides quality protection to sensitive data and observes various policies. For instance, you may want to add password protection to the information for a meeting. With a professional screen recording tool, you can secure your capture or recordings with a password only, giving access to a limited number of people. These tools also have features that block cyber attackers and prevent data leakage.
Assist in Creates Helpful videos
Screen recording tools enable one to create compelling videos. These screen recording tools can be of great use when making online tutorial videos, instruction videos, how-to videos, among others. With modern screen recording tools, you can also capture video calls, business meetings, and other events that are of importance to you. These screen capturing devices also entails more feature that enables editing, and you can quickly turn your videos into a digital art showpiece.
Taking Screen Video Recordings and Screenshots on Any Device
Most devices often come with an in-built solution for taking screenshots and screen recordings. Whether you need a screenshot for your computer or mobile device, there’s a way to do it. We’ll review how to do it without installing a third-party application.
How to Take A Screenshot and Record Screen iOS and iPad
When taking a screenshot on an iPhone and iPad that does not have a button, all you need is to press and release the power and volume up buttons simultaneously. Once you take the screenshot, it’ll automatically save itself to the camera roll once you take it. However, you can tap the thumbnail preview if you need to edit the capture.
On the other hand, when you are a screen recording, all you need is to swipe down from the top-right corner of your screen to bring up the control center, then click the circular record button and begin capturing the screen.
You can also hold the record button to add more options, such as adding a microphone toggle and sharing your screen in the video cat apps. To stop recording, open the control center, tap the red status bar at the top of the screen, and then tap stop.
How to Take a Screenshot and Record Screen on Android
Android OS is built to enhance user experience through a user-friendly interface and functions. When taking a screenshot or screen recording, the steps may vary depending on the android version of your device.
Taking screenshots on android
In taking a screenshot with an Android device, the steps may vary depending on the type of phone. You can take a screenshot for most phones by pressing simultaneously the power and volume down buttons. If that does not work by any chance, try this other way. Try pressing and holding the power button for a second and tap screenshot.
Also, you can ask Google to help take the Screenshot, test this by saying, “Hey Google, take a screenshot.” Another way is to try swiping up diagonally from the button corner of the screen. If all this does not work, please go to your phone manufacturer’s support site to find help.
To see the screenshot, go at the bottom at the left of your phone; there, you will find the screenshot preview, but you will find the capture at the top of your screen on some phones.
Taking screen recording on android
Perhaps you have come across a funny video clip, and you want to save it on your phone; this is how a screen recording on an Android device is done. Swipe down from the top of the screen for a quick setting menu, then look for the screen recorder option. The recording starts right after the countdown.
This procedure works for all Android 11 or higher devices, but it may also appear on some phones with old versions. To stop the recording, drag down your screen and tap the screen recorder notification to end the recording. Open your phone’s photo app, go to the movies option in the library, and there is where to find your screen recording.
How to Take a Screenshot and a Record Screen on macOS
macOS is a Unix-based system, often known for its complexities. But Apple did excellent work making the OS more user-friendly and sleek. Most of the functions are readily available to users than other Unix-based operating systems like Linux.
Taking screenshots on Mac
Press CMD + shift +3 to capture your entire screen; you can press CMD +shift+4 to select the area you need to capture. Alternatively, press CMD +shift+5 to bring a capture menu where you can choose a screenshot for a single application window.
macOS saves your screenshots and all your recordings to the desktop; if you need to change the storage location, go back to the CMD+shift+5 capture menu. Here, you can choose a different location under “save to,” and you can save your content to the space of your choice.
Take screen recording on Mac
The process is almost similar for screen recording—Press CMD+shift+5 for the capture menu. From there, you can choose whether you want to record the entire screen or just the selected portion. You can also use the “Options” menu to record the microphone audio; you can decide whether to show mouse click or just set up a countdown timer.
Once you are done recording your screen. Click the circular icon in your menu bar, and this is where you can trim your footage if you need to. If you need more screen recording options, i.e., to record a single application window or maybe a specific browser tab, you should defiantly try out the Snipclip recorder. It is a free app used for screen recording; it captures system audio.
How to Take a Screenshot and Record Screen on Windows
Microsoft has done some great work improving the Windows OS, from less intuitive Windows NT to more powerful Windows 11. You can find great screenshots and screen recorders for Windows from various third-party developers. But first, let’s look at the in-built features for achieving this.
Taking a screenshot on Windows
Here is how to take a screenshot for Windows, press Win+Shift+S. Your screen will dim, then draw a rectangle shape around the area you want to capture. You can also use the icons at the top of your screen and select a freeform screenshot, then catch a whole window or the entire screen.
Once done capturing the image, paste it into an image editor, maybe Microsoft Paint to edit; when done, save the image.
Here is yet another way to save a screenshot on your windows, press your keyboard’s print screen button and copy the whole screen, or try pressing Alt +print screen to copy the current window. Alternatively, you can press the Win + print screen and save the capture directly to your screenshot folder or pictures, which requires no pasting.
Taking screen recording on Windows
On the other hand, press Win +Alt + R for screen recording, and it will automatically start recording the current window. Once the recording is through, save it in the video folder under “capture .”
Unfortunately, the screen recording feature of Windows is a bit lacking. It doesn’t offer many options, such as advanced editing and annotations. To achieve all that and more on Windows, a DemoCreator is a great tool. The tool allows you to record everything happening on your screen quickly.
Taking screenshots and recordings using DemoCreator on Windows
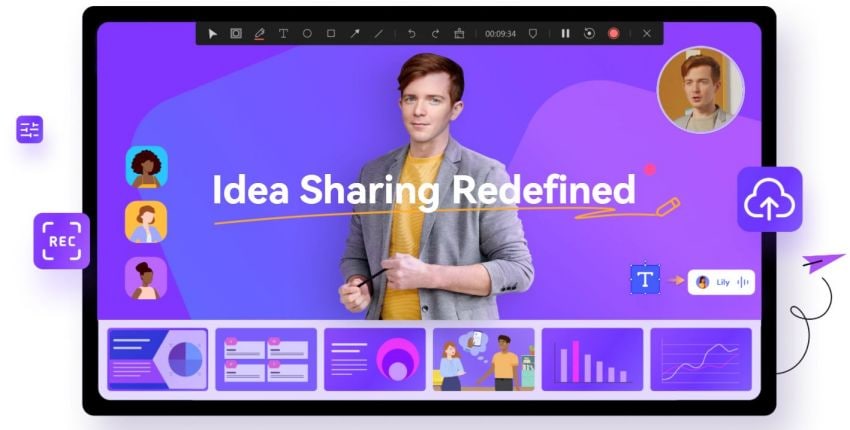
DemoCreator is an advanced tool by Wondershare, built as a screenshot and screen recorder for all tasks. This tool has no time limits, and you can record your video for as long as you want and later edit it. It lets you get rid of the part that is not needed and only keeps the essential portions of the video. If you need to record gameplay where your webcam and mic audio are also part of the video, DemoCreator can do it perfectly.
 Secure DownloadSecure Download
What can DemoCreator achieve?
Using DemoCreator is pretty straightforward, and you don’t need a tutorial for it. That’s why it’s better to review what it can do that the default screenshots and screen recorder on Windows cannot.
- Screen recording - you can record videos of what’s happening on your desktop.
- Apply annotations in real-time while recording. You can draw shapes and lines while recording to put more emphasis.
- Webcam capture is much easier as it allows you to include a facecam on your video recording, excellent for tutorials or gaming.
- Fast export feature that lets you save recorded videos without editing.
- Add a green screen effect to your video recording.
- Add video captions to help your audience understand your content.
- Add transitions to your videos.
- Edit recorded videos to enhance features and make them more appealing.
DemoCreator can achieve much more, and the only way to test it is by installing it on your PC. Alternatively, if you don’t have the time to install it, you can try the web version, DemoAir, similar to the desktop version.
DemoCreator Pros
- Easy to use interface.
- Powerful and full-featured video editor.
- Supports recording magnified parts of the screen.
- Receives free updates regularly.
- Allows simultaneous recording of webcam and screen.
- Supports mic and system audio recording.
- Supports fast video export without editing.
DemoCreator Cons
- Mic remains on after recording until manually turned off.
- Video editing supported in premium version.
- Free version leaves a watermark in videos.
How to Screenshot and Record Screen on Chromebooks
Taking a screenshot in Chromebook is not all difficult; simultaneously press Ctrl + window to capture part of the screen, press ctrl +shift+ window. You can also press ctrl +Alt – window for the capture menu and choose to charge a single window.
Press ctrl +Alt + window for screen recording, click the camera icon, and choose whether you want to capture the entire screen or just a specific part of the screen or a particular window. Then click the gear icon to control whether your microphone is on or off.
How to take a Screenshot in a Web Browser
Most browsers like Chrome, Safari, Firefox support add-ons, extending browser usability. Here are a few screen capture add-ons that will perfectly fit into your browser.
Lightshot
Lightshot is a free, convenient screen capture tool available for Windows and Mac and an extension for Firefox, Microsoft Edge, and Chrome browsers. With two simple clicks, you can easily take screenshots of your desktop. It also includes annotation and editing features for lightweight editing.
Fireshot
Fireshot works like Lightshot and is available as a free and paid version; it can work on a browser or email client. This screenshot and screen recorder enables you to take screenshots, make edits, save files to your computer and even share through social media. There are available extensions for Chrome and Edge.
Awesome Screenshot
This free screen recorder helps capture a whole screen or just a section. It quickly interprets it before sharing. Awesome Screenshot lets also capture the webcam simultaneously with your screen recording. It also lets you take screenshots and annotate them to highlight important sections. You can install it as an extension on Firefox and Chrome.
Nimbus Screenshot & Screen Video Recorder
This software is a free screenshot program that allows you to take a portion of the screen or its whole. This program is also used to draw, make annotations, or mark up the same images. It’s available for Edge, Chrome, and Firefox.
Screenshotting
This extension works just like other screenshots and screen recorders, only that taking full page screenshot takes a little longer. If the web page is too big to be saved in one image, the recorder will split it into images on several tabs.
It enables capturing the entire screen or the required small portion of the website. The program opens a preview for editing once the screenshot is taken. Screenshotting is available as a Chrome extension.
Conclusion
Regardless of the system or device, you’re using, there are various ways to capture a screenshot or video recording of your screen. Suppose you’re into gaming, content creation or are an online tutor. In that case, you want a screenshot and screen recorder that lets you simultaneously record the video, webcam, and audio through the mic.
Normally, these features can be difficult to get on default recorders for PC, Mac, or smartphones. That’s why using a third-party screen recorder and screenshot tool is crucial. DemoCreator is a superb tool for capturing screenshots and recordings simultaneously with the mic and webcam. It also has plenty of other features such as annotation, video editing, caption addition, and more.


