How to Record Voice on Windows 10
As for much of the social conditions now, even corporate employees and other professionals depend on PCs considerably. However, no matter the kind of work an individual does, recording the voice output from a PC has become a pretty prevalent part of it. For example, if you are a streamer who plays video games and thus requires decent audio, you need to know how to record voice on Windows 10.
Otherwise, your gameplay will only consist of the visuals and the internal audio from the game itself and not the voice input that you provide.So, here, you will know the ways to record voice Windows 10 very effectively and effortlessly so that your passion or job requirement is not compromised.
Way 1. Use Window Voice Recorder
On all the PCs that are run on the Windows 10 OS, the Windows Voice Recorder Application is one of the most popular and mainstream options for recording high-quality audio. So, suppose you are wondering how to record my voice on windows 10.
In that case, you should most definitely check out the Windows Record Application that is highly compatible with all windows operated PCs. You can use the software to record the audio of everything that is being run on your computer, and thus, it provides a great deal of utility for the user.
The steps for downloading Windows Voice Recorder from the Windows Store are mentioned below:
- Go to the homepage of Microsoft Store or the Windows Store present on your computer.
- Search for Windows Voice Recorder in the search bar.
- Install the Windows Voice Recorder application for Windows 10.

Here are the steps to configure and use the Windows Voice Recorder application for Windows 10:
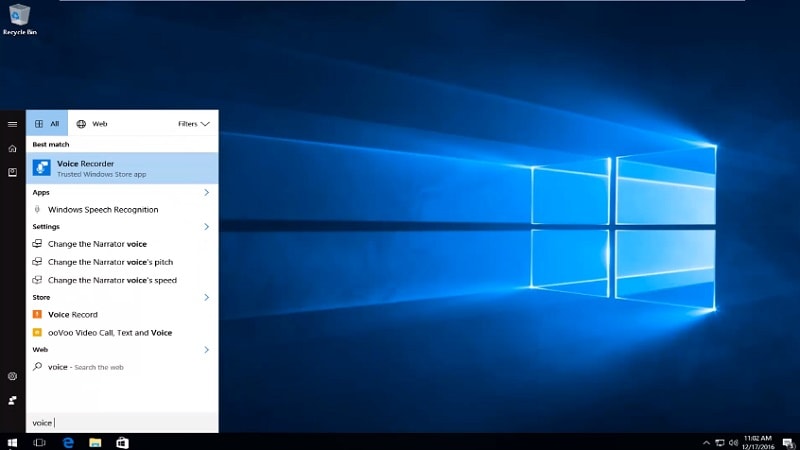
- At first, go to "Start" on your computer.
- Now, op to search for Windows Voice Recorder application for Windows 10.
- At this point, opt to hit the Record option mentioned in the application. You can also use the Flag option to add several markers to the recorded audio.
- You can use the Pause option to pause the recorded audio, but this option will not end the recording procedure. Instead, you can restart the audio recording from that exact moment, and it will get added to the same sequence.
- Now, to stop the voice recording procedure, you must use the Stop option, and the recording will stop. Also, the recorded audio will be saved in your personal computer's memory so that you can access it anytime in the future. You can also share the audio that you have recorded with your peers or other third-party software to make use of the content.
Way 2. Use Audacity to Record Windows 10 Voice
If you are looking for a 3rd party application that will record high-quality audio right from your computer, you should most definitely check out Audacity. It is a compelling and practical 3rd party application that you can download from the web, and it is known for providing users with one of the highest audio quality out there.
Furthermore, Audacity can prove highly beneficial for your cause if you happen to be a streamer, providing you with a super steady, stream-friendly audio output right from your computer.
Here are the steps that you are required to follow to install and run Audacity so that you can Window 10 record voice:
- Search for an Audacity voice recorder in your search engine.
- Locate the appropriate resource files on the download page.
- Download the packaged data.
- After you have finished downloading the application software, visit the Downloads folder and click on the software.
- Follow the instructions and allow permissions wherever asked.
- Audacity has now been successfully downloaded to your computer.
Here are the steps to configure and use Audacity to record high-quality audio from your microphone:
- Open the Audacity application on your computer.
- Give the necessary permissions to the application to record and capture audio from different sources on the computer.
- Select the speaker or the headphone you are currently using to ensure that Audacity can track its interaction and record its input.
- Hit the Record option when you are all set to start the voice recording.
- Here, you can opt to pause the voice recording by clicking the Pause button.
- Now, you can end the voice recording session by hitting the Stop button.
- You can play the audio that you have just recorded or save it on your computer if you wish to use it later for editing purposes.
Way 3. Record Your Voice on Windows 10 with DemoCreator
If you are looking for a compelling yet subtle way to answer how to record voice on Windows 10, you are highly recommended to try Wondershare Democreator. This third-party software has been used and preferred by most professionals who require recording the voice input from their computer.
Also, this mode of voice recording ecosystem comes along with several perks, and it is straightforward to use simultaneously. Thus, you need not be a tech enthusiast or someone who likes to play with complex voice recording software to get their job done.
You are only required to set up your recording system once you install and run the program, and you are good to go. Then, every time you wish to record the voice input of your computer, you can effectively manage to start recording with a single click of your mouse.
 Secure Download
 Secure Download
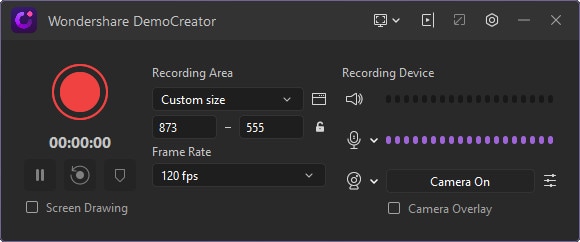
Step 1: Start a new recording by first going to the Wondershare DemoCreator. This will lay the foundation for applying the new settings for voice recording with the help of your external microphone.

Step 2: Select the audio settings and make the necessary changes for capturing audio input.
Step 3: Define the required recording settings.

Step 4: Now, opt to hit the red button on the application and start recording.
Related FAQs
Q1. Does Windows 10 have an audio recorder?
Yes, the Windows Voice Recorder Application is pre-installed on most of the windows operated computers. However, even if your PC does not have this application, you can visit the Microsoft store's application on your computer and have it installed right away. This is the default voice recording application in most windows operated computers, and so there is a high chance that your PC has it too.
Q2. How do I record my voice on Windows?
There are various ways you can record your voice in Windows-operated PCs, and for that matter, you can rely on some efficient third-party application software. The Wondershare DemoCreator is a high-quality voice recording application that suits the purpose of all voice recording requirements.
Thus, if you indulge in heavy tasks such as streaming, or trivial tasks such as recording the audio output, this application will serve your purpose throughout. Furthermore, given the user-friendliness of this application, there are no prior hassles to recording high-quality audio.
Q3. How do I record audio on my computer without a microphone in Windows 10?
There are several ways to record your voice on a Windows 10 computer. You can use the default voice recorder application that is already installed in the system or even use the help of other third-party applications that can serve your purpose.
While recording your voice, you can either choose to plug in a microphone, but you can still record high-quality voiceovers without utilizing one. However, this process might absorb the surrounding sounds as well.
Various queries related to record your voice on Windows 10 have been very briefly answered in this segment. If you are someone whose job description depends on the audio output from the PC, you ought to have very stable and efficient voice recording software that lets you achieve this feat without any hassles. Therefore, you are highly recommended to check out the mentioned record voice Windows 10 software so that you can record and stream high-quality output regularly.


