
Apowersoft iPhone Recorder

Are you looking for a reliable tool to help you record the display of an iPhone or iPad to your computer? If yes, then this guide is what you need.
Apowersoft iPhone Recorder enables you to stream and record the screen of your iOS devices on your computer while being able to interact with your device as well.
Here, we are going to explain:
- Apowersoft iPhone/iPad Recorder’s key features;
- Step-by-step method to stream and record iPhone/iPad screen;
- A professional & efficient approach to record your PC screen.
Let’s get started.
Apowersoft iPhone/iPad Recorder
While there are numerous tools out there to record your Android or PC screen, you won’t find many screen recorders for your iPhone/iPad. Fortunately, some companies identified this gap and developed screen recorders for iOS devices. Apowersoft is one of such companies.
Apowersoft iPhone/iPad Recorder is a tool that lets you stream and record your iOS device’s screen using your computer.
It’s an easy-to-use tool with some key features, which improve your screen recording experience.
Key Features of Apowersoft iPhone/iPad Recorder
A number of useful features is what sets apart Apowersoft iPhone/iPad Recorder from other options. Here’s how each feature adds value to your life:
● Connect Wirelessly via AirPlay
One of the issues with other iPhone screencasting tools is you need to jalbreak your device. This poses some potential threats to your device’s security.
Apowersoft iPhone/iPad Recorder uses AirPlay mirroring function to screencast and record your screen activity on your computer. It allows for streaming and recording videos, photos, music, and documents from your iOS device to your computer.
Apowersoft is installed on your computer, and you can connect it to your iPhone/iPad via the same Wi-Fi network your computer is connected to. It enables the mirror function, allowing you to then capture the recording from Apowersoft’s recording feature.
● Real-time Mirroring in HD
iOS has a built-in screen recording and mirroring feature, but nothing compares the rea-time mirroring in HD. When you use Apowersoft iPhone Recorder, you can mirror your screen on your computer and watch whatever you want in a larger display. Indeed, this offers an ultimate viewing experience in HD quality.
If you want to record an iOS related tutorial or iOS game, the HD mirroring capabilities will make it more fun and interactive.
● One-click Screen Recording
In addition to stream your iOS device on your computer screen, you can record the activity with one-click – an effortless screen recording experience. There’s no steep learning curve or complex process when it comes to its screen recording capabilities.
You can save the recording as a video, image, or GIF. What’s even better is you can also capture your computer screen with Apowersoft iPhone Recorder.
● Multiple Recording Settings
It’s highly likely your screen recording will be viewed on different devices, so you need to save it in different formats. Apowersoft iPhone/iPad Recorder has multiple settings pertaining to output formats, video quality, and save location. Apart from saving your file as a GIF and image, you can save in various video formats including MP4, WMV, AVI, FLV, so on.
For providing additional details to viewers, recording your computer’s system sounds, microphone sound, or both with this recorder is cherry on cake.
● Instant Sharing for Quick Access
The convenience that instant sharing brings to your life is unmatched. Once you’ve recorded the screen activity, you can either save the file to your local disk, or upload directly to your social media sites or cloud storage.
To be more specific, you can upload and share your videos on your YouTube channel, Facebook account, Dropbox storage drive, ShowMore account, and more. It saves a lot of time and hassle, while letting you quickly distribute your video content links among friends and family.
How to record iPhone with Apowersoft iPhone Recorder
Apowersoft iPhone Recorder is an intuitive tool. If you need to stream and record your iPhone on your computer, you can use Apowersoft.
The method to record iPhone with Apowersoft entails the following steps:
Step 1: Download & install Apowersoft iPhone/iPad Recorder on your computer
Firstly, you need to download the recorder on your computer if you haven’t already. You can visit Apowersoft’s official website to download the software. It’s available for both Windows and Mac computers.
After downloading, run the setup and proceed with the instructions on the setup explorer to successfully installed the recorder.
Apowersoft also offers an online recorder, which can be used only after installing a launcher on your computer.
Step 2: Launch Apowersoft on your computer and configure settings
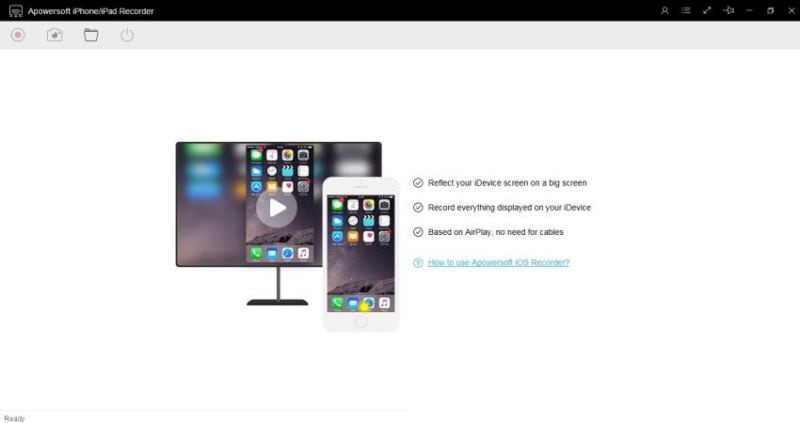
Now that you have Apowersoft iPhone Recorder installed on your computer, launch it from the desktop.
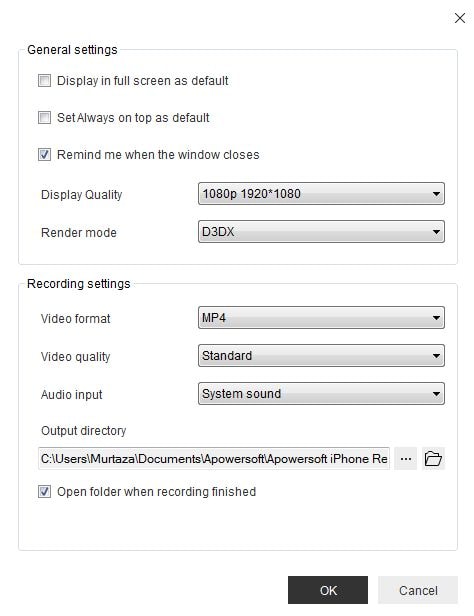
Now click on the three dot menu to access recording settings from the Options tab.

You can configure a collection of settings according to your needs. Whether you want to adjust Display Quality, Render Mode, Video Format, Video Quality, Audio Input, or Output Directory, everything is in the Settings window.
Step 3: Connect your iPhone to Apowersoft iPhone Recorder via AirPlay
After completing the settings configuration, it’s time to connect your iPhone to Apowersoft iPhone Recorder.
iPhone has AirPlay feature that allows you to mirror your device on computer.
To connect via AirPlay, make sure your iPhone and computer are both connected to the same Wi-Fi connection.
Now follow the below steps:
- Swipe up from the bottom of your iPhone to access Control Center.
- Tab the AirPlay button.
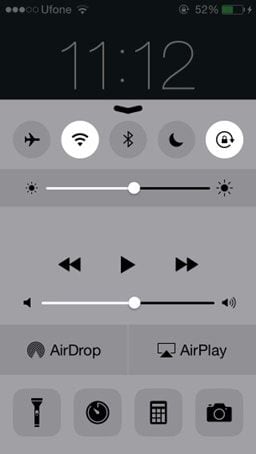
- Now find the “Apowersoft [your computer name]” in the available list of connections and tap that.
- Keep the toggle switch next to Mirroring green, and tap the Done button on the top right of the screen.
Step 4: Start recording
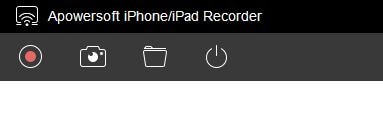
At this point, you can see your iPhone’s screen mirrored on Apowersoft. Now click the Record button in the top left of the screen to start recording.
Now, you’ll not only be viewing the screen activity of your iOS device on computer but also recording the screen.
Click the same button again to stop recording whenever you want.
How to Record iPad with Apowersoft iPad Recorder
Apowersoft iPad Recorder allows you to mirror and record your iPad’s screen on your computer. If you want to do so, just follow the same steps as you’d do for recording iPhone with Apowersoft.
How to Record PC screen
Apowersoft iPhone/iPad recorder can help capture your screen activity on iOS devices. What if you need to record a PC screen? In that case, you can use a professional screen recording tool; Wondershare DemoCreator.
DemoCreator is for every content creator, tutorial maker, game streamer, educator, or marketer who needs to capture their PC or laptop screen. Whether your screen recording needs are basic professional, Wondershare DemoCreator is equally impressive.
Wondershare DemoCreator : PC Screen Recorder
It features a superior quality interface both in terms of intuitiveness and aesthetic appeal – it makes your screen recording and video editing experience a breeze to work with.
Wondershare DemoCreator is now available with the additional capabilities of an animation explainer video maker and online screen recorder. It’s available for both Windows and Mac computers.
3-in-1 leading screen recording software
Having 3 functionalities, DemoCreator is a step ahead of other screen recorders available out there. It has Anireel Animated Explainer Video Maker for animation content creation. In addition, it features DemoAir, which lets your record your browser online.
Professional video editor
DemoCreator has a video editor, which is more than a lightweight editor you get in other screen recording software. Its video editor provides editing tools that are more than trim and crop capabilities.
One can use its video editing tools to create exceptional content, and garner an incredible online presence. Some impressive features in video editor include:
● Zoom & Pan
DemoCreator has a useful pan & zoom function to make something prominent in the video, helping you to draw attention to something important in the video.
● Cursor Effects
There are 5 cursor effects in the video editor: spotlight, magnify, cursor highlight, left-click rings, and left click sound.
● Annotations
Annotations go a long way in expressing your thoughts more clearly. You can add text, sketch, and animation-based annotation in the video using the DemoCreator video editor.
● Transitions
One of the things that separate an average video from a highly attractive video is transitions. You can use the available 50+ transition effects, which include dissolve, erase, evaporate, and more types of transitions.
● Facial Recognition
Facial Recognition was added to DemoCreator not long ago and can be found under the Effects tab. Its function is to remove the background and emphasize your face in the video. It can be useful when you deliver online lectures or conduct meetings. Using the Facial Recognition effect, you can make your face prominent in the video and explain whatever is on the screen. This can make your video more interactive.
● Automatic captions
Video creators can make videos more engaging with captions. Wondershare DemoCreator has a collection of Automatic Captions templates feature to create stylish and attractive title texts.
You can use this feature by exploring the Caption menu. When you select Automatic Captions, suitable captions are generated depending on the video content. There’s a wide range of templates available. In addition, you can download more templates.
● Mirror, Mask, and Overlay
Some professionals use green screens and add backgrounds to the video for a number of purposes such as branding, professional scene, etc. By using a green screen while capturing facecam recording, videos can be made more interactive. Mirror, Mask, and Overlay features are more suitable for videos where green screen is used with facecam recording enabled.
● Animation Effects on text and video
There are more than 50 animation effects. You can use them to add animation touch to text and video content. These effects include text behaviors and video motion.
● Customize brand watermark
Whether you want to add a touch of branding to your video or protect its copyright, you can use DemoCreator’s custom brand watermark feature. You can add both text and image watermarks.
● Built-in Video effects packs
There are more than 1000 built-in video effect packs to make your content stand out among the crowd. You can access these effect packs from the cloud. What’s even impressive is that DemoCreator introduces new effects every month, meaning you’re never out of unique options.
How to Record PC Screen with Wondershare DemoCreator?
Wondershare DemoCreator has a user-friendly interface. Despite offering a range of recording modes and settings, it’s easy for beginners and professionals alike.
No matter what you’re doing on your PC screen, you can record it with DemoCreator using the below steps.
Step 1: Launch the software and select recording mode
First of all, you need to download and install DemoCreator on your computer. You can visit the Wondershare DemoCreator website to download it for your Mac or Windows computer. Once downloaded, run the setup and complete its installation.
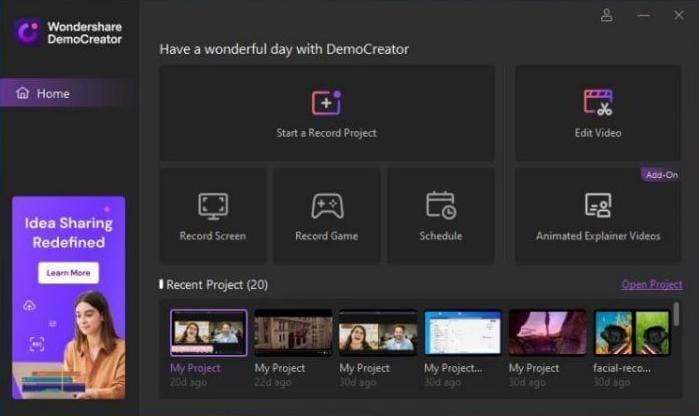
Now, launch the program and select from available options. Select Start a Record Project to record the entire screen activity and configure settings according to your choice.
 Secure DownloadSecure Download
You can also select Record Screen if you want to quickly start with the default settings.
It has Record Game option to capture your gameplay.
Step 2: Adjust the screen size
After you’ve selected Start a Record Project, select an option in the dropdown menu of Capture Area. It lets you choose the area you want to include in the screen recording.
If you want to record a specific area, select Custom Area and set the screen size by moving the edged of the frame.
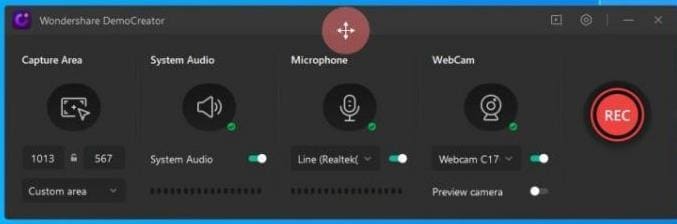
Step 3: Set up Audio and Camera Settings
DemoCreator record the System Audio and Microphone sound by default. However, you can disable them. You can adjust audio, microphone, and webcam settings to your discretion. You can adjust the sensitivity of your microphone by hovering the cursor over dotted bar in the Microphone section.
Also, you can enable webcam recording to capture your facecam video.
Step 4: Start recording
Click the REC button to start capturing the screen activity of the specified area. You can also press the F10 hotkey to begin the recording.
The recording will begin after a count down of 3 seconds. At any time during the recording, you can press the F9 key to pause and resume the recording. Click the Stop button or press F10 to stop the recording.
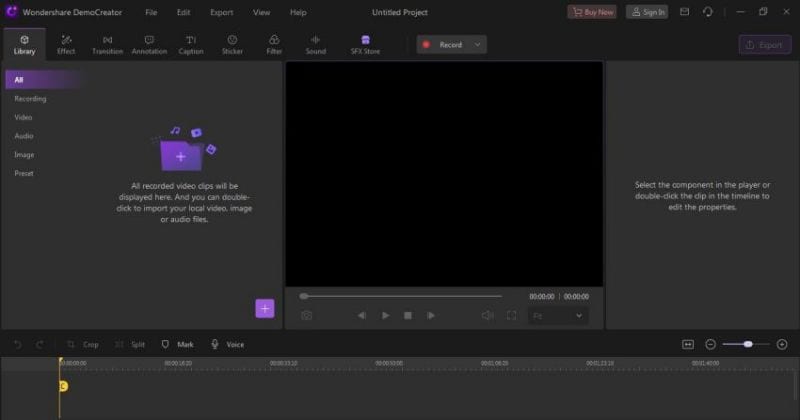
The recording video will open in the DemoCreator editor where you can do professional-level editing.
Conclusion
Apowersoft iPhone/iPad Recorder is a nice app to stream your iPhone/iPad screen right on your computer, and record it.
Having HD mirroring, multiple output formats, wireless connection, instant sharing, and more, it makes a feature-rich screen recorder for iOS devices. However, you need a professional screen recorder to record your PC screen.
Wondershare DemoCreator is the leading screen recording tool for anyone who needs to capture screen activity. Download the software and enjoy its combination of supreme ease and functionality.


