

In the modern era of on-demand streaming, YouTube TV has emerged as a game-changer. It provides users with a seamless and convenient way to access live TV channels, movies, and shows. However, one of the standout features that truly sets YouTube TV apart is its DVR (Digital Video Recorder) functionality.
With the DVR on YouTube TV, you can effortlessly record your favorite programs, movies, and live events, ensuring that you never miss a beat, no matter how hectic your schedule may be.
This comprehensive guide explores the ins and outs of DVR YouTube TV, exploring its capabilities, strengths, and best practices. Whether you're a cord-cutting enthusiast or simply seeking a more flexible and convenient way to enjoy your favorite content. This article will equip you with the knowledge and insights necessary to unlock the full potential of the YouTube DVR.
In this article
Part 1: What is DVR on YouTube TV?
At its core, the DVR for YouTube TV is a powerful tool that allows you to record live TV programs, movies, and events, enabling you to watch them at your convenience. With the YouTube TV DVR feature, you can bid farewell to the frustrations of missing your favorite shows due to conflicting schedules or unexpected interruptions. Instead, you can effortlessly capture and store the content you love, ensuring that it's always available for you to enjoy whenever you're ready.
The DVR on YouTube TV is seamlessly integrated into the YouTube TV platform, providing a user-friendly interface that makes recording and managing your content a breeze.
Part 2: How Does YouTube TV DVR Work?
Understanding how does YouTube TV DVR work is crucial to fully leveraging its capabilities. At its core, the YouTube DVR functions by recording live TV streams and storing them in the cloud. This means that you don't need any additional hardware or external storage devices; everything is conveniently stored and accessed through the YouTube TV platform.
The process is remarkably straightforward. When you find a program or event that you want to record, simply navigate to the specific channel or program guide and select the "Record" option. The YouTube TV DVR will then automatically capture the content as it airs, ensuring that you don't miss a single moment.
One of the standout features of the YouTube DVR is its capacity to record an unlimited number of shows simultaneously. This means that you can record multiple programs airing at the same time without any conflicts or limitations. Additionally, the recorded content is stored in the cloud for up to nine months, providing ample time for you to catch up on your favorite shows.
Part 3: Turn on DVR on Live Streams: Simple Steps
Enabling the DVR on YouTube TV for live streams is a straightforward process that can be accomplished in just a few simple steps. Here’s how to DVR YouTube TV:
Step 1: Go to YouTube Studio. Click on "Create" and then "Go live."

Step 2: Begin your live stream instantly or schedule it.

Step 3: In the stream dashboard, click the "Enable DVR" option in “Additional Settings”.
Once you've completed these steps, the YouTube TV DVR will automatically capture the live stream as it airs, ensuring that you never miss a moment of the action.
Part 4: How to Record Programs on YouTube TV?
Recording programs on YouTube TV is a seamless and intuitive process, thanks to the platform's user-friendly interface. Here's how you can easily record your favorite shows and movies:
Step 1: Go to YouTube TV. Tap "Add to Library" next to a show, sports team, or event to record it. All upcoming airings will be recorded and saved to your Library.

Step 2: If you add a program while it's already airing, your recording will start from that moment. Any reruns will replace partial recordings with full episodes.
Also, it's important to note that while the DVR YouTube TV offers a generous storage capacity, recorded content is subject to expiration after a certain period (typically nine months). However, you can easily manage your DVR library by deleting unwanted recordings or marking specific programs as "Unwatched" to prevent them from being automatically deleted.
Part 5: Best Alternative to YouTube DVR: Wondershare DemoCreator
While the DVR on YouTube TV is a convenient tool for recording live TV content, there may be instances where you require more advanced recording capabilities or desire greater control over your captured streams. In such cases, Wondershare DemoCreator emerges as a robust and feature-rich alternative, offering a comprehensive solution for recording live streams and beyond.
One of the key advantages of Wondershare DemoCreator is its ability to seamlessly capture live streams from various sources, including online platforms, streaming services, and even local network broadcasts. This versatility ensures that you can record your favorite live events, sports games, or news broadcasts with ease, regardless of their origin.
Unlike the YouTube TV DVR, which is primarily designed for recording YouTube TV's live channels, Wondershare DemoCreator allows you to capture streams from a wide range of websites and applications. This flexibility is particularly valuable for those who enjoy watching live content from multiple sources, such as social media platforms, video-sharing sites, or specialized streaming services.
In addition to its live stream recording capabilities, Wondershare DemoCreator excels in several other areas, making it a superior choice for power users and content creators:
- High-Quality Capture: DemoCreator offers the ability to record videos in up to 4K/8K resolution and 120FPS, ensuring that your captured live streams maintain exceptional visual quality and clarity.
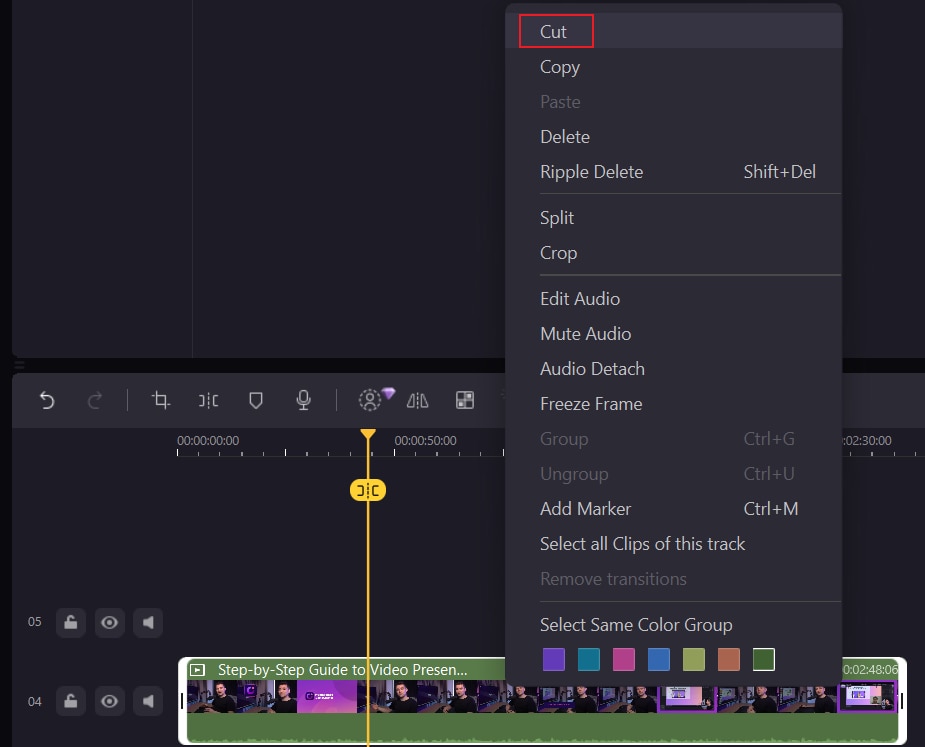
- Advanced Editing Tools: DemoCreator comes equipped with a comprehensive suite of video editing tools, allowing you to trim, crop, annotate, and enhance your recorded live streams with ease. You can add annotations, callouts, transitions, and even incorporate additional media elements like images or graphics.
- Multi-Source Recording: With DemoCreator, you can capture multiple sources simultaneously, such as your computer screen, webcam, and audio inputs. This feature is particularly useful for live streamers or content creators who wish to incorporate various elements into their recordings.
- Customizable Recording Settings: DemoCreator offers granular control over recording settings, enabling you to adjust parameters like frame rate, resolution, and bit rate to suit your specific needs and preferences.
To use Wondershare DemoCreator for recording live streams, follow these simple steps:
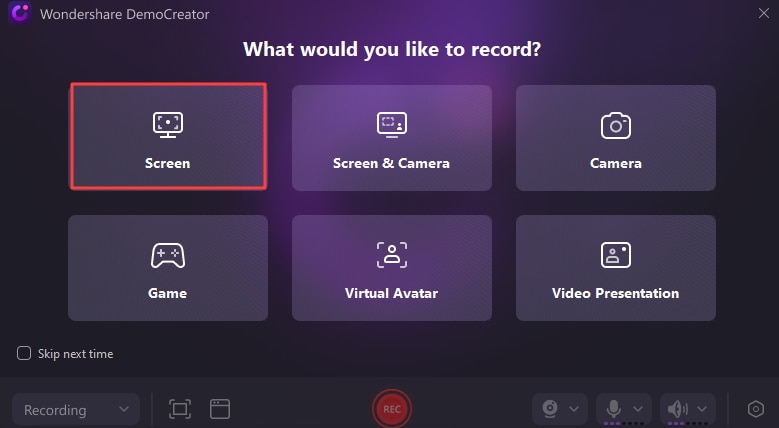
Step 1: First, install Wondershare DemoCreator on your computer. Launch the application and select the "Video Recorder" mode from the main interface. Choose the appropriate recording source, such as “Screen” "Screen & Camera" or "Game" if you're recording a live stream from a website or application.
.
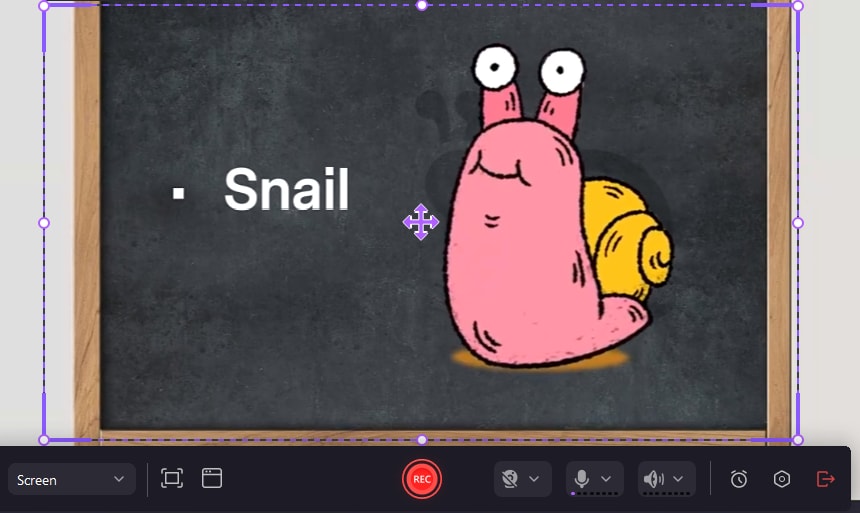
Step 2: Adjust the recording settings as desired, such as resolution, frame rate, and audio settings. Click the "Rec" button to begin capturing the live stream.
Step 3: Once the live stream is complete, click the "Stop" button to end the recording. DemoCreator will automatically save your recorded live stream, which you can then edit, annotate, or export as desired.
By using the powerful capabilities of Wondershare DemoCreator, you can elevate your live stream recording experience to new heights, enjoying greater flexibility, control, and quality compared to the limitations of the YouTube TV DVR.
Part 6: Tips to Use DVR on YouTube TV Seamlessly
To ensure a seamless and enjoyable experience with the DVR YouTube TV, here are some valuable tips and best practices to keep in mind:
- Plan ahead: Take advantage of the program guide and channel lineup to identify and schedule recordings in advance. This will prevent you from missing important shows or events.
- Manage your DVR library: Regularly review your recorded content and delete programs you no longer need. This will free up storage space and ensure that your most important recordings remain accessible.
- Utilize series recording: When available, opt for recording the entire series rather than individual episodes. This will save you time and ensure that you never miss an installment of your favorite shows.
- Explore parental controls: If you have children or prefer to maintain content restrictions, take advantage of YouTube TV's parental control settings to manage access to certain channels or programs.
- Customize recording settings: Depending on your preferences and storage constraints, you may want to adjust the recording quality or duration settings to optimize your DVR experience.
- Stay updated: Keep an eye out for updates and new features related to the DVR on YouTube TV. YouTube TV is constantly evolving, and new enhancements or improvements may be introduced over time.
By following these tips and best practices, you'll be able to maximize the potential of the YouTube TV DVR, ensuring a seamless and enjoyable viewing experience tailored to your unique preferences and needs.
- Record customized screens with audio and edit them in different tracks.
- Capture gaming videos, tutorials, and presentations and then edit them in one tool.
- Built-in unlimited editing templates, special effects, and other sources.
- Supported export to MP4, MOV, MKV, GIF, and other formats.

Conclusion
The DVR on YouTube TV has revolutionized the way we consume and enjoy live TV content. By offering the ability to record programs, movies, and events with ease, YouTube TV empowers users to take control of their viewing experience, eliminating the frustrations of missed shows or conflicting schedules.
With its user-friendly interface, generous storage capacity, and seamless integration into the YouTube TV platform, managing and accessing your recorded content has never been easier.
As the world of entertainment continues to evolve, the DVR on YouTube TV stands as a testament to the power of innovation and the commitment to delivering exceptional viewing experiences. So why settle for the limitations of traditional TV schedules? Enjoy the freedom and flexibility offered by the YouTube TV DVR and unlock a world of endless entertainment possibilities.
FAQ
-
How long are recordings kept on the YouTube TV DVR?
Recorded content is typically stored in the YouTube TV DVR for up to nine months. However, it's essential to note that this retention period may vary based on your location, subscription plan, or any updates from YouTube TV. -
Can I record multiple shows simultaneously with the DVR YouTube TV?
Absolutely! One of the standout features of the YouTube TV DVR is its ability to record an unlimited number of shows concurrently. This means you can capture multiple programs airing at the same time without any conflicts or limitations. -
Is it possible to record shows from specific channels only?
Yes, YouTube TV allows you to customize your recording preferences by selecting specific channels or networks that you want to record from. This feature helps you streamline your DVR library and focus on the content that matters most to you.


