
How to Record and Edit Green Screen Video

If you're wondering why green screen videos are getting more and more popular, the answer can be summed up in one word: quality. These videos help increase the overall quality of your video, and they are quickly becoming an essential part of any filmmaker's repertoire. From family reunion videos to product reviews, any project that benefits from high-quality video production will also benefit from the use of green screen technology. To make a green screen video, all you need to do is film yourself in front of a physical green screen (a sheet made out of green fabric will do the job just fine). DemoCreator will then allow you to replace the background of your video with anything you want with a simple click!
Green Screen Videos are used for movies and television shows. Moviemakers have used them for a long time, but recently they have become more prevalent in other areas. Because these scenes are created with video editors and computer programs, it is a great idea to use a Green Screen instead of paying lots of money on creating outdoor scenes or renting space from movie studios to film your video. The green is not actually referring to Green plants, but instead refers to RGB (Red, Green, Blue). This term is used often when referring to TVs because those three colors make up each pixel on TV screens. This technique has been around for many years and makes editing much more straightforward than using any other type of scene.
- How to Make a Green Screen Video with DemoCreator
- What other effect can be used on DemoCreator
- How to do if you already have a green screen effect
- Why you will want to make a green screen video?
How to Make a Green Screen Video with DemoCreator
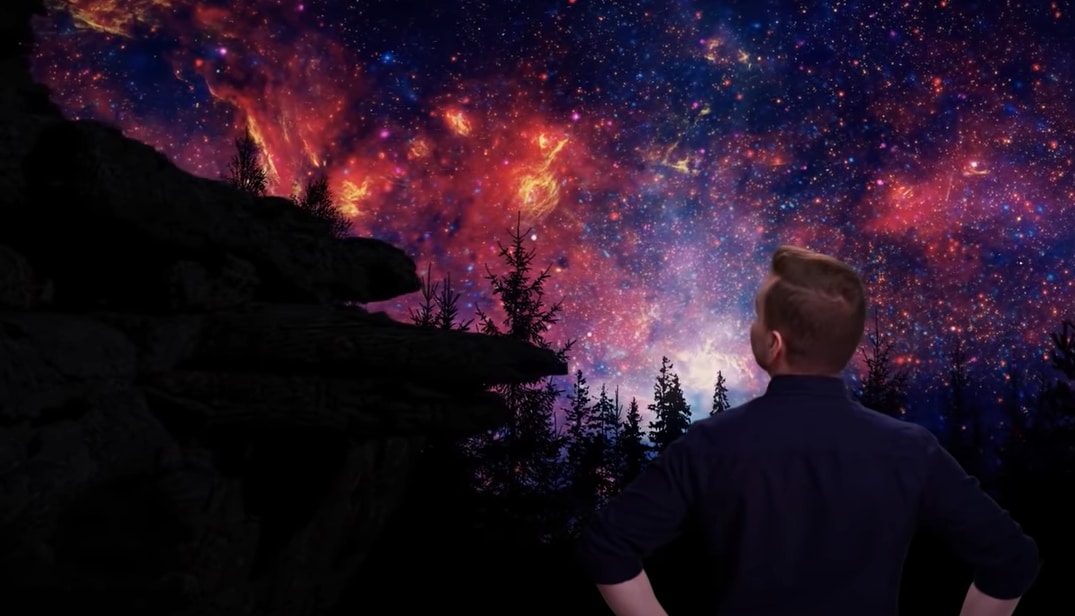
A green screen video allows you to put your DemoCreator animated characters into any setting imaginable with just the click of a button! Here’s how to make your own green screen video with DemoCreator by using the ready-to-use green screen effects or chroma key function!
At this stage, we assume you already have an account and know how to use DemoCreator software.
 Secure DownloadSecure Download
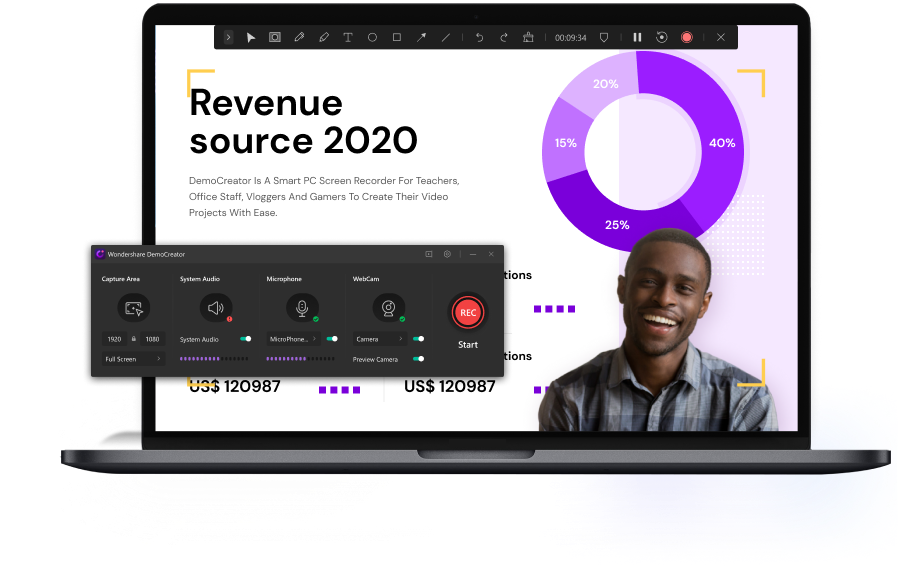
Step 1: Record with a webcam using the AI recognition to remove webcam background
In order to make a green screen video, it’s important that you have something of interest behind you. This will be useful when removing your background later on and will give your viewer an indication that they’re watching an effect and not just staring at a blank wall. Try recording against a green background. Don’t record in front of something super busy or distracting, since any small part of your background might show up in your final product. Record for at least two minutes so you have enough footage for later editing purposes.
After you’ve recorded your screencast, you can use DemoCreator's AI-powered background removal tool to remove any other elements in your footage. This will allow you to replace your background and turn it into whatever you want!
Step 2: Import Videos into DemoCreator
To make a green screen video, import videos into DemoCreator. Adding videos is easy! Click on Videos under your Library button, select Import, and then add your videos by dragging them onto your project. Alternatively, you can drag and drop video files directly from your computer onto your video in your DemoCreator. There's no limit to how many videos you can add.
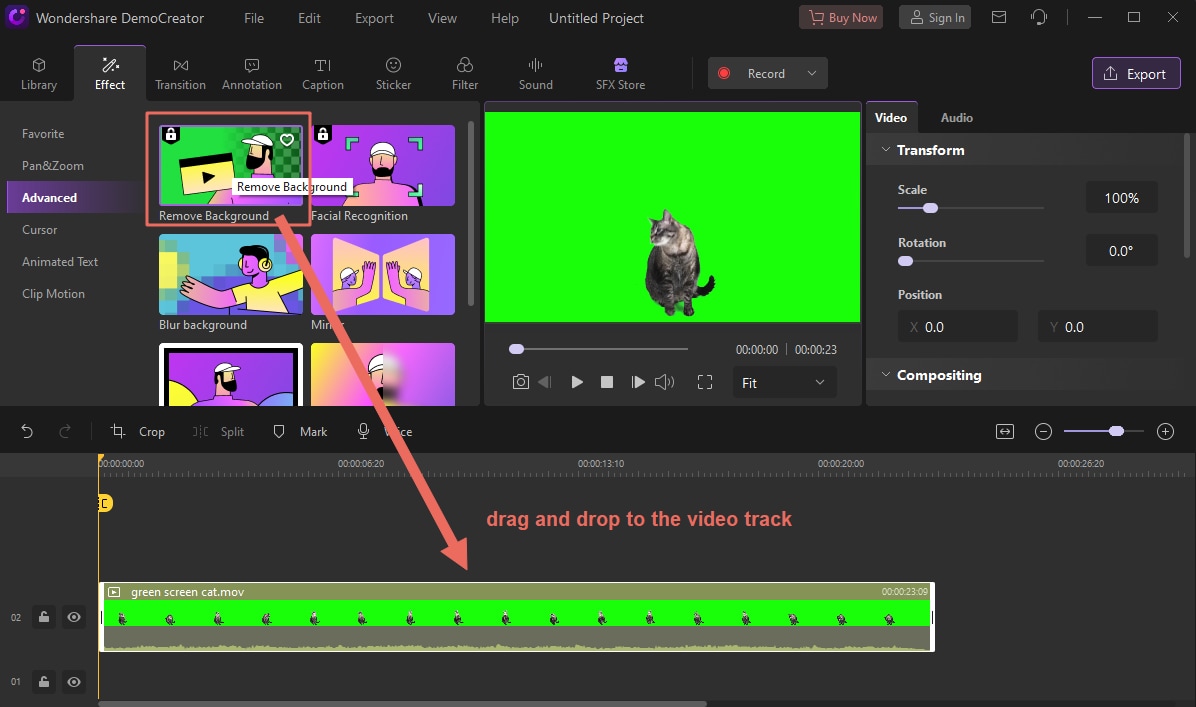
Step 3: Remove background when editing using the chroma key effect or green screen effect
Background removal is also called green screen effects or chromakey effects. If you have an existing picture or video that you want to remove part of, you can use a digital chromakey effect. A chromakey effect makes it so only one particular color will be in focus when you edit your video—it’s kind of like how our eyes only see green during a yellow-green field because our brains figure out what’s not in focus and don’t send those signals to our eyes anymore. With digital chromakey effects, you take a picture against a solid colored background (called key chrome) or a green screen and then combine it over your original video while using DemoCreator.
Secure DownloadSecure DownloadWhen you use chromakey effects, make sure you plan how you want it to work before filming. It’s important that your video subject is centered in front of its background so that when you combine both videos together, there are no gaps. You should also think about whether you want a mask effect—where only parts of your video subject are showing through—to show up on one side or both sides (as it fades out) once you edit together your videos.
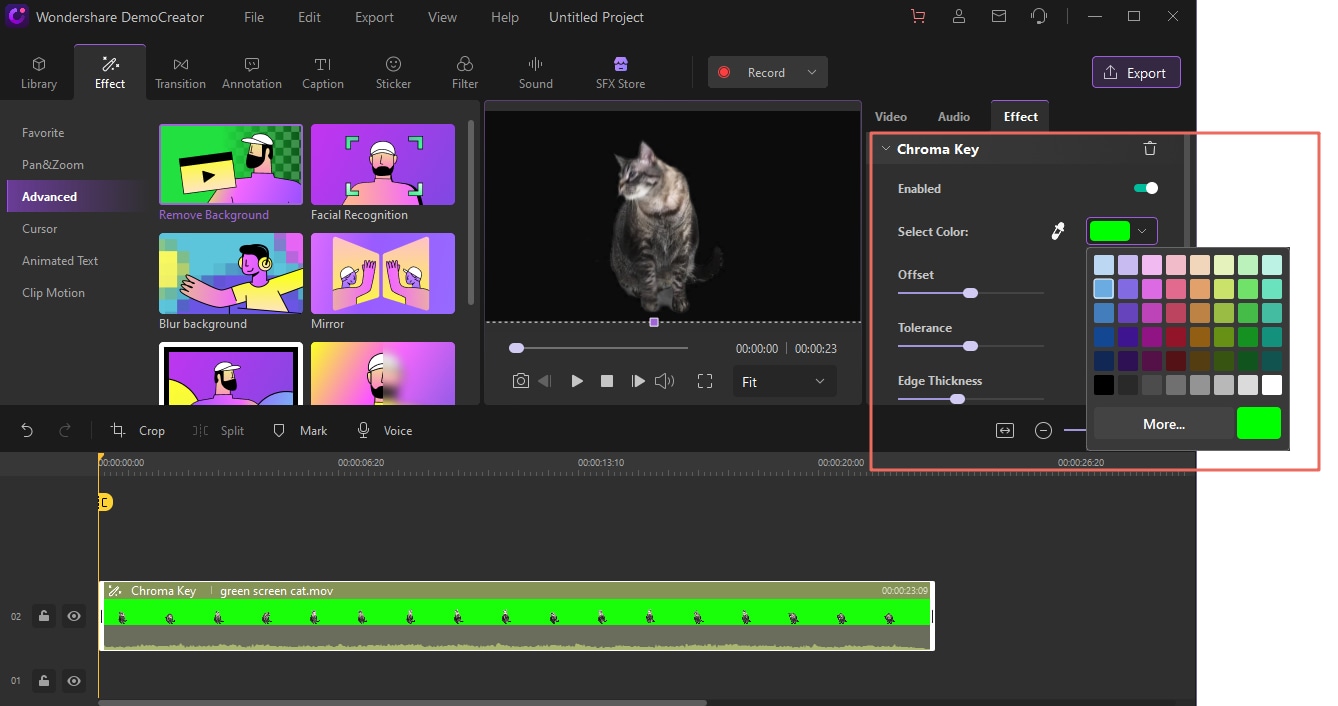
(To use the chroma key function, please apply the "green screen" effect first.)
Step 4: Remove video backgrounds of any color
Sometimes you want to use a video as an element in your own production—but not when it's on top of your green screen. So how do you remove video background without green screen? Easy. Create your original image using Demo Creator, and then drag that image into your favorite editing program (such as Final Cut Pro X). Add in your green screen footage (both in front and behind) by importing them into separate tracks of your video. Just like that, all of those pesky backgrounds have disappeared. You can even add effects, such as light leaks or film scratches, in post-production to spice up things.
Another great use for green screen backgrounds is when you want to change it later. Using techniques like chromakey and masks, it’s possible to replace your original footage and add in any new background you want at any time. This means that your original footage can be updated or changed at any time. Plus, if you want multiple versions of your video showing different backgrounds, creating all those original images before shooting can save loads of editing time in post-production—you'll only need one video clip instead of several different videos! And that's how you create video backgrounds using DemoCreator!
Further reading:
- Remove green screen in Premiere Pro
- Remove green screen in After Effects
- Change video background in After Effects
What other effect can be used on DemoCreator
We already saw how DemoCreator helps to remove any colored background to make your videos look beautiful. Apart from creating a chrome effect, there are numerous things you can do with DemoCreator. Let us look at what and all we can do to improve the quality of videos.
Make picture-in-picture videos
Create DemoCreator videos by adding text, images, and video in a picture-in-picture style. These embedded video snippets are great for getting more information across in a short amount of time. For example, add testimonials of previous clients saying how well your product performed or even play out a scenario using actors to demonstrate what users would go through using your software. This technique is also great if you need to make an instructional tutorial or explain features that would not fit easily into words. Just remember, though, don’t use so many pictures that they become distracting! Use these only as complementing elements when needed; keep things simple with just text or just pictures (not both).
Secure DownloadSecure DownloadCreate animated titles and intros
Creating animated titles and intros will help you to create an identity for your Videos. By setting up a title screen, you’ll give people something to pay attention to. Just as you would in any video, animated titles should communicate with people, announce what your video is about, and entice them to watch more. Don’t just add text; think about adding logos or splashes of color that follow along with their overall look and feel. You can even use some subtle animations here that reinforce your branding – think about adding a subtle bounce or zoom animation to get people excited about what they’re watching!
DemoCreator has a number of very useful and advanced effects that you can use to give your videos a little extra pizzazz. For example, try using color wipes or scroll effects for opening titles. Animation is an excellent way to make your content more interesting and engaging; as long as you don’t overdo it with big, elaborate animations. Remember that too much movement in a title or intro could distract from what your video is about, so balance how much animation you use accordingly. You want enough to set your video apart, but not so much that it detracts from what you have to say.
Secure DownloadSecure DownloadCut, Trim, and Crop
By cutting out unnecessary content, you remove time-consuming tasks and keep your videos short and sweet. DemoCreator gives you a quick way to select portions of your video or photos. The Cut feature is great for deleting sections of audio or removing words from your script, while Trim helps you cut extra clips off a video recording. Crop makes it easy to get rid of extra white space on images without compromising image quality.
DemoCreator offers you three special effects to make your projects even more interesting and eye-catching. Put text in motion with Kinetic Typography. Place a video clip behind another video clip with Transparent Overlay, or add elegant graphical effects like glows, borders, and shadow to individual images with Customized Effect.
Secure DownloadSecure DownloadHow to do if you already have a green screen effect
A green screen can create almost any background effect you want in your video projects. Even though it’s easy to add, it does make things more complicated if you don’t know what you’re doing. If you already have a green screen effect in your project, but looking to edit your videos in DemoCreator, here are the three simple steps to follow.
Step 1: Import your video to DemoCreator video editor
DemoCreator video editor supports almost all format video, including mp4, WebM, MPEG-1/2/4. DemoCreator will help you transform your original video into a live-action and apply background from your computer or use our extensive database of backgrounds. It’s easier than ever for users to change their videos by adding multiple effects and backgrounds at once using DemoCreator’s multi-track timeline. Trim, cut, and merge videos quickly using our intuitive drag-and-drop interface with seamless transitions available on each track. No matter what your skill level is, there are powerful tools that allow anyone to create stunning demo reels in just minutes.
Once your video is imported into DemoCreator, choose a background image or live-action footage. For example, adding a person in a white t-shirt into the office background. You can drag and drop it easily onto your track timeline. Adjust Track Color and Alpha Channel as needed to blend person with background effectively. On each part of the body that is supposed to be replaced by background, turn on Background Outline for better effect.
Step 2: Remove the green screen
Using Democreator tools, it is possible to remove your green screen without damaging your footage in any way. That way, you can keep using it for other purposes, like more professional videos. It will be easy and fast using these tools. So try them now!
The first option is to open your video in Democreator video editor. Then, use clip adjustments, where you’ll find a list of sliders, which allow removing any color cast. You can also zoom in and edit your footage more precisely using these tools. After that, all that remains is saving it again as a project file! Very simple, right? Try it now!
Secure DownloadSecure DownloadIt is true, Democreator gives the best results for removing greenscreen. Try it now and see how easy it is to use these tools. These tools will help you in editing your videos to achieve great results which other video editors can’t offer. It is a great option for professional video editors.
Step 3: Export
What happens when your first attempt at a cinematic masterpiece fails miserably? What is there left to do with your panned footage that cannot be exported as a video file? The truth is, once you’ve exported your finished projects in DemoCreator, they become easy-to-share files (YouTube-ready!) and are therefore rendered useless outside of DemoCreator. But don’t fret—you can export your cinematics as images.
When you export your finished project, it will be rendered in an MP4 format (which is a standard video file format). It will also automatically produce a time-lapse of your editing process so that others can see how exactly your project was edited together.
Why you will want to make a green screen video?
You have probably seen some of your favorite YouTube personalities making green screen videos. It looks like such fun, doesn’t it? Being able to make magic look so easy! Want to know the secret? Making green screen videos isn’t actually that difficult, but it does take just a little bit of effort on your part and the proper resources to get you started.
Secure DownloadSecure DownloadIncrease your services
Video is essential for modern businesses, and it can be very helpful in attracting new customers. Many people choose to have videos made by production companies, but many of them are looking for creative ways to increase their services and attract more customers.
Increase your client base
Looking for ways to attract more customers? Why not try investing in a green screen studio? This is often seen as an extravagant expense, but there are many benefits that come with it. For example, if you already own or operate your own photography business and invest in a green screen studio, then you have immediate access to producing promotional videos. This can drastically increase your client base at very little cost or effort.
Improve the quality of your videos
A green screen is an inexpensive and quick way to improve your videos. It’s incredibly easy to set up, it gives you more options when editing, and it can create better angles and cuts than other options. It’s no wonder why many YouTubers use one when they first start out!
Save time on editing
With green screen videos, you’ll be able to record and edit your final cut without ever having to worry about whether or not an actor is in the frame. Record your product or service directly against a solid color background, then replace it with whatever image you choose for your background during editing. You can even have multiple actors in multiple locations appear onscreen at once by using different screens! A picture really does speak a thousand words—and these pictures aren’t just talking; they’re selling.
Increase audience engagement
The green screen is much more than just putting your actors in front of a background. It’s about engagement with your audience and making them feel like they are part of an immersive experience. Use captions, annotations, or graphics on your videos that enhance what’s going on behind that subject matter. Captions allow you to promote hashtags, call-to-actions, and extra information about what’s happening in real-time.
Create awesome videos with virtual backgrounds
Green screen or chromakey is a technique used in video production and still photography to produce images with a specific background. The name green screen comes from early color television screens, which were usually painted with a green tone to reduce glare. The effect was achieved by using critical colors in front of and behind elements to allow fine control over a photographic composite image; here, both polar opposites—black and white—were considered vital colors. It is sometimes known as Chroma key because one side-effect of using complementary colors is that often unwanted colors will be removed along with undesired objects (such as clothing), creating an ideal backdrop for later compositing into other material.
Green screens can be used for various applications, including compositing two images or animating. Usually, one appears more dominant because part of it was hidden from view or camouflaged. For example, a physical set is built to film a scene in traditional movie-making. When filming begins, all elements that are not part of the set are considered run-throughs (elements seen on camera but removed from production) and must be masked off or removed entirely from view through a process known as roto. The background area where film elements would have been placed in traditional physical photography is then replaced by virtual items, known as greenscreens.
Green screen webcam recording
There are several reasons you want to make a green screen video. The major one is that it saves you a lot of money. Once upon a time, if you wanted to record an interview on TV or film, you would have had to take your actor over to the set and put them in front of where they were supposed to be standing. That meant that you had to pay for all their transportation costs, as well as putting them up in a hotel near where they would be filming for however long it took for them to finish their scenes. Then there were all their food costs, and not forgetting that when something goes wrong on set, it can go terrible indeed.
The easiest way to avoid all that is to record your actors in front of a green screen, which can be done easily and cheaply with any old webcam. By not putting them in front of an actual set, you don't have to pay for them to be in an actual location, saving you thousands if not tens or hundreds of thousands if you're planning on making a full-length feature film. It also makes reshoots much more manageable and allows you to edit out your actors' mistakes without reshooting everything from scratch. You can also move around sets digitally very quickly after shooting by simply editing where they are supposed to be standing instead of having to move everyone.
Create accessible training videos
Green screen videos might seem flashy, but they can also be helpful. For example, if you're selling a product that only works in specific environments or with certain tools, demonstrating how it works on your site could be super helpful for your customers. With a good set of lighting and some practice, you can use green screen technology to create highly effective and engaging tutorials for customers who want to use your product in various situations. And yes: It is possible to do it on a budget!
One nice thing about using a green screen for training purposes is using your own office or apartment as your set. This means that you don't have to spend tons of money renting space or hiring extras. If you're interested in getting started making your own videos but aren't sure where to start, there are some great tutorials and courses available online to help get you started!
Conclusion
If you are considering using a green screen effect for your next video, then use DemoCreator and it is the best choice for creating a green screen effect and also for editing. DemoCreator is the best choice for creating a green screen effect and also for editing. DemoCreator provides a fully-integrated software solution that helps users with all phases of video production, including shooting, filming, and editing. It has the best green screen background replacement feature which gives more realism.
DemoCreator makes your projects effective with DemoCreator editing features, including facial tracking and green screen effects. For example, you can use the skin retouching feature to remove freckles and blemishes from your footage.
Secure DownloadSecure Download


