Discord has rapidly grown from a gaming communication platform to a versatile tool for streaming, community engagement, and content creation. With its user-friendly interface and robust features, Discord allows users to share their screens, stream gameplay, or present content seamlessly. Whether you want to showcase a game, host a virtual event, or share a tutorial, streaming on Discord can enhance your interactions with friends, followers, or community members. In this guide, we’ll cover how to stream on Discord effectively and how DemoCreator can enhance your streaming experience.
In this article
Before Streaming on Discord: What You Should Know?
Before diving into the steps to stream on Discord, it’s essential to ensure you have the right setup:
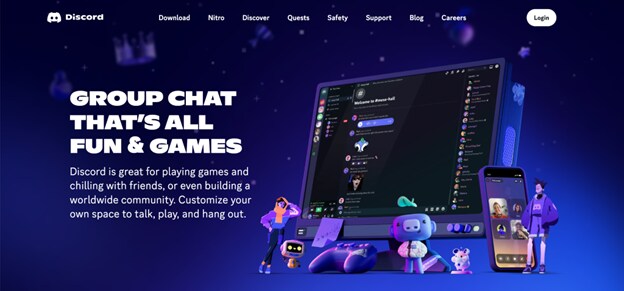
- A Discord Account: If you haven’t already, create a Discord account and set up your server or join an existing one.
- A Stable Internet Connection: A reliable and fast internet connection is crucial for smooth streaming.
- A Compatible Device: Discord can be accessed on desktops, laptops, and mobile devices. For streaming, a computer is recommended for better performance.
- Streaming Software (Optional): While Discord has built-in streaming capabilities, some users prefer to use software like OBS Studio for more advanced features.
- DemoCreator: A powerful video recording and editing tool that can enhance your streaming experience by allowing you to create polished content before or after your live streams.
How to Stream on Discord
Streaming on Discord is straightforward. Here’s a step-by-step guide to get you started:
Step1Join a Voice Channel
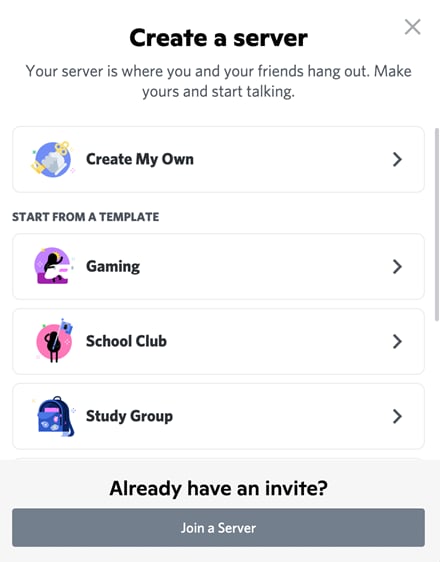
To begin streaming, you need to be in a voice channel. Here’s how:
- Open Discord and navigate to the server where you want to stream.
- Click on a voice channel from the list on the left side of the screen. You can create your own channel if you have the permissions.
Step2Start Streaming
Once you’re in a voice channel, follow these steps to start streaming:
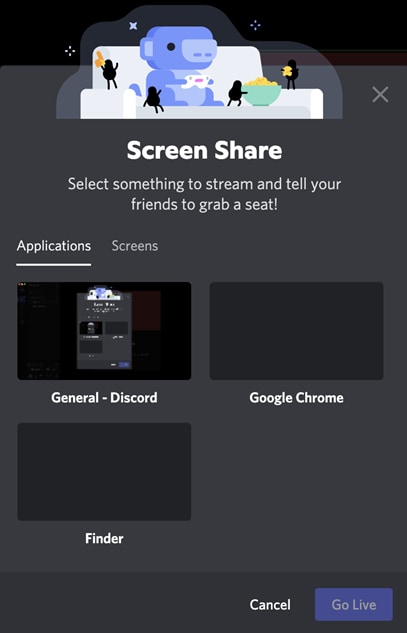
- Select “Screen” or “Application”: After joining the voice channel, look for the “Screen” button located at the bottom of the window. Clicking on it will give you the option to choose whether to stream your entire screen or a specific application. Select the option that best fits your needs.
- Choose What to Share: If you opt to share your entire screen, select your main monitor (if you have multiple screens). If you’re sharing an application, click on the specific app window you want to stream.
- Set Stream Quality: Discord will ask you to choose the stream quality and frame rate. Higher quality will provide a better viewing experience but may require more bandwidth. Choose the settings that work best for your internet speed and computer performance.
- Click “Go Live”: After selecting what to share and setting your quality, click the “Go Live” button to start streaming. Your friends or community members in the voice channel will be able to view your stream.
Step3Interact with Your Audience
As you stream, engage with your viewers. Encourage them to ask questions or provide feedback in the text chat. Interaction enhances the streaming experience and keeps your audience engaged.
Step4Stop Streaming
When you’re finished, stopping the stream is easy. Click on the “Screen” icon at the bottom again, and then select “Stop Streaming.” Your viewers will be notified that the stream has ended.
Enhancing Your Streaming Experience with DemoCreator
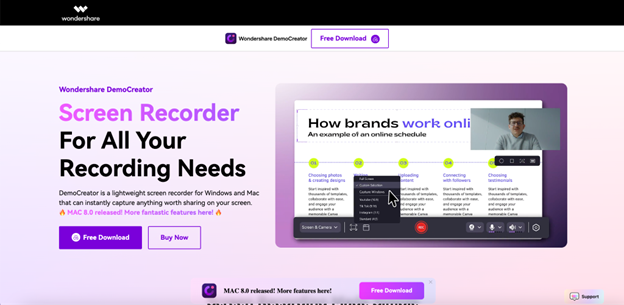
DemoCreator is a versatile video recording and editing software designed to elevate your content creation process. With its intuitive interface and powerful features, it caters to both beginners and experienced creators alike. Whether you're looking to record high-quality gameplay, create engaging tutorials, or enhance your streaming sessions, DemoCreator has the tools you need. Its comprehensive editing capabilities allow you to produce polished videos that captivate your audience. By integrating DemoCreator into your streaming workflow, you can ensure that your content stands out in the crowded digital landscape. Here’s how:
1. Pre-Stream Preparation
Before you start streaming on Discord, you can use DemoCreator to create polished content. Whether you’re producing tutorials, promotional videos, or gameplay highlights, DemoCreator allows you to:
- Record High-Quality Videos: Capture your gameplay or presentation with high-definition recording options. This ensures your content looks professional and engaging.
- Edit Your Videos: Use the editing features to add text, transitions, and effects, giving your videos a polished look before sharing them on Discord.
2. Recording Your Streams
If you want to save your streams for later use, DemoCreator can help you record and edit your Discord streams:
- Use DemoCreator for Screen Recording: After your live stream on Discord, you can use DemoCreator to record your screen and capture your content. This can be useful for creating highlights or repurposing your content for other platforms.
- Editing After the Stream: Once you’ve recorded your stream with DemoCreator, you can edit the footage, cutting out unnecessary parts, adding commentary, or enhancing audio quality. This is particularly helpful for creating recap videos or tutorials based on your stream.
3. Steps to Use DemoCreator for Recording and Editing
Here’s a step-by-step guide on how to use DemoCreator for recording your Discord streams:
Step1Download and Install DemoCreator
Visit the official DemoCreator website to download the software and follow the installation prompts to set it up on your computer.
Step2Choose Your Recording Option
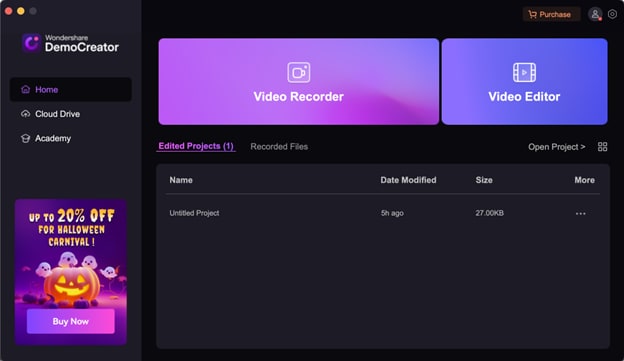
Launch DemoCreator and select the “Video Recorder” option to begin recording your screen.
Step3Configure Recording Settings
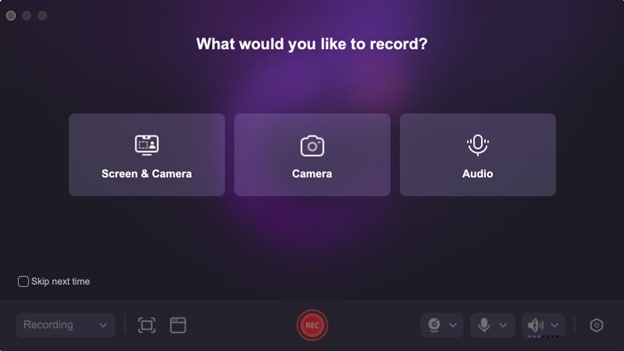
Choose to record the entire screen or a specific application window, ensuring you select Discord if you’re capturing your stream. You can also adjust audio settings to capture system sounds and your microphone input. This setup will allow you to record your live stream or any other content you want to share with your audience later.
Step4Start Recording
Click “Start Recording” to begin capturing your Discord content. While DemoCreator does not support live streaming, it enables you to record your Discord sessions. You can pause or stop the recording as needed, allowing you to focus on the content without worrying about interruptions.
Step5Edit Your Video
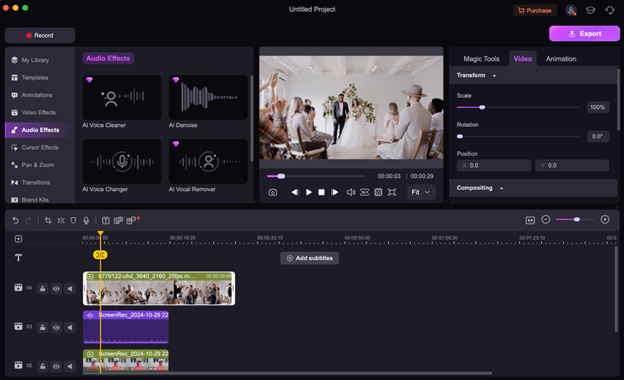
After recording, use the built-in editing tools to enhance your video. Trim unnecessary segments, add overlays, and adjust audio levels to create a polished final product.
Step6Export Your Video
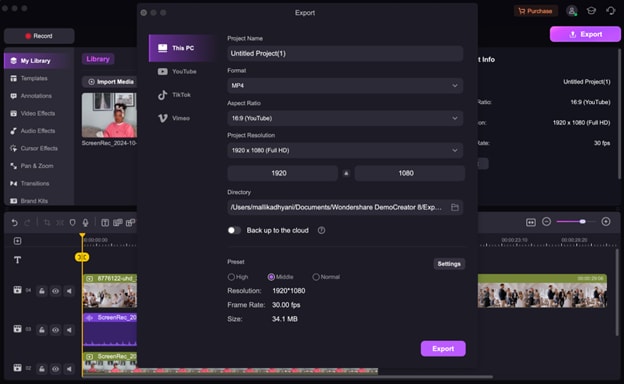
Once you’re satisfied with the edits, click “Export” to save your video in your preferred format, ready to share on Discord or other platforms.
Benefits of Streaming on Discord
Streaming on Discord offers several advantages:
- Community Engagement: Connect with your audience in real-time and create a sense of community.
- User-Friendly Interface: Discord's design makes it easy to set up and manage streams without needing extensive technical knowledge.
- Versatility: Whether you're gaming, giving a tutorial, or hosting an event, Discord supports various types of content.
- Privacy Controls: You can choose who can see your stream by controlling access to your server or specific channels.
Conclusion
Streaming on Discord opens up a world of possibilities for engaging with your audience and sharing content. By following the steps outlined in this guide, you can easily set up and start streaming on Discord. Additionally, utilizing tools like DemoCreator can significantly enhance your streaming experience, allowing you to produce high-quality content that resonates with your viewers. Whether you’re gaming, hosting a workshop, or simply sharing your thoughts, Discord and DemoCreator together can elevate your content creation journey. Start streaming today and connect with your community in exciting new ways!
FAQ
-
Can I stream on Discord for free?
Yes, streaming on Discord is free as long as you have a Discord account. You can share your screen or stream games without any additional costs. Utilizing tools like DemoCreator for recording and editing content is optional but can enhance the quality of your streams. -
What type of content can I stream on Discord?
You can stream a wide range of content on Discord, including gameplay, tutorials, presentations, and virtual events. The platform is versatile and supports various formats, allowing you to engage your audience with different types of content. -
Do I need special equipment to stream on Discord?
While you don’t need specialized equipment, having a good quality microphone and a stable internet connection will improve your streaming experience. Additionally, using software like DemoCreator can help you create high-quality recorded content. -
How can I improve my streaming quality on Discord?
To improve your streaming quality, ensure you have a fast and stable internet connection, choose appropriate stream settings, and minimize background applications. Using DemoCreator to edit and enhance your recorded streams can also elevate the overall quality of your content. -
Can I record my Discord streams?
Yes, you can record your Discord streams using screen recording software like DemoCreator. This allows you to capture your live sessions and edit them for later use, such as creating highlight reels or tutorials based on your streamed content.


