

Microsoft Encoder Screen Recorder Review

When most people think of the best screen recording and encoding tools, the name Microsoft or Windows barely comes up. Yet, there is a Microsoft screen recorder with features that threaten to blow all other similar tools out of the water. The Microsoft Encoder 4 screen recorder is a tool that offers a wide range of premium options when it comes to screen recording. The free screen capture tool allows users to capture videos in high resolution from their desktop.
There is a Microsoft Expression Encoder 4 screen recorder free version along with a premium version designed to make encoding the recorded video that much easier. Microsoft Encoder screen recorder encodes videos in Silver light format and offers a wide range of options when it comes to editing the recorded video.
Interface and Specifications
Although Expression Encoder is not as easy to use as some of its third-party competitors, once you get used to the interface, the program can prove very useful to use. As we shall see shortly in the “how-to” section of this article, this program works pretty much just like most other screen recorders. You need to, first, install the program to your computer and then select the area you would like to record.
The system specifications that you need to have to download the screen recorder utility from Microsoft include the following;
- Operating System - Expression Encoder can be installed on a PC running Windows XP with service pack 3, Windows 7 and Windows 10
- Processor- To use Expression Encoder, you need to have 1 GHz processor or higher
- Disk Space- You need to have a minimum 2 GB free disk space on your computer to install this program
- Display- For the best results, your screen should be at least 1024 x 768 pixels or larger
- Video Card- You should also have a minimum of 128 MB video RAM support on your computer. The video card should also support Direct X 9 and Pixel Shader 3
Key Features of the Microsoft Expression Encoder
This Microsoft Free screen recorder comes with a lot of useful features, including the following;
- Encoding and Decoding Features
With the Microsoft Expression Encoder screen recorder, you have multiple options when it comes to the encoding of WMV formats. It supports the smart encoding and recompression of WMV videos, as long as no frame operations have been performed on the video. It also allows for batch encoding operations, as well as the encoding of live recordings from both webcams and camcorders. DirectShow in Microsoft allows this program to decode imported videos.
- Smooth Recording and Streaming Experience
While it is very easy to record videos using this program, it is particularly useful when you want to stream videos in HD using HTTP. This is made easier by the in-built Silver light client and IIS server. It also comes with API integration designed to make it very easy for you to stream the videos to online platforms like YouTube.
- Edit the Recorded Videos
The program also comes with simple editing tools that allow users to customize the recorded videos in numerous ways. You can very easily change the timing, opacity, looping and placement of the video, and you can also add text and effects to further enhance the video. It is also very easy to add a caption to your video.
How to Use Microsoft Expression Encoder
The Microsoft Screen Expression Encoder is not the simplest tool to use, unlike many of its third-party competitors, it can be difficult to access and operate, especially when you want to record the screen. We have tried as much as possible to simplify this "how-to" section to make it as easy as possible to use;
Step 1: Access the Encoder Screen Capture
While the screen capture feature of the Microsoft Expression Encoder is often a part of the whole program, you will have to start the Encoder screen capture separately to use it.
To do that, click on Start >> All Programs >> Microsoft Expression and then select "Microsoft Expression Encoder 4 Screen Capture".
Step 2: Set the Screen Capture Options
Before you start recording the screen, it may be a good idea to configure both the audio and video settings. This may be especially necessary if you are using this program for the first time.
To do that, you need to click on the gear icon in the program's main window. This will open the settings window, allowing you to set or change any preferences as you desire.
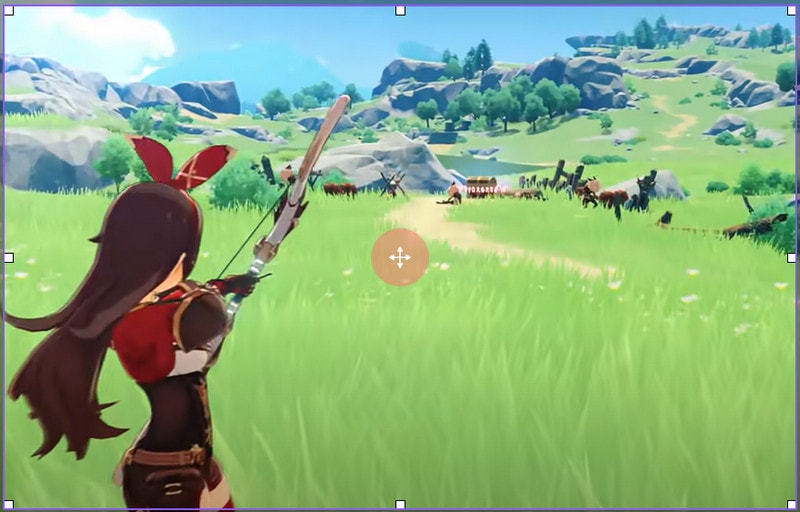
Step 3: Start Recording the Screen
When you have your preferred settings, close the settings dialogue box and click on the red "Record" button. Red crosshairs will appear on the screen as soon as you do, and can place your pointer at the center of the crosshairs to select the area you want to record.
The program should begin recording the selected area. When you're done with the recording, click on "Esc" to finish the recording
You can then preview the recorded video from within the program.
Encoder 4 Screen Capture No Sound?
One of the main problems users experience with Expression Encoder 4 recordings is the fact that sometimes the program will not capture the sound, and when it does the audio is of very low quality. If this is happening every time you try to record your Windows Screen, we recommend trying a different screen recorder.
The best tool to use when you want to capture both high-quality video and sound is Wondershare DemoCreator. Designed to ensure you only produce high-quality videos, you’ll find this software useful in a number of ways like recording PowerPoint presentations, video games, tutorials, lectures, and more.
 Secure DownloadSecure Download
It is also very easy to use, as this simple step-by-step tutorial will show;
Step 1: Install DemoCreator on to Your Computer
Begin by downloading and installing this recorder on your computer. Open the program after successful installation and then select the "New Recording" option in the main window.

Step 2: Select the Region You Want to Record
Now you can select the region, set up the webcam and audio settings as your needs. Also, you can customize the frame rate.
Step 3: Record the Screen
When all your settings are set according to your preferences, click on Capture to exit the Setup window
When you're ready, click on Record to begin recording the selected area
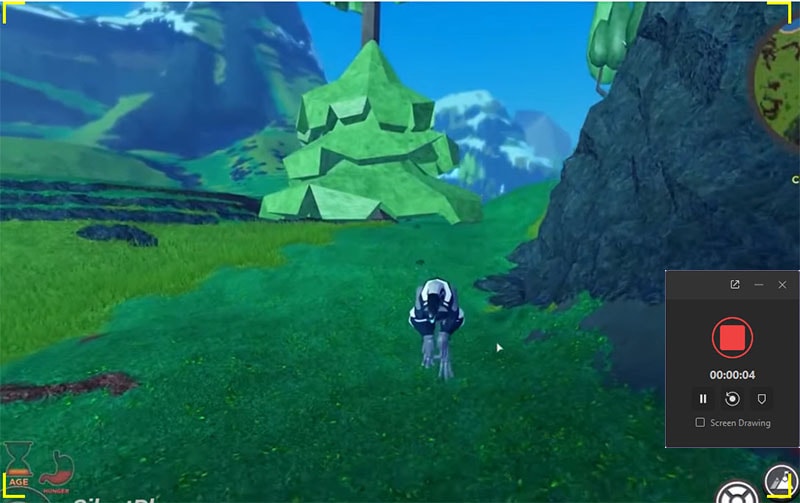
If you would like to add markers to the video while recording, click on the "M" icon on the Scrn widget.
Once you're done recording, click on the red Record button again to end the process.
Keep in mind that you can also use the wide range of editing tools that DemoCreator offers to easily edit the videos. You can annotate the video, add text, and even add special effects and call-outs.
The Microsoft Expression Encoder is a great video encoding program that comes with a built-in screen recorder. One of its main advantages is that its free version comes with enough features that most people find they don't need to purchase the premium version. But as we have seen, it can often be difficult to access and use, not to mention the many audio recording issues that users have reported.
If you are having trouble accessing or using the Microsoft Expression Encoder to record your Windows screen, we recommend choosing DemoCreator instead to record laptop screen on HP, ASUS and other devices. it's straight forward and very easy to use interface allows users a seamless user experience, even if it is your first time using screen recorder programs.


