

How to Screen Record on HP Laptop

While you are watching a tutorial video on YouTube, have you ever thought about how YouTubers post it? Can you also make one? Can you screen record on an HP laptop? If yes, you have landed exactly at the right spot, and we are going to discuss each and everything related to how you can screen record on an HP laptop.

 Secure DownloadSecure Download
In this article, we are going to talk about solutions, tips, and tricks that work on any Windows laptop but are not limited to HP models only. Thus, if you carry an HP one, this article specifically shows how you screen record on an HP laptop.
Part 1: How to Screen Record on an HP Laptop with Recorder
There are many software applications available in the market that claim to be the best screen recorder for HP laptops. However, it is seen most of the time that there are some hidden T&Cs, and the full range of features will not function as you expected. Wondershare DemoCreator is an easy but effective tool to record laptop screens with high resolution, no matter a lecture, PowerPoint, online course, or gameplay, it will always do the best recording projects for you.
The software will provide you with all the necessary features that you will need to create an engaging video/content. The in-built editor will allow you to add files from your device and also record audio/video by connecting an external recording device. Another plus side is that the interface is quite intuitive, and anyone with basic knowledge of computers will be able to use it.
Capturing high-quality video at resolutions up to 4K UHD is possible with this device. Furthermore, it is packed with several editing options that allow you to alter the recorded file instantly after it has been recorded. This all-in-one tool is compatible with Windows 10/8.1/8/7 and is available for free download from the official website. To be utilized by both experts and novices, this recording tool must be both comprehensive and simple to use. It is available in both English and Spanish. Regardless matter whether you are a seasoned computer user or a novice, you will have no trouble learning this program. It will be shown in the following instruction on how to record the screen on an HP laptop using this recording software.
Steps to Screen Capture on HP Laptop
Once downloaded, launch the setup and proceed by agreeing to the terms and conditions. You will need to select the location on your device where you want it to be installed. It will take a couple of seconds to complete the installation.
Let’s go through the steps you need to follow to record a video, and then tweak it according to your requirements. If you are a beginner, this guide will be more than enough for you to understand the functionality.
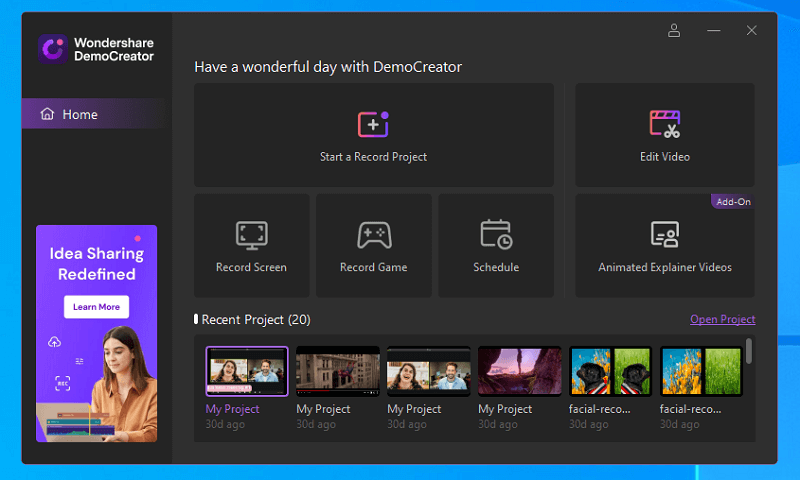
As soon as you will launch the app, you will get a dialogue box where it will give you 2 options along with a list of recent projects. The options will be to start recording and video editing. Select “Start a Record Project” to move on.
Step 1: Download and Run the Program
The first step is to get this program from the official website URL that we have provided below for your convenience.
After you've downloaded it to your HP Laptop, you can install it by opening the downloaded file, which will only take a few minutes to complete the process.
Step 2: Start the Screen Recorder Application
Following the installation of DemoCreator, go to the screen recorder for which you want to record a screencast and press the Start New Recording button, which will launch the screen recording feature of this program.
Secure DownloadSecure DownloadStep 3: Customize the Recording and Begin Recording
To proceed further with a new project, you will need to click on the red button. It will take you to a new dialogue box.
In the primary stage, while still inside the screen recorder of this program, modify the software to the greatest degree possible, allowing you to activate the microphone, system sound, camera, screen cropping, frame rate control, and many other features.
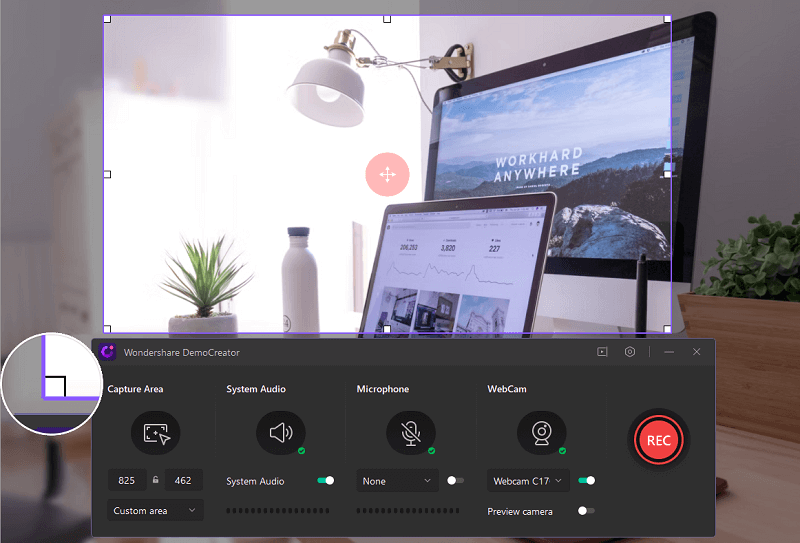
As soon as you have finished customizing your screen, click on the recording button, which will begin recording your selected screen without any more effort from you.
Here, it will give you more options. Before it starts recording, you will need to provide the recording area. It can either be a full screen, a particular window, or a custom size.
Secure DownloadSecure DownloadStep 4: Stop/Share the Recording
Now, everything is done, and you can hit Record anytime. While the recording is going on, you can press F10 to stop and F9 to pause/resume.
In the last stage, press the stop button on this recorder, which will terminate the recording function and instantly transfer you to the video editor, where you may polish your recordings using the user-friendly interface.
After you've finished recording, it's time to save and share your recordings with your audience. To do so, just click on the Export option on this software's toolbar and follow the on-screen instructions.
A screen recording and video editing program, DemoCreator may be used to capture your desktop and transform it into a high-quality movie of professional quality. DemoCreator allows you to customize your recording by adding comments, transitions, and other features to make it seem its best. This tool can record the screen of your HP laptop in a variety of sizes, capture a camera, and even record games on your HP laptop with relative simplicity and convenience. It may even be used to capture response videos, commentary videos, and instructional videos, among other things. Just to put it simply, DemoCreator does so much more than serve as a simple screen recording application. Apart from that, it is a powerful video presentation program, a whiteboard animation tool, and many other things as well. This article will walk you through the process of capturing the whole screen or a portion of your screen on an HP laptop. Follow the steps to make a record of everything you need.
Part2: Windows 10 game bar to Screencast on HP Laptop
There are many times when no software can fulfill the basic requirements you have. We often tend to oversee the options that are present all along. In this section, I am going to discuss some screen recorders for HP computers:
Using the built-in Windows Game Bar on your HP laptop running Windows 10, you may record any action that occurs on the screen without paying anything. It provides the ability to alter the recording settings and also permits the use of the background recording feature. You should be aware that the Windows 10 operating system has a Gaming Bar function that allows you to record your video game sessions. Using the Game Bar on your HP laptop, you may screen capture the contents of your HP PC running Windows 10. However, this technique is only useful if you have already installed Windows 10 on your HP laptop before proceeding. This tutorial will show you how to screen record on a laptop using the Windows Game bar.
For Windows 10 users, the Xbox Game Bar has a built-in screen recorder. In the same way that every premium screen recorder does, this advanced recorder allows users to record audio from both the microphone and other sound sources, as well as to take screenshots. Some people may not be aware that your HP laptop has a built-in screen recorder, and this is understandable. Indeed, this default recorder is provided by the Windows operating system, and you may begin using it immediately if you are using Windows 10 or Windows 11 as your operating system. It has a maximum time restriction of four hours. Simply read on to learn more about how to screen record on an HP laptop for free using the instructions provided below.
In higher-end computers, HP provides an integrated video card that is capable enough to provide you with screen recordings of higher resolution. If you recently got a system with the latest configuration, there are very high chances that this functionality is already there. However, you will need to check if your device comes with a compatible video card to process the recorded footage.
You will need to follow the steps mentioned below to check whether this Windows 10 game bar recording is working or not.
Step 1: Launch Game Bar on HP Laptop
On your Windows 10 computer, press the Windows + G keys simultaneously. You should be able to locate a little box that prompts the popup message. The system may ask your permission to run the Game Bar application. Do you want to access the Game Bar? to record the activities that occur on the screen.
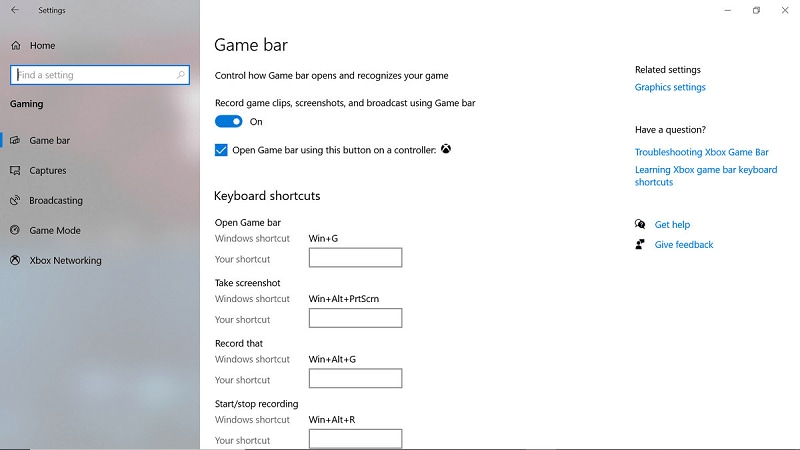
Step 2: Setup the Game Bar
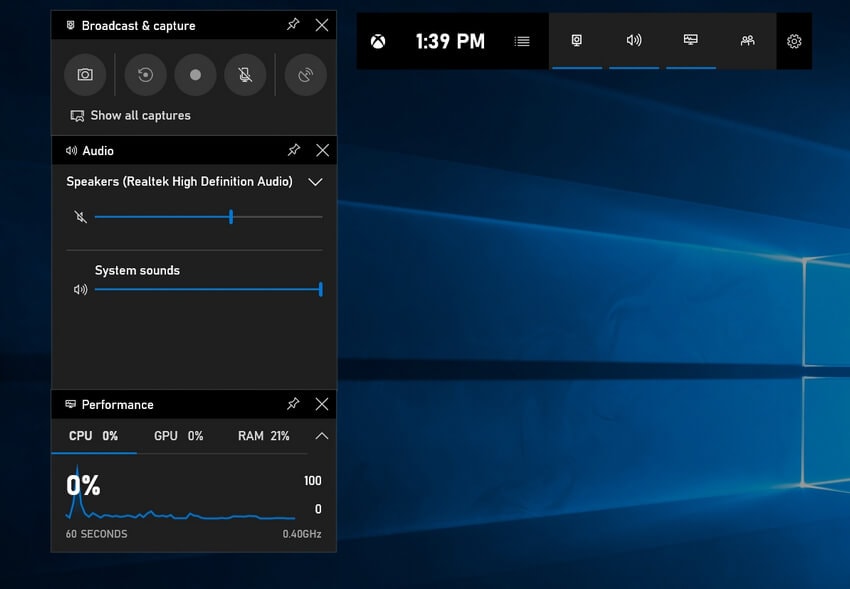
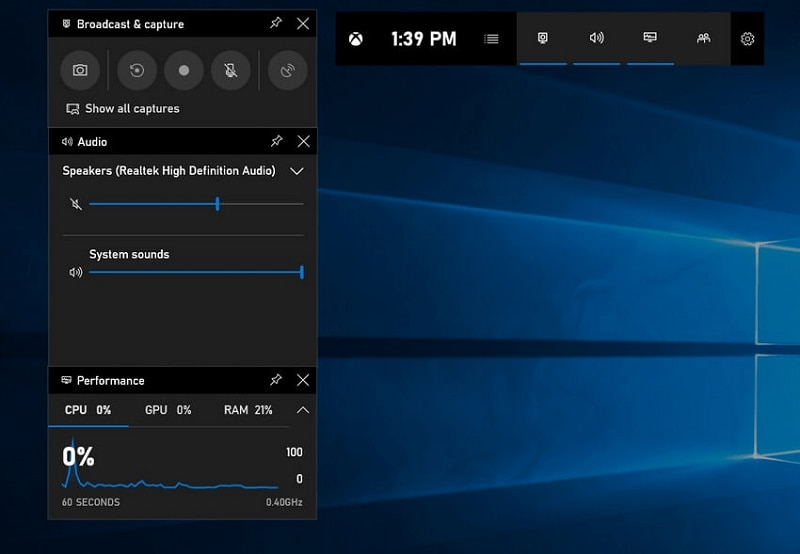
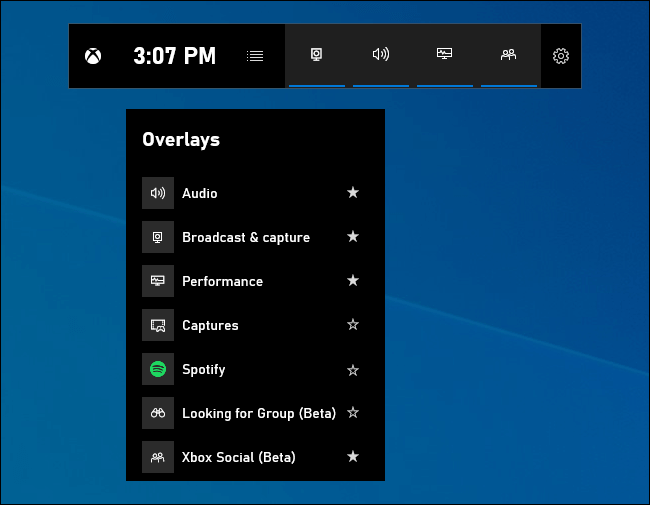
Allow it to open, and you will get a horizontal menu on the top. There will be a range of features/options; however, we are going to discuss screen recording only. On the right side of the Xbox logo, you will see the time. In the same direction, there will be a camera icon that says Capture. Click on it, another small dialogue box will appear up.
Check the box next to the message underneath the message that you want to read. It is, in reality, a game that you are playing. The Game DVR functionality, which was transferred over from Xbox and enables you to screen record on an HP laptop using the Game Bar, is another feature of the Game Bar.
Step 3: Save the Settings
It will contain multiply options: Capture screenshots, record the previous 30 seconds, Record and Mic.
To complete the third step, move your mouse cursor over the top bar that contains the Xbox symbol. A Camera icon is positioned on the right-hand side of the screen, and it may be used to capture still images of the screen. Additionally, by clicking the Settings option, you may make changes to your current settings.
Step 4: Start/Stop Recording
As soon as you will hit the circular recording button, it will turn square; it means that the Game Bar is now recording.
Choosing the Start Recording option in the Capture box in the upper-left corner of the screen will start the recording screen on your HP. Step 4: The recording process may begin before the process indicator turns red, signaling that it has started. To complete capturing the files you desire, push the circular button a second time, and the button will become white. Automatically generated screen recordings should be saved as an MP4 video in the C/Users/Videos/Captures directory without the need for any user involvement.
Step5: Save the recording
Once the video is recorded, you can click that button again, and the recording will be saved in the "Users" folder.
If you want to edit some settings, you can use Windows Photos to alter them.
No dialogue box appeared on pressing Win+G. Any solution?
If your system responded nothing to the Win+G command, it is most probably due to the missing Xbox app. You can download it from the Microsoft Store for free. You will not need an Xbox account to use the screen recording feature.
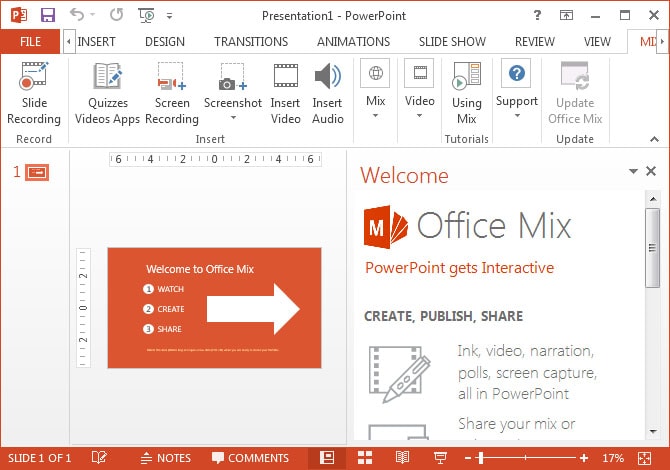
Part3: Video screen capture with PowerPoint
When creating training presentations, particularly technical ones, you will often need to incorporate screenshots (static photos of the screen) and screen recordings (video recordings of the computer screen) (videos showing activity on the screen). In PowerPoint 2010 and subsequent versions, you may capture screenshots directly from inside the presentation. If you are attempting to capture system audio while generating a screen recording in PowerPoint, it is crucial to understand that PowerPoint records audio using the default sound input device that is specified by Windows when recording audio. This is often where your microphone would be located.
PowerPoint has a free screen recorder for HP computers, which you can use to capture movies and then integrate them into a presentation slide. It not only allows you to utilize videos in your PowerPoint presentations, but it also allows you to use the files on social networking websites. Using the "Screen Recording" feature in PowerPoint, you may capture a screenshot of your screen and use it in a presentation slide. You have the option of recording the video with or without audio, depending on your preferences. A demonstration of a certain software might be included in your presentation as a result of this. Audio recording with screen recording requires the use of a microphone, audio card, and speakers on the computer where the screen recording is being done. The speakers allow you to hear what you've recorded on your computer. With the introduction of PowerPoint 2016, the option to record screen sessions was enabled, and this function has now been made available in PowerPoint 2013. You should be able to view it if you have all of your updates installed.
All the Windows 10 users, whether Home, Student or Professional version, if you have MS PowerPoint installed on your PC, you will be able to use it to capture screen recordings. There is no need to worry about the steps; we are providing you with a full guide right here. The only prerequisite is that the window that you want to capture should be open and ready before you start recording.
Steps to Capture Screen with PowerPoint
In terms of screen capture, just before you begin recording, you should show the window that you want to capture. Using the Incorporate tab on the Ribbon, you may insert a screen recording into a PowerPoint presentation slide. Then, under the "Media" button group, choose the "Screen Recording" button from the drop-down menu. A popup window emerges at the top of the screen as a result of this.
Step 1: Launch PowerPoint and Insert Media
In the search, type MS PowerPoint and launch the application.
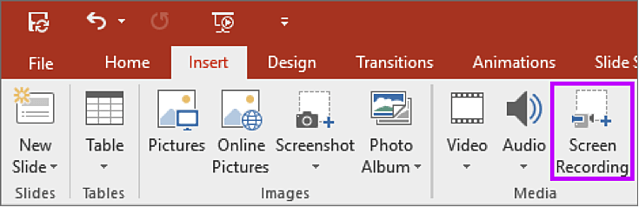
From the top horizontal menu, find the Insert tab and then click on Screen Recording.
Select Insert, Screen Recording from the Media group on the left-hand side of the screen. You'll see a little toolbar at the bottom of the screen. It is usual practice to add the mouse pointer in your video so that your viewers can see what you are clicking on more clearly. You may also choose whether or not to play audio.
Step 2: Select Recording Area
There will be a prompt that will ask you to select the area that you want to be recorded. Drag and drop one edge of the cropping tool to set the custom recording area.
Selecting a screen area to record is accomplished by selecting the "Select Area" button in the popup window. Your cursor will then change to the symbol of "crosshairs." Then, starting from the upper-left corner of the area to record and dragging down and to the right, release the mouse button when you reach the lower-right corner of the area to record, as shown in the screenshot. The screen area to be recorded is then delineated by a dashed red rectangle. Anything that appears inside the outline is also captured.

Step 3: Start Recording
The recording menu will give you the option of turning off the mouse inputs along with the microphone inputs. Turning these off will only record the screen area you selected.
When you are ready, hit the circular recording button, and this menu will go off-screen, so the recording area doesn't record the controls.
When you press the Windows button + Shift + Q, a video displays on the current slide of your presentation. You may right-click and choose a screen capture–or any image–then choose Save as Picture to export it as a separate file from the rest of the document. You may, however, do the same thing with your screen recording! You may want to modify it in another software rather than PowerPoint — however, you can clip it and use a fade in/out effect in PowerPoint.
Step 4: Save Recording
Once the task is completed, you will need to take your printer to the top, and the controls will appear—hit Stop.
Simply choose Save Media As from the context menu of your screen recording. Give it a name and save it in a convenient place. In this brief video, I demonstrate how to move vast quantities of text about Word's Outline view, which I prepared with the help of the screen recording tool in PowerPoint.
Now the video will be present in the PowerPoint; you can save it as a .ppt. However, if you want to save just the video file, hit File and then scroll down to Save Media As option.
This method is perfect for those who don't want to edit the videos much, and they can use it as they are recorded. The basic trimming, cropping, etc. can be done, though.
Part 4: Use YouTube Live streaming to record videos
You must have seen various YT live, and if you are a nerd, the thought must have gone through your mind that this is also a tool that can be used as a screen recorder app. There is nothing that you will need or make payment anywhere. You are set to go if you have a Google account. If you don't have one, it's very easy to set up and won't take more than 5-7 minutes. Sign in using the same account on YT Creator Studio, and then follow the steps mentioned below to record your screen.
If you wish to screen record for YouTube, you may use the YouTube Live Streaming feature on your HP laptop to do this. Create a YouTube channel and record the video in the format shown below. For the vast majority of HP laptop users, this is likely to be the most convenient method of capturing actions on your screen. In addition, they will not have to spend time searching for and installing any third-party software, and all of the video clips that were shot will be stored on your smartphone instantly. Nevertheless, since this recorder may only be used to capture the content of an application, it is not as adaptable as other recorders.
You may record anyplace on the PC screen with whatever size recording window you like (including sound), and you can even schedule a recording to catch anything while you are gone from your computer... After recording, you may make notes on the recordings and upload them to YouTube right away, all from inside the program itself. It has the capability of creating scenes from a variety of diverse sources, such as window grabs, photos, text, browser window captures, and cameras, and combining them all into a single movie for later publication on the internet (yes, Twitch and YouTube support are included). Take a look at the steps listed below to discover how to correctly use them.

Steps to Use YouTube Live Streaming:
On the browser, enter youtube.com, or if you are on the smartphone, you will need to go to the YouTube app.
Step 1: Visit YouTube Live Streaming Page
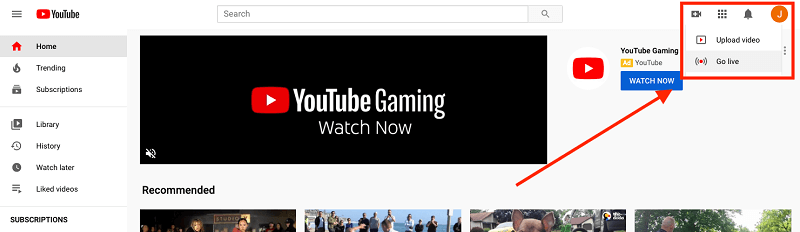
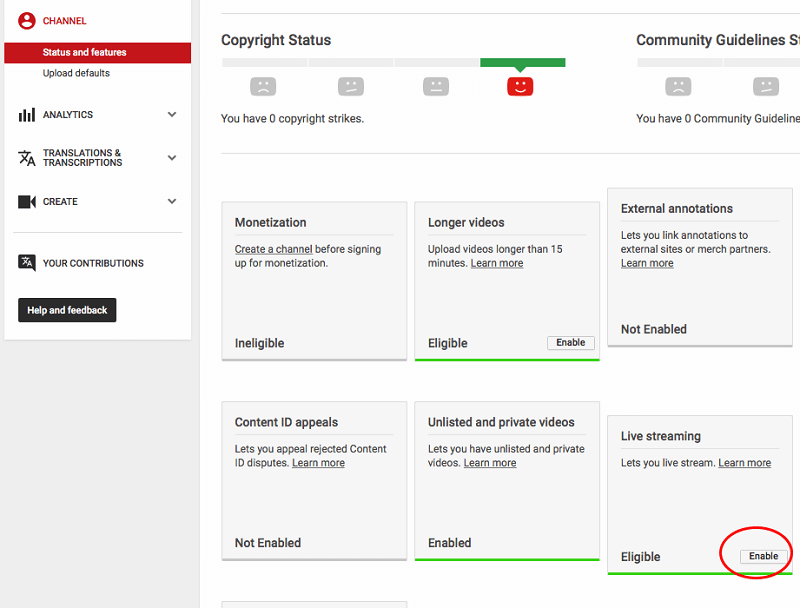
Right beside the search bar on the web page, you will find the option to Go Live option.
Go to the YouTube page on your website and click the Upload button to choose the Live Streaming option from the drop-down menu. Afterward, you may use the Events option to schedule a video for YouTube to broadcast.
Step 2: Enable Microphone
If you do not want to record the sound, click the Microphone icon to turn off the recording feature. Select Screenshare from the menu bar and then select the window you want to screen record on the HP laptop from the list.
Step 3: Start Screencasting and Recording
Find the option that says Live Streaming and then scroll to the Events tab. The Studio may ask you to verify the number to start the streaming.
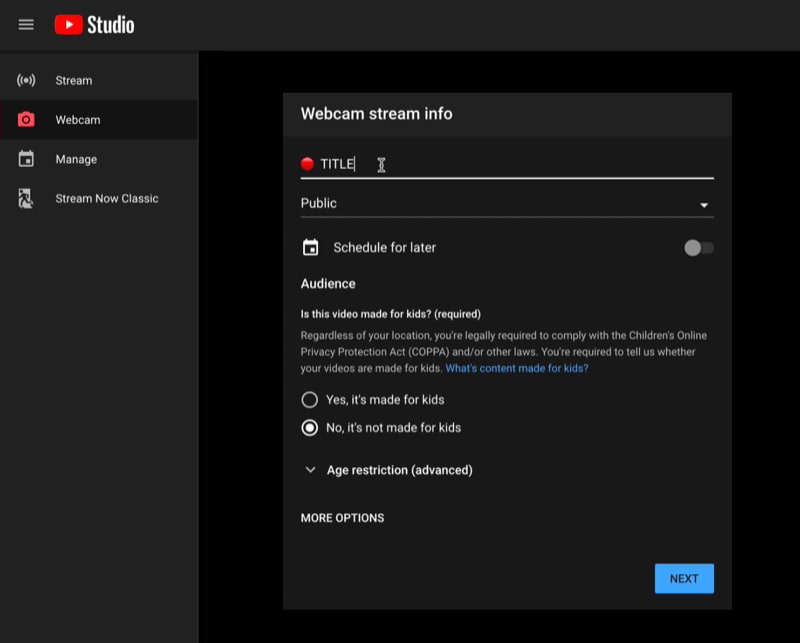
In the Events section, the user will need to click on Create Event and, after entering the title, change the privacy to Private.
Hit Proceed. On the Next window, you will see a Hangout on Air page, and if you only want to record the screen, you will need to press the microphone icon to mute yourself.
On the left-hand menu pane, you will need to select Screenshare. The next step will be to select the window that you want to capture.
After everything is set, click on Start Screenshare, and it will show your PC screen on the Hangouts page.
When you are ready, select Start Screenshare from the drop-down menu to project your screen onto the YouTube Hangouts interface. Then, to begin recording the video, click on the Start Broadcast button.
Step 4: Stop and Save Recording
When you are finished recording, you can select the Stop Broadcast option from the drop-down menu. The video has now been saved to your Channel dashboard for future reference. You have the option of saving the recording in MP4 format.
After you finish what you are recording, click on Stop Broadcast. It will automatically save your video to your Dashboard.

The Best Screen Recorder
Secure DownloadSecure DownloadConclusion
There are several different methods that you can use to record the screen of your HP laptop while simultaneously recording audio. Whichever method you choose, make certain that your audio input and output devices are correctly configured in the program's settings before proceeding. Then all you have to do is start recording and have fun!


