

Users usually want to tap the red record button and create a new audio/video recording without hassle. However, for content creators, educators, and presenters, this makes it difficult to edit the clips or mix and match audio tracks, music, and voiceovers.
That’s where separate audio/video recordings come in.
Today, we’ll show you how to record audio separately from video with three different tools. You’ll see how to record audio and video separately in OBS Studio and Wondershare DemoCreator. We’ll also explain how to sync audio and video or export the audio track from a recorded clip.
In this article
Why Record Audio and Video Separately?
Audio/video content has taken the internet by storm. From binge-watching TV shows before sleep to listening to podcasts while commuting to watching social media videos while eating, we spend much of our day consuming this content. Yet, its creation is a process users know little about.
Creating an exciting video that attracts and retains the viewer’s attention takes time, skill, and editing. The last one of these, editing, can be significantly simplified by using separate audio and video tracks and independently modifying them as such a practice has certain advantages like the following:
- Easier Editing – Multiple audio/video tracks allow for far greater control in the editing process;
- Higher Quality – Top-notch audio quality can’t be achieved with built-in smartphone and laptop mics. You’ll need third-party mics that require separate audio recordings;
- Exciting Content – Content creators of all types can add cool sound effects, music, and voiceovers to create exciting videos for the general public;
- Content Repurposing – Separate audio and video files allow you to mix and match clips multiple times and create numerous YouTube shorts, TikTok videos, or Instagram reels from one extensive clip.
Whatever your reason for learning how to record audio for video separately, it’s completely valid. Let’s explore what you’ll need and what software works best.
Things You Need to Record Audio and Video Separately
Before you can reap the benefits of separate audio and video recordings, you’ll need a few tools to help you record separate audio and video files. They include the following:
- Microphone – Most laptops have simple built-in microphones, while desktop users can use a smartphone or a third-party external mic;
- Recording Tool – An app like DemoCreator, OBS Studio, or any other audio and video recording tool will do;
- Editing App – You can use software such as Wondershare DemoCreator, Adobe Premiere Pro, DaVinci Resolve, etc.
With these three basic requirements checked, you’re ready to learn how to record audio for video separately and create exciting content that’ll leave your audience constantly wanting more.
Quick Comparison of Best Methods
Now that we know how to record audio for video separately, we can quickly compare the top three methods for creating separate audio and video files. This comparison will help you choose a tool that suits your needs.
| Method | Effectiveness | Ease of Use | Quality |
| DemoCreator | High – The tool is effortless to set up, offers many customization options, and has a built-in Video Editor. | High – Recording and editing take only a few taps. | ⭐⭐⭐⭐⭐ |
| OBS Studio | Medium – It’s a well-built, free app with fantastic recording and streaming features, but it requires getting used to. | Low – It requires a lot of setup. | ⭐⭐⭐⭐ |
| Smartphone | Medium – While you can easily record audio, you’ll need to manually transfer it to your PC and use a separate video editing tool. | High – You can record audio in just two clicks. | ⭐⭐⭐ |
How to Record Audio and Video Separately in Wondershare DemoCreator
A professional recording and editing tool like DemoCreator quickly checks off two of three requirements and effortlessly separates audio and video tracks. Its six recording modes and countless customization options allow you to record what and how you want.
Even better, audio and video quality will be incredibly high, as DemoCreator supports all popular audio formats and videos of up to 8K and 120FPS on Windows and macOS.
Using the app is a piece of cake:
Step 1: Launch the app, select Video Recorder, and select one of six recording modes. We’ll do Screen recordings as an example.

Step 2: Customize your recording settings by tapping the Select Screens button in the left part of the bar.
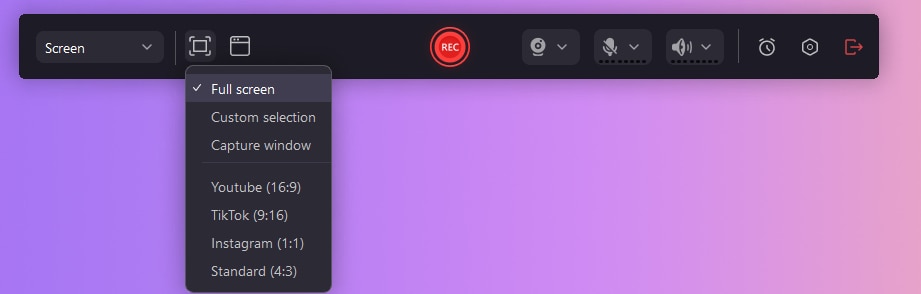
Step 3: Alternatively, click the Select Windows button to choose an open window and record it.

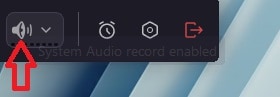
Step 5: In the right part of the bar, you can include a webcam recording and adjust the app to record microphone audio and system sounds. You can also tap the Sound button to turn off the system sound recording if you don’t want to record audio, and the same applies to the microphone.
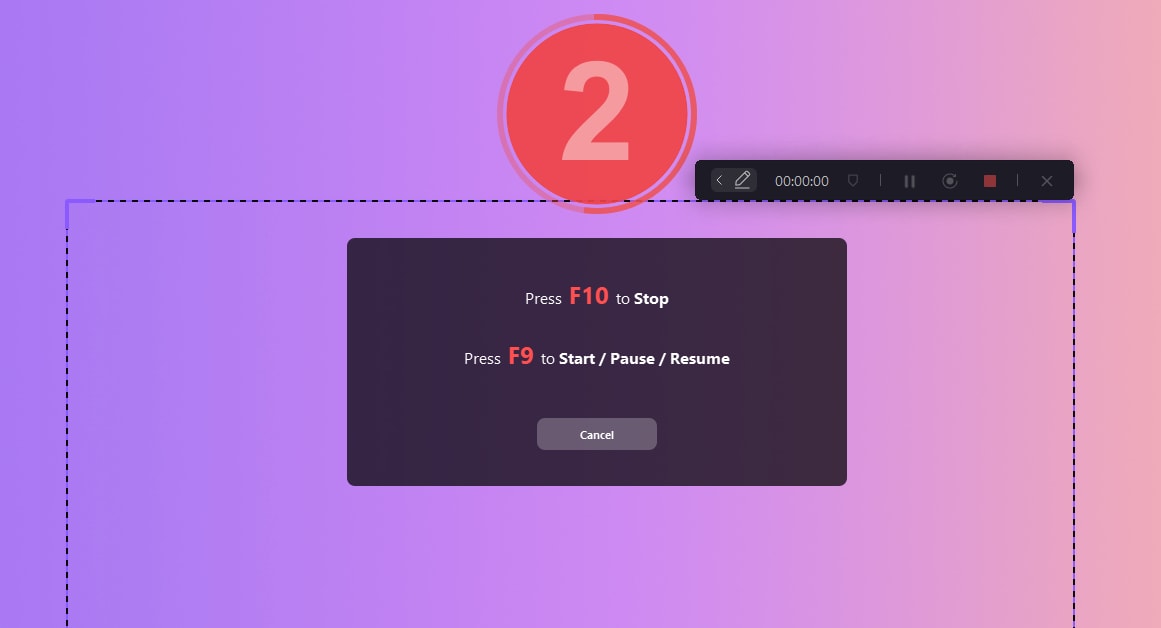
Step 6: When ready, click DemoCreator’s red REC button to start recording.
Step 7: Once done, tap the F10 button on your keyboard to stop recording. Alternatively, tap F9 to pause or resume the app’s recording.
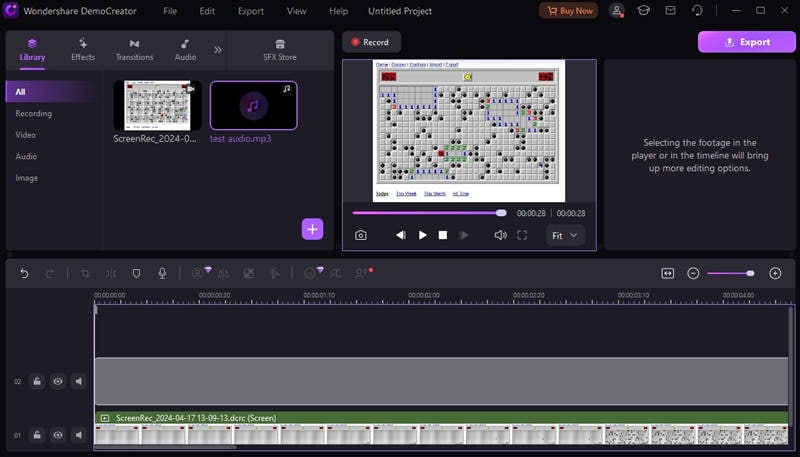
When you end a recording, DemoCreator automatically launches its Video Editor and imports the latest recording, regardless of what you captured. You can drag the recording from the app’s Tool Bar and drop it into the Timeline. From there, you can select the recording’s audio and video tracks and edit them to your liking with DemoCreator’s countless editing features.
How to Record Audio and Video Separately in OBS Studio
Another excellent recording app many streamers love and use daily is Open Broadcaster Software, commonly known as OBS Studio. This free, open-source, cross-platform tool is fantastic for screencasting and streaming on Windows, macOS, Linux, and even BSD. The app isn’t limited to just streaming; it can also help users create separate audio and video tracks.
Here’s a quick guide on how to record audio and video separately with OBS:
Step 1: Download, install, and launch OBS Studio on your computer.
Step 2: Head to File > Settings > Output.
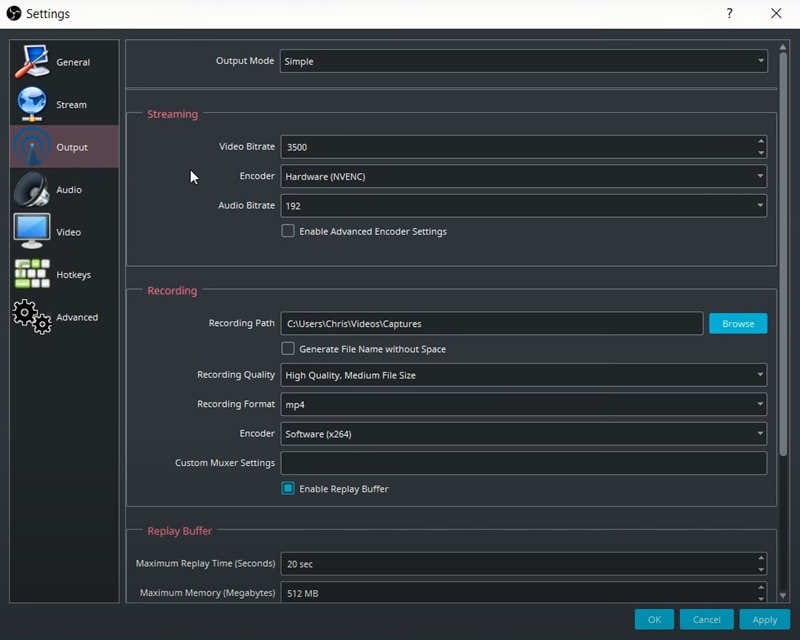
Step 3: Change the Output Mode from Simple to Advanced.
Step 4: Go to the Recording tab and change the Recording Format to MP4. (The default FLV format doesn’t support multiple audio tracks.)
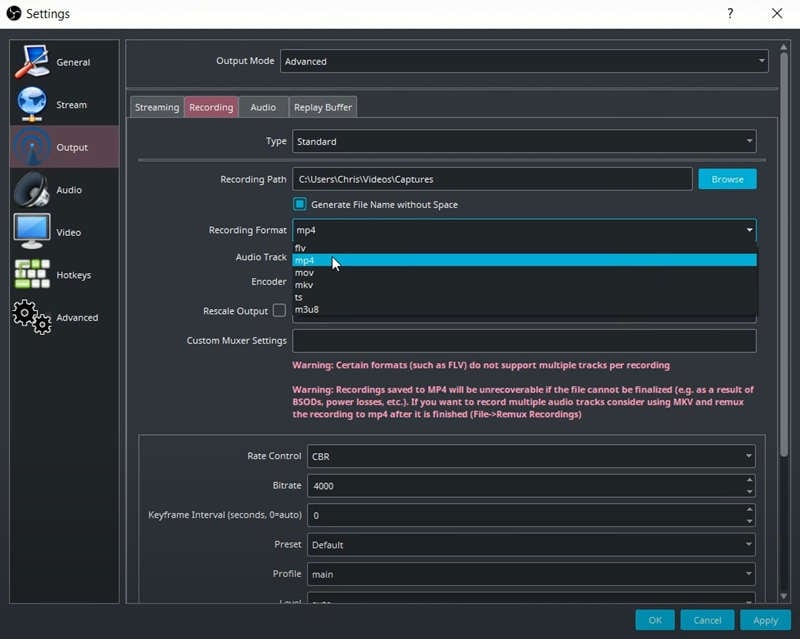
Step 5: Enable at least two Audio Tracks and tap Apply > OK.
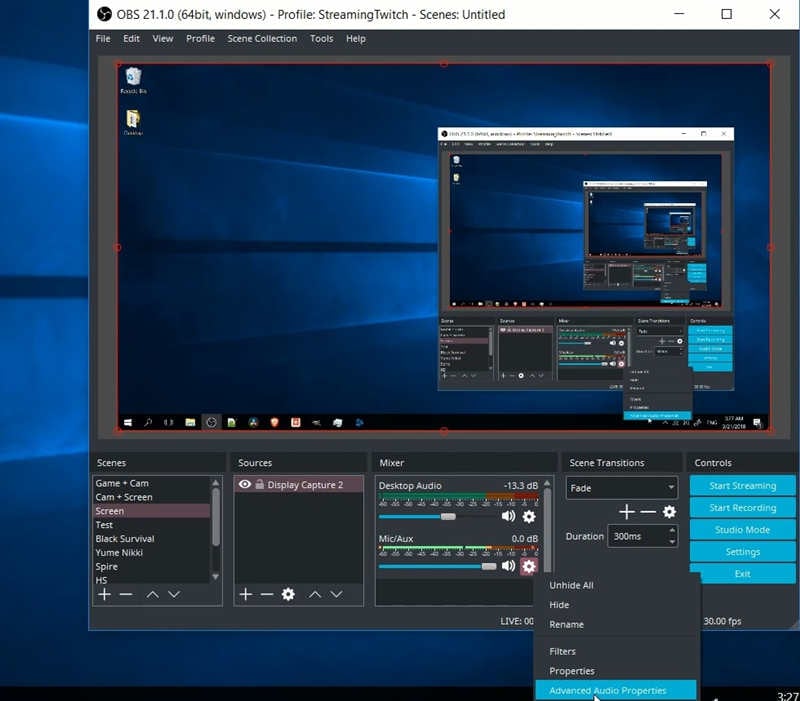
Step 6: Navigate to the Mixer menu and click the Settings wheel next to either Desktop Audio or Mic/Aux. Then, select the Advanced Audio Properties option.
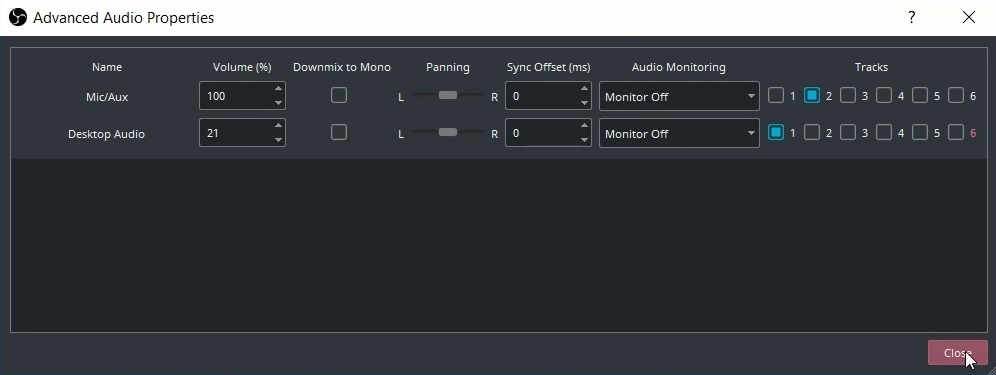
Step 7: Select one of the six tracks for Desktop Audio and another for Mic/Aux, and tap Close.
Once you set up OBS Studio like this, the app will create a single MP4 file after each recording. However, when you import the MP4 file into any video editing app, you’ll see it as multiple audio/video items. You can test this by making a screen recording with OBS Studio and using DemoCreator’s Video Editor.
When you import the recording into an editing app, you’ll have three audio/video tracks in the Timeline. One of these will be your screen recording video, while the other two are your Desktop and Microphone audio, which you can then edit, sync, or remove.
How to Record Audio if You Don’t Have a Microphone (Using Smartphone)
Not all PC users like laptops. Some prefer the raw power of desktop PCs with more powerful CPUs and GPUs. Yet, unlike laptops, most desktops don’t include a built-in microphone, making the recording impossible unless you buy a third-party mic.
However, most of us have a smartphone, whose built-in microphone often makes for a great alternative to spending money on a mic for a desktop. You can use its recording capabilities to create clear sound recordings and attach them to your video clips later. Here’s how:
Step 1: Open your phone’s Recorder app. Depending on your phone’s brand, it may also be called Voice Recorder or Voice Memos.
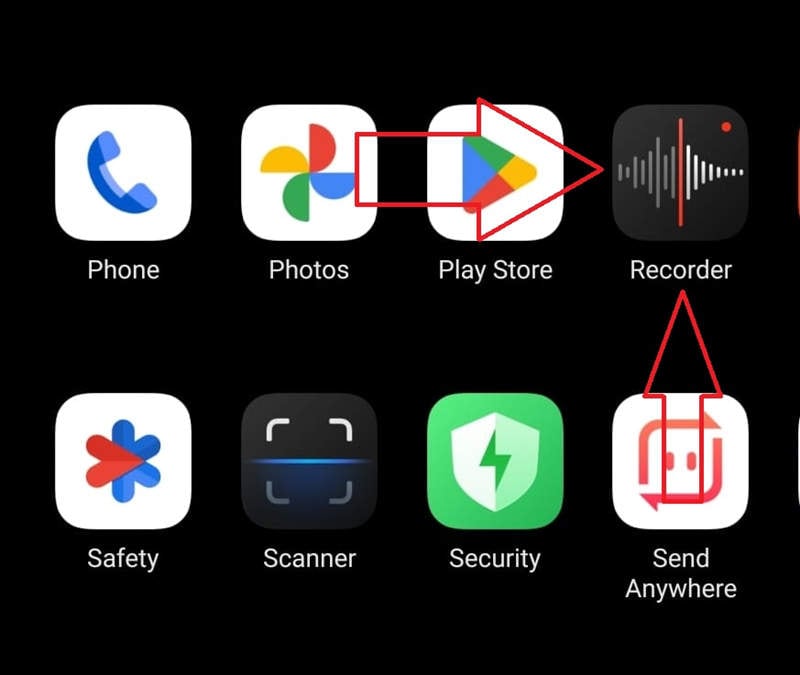
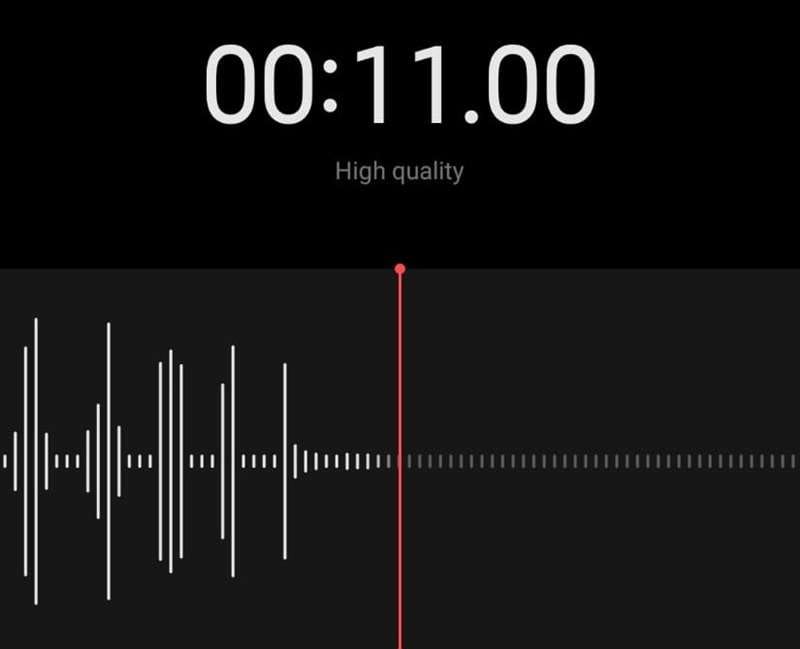
Step 2: Tap the (usually red) Record button to start a new audio recording.

Step 3: Record audio with your smartphone’s built-in microphone. When done, tap the End Recording button and save your audio file.
Step 4: Press and hold on the recording and tap Share to send it to your PC. Alternatively, you can transfer it onto the computer using a USB cable.
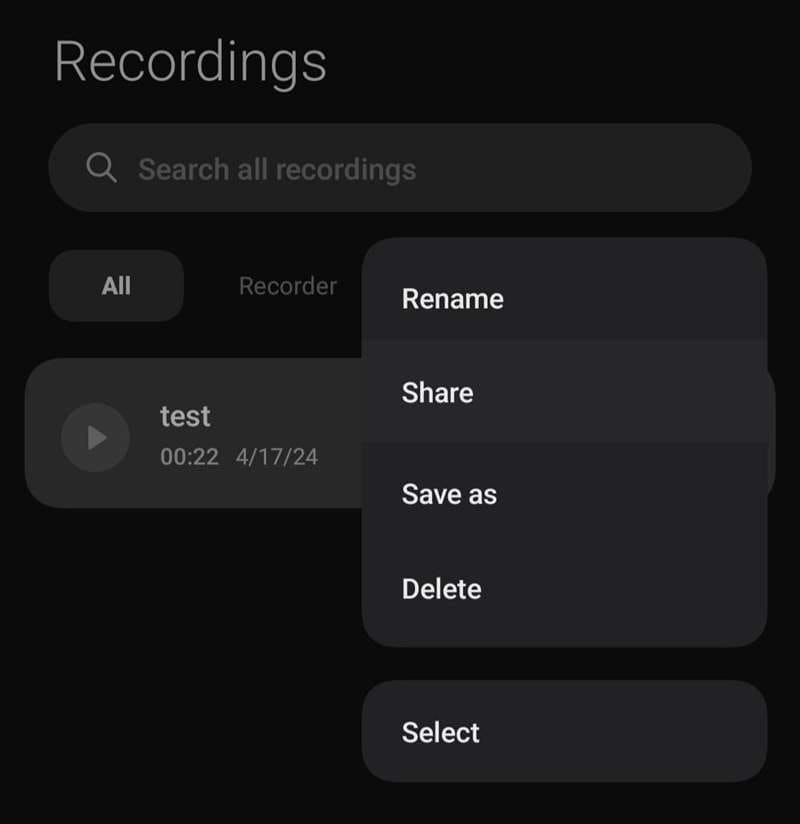
Once the recording is on your PC or Mac, you can trim it, edit it, and sync it to your video clips however you like. While there are countless audio editing tools, the easiest one to navigate is DemoCreator, so let’s dive right into it.
How to Sync Audio and Video in DemoCreator
Whether your audio track comes from the smartphone or you want to add music to your screen, camera, and game recordings, syncing audio and video tracks is a breeze with DemoCreator. Here’s what you’ll need to do:
Step 1: Launch the app on your PC or Mac.
Step 2: Import your video into the Tool Bar and then drag it into the Timeline.
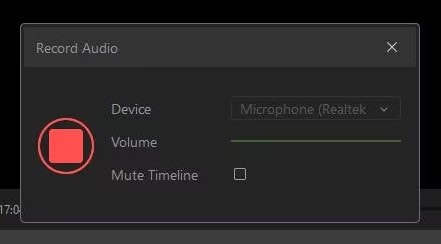
Step 3: If the video doesn’t have audio, tap the Voice button at the top of the Timeline to create a new audio recording and add it to your clip.

Step 4: Tap the big red REC button to record your system sounds or microphone audio.
Step 5: The recorded audio will be imported into the app’s Tool Bar. You can then drag and drop it into the Timeline and sync it with your video.
Note: DemoCreator also provides many audio effects to add to your clips. You can access them by tapping the Audio tab at the top of the Tool Bar, double-tapping an effect to preview it, and dragging these effects onto the Timeline to sync them with your clips.
How to Extract Audio From Video in DemoCreator
If you’ve already recorded a clip with audio and video, you can still separate these tracks by extracting the audio from the video in DemoCreator. This action is known as detaching, and here’s how you can use it for your clips:
Step 1: Launch Wondershare DemoCreator on your computer.
Step 2: Import the clip into the Tool Bar and then drag it into the app’s Timeline.
Step 3: Right-click the clip in the Timeline and select the Audio Detach option.
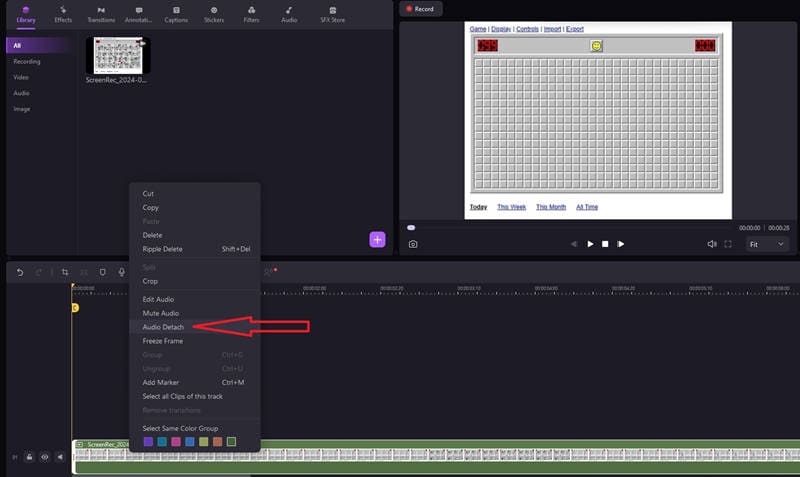
Step 4: If you don’t need the audio track, right-click the newly detached audio file in the Timeline and tap Delete.
Of course, you can also select the audio file and navigate to DemoCreator’s Properties Panel on the right to apply any of the app’s audio editing features.
- Record customized screens with audio and edit them in different tracks.
- Capture gaming videos, tutorials, and presentations and then edit them in one tool.
- Built-in unlimited editing templates, special effects, and other sources.
- Supported export to MP4, MOV, MKV, GIF, and other formats.

Conclusion
Learning how to record audio and video separately is a skill that can be useful for content creators, video editors, business people, and educators. It gives users far greater control during the editing process, allowing them to mix and match audio tracks, create exciting content with multiple songs and sound effects, and repurpose a single video for various platforms.
While you can teach yourself how to record audio separately from video in many recording and editing suites, we’ve covered the three best methods: Wondershare DemoCreator, OBS Studio, and smartphones.
After all, gamers and streamers love the open-source OBS, so we had to show you how to record audio and video separately in OBS Studio. At the same time, a smartphone provides an excellent free method of recording audio separately from video.
However, Wondershare DemoCreator is undoubtedly the top choice among the three. It allows users to mix and match settings with its six recording modes, effortlessly record audio, webcam, and screen, and edit these recordings in its built-in Video Editor. It’s available for Windows and macOS, making it an indispensable tool for all your recording and editing needs, including separate audio and video tracks.


