Are you someone who loves playing PS4 and wants to show off your skills? Well, the thing is, you need to know how to record ps4 gameplay smoothly, right? If so, you're in the right place! Join us as we examine the simplest and most effective methods for capturing your PS4 gameplay. So what are you waiting for? Let's dive in!
In this article
Part 1: How to Record PS4 Gameplay Directly?
You can directly capture PS4 gameplay on the console itself. But you must be careful in this part as you will do this manually. To avoid any mistakes, follow these procedures:
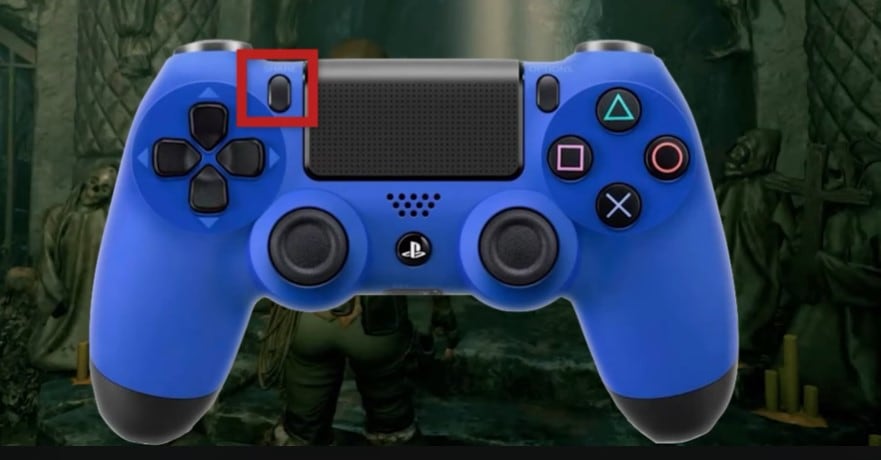
Step 1 Double-press the sharing button on your controller.
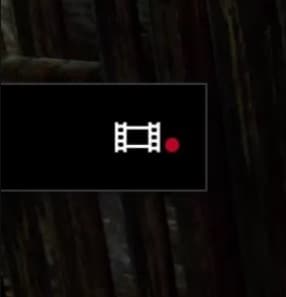
A small recording symbol will pop up on the left side of your screen.
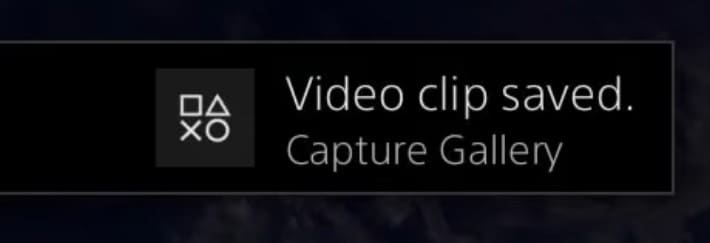
Step 2 To stop recording, double-press the sharing button again. After that, another symbol will pop up that indicates your recorded PS4 gameplay has been captured.
Advanced Tips for Better Recording:
Here are some advanced tips that can surely help you make a better recording. So please follow and consider what is mentioned below.
- 💻 Set Resolution and Frame Rate. Go to PS4 settings by pressing the "Settings" button on the home screen. Then, go to "System" and look for "Video Output Settings" to find the "Resolution." After that, choose the highest available resolution (1080p or 720p) for better video quality. Similarly, adjust the "Frame Rate" option to select the highest frame rate supported by your game and recording preferences. Higher resolutions and frame rates result in smoother and clearer gameplay recordings.
- 💾 Manage Storage Space. PS4 has limited internal storage, so managing your gameplay recordings efficiently. Navigate to the "Capture Gallery" from the home screen, select the recordings you no longer need, and delete them to free up space. Alternatively, transfer recordings to an external USB storage device for long-term storage.
- 🔗 Customize Share Settings. Utilize the "Share" button on your PS4 controller to access Share settings. From here, you can customize recording options to enhance your gameplay captures. Enable microphone audio and camera overlay to add commentary and face cam footage to your recordings.
- 🎬 Use Editing Software. While PS4 offers basic editing tools, consider using external video editing software. This can give you more advanced editing capabilities. Transfer your recorded gameplay footage to a computer and use reliable software to add effects to your recordings. Editing software allows you to create professional-looking gameplay videos.
Part 2: How to Record PS4 Gameplay on PC?
If you ask if capturing PS4 gameplay directly on your PC is possible, the answer is "yes." And did you know? Unlike capturing gameplay directly on the console, recording on your PC offers several benefits. Firstly, it provides easy access to the recorded files, allowing you to conveniently manage and edit them. Secondly, sharing your gameplay with others on social media or the internet becomes much simpler from your PC. Here's how it works:
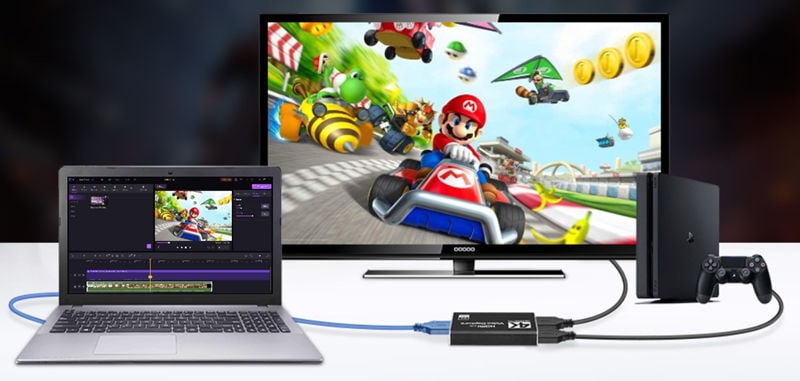
Step 1 Begin by connecting one HDMI cable end to the game capture device (in port) and the other to your PS4. This establishes the connection between your PC and the capture device, enabling your PC to capture gameplay.
If you want a good capture card, try Elgato Game Capture HD60 S. AVerMedia Live Gamer Portable 2 Plus and Razer Ripsaw HD are also great options for top-notch streaming and recording.
Step 2 Next, take the HDMI cable provided with your PS4 and insert one end into the HDMI out port and the other end into your TV.
Step 3 After that, connect one end of your data or USB cable to the capture device and the other to your laptop. With the hardware setup complete, you can start recording your PS4 gameplay.
Like this one:
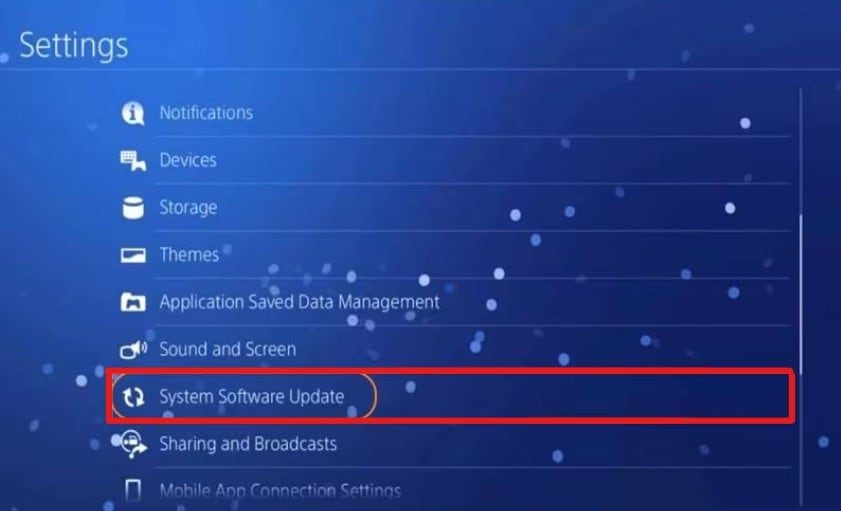
Step 4 Before recording your gameplay, ensure your PS4 settings are current and up-to-date. Simply power your PS4, turn on your TV, and navigate to the "Settings" menu. Once there, go to "System Software Update.”
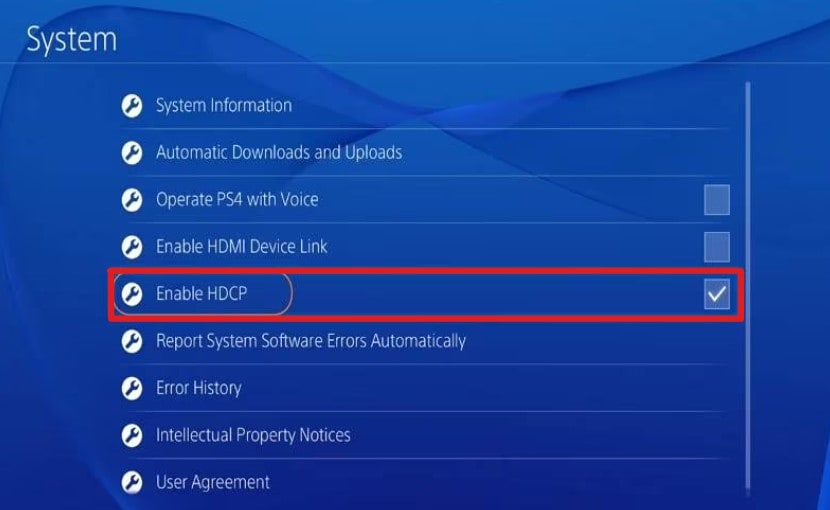
Step 5 You need to know that the Enable HDCP function is the potential obstacle to capturing PS4 gameplay. To resolve this, click "Settings," navigate to "System," and turn off this function.
Once done, you're all set to start recording your video. To do this, you need a recording tool to capture PS4 gameplay.
How to Record PS4 Gameplay via Wondershare DemoCreator
Looking for an effective PS4 screen recorder is a crucial task for you. But this article helps you choose what’s right and best. Wondershare DemoCreator is the perfect tool if you are looking for a recorder that can give you a high chance of cool output. You can capture every detail in 4K/8K quality with 120 FPS and a long recording time. If you want to know how easy DemoCreator is in terms of your PS4 gameplay, here’s how:
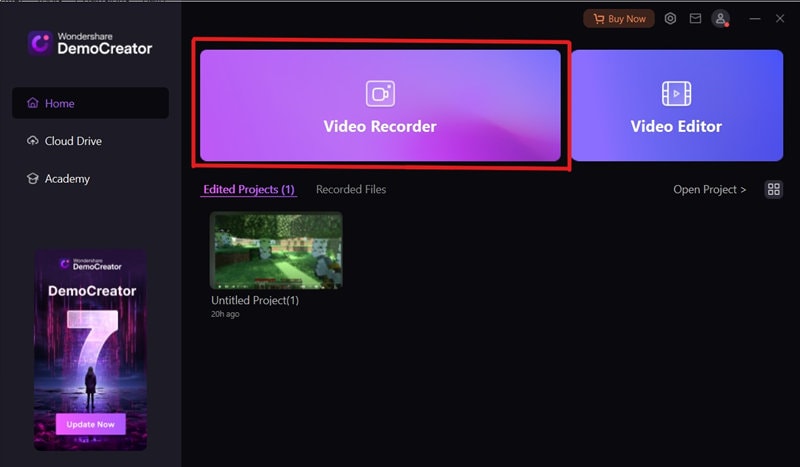
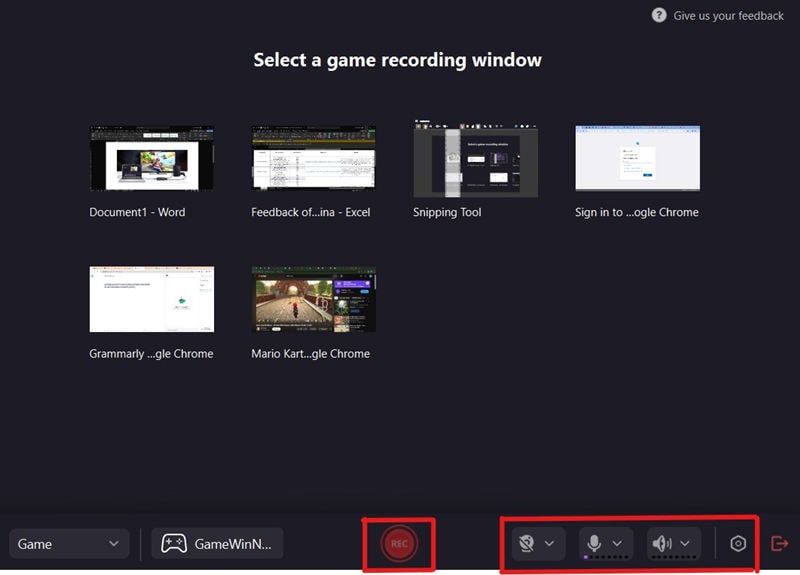
Step 1. Get Wondershare DemoCreator and launch. Afterward, go to the “Video Recorder” to capture PS4 gameplay.
Step 2. Select “Game” as a way to record your PS4 gameplay.
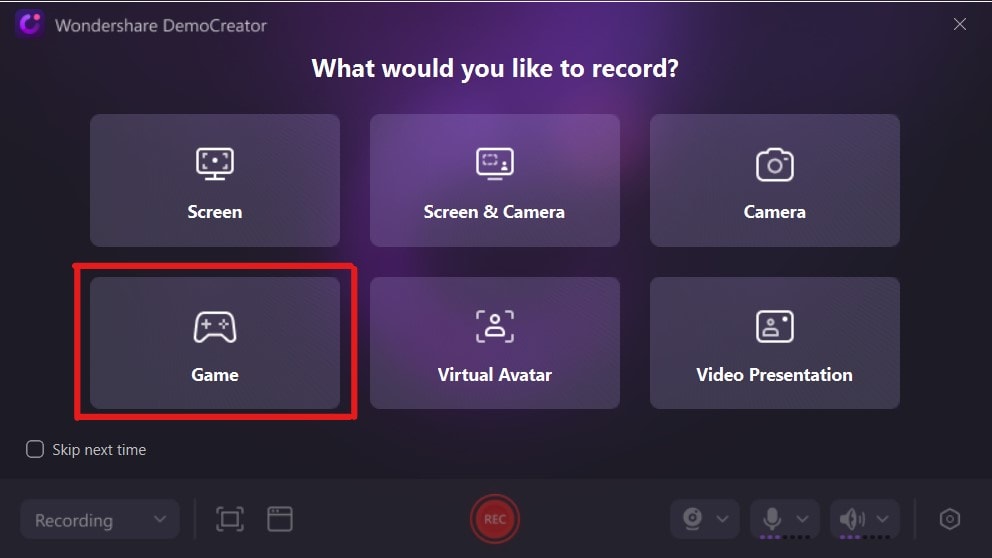
Step 3. After that, DemoCreator will ask you what windows you want to record. Also, you can customize the webcam, microphone, and your audio. Then click the record button to start.
That’s not all; if you want to make your captured PS4 gameplay more attractive or plan to share this video with others, you can do some editing. Wondershare DemoCreator also offers Video Editor features to make your recorded video more engaging.
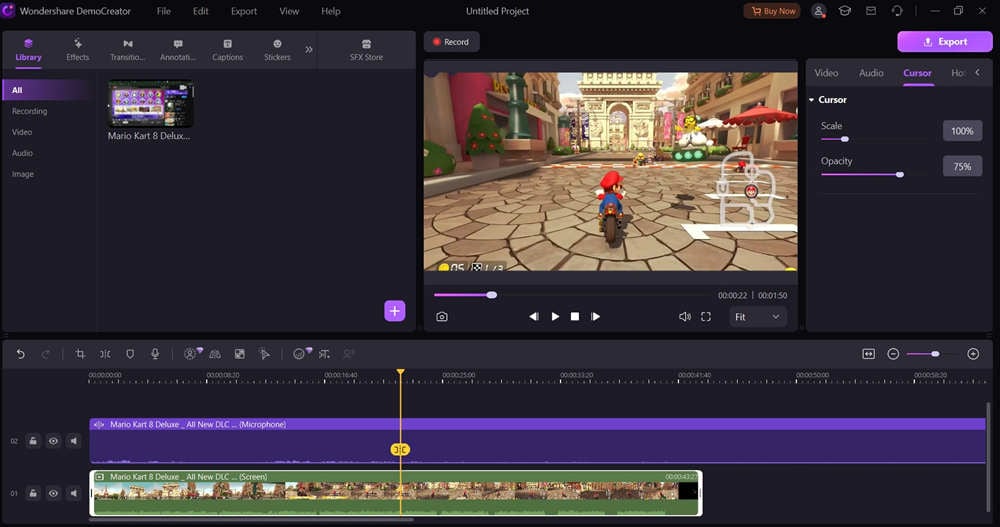
- Record customized screens with audio and edit them in different tracks.
- Capture gaming videos, tutorials, and presentations and then edit them in one tool.
- Built-in unlimited editing templates, special effects, and other sources.
- Supported export to MP4, MOV, MKV, GIF, and other formats.

Part 3: Conclusion
This article has provided valuable insights into capturing PS4 gameplay effortlessly. From direct console recording to PC setups, we've covered it all. Also, don't forget Wondershare DemoCreator as a powerful tool for recording and editing gameplay. We are excited for your high success and take your gaming content to the next level!


