Valorant gamers, gather around! All Valorant enthusiasts have had some crucial moments during their gameplay that they wanted to capture and share with their fellow players. How do they record their gameplay? They use clipping software for Valorant. The question is, which solution should you choose?
This review will focus on the aces of the Valorant clipping software world, the top tools for recording your gameplay. They all have robust features and capabilities that can capture everything you set your mind to.
In this article
Why Is Clipping Software Valuable for Valorant Players?
Using clipping software for Valorant can bring numerous benefits. Here are the most prevalent reasons players choose these solutions and use them while playing their favorite game:
- Analysis and review – Players can review their clips and determine which elements to improve during gameplay. They’ll notice the mistakes and effectively work on honing their skills.
- Content creation – Some players want to share their gaming prowess with the world, so they use clipping software. It can help record high-quality, market-ready videos.
- Troubleshooting – Many Valorant players use clipping tools to capture and report problems to the customer support team. For instance, if an item doesn’t work how it should, players can record their experience as proof.
- Creating memories – One of the most common reasons Valorant gamers use clipping tools is to save their favorite gameplay moments.
Comparison of the Best Valorant Clipping Software Solutions
In this post, we picked the top 8 Valorant clipping software for you. Before we go into detail about these tools, we present all the differences between them, if you’re unsure which tool to select, check out the table below.
| Valorant clipping software |
Recording Quality |
Easy-of-use | Editing features |
Price | Sharing features |
| Wondershare Democreator | 1080p | Easy | ✔️ | Cross-platform quarterly plan – $29.99 a month Cross-platform yearly plan – $59.99. Perpetual plan – $75 |
✔️ |
| Gazoom | 1080p | Easy | ✔️ | Free | ✔️ |
| Medal | 4K | Medium | ✔️ | $9.99 a month | ✔️ |
| ShadowPlay | 1440p | Easy | ❌ | Free | ✔️ |
| Action! | Up to 4K | Medium | ❌ | $24.99 | ✔️ |
| OBS Studio | 1080p | Easy | ✔️ | Free | ✔️ |
| Xbox Game Bar | 1080p | Easy | ✔️ | Free | ❌ |
| Powder | 1080p | Medium | ✔️ | $19.99 a month | ✔️ |
Top Valorant Clipping Software of 2024
Below is a list of the best Valorant clipping software solutions to help you select your ideal tool.
1.Wondershare DemoCreator
Best for: recording high-quality Valorant clips and post-production editing
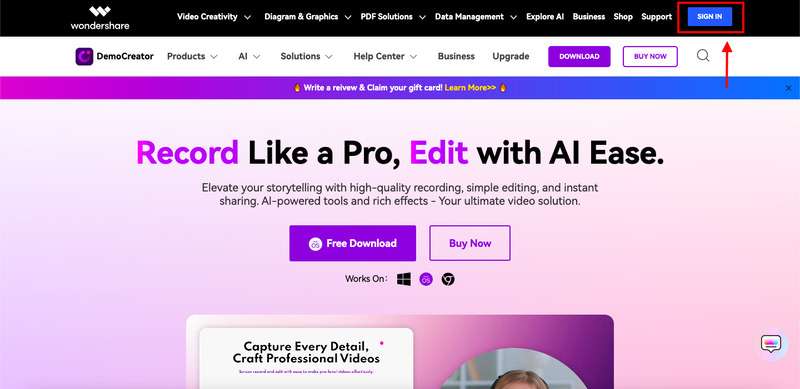
Wondershare DemoCreator is the most advanced recording and editing tool on the market. This all-in-one solution lets you record videos up to 8K, making it ideal for high-quality content. You can also edit your videos afterward to master the art of clipping and create professional results.
Key Features
Some of the most prominent Wondershare DemoCreator features include:
- Quick screen area selection
- Up to 4K quality and 120 FPS
- Multi-track recording (video, audio, and webcam)
- On-screen annotations
- Scheduled recording
Pros and Cons
How to Use It
Once you download the tool from the official source, follow this guide to make Valorant clips:
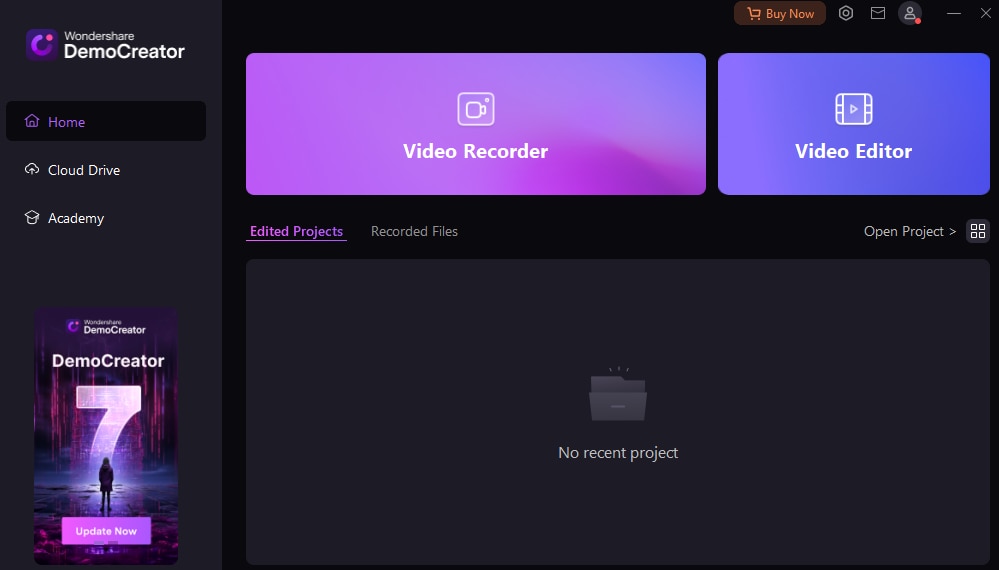
Step 1: Open Wondershare DemoCreator and click the Video Recorder.
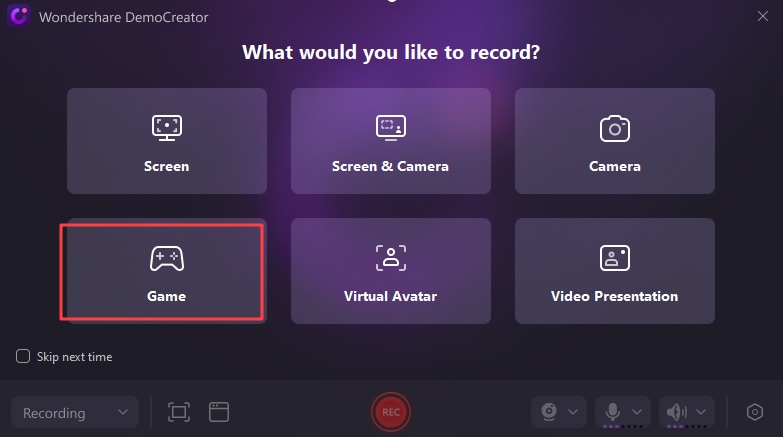
Step 2: Choose the Game recording mode from the available options.
Step 3: Set your recording preferences.

Step 4: Click the REC button or the F9 key to start recording.
Step 5: Press F9 or F10 to stop recording.

2.Gazoom

Best for: low-impact capturing and free cloud storage
Gazoom can help all gamers get the most out of their experiences. The tool is so intuitive that anyone can use it without expertise in the Valorant clipping field. The best aspect of this software is that you can share your clips directly from the platform in just a few seconds.
Key Features
Here are some of Gazoom’s top features:
- Video-on-demand reviews
- Cloud storage
- One-click social media sharing
Pros and Cons
How to Use It
Here’s how to use Gazoom to record your gameplay:
Step 1: Open Gazoom and click the Valorant icon in the top bar.

Step 2: Select your recording preferences, such as the FPS and video quality, and enable the microphone (if you wish to record your voice).
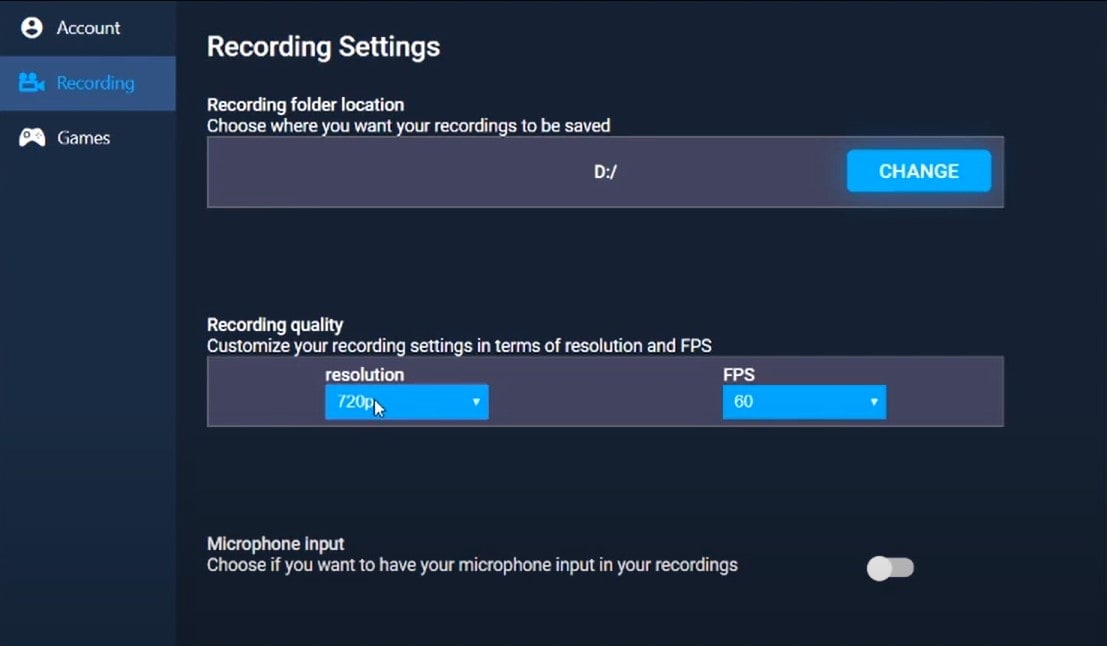
Once you start playing the game, the program will automatically start recording.
3.Medal

Best for: recording Valorant clips without dropping frames
Medal is another tool to help all gamers get the best experience. One of its most notable features is creating memes from your clips within the platform to make your creations go viral. Another excellent feature is tagging your friends within the program and giving them the appropriate credit.
Key Features
Medal offers the following features:
- Hotkey support
- One-click social media sharing
- Standard editing tools
Pros and Cons
How to Use It
Below is a guide to using Medal to record Valorant clips:
Step 1: Go to Settings > Recorder and select your recording preferences.

Step 2: Choose Valorant from the available options.
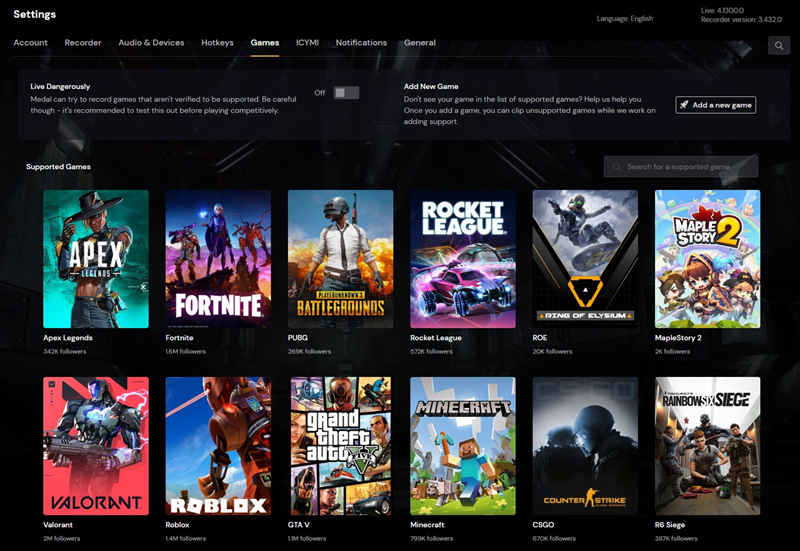
Step 3: Press the F8 key to start recording.
4.ShadowPlay
Best for: hardware acceleration recording
This Nvidia tool is one of the best clip recorders, capable of recording videos up to 8K. Although straightforward, it lets you replay, record, and screenshot your favorite Valorant gaming moments. It’s also one of the easiest-to-use clipping software solutions.
Key Features
Here’s a list of ShadowPlay’s most prominent features for recording Valorant clips:
- Game broadcasting
- Creating GIFs from clips
- Automatically saving clips
Pros and Cons
How to Use It
Here’s how to activate and use ShadowPlay’s recording and clipping feature:
Step 1: Launch Valorant and press the Alt + Z keys to open ShadowPlay.
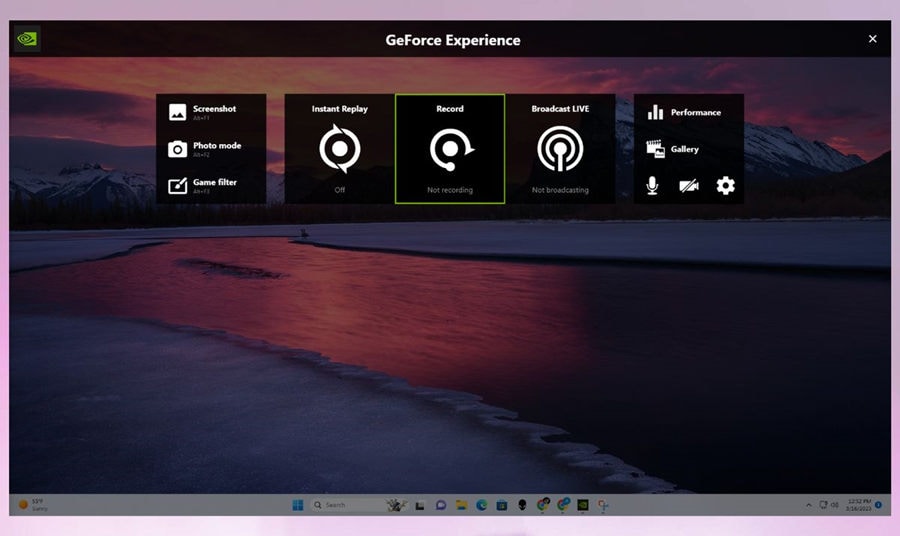
Step 2: Click Record > Start to begin recording.
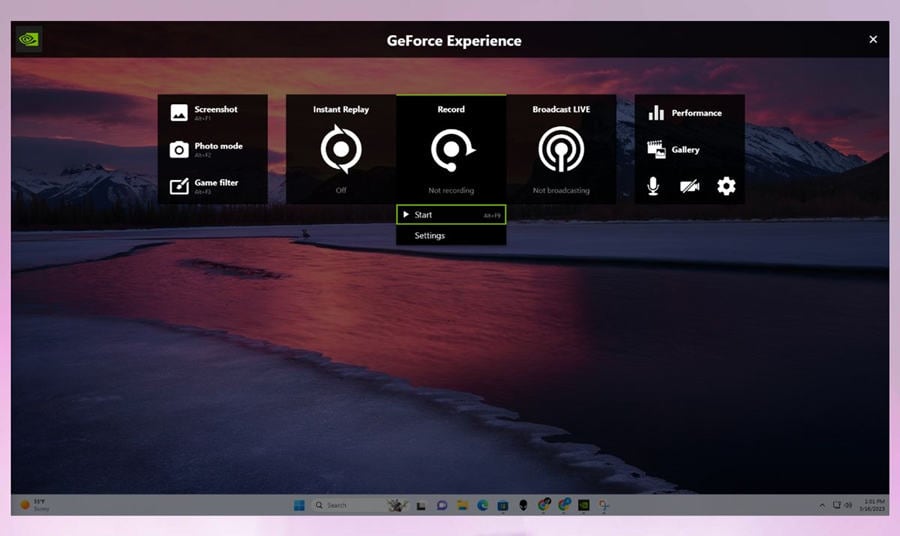
Step 3: You can also click Broadcast Live to live-stream your gameplay.
5.Action!
Best for: live audio commentary and displaying frame rates
Action! can fit all your game recording preferences and needs while being one of the most power-saving solutions on the market. The tool has a low CPU usage and will make your clips as small as possible to help you save storage. Moreover, it provides multiple features to support your Valorant gaming and help you focus on what matters: dominating the game.
Key Features
Some of Action’s best features include the following:
- Recordings up to 120 FPS
- Fast exporting to YouTube and Facebook
- Audio commentary
Pros and Cons
How to Use It
Here’s how to activate and use Action:
Step 1: Open the program and click Game under Video Capture.

Step 2: Run Valorant. The Action Bar should appear on the right side.

Step 3: Press F9 to start and stop recording.

6.OBS Studio
Best for: simple Valorant game recordings
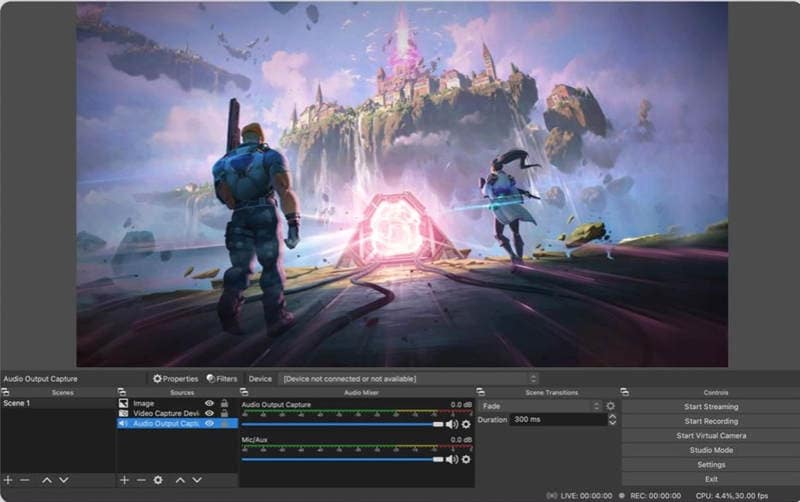
OBS Studio is a straightforward yet highly sophisticated recording tool. Although not feature-packed, it can still record high-quality videos and provide professional results. For instance, you can set up an unlimited number of screens to record or use an audio mixer to enhance the quality of the audio experience.
Key Features
Some of the features OBS Studio offers include:
- Configuration options for customizing the recordings
- Modular dock UI
- Streaming platform support and integration
Pros and Cons
How to Use It
Below is a guide to recording Valorant clips using OBS Studio:
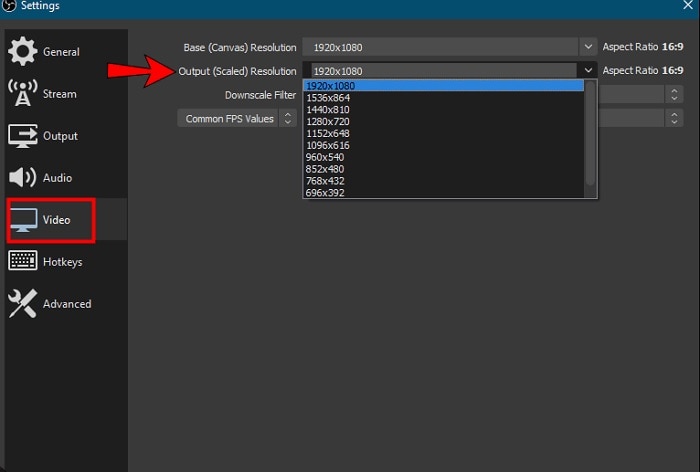
Step 1: Launch OBS Studio and go to Settings > Video to set your recording preferences.
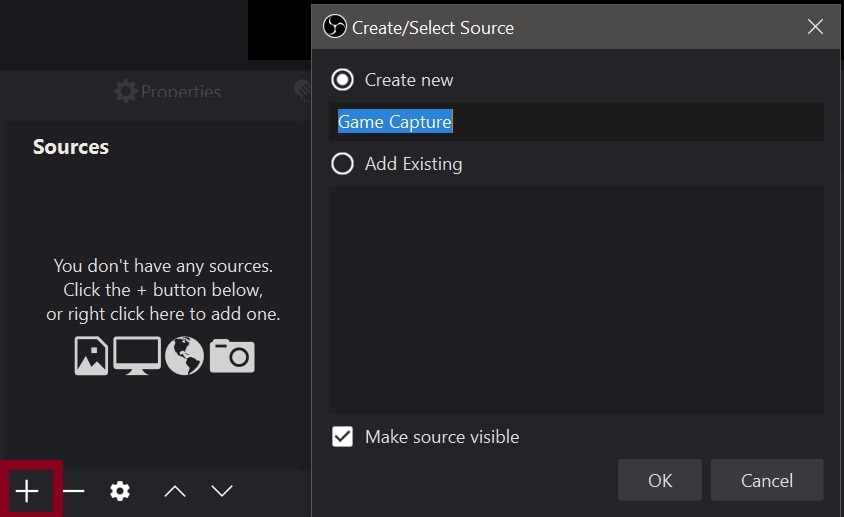
Step 2: Return to the main interface, click Sources, select Create New, name your capture, and hit OK.
Step 3: Click Start Recording.
7.Xbox Game Bar
Best for: built-in Valorant game recording
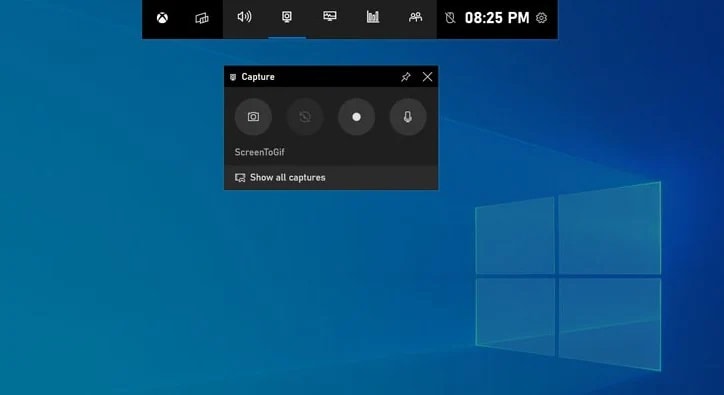
Xbox Game Bar is a built-in tool for Windows devices that lets you record your favorite gaming moments. It might be your ideal solution if you’re searching for a straightforward tool to record your Valorant gameplay but don’t want to overspend. It’s easy to use, but don’t expect too many features from this tool.
Key Features
The Xbox Game Bar has several features, including:
- PC performance tracking during gameplay
- Support for external audio recording
- Customizable recording settings
Pros and Cons
How to Use It
Here’s how to use the Xbox Game Bar:
Step 1: Launch Valorant and press the Windows + G keys to activate the Xbox Game Bar.
Step 2: Go to Settings > Capturing and set your recording preferences.
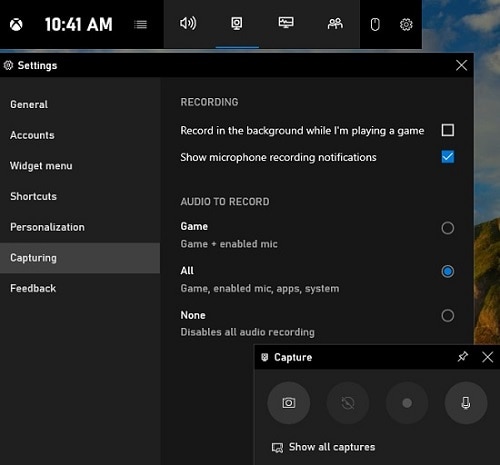
Step 3: Click the Record icon to start the process.
8.Powder

Best for: AI analytics and content sharing
Powder is a relatively new AI-powered recording and streaming tool. Although it has been on the market for only four years, it has some of the most advanced features you can find. For instance, you can transcribe your Valoran clips and categorize them according to your preferences.
Key Features
Some of the most notable features of Powder include:
- Standard editing tools
- Up to 4K video output
- Keyword search
Pros and Cons
How to Use It
Below is a guide to using Powder to record Valorant clips:
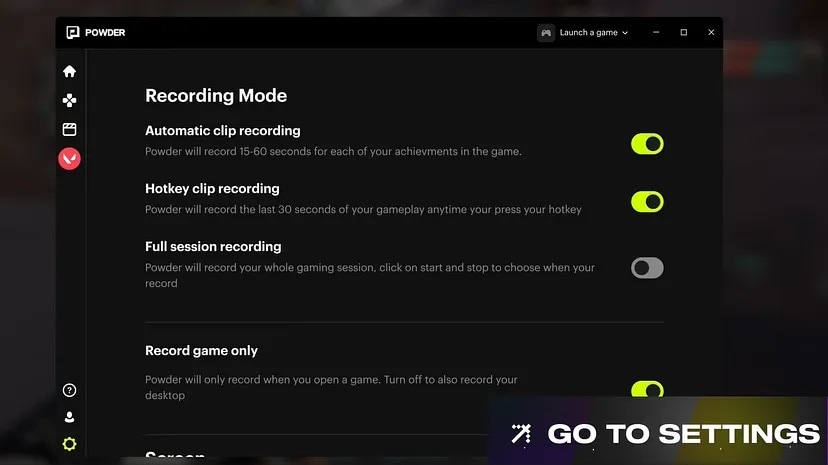
Step 1: Open Powder and click the Gear icon to set your recording preferences.
Step 2: Launch Valorant on your device.
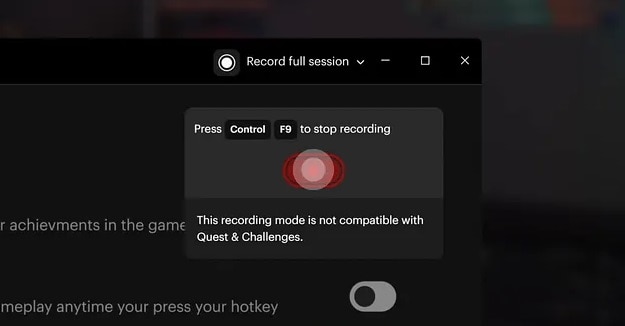
Step 3: Click the REC button to start recording.
- Record customized screens with audio and edit them in different tracks.
- Capture gaming videos, tutorials, and presentations and then edit them in one tool.
- Built-in unlimited editing templates, special effects, and other sources.
- Supported export to MP4, MOV, MKV, GIF, and other formats.

Conclusion
Valorant is among the most entertaining, engaging, and complex games on the market. Due to its difficulty, you may want to capture once-in-a-lifetime moves and share them with the gaming community. Our list of the best Valorant clipping software solutions will help you pick an ideal tool for professional results.
Check out Wondershare DemoCreator if you seek the most universal solution. This software has everything you need to record and edit your clips, including exclusive features for integrated game recording. Moreover, it can record videos up to 4K and 120 FPS, making it the most advanced Valorant clipping solution.


