

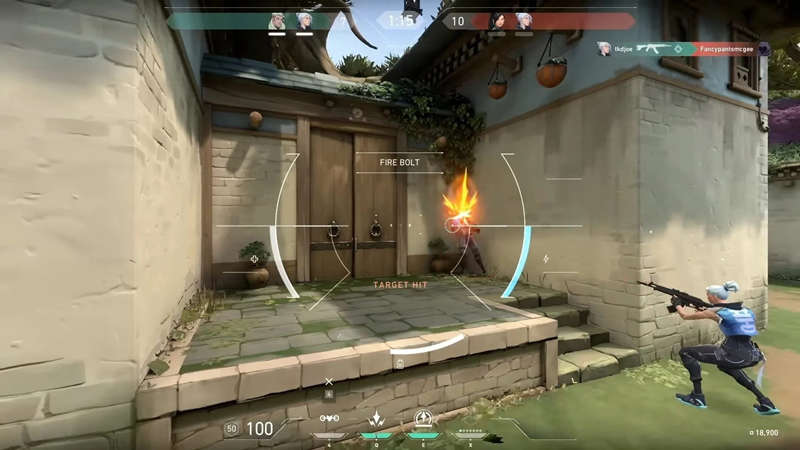
With over 14 million active players, Valorant is one of the most popular games to play today. This free-to-play shooter has everything you need – futuristic weapons, diverse characters, challenging objectives, and dynamic gameplay. So, it should come as no surprise that people like playing it just as much as watching it.
If you’re a half-decent player, you might just be able to record Valorant gameplay yourself and start attracting quite a following on platforms like YouTube and Twitch.
Learn the best way to record Valorant gameplay and how to make your videos stand out.
In this article
Different Methods for Recording Valorant Gameplay
To record gameplay in Valorant, you’ll have a few different options. The following are the best methods that will allow you to create engaging videos with the utmost ease.
Best Method: Record Valorant Gameplay Using Wondershare DemoCreator
One of the best methods to capture your Valorant gameplay is Wondershare DemoCreator. With 6 different recording modes, including a specialized game mode, it gives you full flexibility to capture and edit your videos perfectly.
It allows you to record your Valorant gameplay and your webcam and mic for as long as you want. As soon as you’re done recording, it takes you to its built-in editor, where you can clip your videos, make unique transitions, add visual and audio effects, etc.
It even has several AI-powered features that will help you clean up your audio and video, add transcriptions in a single click, and create your very own virtual avatar.
Thanks to its user-friendly interface, Wondershare DemoCreator enables you to seamlessly capture your Valorant gameplay in a few steps:
Step 1: Download and install Wondershare DemoCreator on your PC;
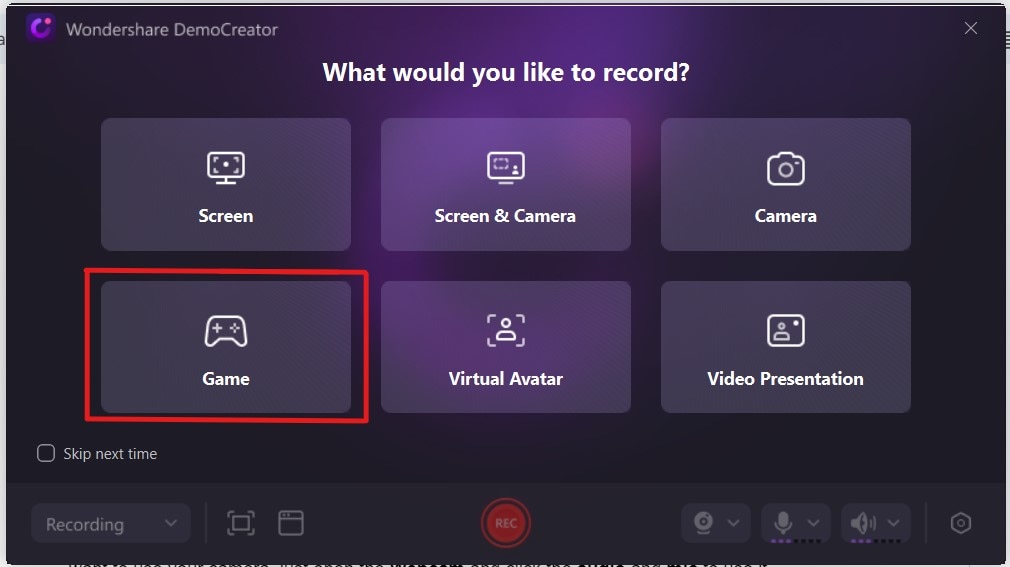
Step 2: Go to Video Recorder and select Game mode;
Step 3: Launch Valorant; And then select Valorant as the game to record in DemoCreator.
Step 5: Customize recording settings (add/remove webcam, mic, system audio, add other inputs, etc.);

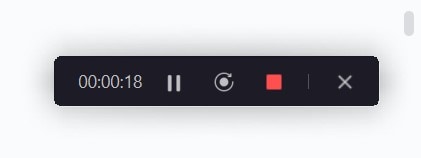
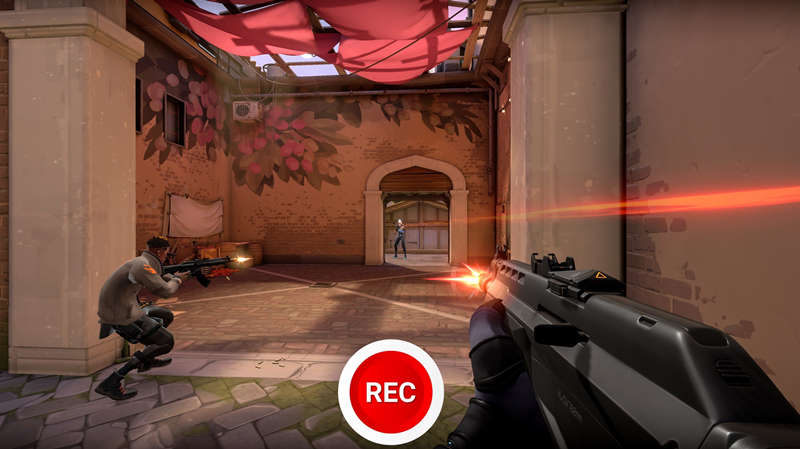
Step 6: Click the red REC button or press the F9 key to start recording;
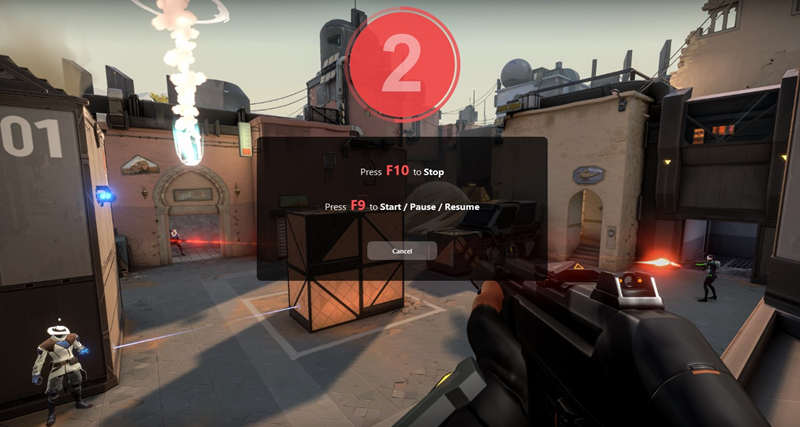
Step 7: Click the square END button or press the F10 key to stop recording.
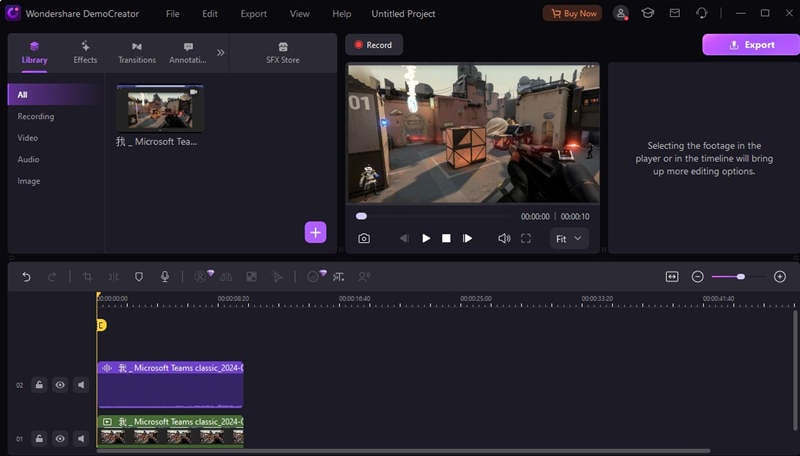
When you’re done recording your gameplay, Wondershare DemoCreator will take you straight to its editor, as mentioned. You can edit audio and video separately or together and take advantage of the dozens of powerful features to make your videos stand out.
Method 2: Record Valorant Gameplay Using Windows Built-in Game Bar
If you have a Windows 10 or 11 PC, you’ll have the built-in screen capture tool, the Xbox Game Bar. It comes pre-installed with your OS, so you don’t have to pay anything. Moreover, it has some pretty decent features and capabilities.
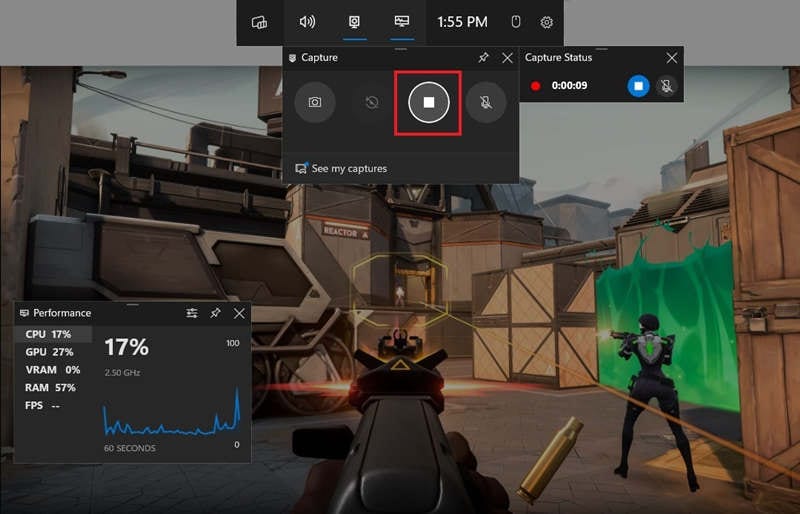
While gaming, you can take screenshots and video captures, chat with friends, and even gauge your computer’s performance (CPU, GPU, VRAM, RAM, FPS).
The problem is that it comes with some limitations. It has inconsistent performance, occasionally fails to capture your videos, and the interface isn’t always accessible during gameplay. So, it isn’t always the best way to record Valorant gameplay.
Still, it can be useful. Here’s how to record your gameplay with the built-in Game Bar:
Step 1: Start your game and press the Windows + G keys to open Game Bar;
Step 2: Click on the Microphone icon to enable/disable microphone recording;
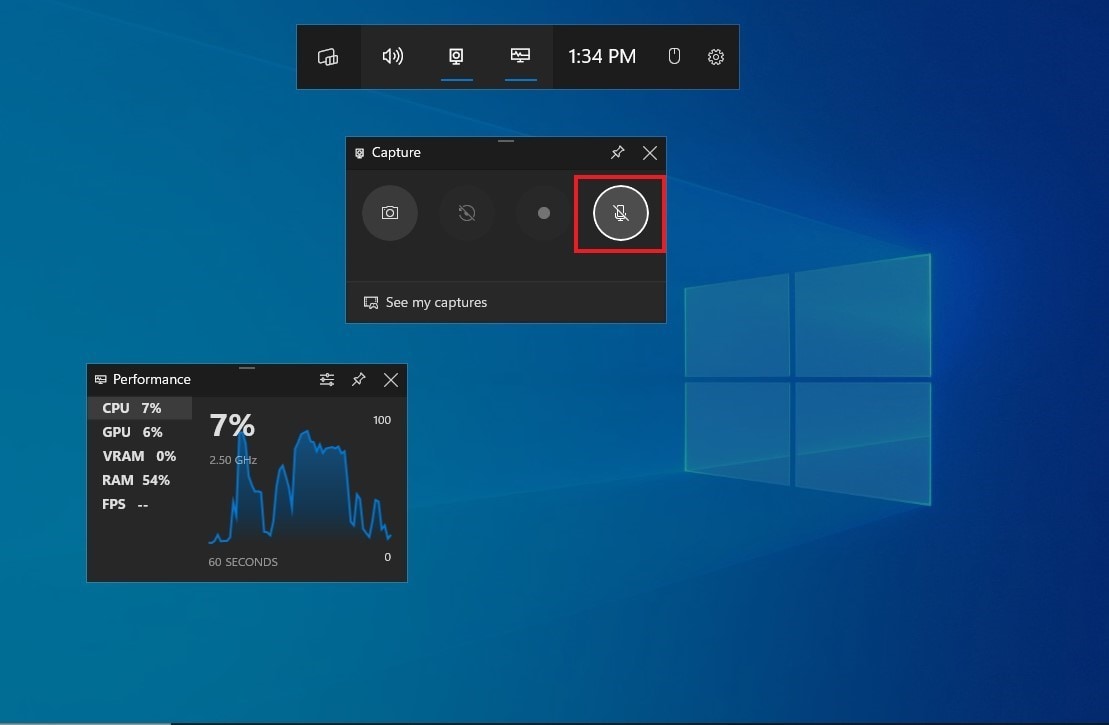
Step 3: Adjust system sound and other settings as needed;
Step 4: Click the circular Start Recording button or press Windows + Alt + R keys to start recording;
Step 5: Click the Stop Recording button or press Windows + Alt + R keys to stop recording.
When you’re done, you’ll get a pop-up notification telling you that your clip has been recorded. You can access it by going to This PC > Videos > Captures.
Other Tools You Can Use to Record Valorant Gameplay
#Using OBS Studio
Another option for recording your gameplay is OBS. It’s a free and open-source solution commonly used for live-streaming gaming videos. Though it can be somewhat overwhelming for beginners, it does come with a nice set of features that can make it a great recorder.
You can enjoy high-performance video and audio recording/mixing, scene creation, custom transitions, and more. What’s truly great about OBS is that you can fully customize almost all configurations and rearrange its entire layout to make it easier for you to navigate it.
To record gameplay with OBS, you’ll need to follow these steps:
Step 1: Download and launch OBS Studio;
Step 2: Go to Settings to adjust configurations;
Step 3: Launch Valorant;
Step 4: Go back to OBS and go to Game Capture option > Capture Specific Window > Valorant.exe;
Step 5: Click Start Recording to start recording.
Once you’re done, click Stop Recording. If needed, use your preferred video editing tool to perfect your content before publishing.
#Using FBX Game Recorder
Last but certainly not least, you can use the FBX Game Recorder. Fully optimized for gamers, it offers high-quality HD recordings that are ready for immediate streaming across different platforms.
It takes a bit of a toll on your computer resources but offers a great set of features in exchange. You can take screenshots, use hotkeys for instant clip creation, add GIFs and unique stickers to your videos, and more. What’s best, you can rely on it for recording both traditional PC and browser-based games.
To record your gameplay with FBX Game Recorder, follow these steps:
Step 1: Download FBX and create your account;
Step 2: Go to Settings > Capture > Game;
Step 3: Launch Valorant and press the Ctrl + F12 keys to start recording;
Step 4: Press the Ctrl + F12 keys to stop recording.
You’ll get a Saved message, and you’ll be able to access your video in the Recordings tab.
How to Pick the Right Valorant Game Game Recorder
Whether you want to become a gaming content creator or want to record your gameplay for personal use, you’ll need to ensure that you choose a suitable recorder for your needs. Some of the most critical factors you’ll want to consider include:
- Video quality – you’ll need a tool that can record at least up to 4K, though 8K is preferred;
- FPS – while 60FPS is acceptable, it’s better to go for 120FPS;
- Max recording length – your screen recorder will need to allow you to record for as long as you need to;
- Supported platforms – whether you want to post on YouTube, Twitch, TikTok, Facebook, or any platform in between, you’ll need a solution that enables you to do so quickly;
- Lag – ideally, your screen recorder should have minimal to no impact on your gameplay, ensuring there’s no lag while you’re capturing videos;
- Ease of use – user-friendly solutions that have an intuitive interface are much easier to master.
In addition to all of these factors, you’ll also want to consider the price. You don’t want to spend a fortune on a decent game recorder for Valorant. Look for powerful yet budget-friendly options.
Additional Tips for Recording Valorant Gameplay
While you don’t need much besides your game and a compatible Valorant screen recorder to start capturing your videos, there are a few things you can do to improve your content:
- Use good lighting – if you’re recording your webcam, make sure that you have excellent lighting in your room and that your face isn’t obscured;
- Invest in a good mic – if you’re adding your own commentary, ensure your audio is crisp and clear. DemoCreator can improve it with its AI denoiser, but it’s always easier to have good audio from the get-go;
- Use a capture card – this inexpensive device will reduce the strain on your PC while you’re recording video and audio and prevent unnecessary lag;
- Get a gaming PC – while expensive, a good gaming PC will ensure that your gameplay is smooth and that your videos are nothing short of perfect;
- Always edit your videos – unless you’re live streaming, you’ll always need to edit your videos. Spend time perfecting your audio, making good transitions, cutting out unnecessary segments, and more. Your audience will thank you for it.
The final tip is simply to enjoy yourself. Valorant is an excellent game with plenty of things to offer. So, have some fun and be true to yourself while recording your gameplay.
- Record customized screens with audio and edit them in different tracks.
- Capture gaming videos, tutorials, and presentations and then edit them in one tool.
- Built-in unlimited editing templates, special effects, and other sources.
- Supported export to MP4, MOV, MKV, GIF, and other formats.

Conclusion
Recording your Valorant gameplay for tutorials, game analysis, or simple fun can be a highly rewarding experience. With a good screen recorder like Wondershare DemoCreator, you’ll be able to capture videos with the utmost ease, perfect them, and enjoy yourself as you’re playing your favorite game.


