How to Record Audio on Google Slides

Google audio recorder has been one of the most requested features for many years now. Being one of the most useful features, Google slides were just missing this one thing. Several organizations and institutions will benefit from this advanced speech recognition, real-time speech processing, and AI, especially in schools.
They are now able to transcribe real-time recordings while speaking automatically. All you need to do is use a separate tool or app to record your audio and save it to Google Drive. Remember, the Google audio recorder is used to insert audio, not create them.
Hence, Google slides were already helping users out just perfectly as it's incredible at the same time a very simple tool. Still, as mentioned before, the only thing that's missing is Google slides record audio. Now, we have an option, but Google slides don't offer a recording option.
So what now? Well, that is exactly what the article is about! Here you are going to learn how to make your presentations lively with audio content. Apart from official presentations, if one can use audio to narrate a slideshow, and so on, it will be fascinating for students. So, what are you waiting for? Look into the following list and quickly create a mind-blowing presentation.
5 Ways to Record Audio on Google Slides
1. Use Wondershare DemoCreator - Most Recommended
Wondershare DemoCreator is a screen recording application that you can use to record HD videos very easily. It's the perfect software for those searching for screen recorder apps with audio, video editing, and screen recording features. The straightforward functions are just what you need to make your videos or audio content appealing and attractive.
Almost everyone puts a lot of effort to create a presentation. But most of them have to go through a lot of struggles and still cannot get most of their presentations. With the Google slides record audio feature, one can easily make quality presentations by adding audio.
 Secure DownloadSecure Download
Here's how to go about that:
Install Wondershare DemoCreator and register yourself. When your account is created, reopen the software. Click on "New Recording" and start recording.

Secure DownloadSecure DownloadSet your recording parameters, recording region, and audio setting, and make sure you are sitting in a noise-free zone. Remember, you need to turn both your webcam and microphone off to record a clear sound without external noises and visuals.
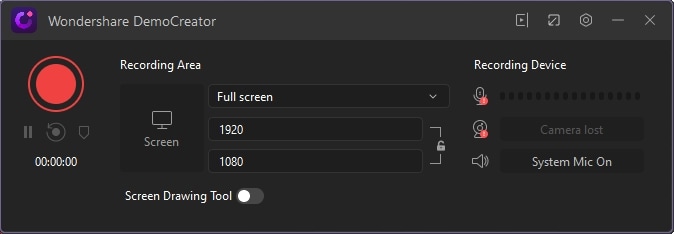
If you want to edit a pre-recorded audio file, then first change the default setting by clicking on the audio tab and then choose either capture or don't capture. Wondershare DemoCreator autosaves your audio file as soon as you finish recording something. You can export to MKV, GIF, MP4, MP3, MOV— any file format you want.
There is no option here to save your audio file directly to Google Drive, so you need to upload it to the drive.
Secure DownloadSecure Download2. ChromeMP3 Recorder from HablaCloud
ChromeMP3 Recorder is a web app from HablaCloud. Now, Web apps and websites are not similar. Web app means something that only runs on Chromebooks, not on any other Pcs are Macs. However, for a Chromebook user, the ChromeMP3 recorder is the perfect audio recorder for Google slides. It's a free voice recording app that simplifies the recording task magnificently.
Beam design for use with Google g suite and Chromebooks, ChromeMP3 Recorder left no space for complaining about quality. Apart from being the best recording app, ChromeMP3 Recorder also has a user-friendly interface and amazing features like fast forward, rewind, and playback of your recording.
ChromeMP3 Recorder records with high fidelity and allows you to encode your recording in mp3 format. So, if you want to use it to record audio for Google slides, then follow the simple steps written below:
- Step 1: First thing first, install the theChromeMP3 Recorder web app official site of HablaCloud.
- Step 2: Open the app, which Chromebook at the launcher, and get started.
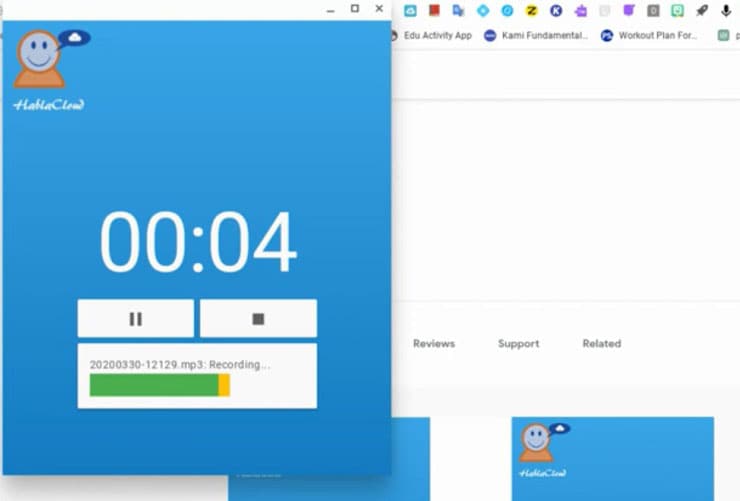
- Step 3: After reopening the app, click on the "red" button and start recording. You can simply click the browse button as per your need during the recording.
- Step 4: By clicking the stop button, finish recording.
- Step 5: Now the app will ask you where you are intended to save the MP3 file in your Google drive.
And just like that, your audio file will be directly saved in Google drive, wherever you want. You can swiftly name the file while saving it in Google drive; this way, it will be easier for you to finding it later. But if you are finding an AP that can provide you editing options along with the recording tool, then ChromeMP3 Recorder is not for you. It is just the best way to record high-quality audio and save it to Google drive.
3.Online Voice Recorder
This is a simple and convenient tool that you use online as well using a browser. With the microphone feature here, you can record any kind of voice and then opt for saving it that is in the MP3 format. Also, it's entirely free, and there are no hidden payments like activation fees or premium fees, etc.
From that, you can also change the microphone settings with the Adobe flash player tools. It is a completely secure app, with the guarantee that all of your recordings will only be accessible to you alone.
The fascinating part about this recorder is, it is able to detect silent fragments that too automatically right at the beginning and ending point of any recording. Game id deletes them so that you don't have to put extra effort into editing.
If you use an online voice recorder to record audio for Google slides, you can crop your recording and save only the section you need. Here's how you can record voice in an online voice recorder,
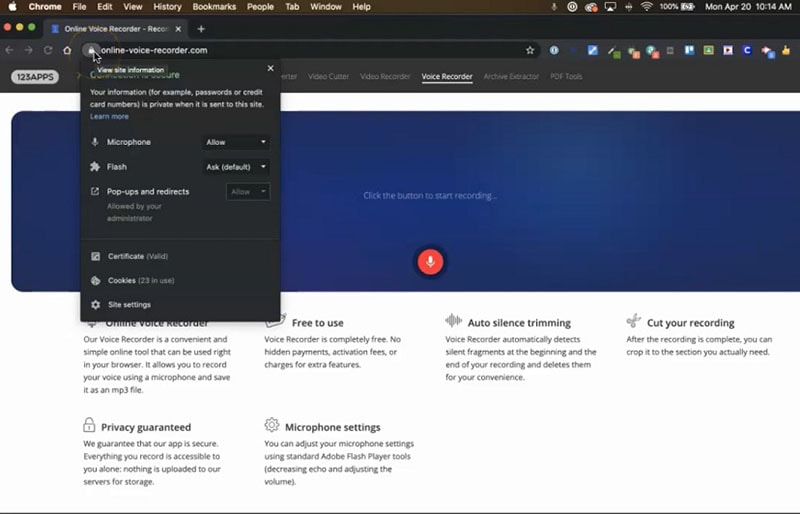
Step 1: Download an online voice recorder from its official site.
Step 2: You will see the mic button on the home screen. Click on that button and start recording. I will ask for your permission to use the microphone for the first time.
Step 3: Quickly click the stop button to complete the recording.
Step 4: Now you will be directed to a screen where you will be able to preview your voice recording.
Step 5: You can also cut the beginning and end of the audio to remove any extra date space for unnecessary recording.
Step 6: When you are done recording and editing, simply click on the save button, and the MP3 flat file will be downloaded to your device.
It is an online voice recorder so that you can use it on your own browser. But if you use Chromebook, then you can save the recorded file directly to your Google drive. All you need to do is change the “downloads” option by opting for Chromebook settings.
4. Beautiful Audio Editor
It's an in-browser audio editor that works with both Mozilla Firefox and Google Chrome. It is one of the easiest audio editor apps; a beautiful audio editor also offers recording features. There is a toolbar including features like effects. The app also offers different editing effects like a snip, copy, Pan, record, or flexibly fade volume. There are various formats available here to provide you convenience while saving a file.
Beautiful Audio Recorder might be one of the most useful tools to Google slides record audio. Still, being an experimental app, there is no guarantee that you will be able to edit or for a longer time without any interruption. It means, from time to time, the app may crash. But if your project is not over 45 minutes, you can click see will use the app to record or edit audio file and name. You will find the option to save your audio file directly in your Google drive.
Below you will find the steps of how to use a beautiful audio editor,
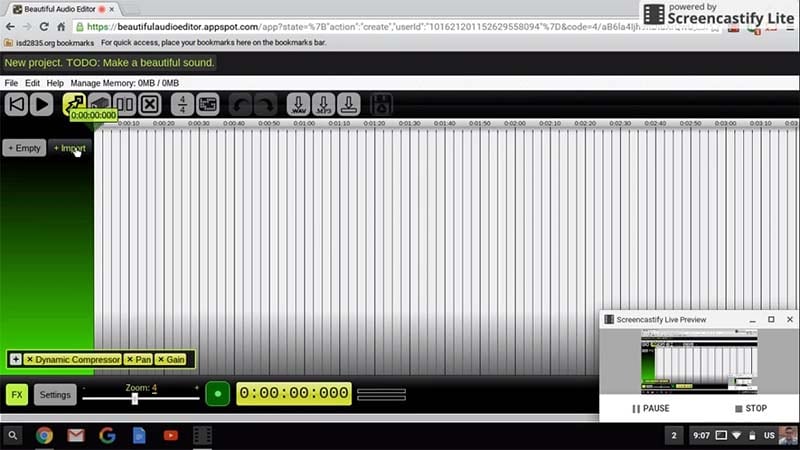
Step 1: Open the beautiful audio editor.
Step 2: Find a record button at the bottom of the screen and click on that to start recording. Don't forget to permit to use your microphone to record with the app for the first time.
Step 3: By clicking on the stop button, finish off the recording.
Step 4: Now the recorded audio file will be added to the editor.
Step 5: If you want to add any effects, you can use the toolbar or trim the audio, use the split section and remove section buttons on the toolbar's top.
Step 6: After recording and editing the audio, click on download as an MP3 option, the app will provide you with the link to save the file on your device. Otherwise, you can also choose to save to Google drive, but you have to use Chromebook in that case.
5. TwistedWave
Designed for Mac, TwistedWave is one of the most powerful, fast, and user-friendly audio editors. The app also allows you to record high-quality audio files. While recording audio, you can use place markers to remember the places you have to edit afterward.
From equalization to limiting or compression, there are more than a hundred audio units for vst plugins are available in TwistedWave. On the other hand, if we talk about converting files, TwistedWave can also provide you with many formats, keeping your benefits in mind.
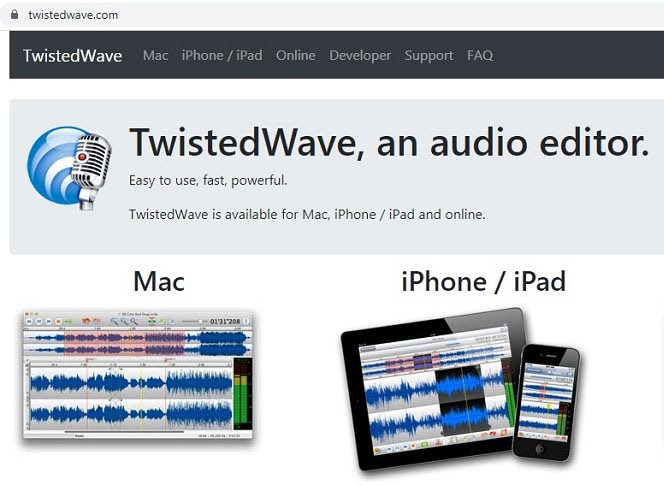
The best part about TwistedWave is its batch processing feature. This feature allows you to load several files at a time, and TwistedWave will trim them automatically, apply them to fade in or out effects or convert them to MP3 or anything else.
Now, are you thinking about using TwistedWave to record audio Google slides? Follow the steps mentioned below,
Step 1. Visit the official website of TwistedWave
Step 2. Hit a new document and create a new file.
Step 3. After permitting you to use your phone's microphone to record with TwistedWave for the first time, click on the red record button and get started.
Step 4. Now hit the stop button and complete the recording.
Step 5. TwistedWave will automatically save your recorded file and sync it to the website.
Step 6. You can click at the beginning point of your clip and press the play button to preview your recording and click and drag with your mouse to select the portion you want to start, and then simply press the delete button.
Step 7. If you are satisfied with your result, then you can download it. Just click on File then Download. If you are using TwistedWave as an audio recorder for Google slides, it will be better to save it directly to Google drive. In that case, after clicking on File, click on save to Google drive.
Simply give permission to TwistedWave to log into your Google account to successfully save your audio file to your Google drive.
How to Add Audio to Google Slides
Just like Google slides are extremely simple tools to use, the new feature of an audio recorder for Google slides is also quite simple once you understand the method. All you need is your audio and save it to your Google drive.
There are several applications available that you can use for this purpose. The difference is, some of them have the feature to save your audio file directly to Google drive, while some of them only allow you to download your audio file and save it to your device. In that case, you can use your file by simply uploading it to Google Drive to insert it into Google slides.
Music is a great method to make your presentation attractive. They bring life to your presentation and make it interesting. From office presentations to school narratives, the combination of Google slides and Google audio recorder can save so much effort with just a few clicks. Now, to know how to add audio recording to Google slides, follow the steps mentioned below:
Step 1: Save Audio to Google Drive
Choose any of the audio recording apps from the list mentioned above. If you face any problem with these apps, then simply search in the Chrome web store and you will be able to select from many other options.
One thing you need to keep in mind, i.e., to insert audio files to Google slides, your audio must be saved in Google drive. Now, not every software allows you to save your recording to Google Drive, so you have to upload it manually to Google drive after creating audio.
In that case, if you want to skip this step, you can choose audio recording software that supports Chromebooks, for example, ChromeMP3 Recorder from HablaCloud.
Now locate the audio file in your Google drive.
Step 2: Share the Audio File
As said before, you might already have your audio files saved in Google drive. If not, then to upload the file, go to drive and click on the new button. From the list, select the options file upload.
Keep in mind that, sharing your slide deck with someone else plays the audio file. So the audio must be shared individually from Google drive.
Now, right-click on your file from Google drives and hit the share option from the appeared list. Thus, anyone with a link can view it. Remember, if you forgot to share the audio file, then the persons you are sharing the slides with will not be able to play it; therefore, your efforts in creating that audio file will all go in vain.
If you want different Audios to play in different slides, then first:
- Select a slide, click on any icon or text on the slide for the link, insert it, click on the link option, paste the link into the link box and then click on Apply.
- Select Present at the top right corner. If you click on the icon or text then contains your audio link, and then a new window will open with the audio file.
- Select Play and minimize the window.
Step 3: Insert Audio to Google Slide
It's time to insert your audio in the Google slide.
Select the new slide where you are going to insert the audio. Then click on the insert button and then click audio.
Select the file you have just uploaded or saved in Google drive. Then click on the select button at the bottom left corner. After that, a speaker button will be shown. Drag and move the speaker wherever you like in on your slide. Now click on the speaker to play.
Audio Formats
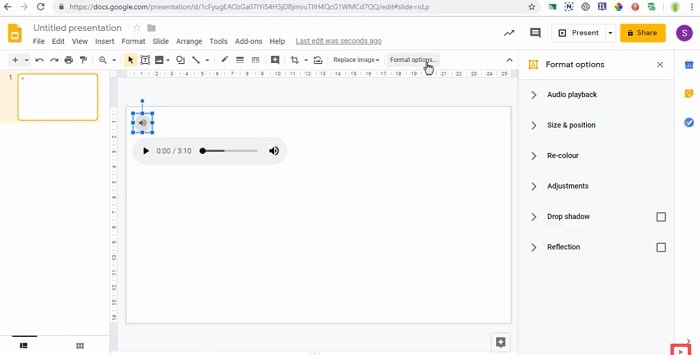
Once you insert the audio file into your Google slides, you will be able to make different adjustments. FY, these options are almost the same as the options you have seen with videos.
You have already read that when the speaker button appears, you can easily drag it and move it to any place on the slides. Now, after selecting the speaker, you will see format options in the toolbar. Click it, and a sidebar menu will come In front of you consisting of some playback options.
From the menu, you can select whether you want to play the audio on click or automatically, or you can adjust the audio's volume, etc.
How can Schools be benefited from the Google audio recorder
Adding audio or music to any presentation will be so much fascinating for students. They will become enthusiastic about attending a class. Hence, learning will be much more fun. All they need is a little more attention and a little more effort from teachers. In the end, if you look closely at the use of Google slides and it's an audio feature, they do not require that much effort. However, here will be discussing how Google audio recorder can benefit schools.
Adding audio in Google slides can benefit schools in the following ways:
- If students carefully listen to the stories read by teachers, they will not have to put a lot of effort into memorizing that chapter's exercises. If teachers use the Google slides and it's an audio feature, Reading a story will be much more fun.
- Now watching slideshows will also become interesting to students.
- Making a presentation on instruments
- Spoken feedback on students' writing
- Explaining any solution and many more
Certain things you have to ensure keeping in mind
- You can only insert audio to Google slides; Google slides do not create audios.
- Google slides support MP3 and WAV audio formats
- You will need a separate tool or app, or software to create an audio file
- Save the audio with a proper name to find it out quickly
- To insert an audio file to Google drive, your audio files must be saved in Google drive
- If you are somehow unable to find your audio files, check the Downloads folder on your phone or PC.
- "How to record audio in Google slides" is the same once you have an audio file. Only the recording process differs from apps to apps.
- You must share the audio files so that the receiver can play them.
- Remember to install audio recording software that is not experimental and guarantees your privacy
- With the audio formatting options in Google slides, you can play your audio in the loop so that listeners can listen to it over and over.
Conclusion
Your question should not be "how to record audio on Google slides"; rather, it should be "how to add audio recording to Google slides." The reason behind mentioning this is a huge confusion that occurred soon after Google slides introduced its feature.
After you realize this, rest is pretty easy. All you need is different software to create audio. Then just follow the steps mentioned in this article, and you will see how easy it is. You may need to look into the steps for the first time before creating a presentation, but from the next time, things will be as easy as it was with Microsoft.
Secure DownloadSecure Download


