How to Record Webcam and Screen Simultaneously
There are some projects that require more than one type of video. If for example, you are creating a how-to video that may require you to actually show how a certain product work, you may need to use a screen flow video to share the basics of the product and webcam footage to actually demonstrate how it works. A project like this one may require using a program that can both record both webcam and screen.
Fortunately, there are a lot of programs in the market today that can be useful for recording both screen and webcam footage and putting them together in a single high-quality video that your audience will find very useful. In this article, we take a look at five of the best tools to use and show you how each one works.
Way 1: The Best Tool to Record Webcam and Screen
If you want to record a video that has all aspects in one, including webcam, screen and audio, the last thing you need is to have to record these components separately and then edit them together. Therefore, the best tool that you can use to record a video that includes the screen and the webcam is one that makes it easy to record all these aspects at the same time. Wondershare DemoCreator is the most ideal solution in this regard. The following are just some of the program’s features;
- It allows you to record crisp clear screen-flow videos for presentations and lectures.
- Recording the screen, webcam and audio is only a matter of turning these options on in the settings
- It has a very simple to user interface that makes it one of the simplest video recording programs to use
- It comes with a full editing suite that you can use to edit your videos to perfection
How to Use DemoCreator to Record the Screen and Webcam
To use this program to record both the screen and the webcam on your computer, begin by downloading and installing the DemoCreator on to your computer and then follow these simple steps;
 Secure Download
 Secure Download
1. Run the program on your Mac or Windows system and then click on “New Recording” to begin the process.

2. This will open a number of options that relate to the kind of video that you would like to record. Enable the microphone and webcam icon from here. (remember to connect your webcam to computer first)
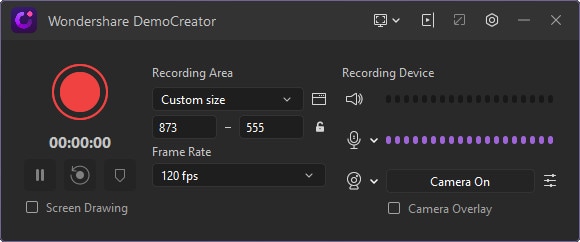
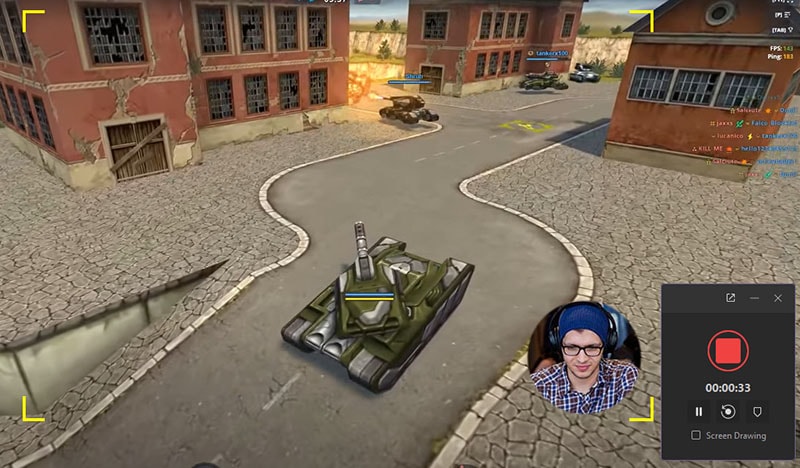
3. Then click on the big red button to start recording. You can use the screen drawing tools during the process. Once you want to finish the recording process, just press F10 simply.
Way 2: Record Screen and Webcam Simultaneously with OBS Studio
OBS Studio is an open-source screen recording tool that can also be used to record webcam and screen at the same time. The program is completely free to use and there will be no watermark added to the resultant recording.
In addition to the screen and the webcam, you can also capture sound from the microphone and the computer’s system sound. But it lacks video editing capabilities so you may need to invest in a good video editor to edit the videos you edit using this tool. To use OBS studio to record both screen and webcam footage, install the program on to your computer and then follow these simple steps;
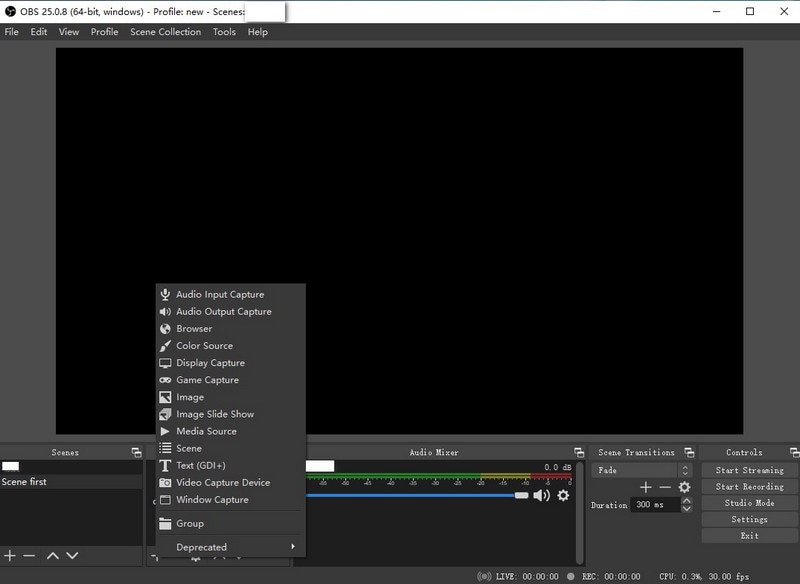
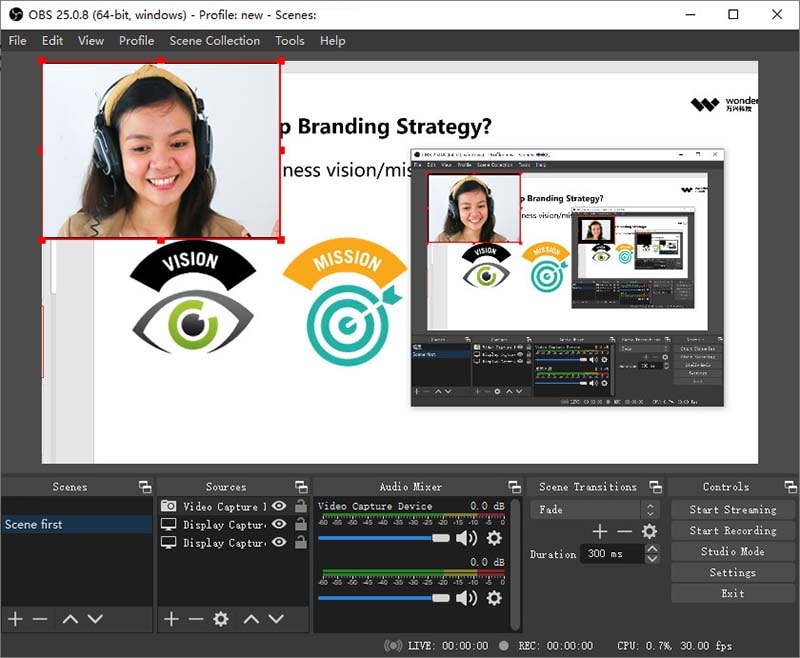
Step 1: Open OBS Studio after installation, click the + symbol under the 'Sources' section. You should see the 'video capture device' option, click on that.
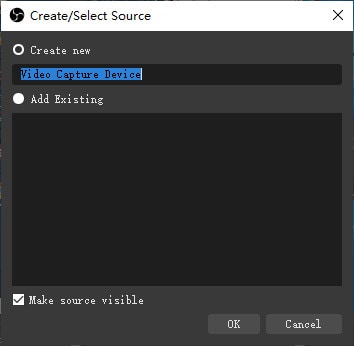
Step 2: A new windows will pop up, enter the name and click "Ok" to go on.
Step 3: Now you can choose the webcam you want to use from the "Device" option, you can also set the frame rate.
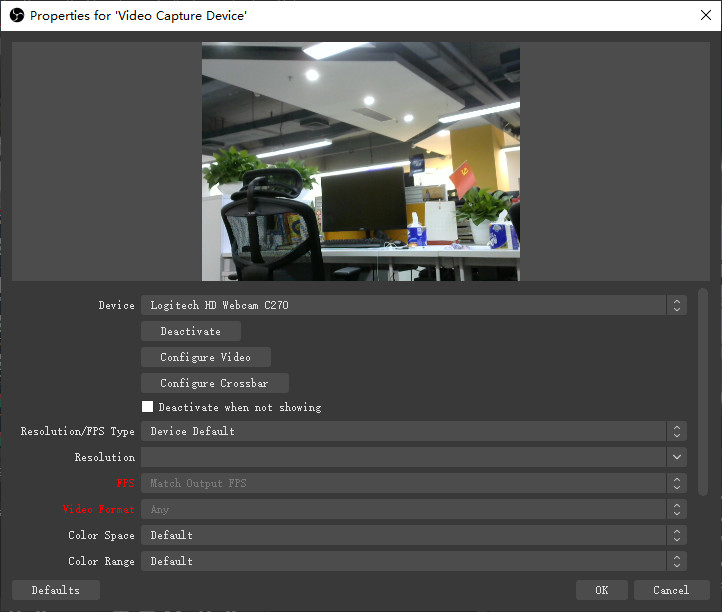
Step 4: You can now adjust the audio and then click "Start Recording" button to get started.
Way 3: How to Record the Screen and Camera with Veed
Veed is an online screen recorder that can also record webcam footage at the same time. You can use it directly from any browser and you don’t need to install any software on your computer. One of the things we love about this online tool is that it simplifies the process by providing you with different layouts that you can use during the recording.
You can use the layouts to record the webcam and the screen alongside one another or on top of each other, depending on your needs. Follow these simple steps to record the screen and webcam with Veed;

Step 1: Select “Screen” from the list of layouts that you will see when you go to https://www.veed.io/ and provide the necessary browser permissions.
Step 2: Click on the red button to begin the recording. You should see a countdown before the recording officially starts. Once it begins, you can then navigate to any other application on your computer and the recording will continue.
Step 3: Click the red button again when you’re done with the recording. You can now playback the video and use the simple editing tools to enhance it anyway you want.
Way 4: Use Apowersoft Screen and Webcam Recorder
Apowersoft is another web-based solution that can be very useful when you need to record whatever is happening on your screen. It also goes a step further by allowing you record both the screen and the webcam along with audio from the computer’s system and the microphone. This program is very easy to use as you shall see shortly.
It also supports a wide range of video formats including MP4, AVI, WAV, FLV and more. When the video is recorded, you can easily upload it to YouTube, Google Drive or Dropbox. Here’s how to use Apowersoft to record both the screen and the webcam;
Step 1: Go to https://www.apowersoft.com/free-online-screen-recorder to access the tool. Click “Start Recording” and you will be prompted to download the launcher to load the program.
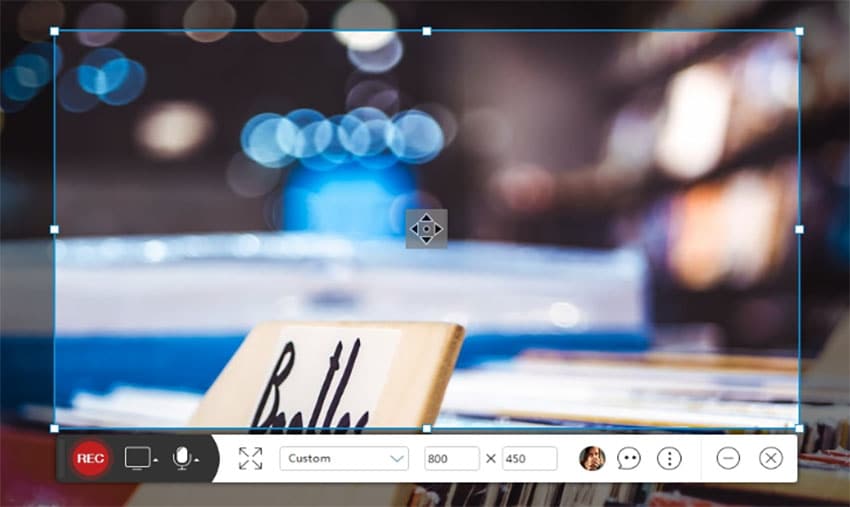
Step 2: You should then see a recording frame with a toolbar at its bottom appear. Use it to customize the recording area as desired.
Step 3: Choose “Region Mode” and then hit “Rec.” When you’re ready to begin the recording, click “OK” to start the recording process. To add the webcam to the recording, just click on the camera icon in the toolbar and then choose the camera that you would like to use. The camera will popup and you can drag it to any desired location on your screen.
Step 4: When you’re done, click on the green checkmark icon to save the video.
|
Name |
OBS Studio |
DemoCreator |
Apowersoft |
Veed |
|---|---|---|---|---|
|
Price |
Free |
$47.99 |
$59.99 |
Free |
|
Time Limit |
None |
None |
None |
None |
|
Support OS |
Windows, Linux and Mac |
Windows and Mac |
Online |
Online |
|
Output Video Formats |
MP4, AVI, FLV, WAV, MOV |
MP4, AVI, MOV, FLV, MPEG and more |
MP4, AVI, FLV, WAV |
MP4 only |
|
YouTube Share |
Yes |
Yes |
Yes |
No |
|
Watermark |
No |
No |
No |
No |
|
Editing Tools |
None |
Basic and Advanced Editing tools |
Basic editing tools |
None |


