

How much do you know about auto subtitles on YouTube? Have you ever tried automatic closed captioning on the YouTube streaming platform? If you ever thought about the best way to get automatic subs on YouTube, this article can help you address the issue.
Table of Content
What Are YouTube's Automatic Captions
YouTube has a feature that automatically detects the audio data in the uploaded video clips. Then, it uses advanced technologies, such as machine learning and speech recognition, to automatically turn the detected audio into custom-tailored subtitles and add them to the specific video.
However, YouTube won't simply add any subs to your videos. You must instruct the platform to do so before you upload your video or after publishing it on the portal. In most cases, YouTube can generate automatic captions for most languages.
If you try to add automatic subtitles in an unsupported language, the YouTube streaming platform won't be able to recognize the caption. Still, the automatic closed captioning is a fantastic YouTube feature that can help save time and effort. It also helps you avoid tedious manual work.
How To Generate Automatic Captions on YouTube Videos
Since automatic YouTube captions are available for most languages, all you need to do to add your subtitles is to select the matching language while or after uploading your clip.
The chosen language must be the same as the audio in your video so that YouTube auto caption can detect it and generate automatic subtitles accordingly.
Here's how to generate YouTube automatic captions and subtitles.
- Open your web browser and access YouTube.
- Locate the Camcorder icon and select Upload video.

- Click Select Files or simply drag and drop the video file you want to upload to YouTube.

- Click Show More to select the correct audio language and set other video details like age restrictions, thumbnail, description, title, caption, etc.


- Click Next to continue.
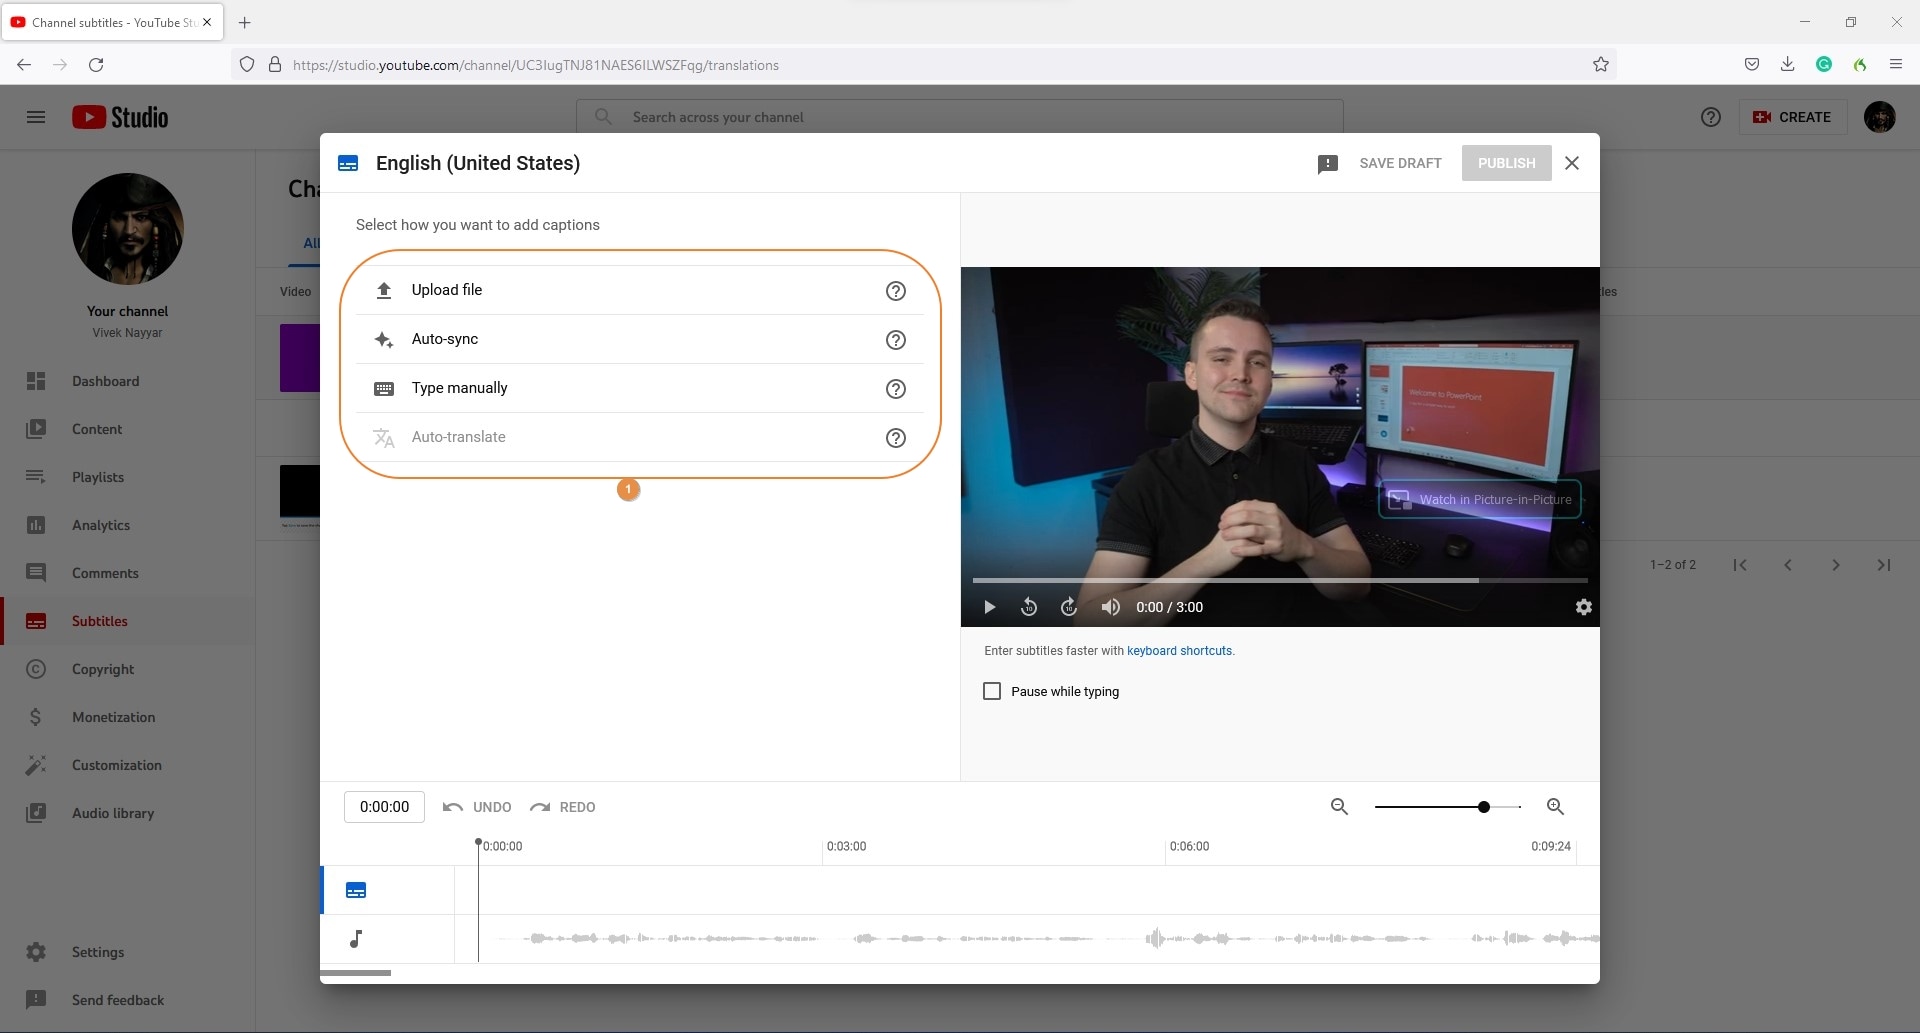
- Navigate to the Channel content page and select Subtitles under Your Channel.
- Click Languages in the Channel subtitles section.
- Confirm the caption preferences by clicking the uploaded video to expand the details.
- Allow YouTube to generate automatic subtitles.

How To Enable Auto Captions on Your YouTube Video
If your YouTube video doesn't have auto captions enabled, simply click the CC icon to see subtitles. You can also enable them in the Settings section of your YT profile.
Here's how:
- Click your profile icon and navigate to Settings > Playback and performance.
- Check the Include auto-generated captions (when available) box.
- You can also check the Always show captions box.

How To Turn Off Auto Captions on YouTube Video
Here's how to turn off auto captions on any YouTube video:
- Find the video on YouTube;
- Click CC and then click it again to turn off captions.
You can also turn off the default auto captions setting:
- Click your profile avatar and select Settings > Playback and performance;
- Untick the Always show captions box;
- Untick the Include auto-generated captions (when available) box.
YouTube's Automatic Captions Aren't Always Available
If YouTube's automatic captions aren't available, the owner probably didn't generate them, or the YouTube platform didn't automatically generate captions upon upload.
That happens if:
- The audio in the video is in unsupported language;
- The audio data contains background noise;
- There are long gaps between the audio tracks in the video.
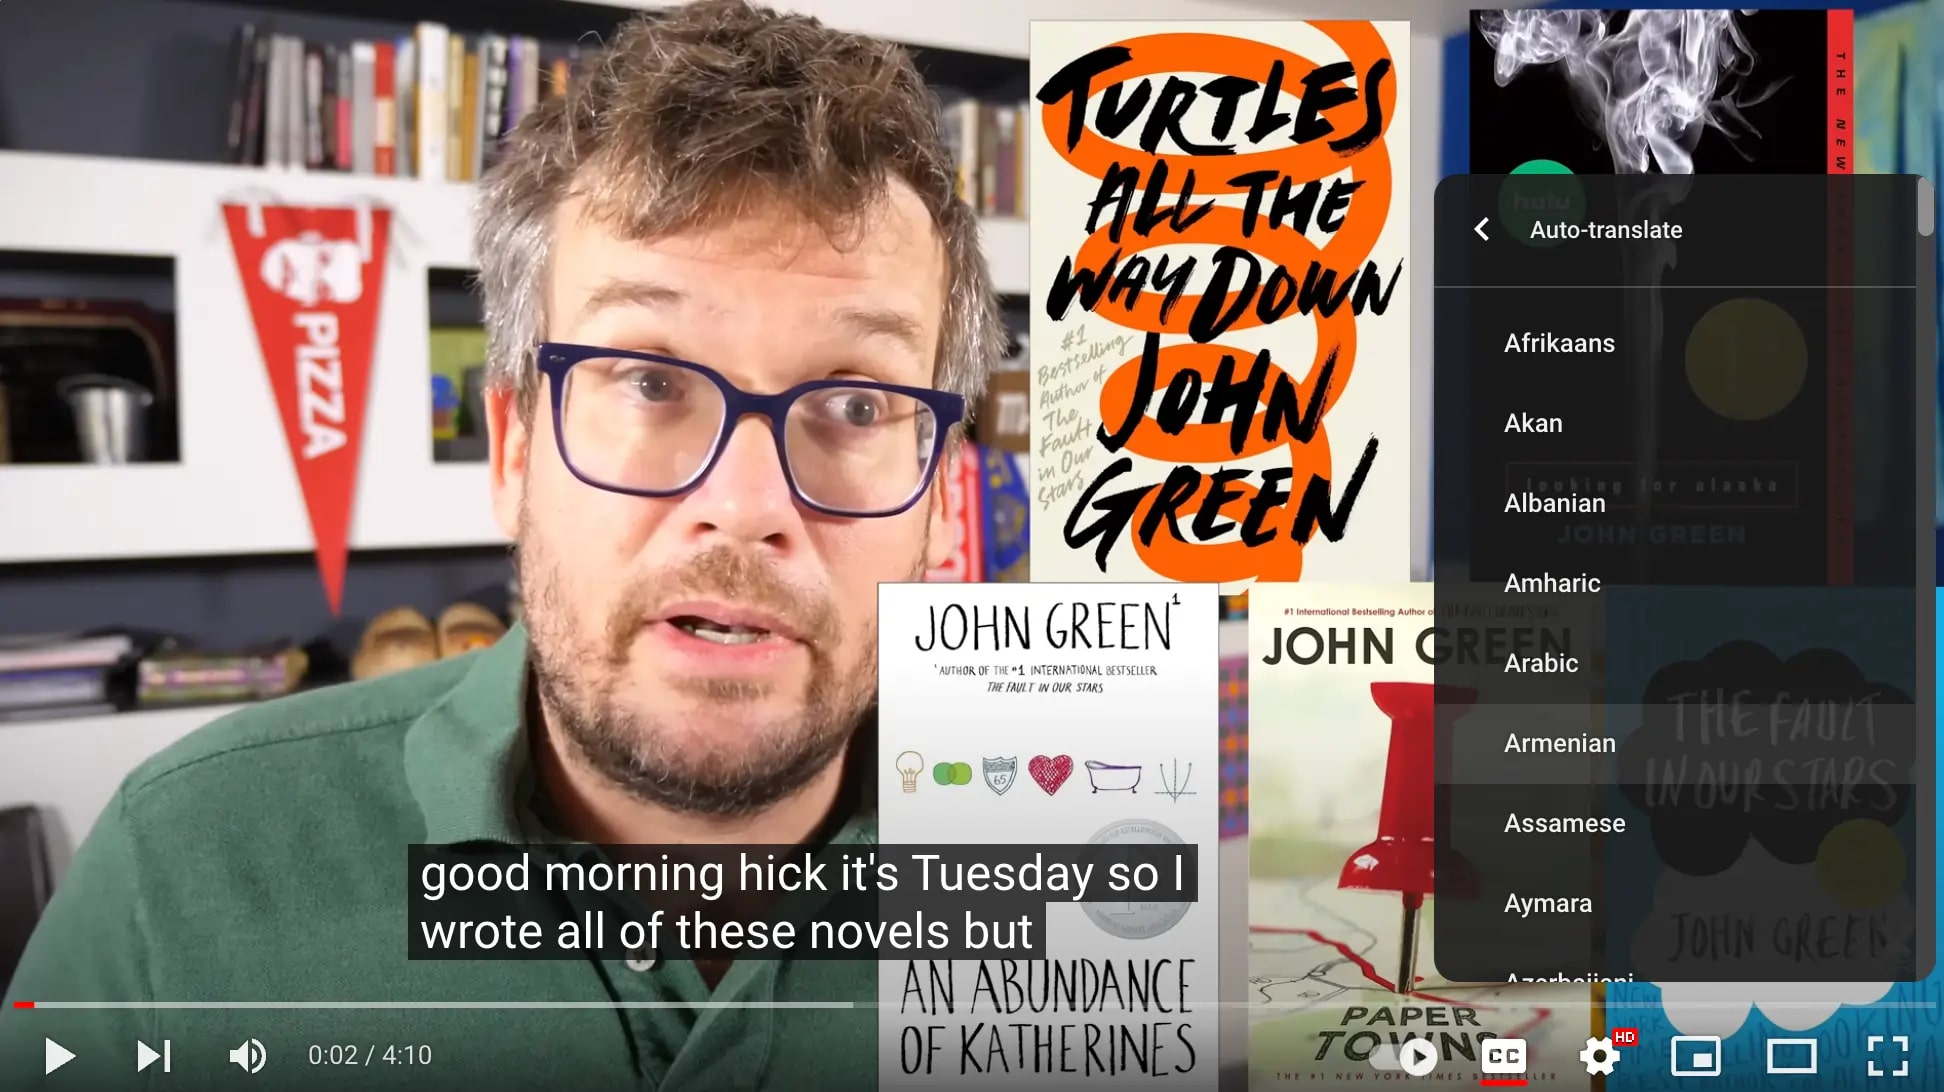
You can often fix this quickly using YouTube's auto-translate feature. Manually upload the subs file and use the feature to translate the automatic captions into the supported language.
Here's how:
- Open the video on YouTube and navigate to Video subtitles > Subtitles > Add.
- Check the Auto-Translate box.
You can also review, change, and edit automatic captions according to your needs:
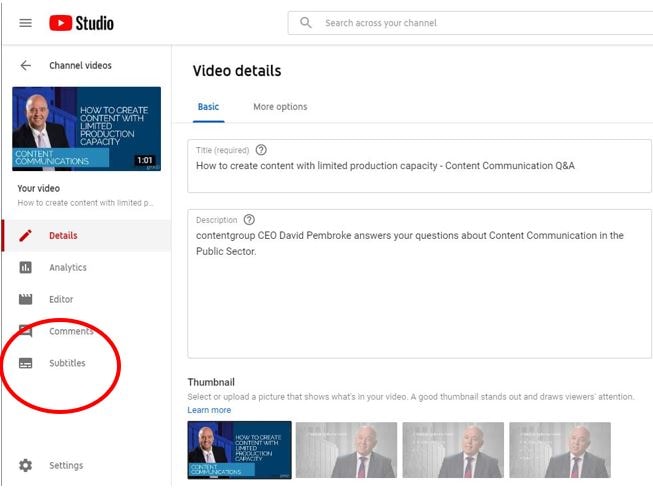
- Sign in to YouTube Studio.
- Navigate to the left menu and click Subtitles.
- Find the video with unavailable automatic captions and click Subtitles > three-dot menu.
- Review the captions and make changes to ensure proper transcription.
Troubleshooting Automatic Captions on YouTube
If you can't generate automatic captions for your YouTube video, it could be due to several different factors:
- Your video's audio contains multiple languages;
- Several speakers are overlapping in the video;
- The clip contains a long period of silence at the beginning;
- YouTube can't detect or recognize the audio or speech;
- The clip contains low audio quality;
- The video clip is too long;
- The audio is in unsupported language;
- The audio is too complex to process and add automatic captions.
Here are quick fixes for the "YouTube automatic captions not available or not syncing or not working” errors:
- Re-enable YouTube subtitles - simply turn off and then turn on YouTube subtitles;
- Clear your cache - clear your web browser cache to refresh your YouTube session;
- Change the playback speed – reset the playback speed to normal;
- Update YouTube - update Google Chrome to fix any YouTube issues;
- Restart YouTube - click the Reload this page icon in your web browser or press Ctrl + F5 to reload YouTube.
Limitations of YouTube's Automatic Captions

Though YouTube offers free machine-learning-powered automatic captioning, you should consider some limitations of automatic YouTube captions. First, YouTube doesn't always make automatic captioning available due to the factors we named above (troubleshooting automatic captions on YouTube).
Then, YouTube makes auto captions available only for the selected languages. The automatic captioning service isn't always reliable, or the captions aren't always indexed. If you aim to increase your SEO, the caption indexing issue might temper your online visibility and searchability.
In addition, YouTube automatic captions might misinterpret the audio content due to background noise, dialects, accents, mispronunciations, etc.
If you want to get your YouTube automatic captioning right, you can use a reliable auto subtitle generator like Wondershare DemoCreator to generate perfect automatic captions for YouTube videos.
Generating Perfect Automatic Captions for YouTube Videos With Wondershare DemoCreator
Wondershare DemoCreator is a professional and reliable AI-powered media creation and post-production software that supports a wide range of video editing tools, including high-quality recording, simple editing, and instant sharing of video content across social media and web-based platforms.
Its auto-caption feature lets DemoCreator generate automatic subtitles and captions in over 90 supported languages. You can add or remove captions, modify subtitles and captions, experiment with different caption templates, and automatically generate subtitles for your YouTube videos using artificial intelligence and speech recognition technologies.
- Automatically generate subtitles in 90+ languages with a 99% accuracy rate.
- Customize every aspect of the captions and subtitles, including the font, color, position, styling, and effects.
- Access over 12,000 trendy caption templates, allowing your imagination to run wild when customizing your captions.

It takes only a few clicks to auto-transcribe your video automatically. Download and install DemoCreator on your computer, then follow the steps below to auto-generate automatic captions and subtitles for your YouTube videos.
- Launch the app on your computer and click Video Editor.
- Click the Sign In icon and log in to your Wondershare ID.

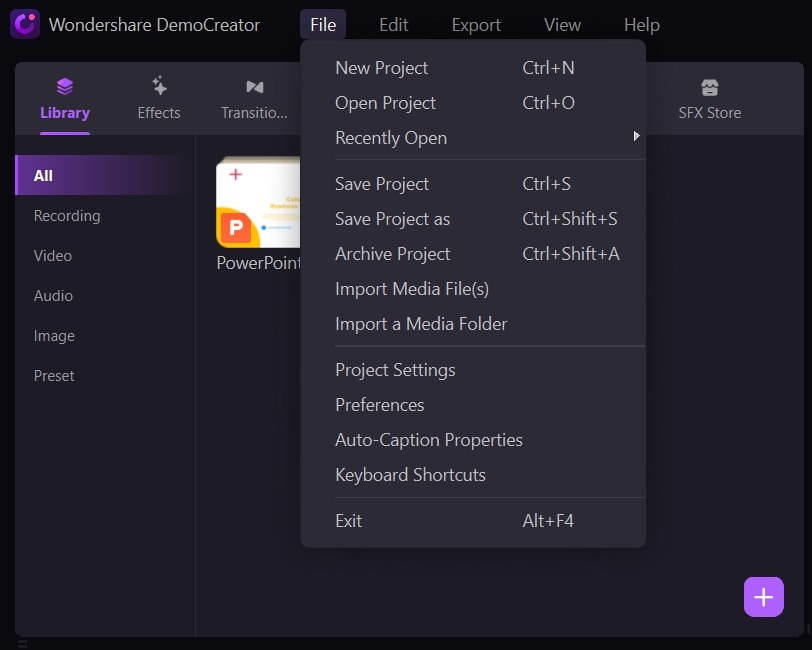
- Upload the YouTube video file by clicking File > Import Media File(s).
- Add the clip to the Timeline by dragging the video's thumbnail from the Library box.
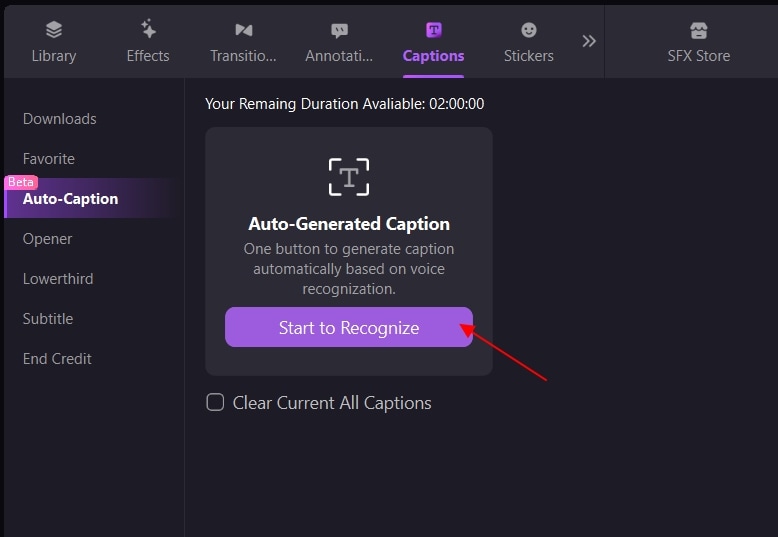
- Navigate the toolbar to Captions > Auto-Caption > Start to Recognize.
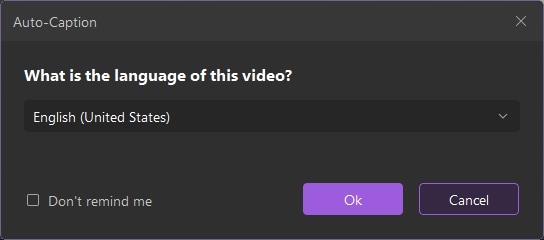
- In the Auto-Caption window, click OK to confirm the detected language.
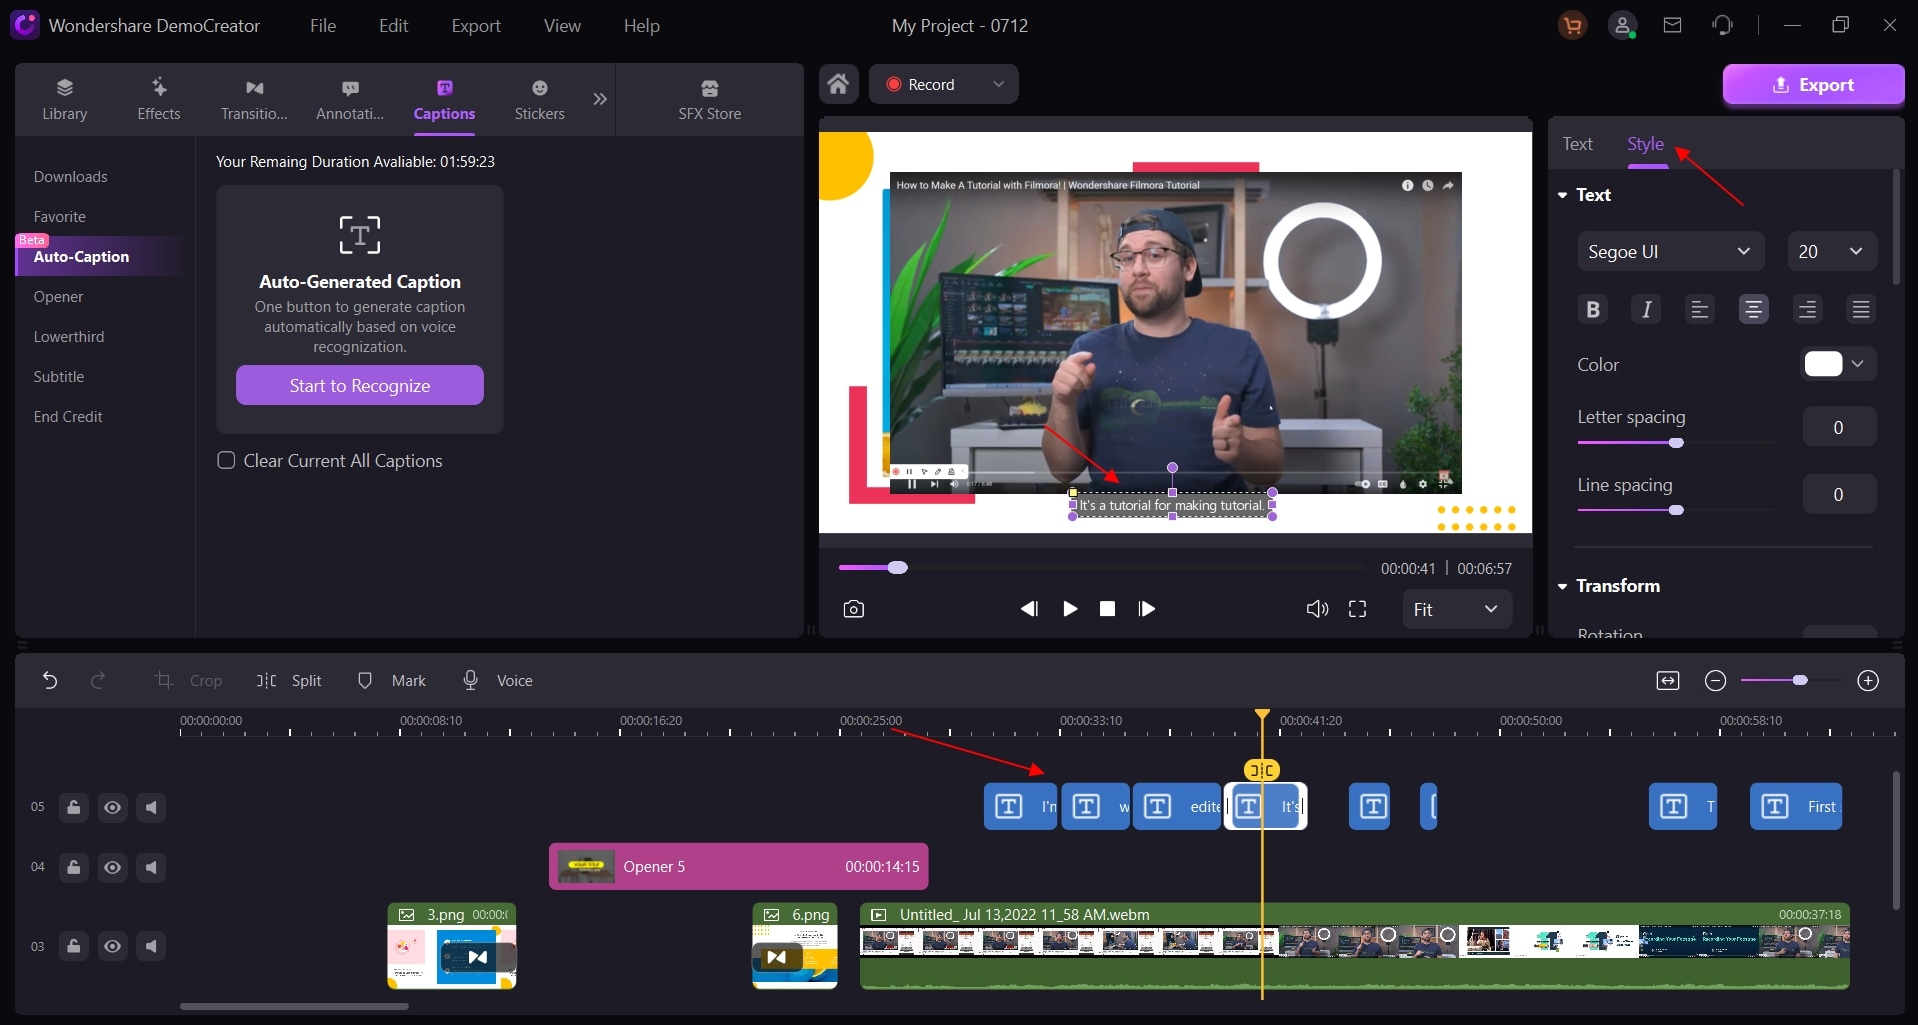
- Click OK to let the app scan the video, detect the audio, and auto-generate YouTube subtitles.
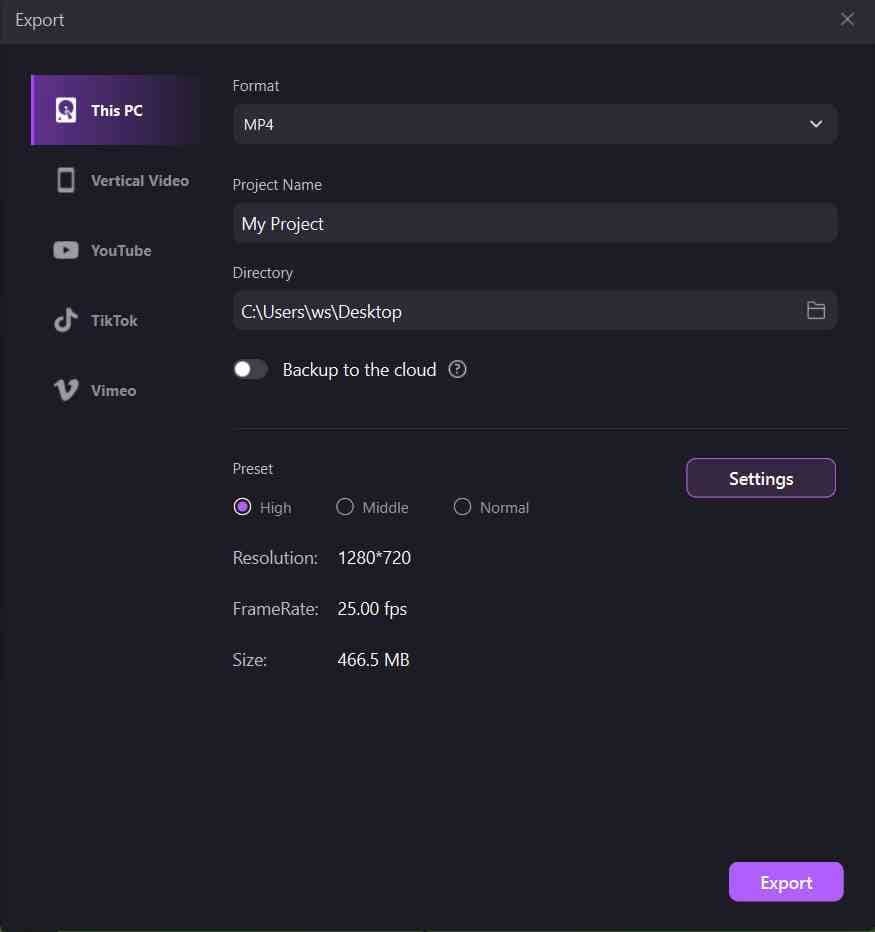
- Select Export, click YouTube, then click Export again to upload the auto-captioned video directly to the platform.
Conclusion
YouTube makes automatic captions widely available for the selected range of languages. This free feature allows you to seamlessly add automatic captions and subtitles to any video clip on the YouTube platform.
However, YouTube automatic captions may not always be available or work as expected. If you can't easily generate automatic subtitles and captions, we recommend using a reliable generator like Wondershare DemoCreator.
Aside from streamlining the auto-caption generation process, DemoCreator also allows you to export auto-captioned videos directly to YouTube so you can bypass the tedious YouTube automatic captions creation process.
FAQs
-
Can YouTube generate subtitles automatically?
Yes, YouTube can generate subtitles automatically using machine-learning-powered algorithms and speech recognition technologies to detect the audio in a video and transcribe it to captions and subtitles. -
How long does it take for YouTube to add automatic captions?
The process depends on the length of the video. On average, the process can take anywhere from a few minutes to up to an hour. -
Why are YouTube auto-translate captions not working?
YouTube's Auto-translate feature only works if the video contains timestamped subtitles in the default language. -
Why do some YouTube videos not have subtitles?
Captions and subtitles are only available on YouTube videos where the platform automatically generates them or where the owner has added them. -
Do YouTube shorts have auto-captions?
Yes, YouTube shorts have auto-captions. However, they are only available in the YouTube app for smartphones.


