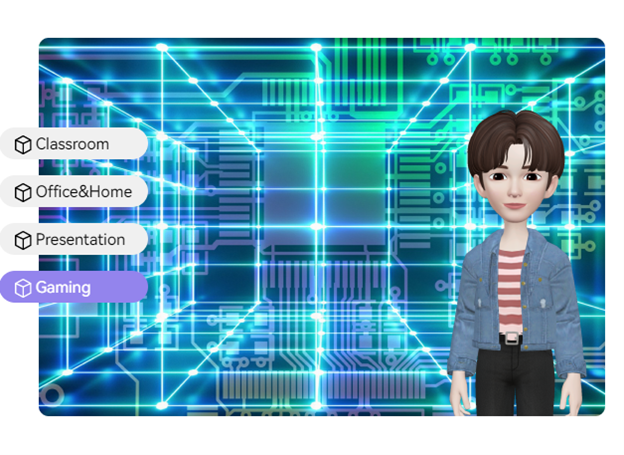
Amidst the rise in social media users, people have been fanatical about certain platforms like Snapchat for multiple reasons. One of the main reasons is their filters and the uniqueness of those lenses.
Responding to that hype of people from multiple fields and professions wanting them, Snapchat has developed Snap Cam, an application that brings those same filters and lenses to PC and Mac.
But exactly how are we going to use Snap Camera in our meetings and presentations with the multi-platform support?
Let’s advance and see how we are going to use it in one of the top meeting platforms, Google Meet.
In this article
How to Use Snap Camera in Google Meet
Before following the steps to use Snap Camera in Google Meet, let’s discover a little more about Snap Camera and why a user would love to use it in Google Meet meetings.
What is Snap Camera?
By using your computer or laptop’s webcam as a virtual camera, Snap Camera, an application designed by Snapchat, allows you to enhance your webcam’s output and apply the many interesting and funky looking Snapchat lenses and filters to your face.
Why do you need to use Snap Camera in Google Meet?
While the majority of our daily interactions now take place online since the last few years and many people use video conferencing to communicate, Snap Camera has proven to be a terrific method to make those mundane daily video chats into something entertaining and more appealing due to the fun and unique filters and effects that are now available for PC.
Steps to Use Snap Camera in Google Meet:
Here’s how to install Snap Map and use it with Google Meet and other applications to get you all the cool filters and lenses.
Step 1Download Snap Camera Application
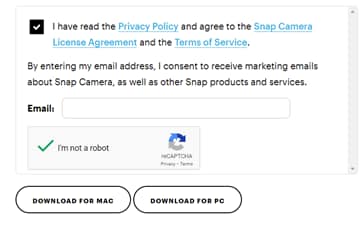
The first step in using Snap Camera is to visit the Snap Camera website and download the installation setup after reviewing and accepting the Privacy Policy, Terms of Service and system requirements.
Step 2Install the Snap Camera Application
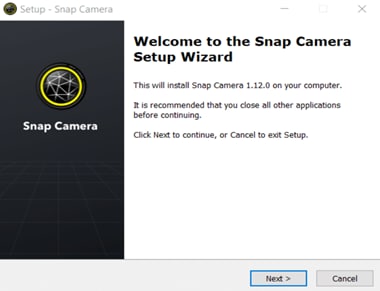
Run the downloaded installation setup, and install it by following the steps provided by the setup wizard.
Step 3Open Snap Camera and select webcam
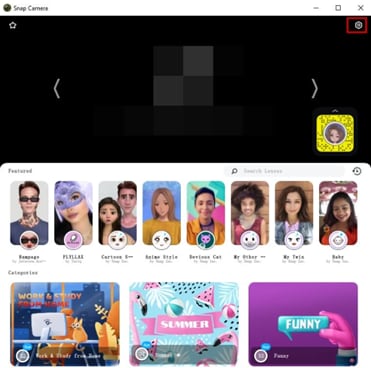
Snap Camera will automatically start after the installation process is complete. If it does not launch, you can simply search for the application in the start menu and launch it from there. The camera will start once the application is launched and you will be able to select from the several lenses that are displayed across the screen.
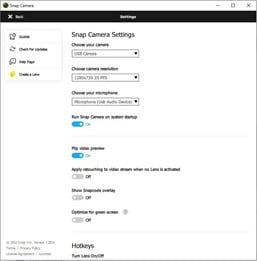
Step 4Open Settings and select webcam
Click on the top right corner of the screen to open Snap Camera settings. To choose camera input from any built-in webcam or USB camera, click on the drop down menu and choose your camera input source.
Step 5Open Google Meet
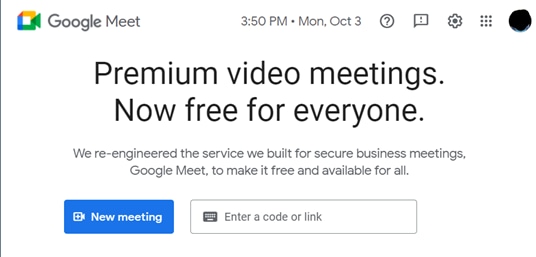
There are 2 ways to start a meeting on Google Meet, by logging in to Gmail or by opening the Google Meet website.
Gmail Login
Login to your Gmail account and you will see a Meet option in the column on the left side of Gmail's page. Choose "Join Meeting" or "New Meeting" accordingly and dive right into it.

Website Login
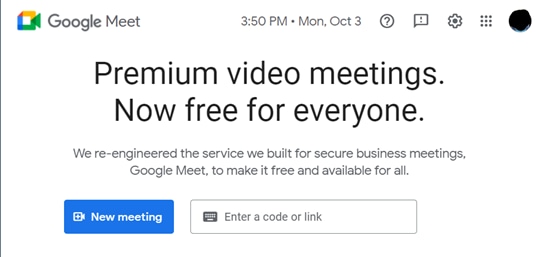
Open the Google Meet website. Log in to your Google account. If you are already logged in, you will see a homepage that will say "New meeting" or "Enter a code or link". You can either start a meeting immediately, join one or choose any of the available options to begin a meeting.
Step 6Navigate to Video Settings
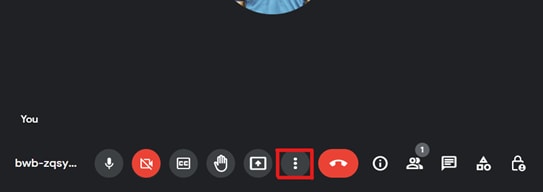
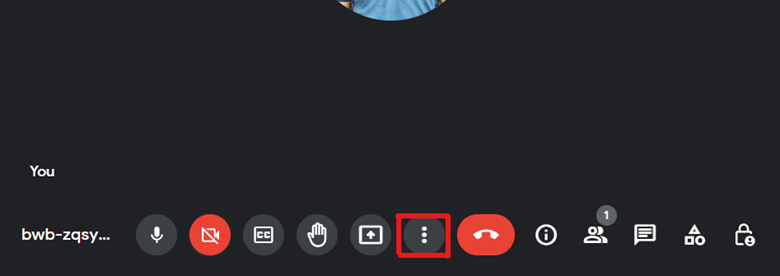
As soon as the meeting starts, you can hover the pointer near the bottom of the screen and a bar will appear with multiple options including camera, microphone, present etc. Click on the three vertical dots and it will open the settings.
Step 7Change Camera Source
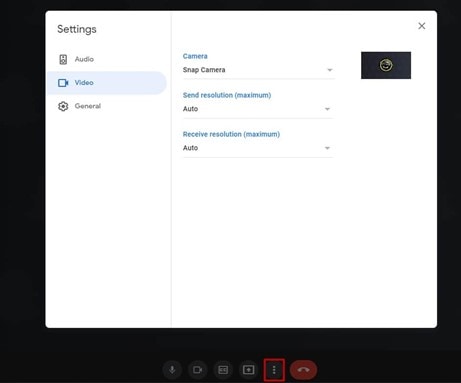
Once the settings menu opens, navigate to the Video tab from the left side. In the video tab, change the camera source to Snap Camera and the resolution to the highest or according to your preference.
When you have finished, you will be ready to go. You may now choose from the countless Snapchat lenses and effects using Snap Cam to add color to your video call.
Furthermore, you can use it for other apps as well for the purpose of webcam recordings, live streaming and more webcam related stuff.
So keep reading now as you are about to be astounded by the incredible capabilities of WonderShare DemoCreator and it will also help you with the creativity and uniqueness of your presentation content on Google Meet.
Improve your Google Meet Meetings with DemoCreator
Let’s take a closer look at WonderShare DemoCreator before we discover how to combine it with Snap Camera and Google Meet to have the ultimate experience of quirky and cool looks combined with a background of your choice while presenting your content live to anyone and anywhere.
What is DemoCreator
DemoCreator is one of the best presentation creators, video editing software and screen recorder currently available on the market. It also enables you to upload and broadcast your videos and platforms directly to other platforms. The powerful built-in video editor can also be used to quickly and easily edit those videos.
The updated features added in the latest version of WonderShare DemoCreator are as follows:
- Presentation making
- Graphics such as demographics, stat charts and reports etc.
- Multiple file format support
- Avatars
- Webcam background change
- Screen recording
- Live streaming
- Video recording
- Annotations
- Interactive tools such as pen and whiteboard
- Powerful video editor
Some of these features are also explained in detail below.
Presentations
You may share your idea instantly with the world directly from your computer screen. You can use a variety of tools to create the best presentations you have ever given by using the multiple features of DemoCreator including avatars, backgrounds and annotations.
Graphics
WonderShare DemoCreator is in a different league as it allows you to efficiently create and communicate demographic data, charts, stats and reports with your coworkers or employees without the aid of any other software.
File Type Support
DemoCreator supports a variety of audio and video formats as well as graphics and other features that will let you give live presentations from anywhere.
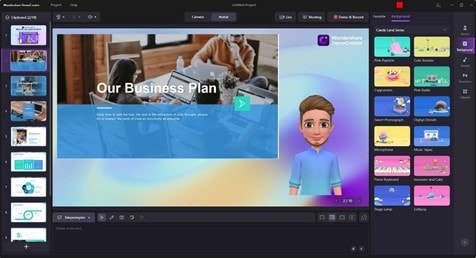
Now that you understand DemoCreator, continue reading to learn how it will help you improve and make your meetings impressive.
Types of Users for WonderShare DemoCreator
WonderShare DemoCreator can cater a wide variety of users due to its wide variety of features and those users include:
- Youtubers
- Social media influencers
- Gamers and Live Streamers
- Teachers and Students
- Business owners and corporate offices for conferences
An essential demo-making tool that helps learners, educators, freelancers, and gamers to take idea-sharing to the next level.
How Can You Improve Your Meetings With DemoCreator?
You may use DemoCreator to enhance your Google Meet meetings in a variety of ways. It includes several features and tools that are described in further detail.
Live Stream Online Meetings
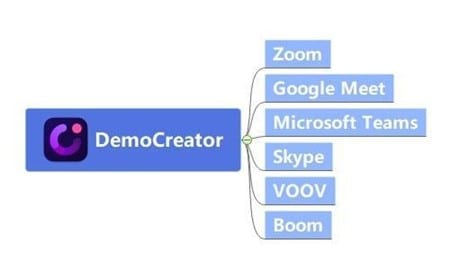
You may connect to a variety of meeting platforms, such as Skype, Microsoft Teams and Google Meet using DemoCreator. You may easily broadcast virtual events, business meetings and any information on your PC screen regardless of the size of the audience.
Avatars and CAM Effects
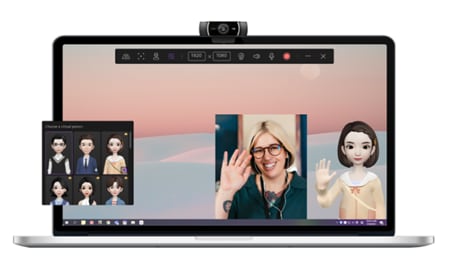
You can add more than 10 virtual presenters to your presentations in place of your own face in the webcam. You can still utilize the ‘Beauty Face’ option if you do not want to use avatars and it will take a portrait and automatically adjust the webcam to get a more aesthetically pleasing result.
Backgrounds
If you are in an unideal location and want to hide your background, you can also upload any custom image or video of any resolution to use as the background of your webcam video.

Pen and White Board
You have access to excellent tools in WonderShare DemoCreator, including a pen and whiteboard and you can use your mouse as a pen to draw anything you want to explain while giving a presentation or just discussing something where words are not enough.
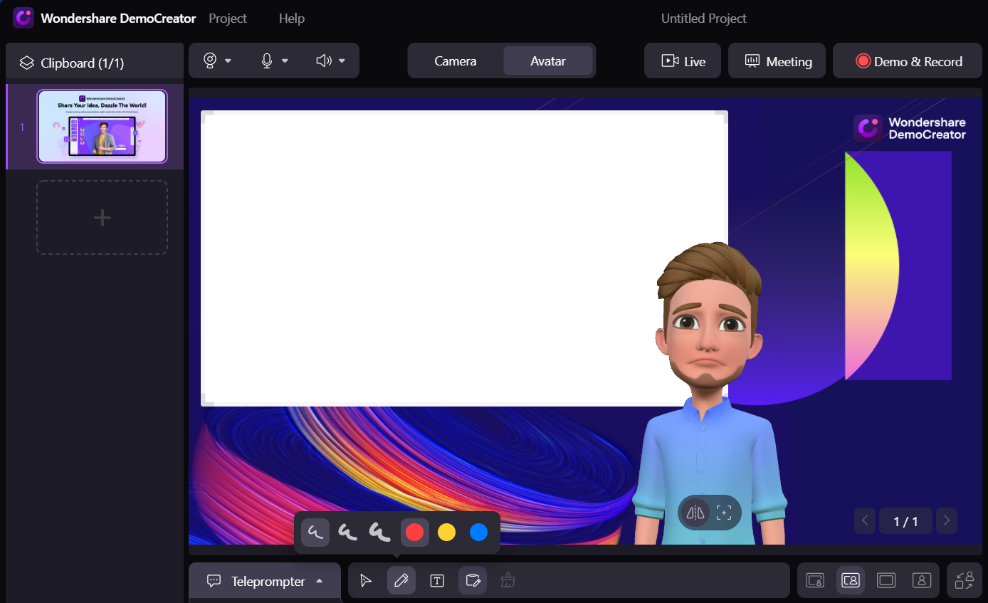
Annotations
Additionally, you can utilize a variety of annotations, text styles, transitions, and presentation tools to grab your audience’s attention.
It is now time to combine Snap Camera and Google Meet with these fantastic DemoCreator features.
How to Connect Snap Camera and Demo Creator with Google Meet
Here is how to mix all three programs to get the most out of Google Meet and WonderShare DemoCreator by creating the perfect combination with Snap Camera.
Step 1Launch DemoCreator and Select Snap Camera
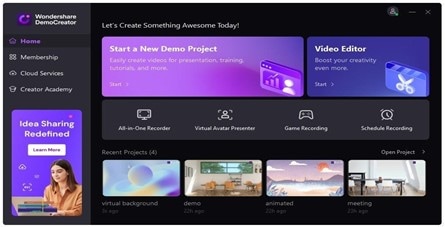
Launch the DemoCreator app on your PC and click on "Start a New Demo Project".
Step 2Select Snap Camera as the Video input of DemoCreator
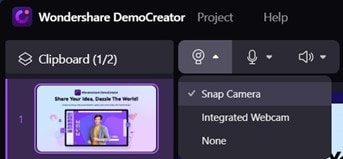
Before connecting to Google Meet, pick the webcam option on the selection bar and designate Snap Camera as the webcam source in DemoCreator demo mode.
Step 3Prepare your content with different tools
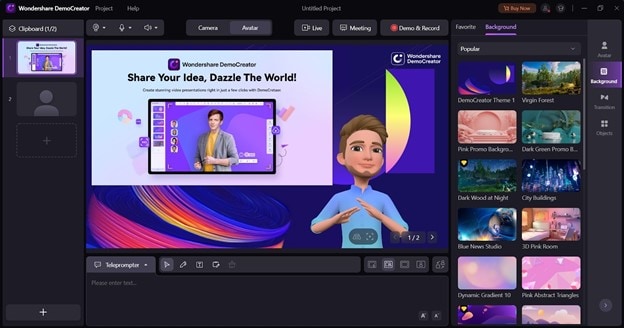
Import all PowerPoint files, audio, video, and other media assets that you might need for your presentation. To make your presentations more appealing, set up the webcam and, if necessary, experiment with the CAM Effect. Alternatively, you can select an avatar to represent you with amusing or professional backgrounds.
Step 4Open Google Meet and Start Meeting
Go to Google Meet’s website and click on the "Meeting Button" to start your meeting.
Step 5Start Google Meet
Remember both applications need to be open at the same time for this to work. After starting a meeting on Google Meet, go to the video settings by clicking on the three vertical dots on the bottom bar.
Step 6Connect DemoCreator with Google Meet
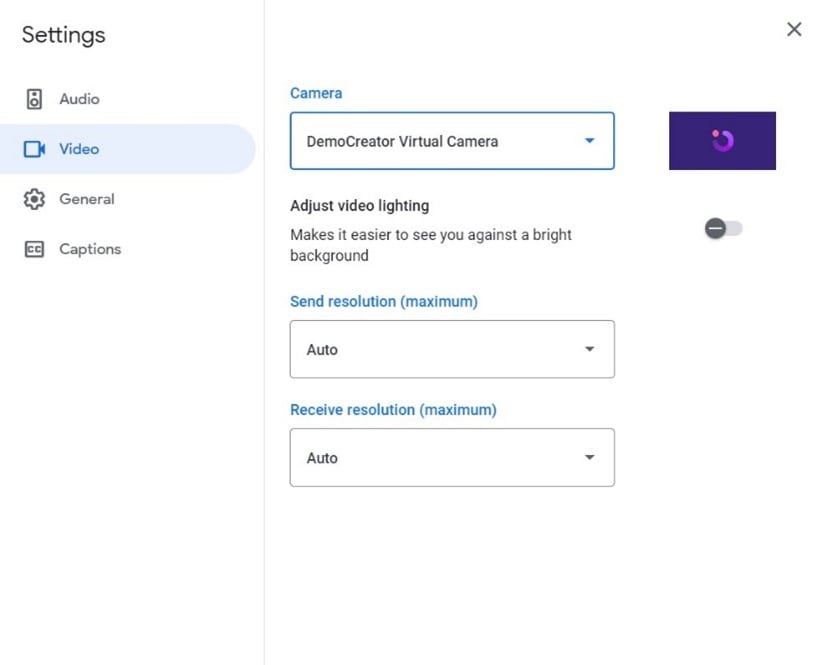
After opening the settings, click on Video from the left sidebar. Choose "DemoCreator Virtual Camera" as your camera input in the video tab.
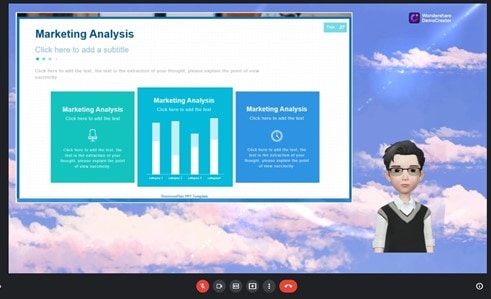
Now you will see the same view in the Google Meet camera as it shows on the DemoCreator and you are all set to present.
DemoCreator and Other Meeting Platforms
You can broadcast games, educational material, or anything else you want to using one of the many Meeting and Streaming platforms that DemoCreator offers. These platforms contain well-known brands from around the world like:
- YouTube Live
- Facebook Live
- Discord
- Twitch
- Google Meet
- Skype
- OBS Studio and many more.
Frequently Asked Questions:
Why does Snap Camera not work on Google Meet?
Please ensure that the latest version of Snap Camera and applications are started in the correct order which is Snap Camera needs to be opened before connecting it to Google Meet. If the problem persists, reboot your computer and check if the problem goes away.
How do I use the Snap Camera on my laptop?
Snap Camera can be downloaded and installed from the Snapchat website. The webcam stream from your laptop is used, and Snapchat filters are integrated. You only need to download and install it to get started, and then you're good to go!
How do I look attractive on Google Meet?
Connect Snap Camera to Google Meet and it will immediately make you look more attractive and cool with its cool and funky filters.
How to make my presentation attractive in Google Meet?
Using WonderShare DemoCreator is the greatest approach to make your presentations on Google Meet better. DemoCreator allows you to make presentations with its unique tools and features such as changing of backgrounds, addition of avatars, whiteboard and different annotations etc.
Final Words
Now Snap Camera, Google Meet, and WonderShare DemoCreator are the perfect trifecta. With the powerful features of DemoCreator, you can now broadcast presentations from Google Meet. All of this while utilizing the webcam capability and the Snap Camera filters built into DemoCreator.

