

Virtual Reality (VR) gaming is rising in popularity, and many gamers want to share their experiences with others. However, recording VR gameplay can be tricky. Unlike traditional games, VR is immersive, so the way you see the world doesn't directly translate to a flat screen. Of course, there are modern game footage recorders, but how to record a VR video game?
This guide will provide the four easiest ways how to record VR gameplay step-by-step. One method is to use the best game recorder for PCs, like Wondershare DemoCreator. You can also use an open-source like OBS Studio. Keep reading to know the steps, whether you're using a Windows or Mac PC, PS5, or smartphone device.
In this article
Part 1: How To Record VR Gameplay on PC With Best Game Screen Recorder?
Wondershare DemoCreator is an all-in-one video and screen recorder that can capture not only popular games like Fortnite, League of Legends, Call of Duty, and Team Fortress 2 but also VR games.
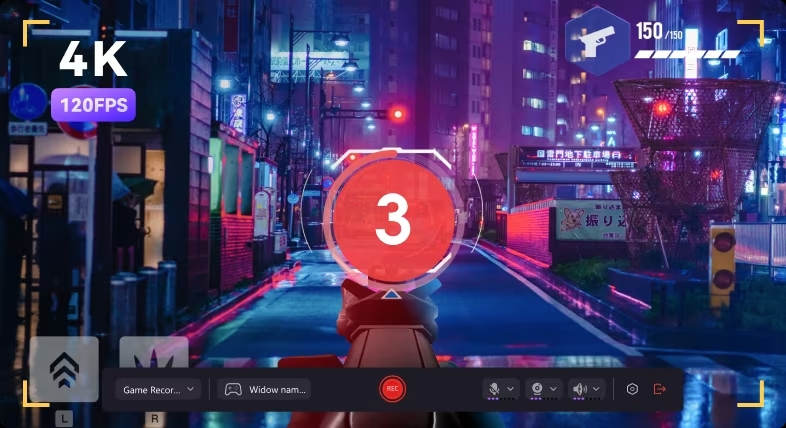
This all-in-one game recording software captures gameplay footage in high quality and supports 4K/8K resolutions and frame rates up to 120 FPS. You can also use it as a camera recorder to add a webcam overlay or to record highlights while streaming your VR sessions.
How To Record VR Gameplay Footage the Easiest Way?
DemoCreator is easy to use for beginners and accessible for Windows and Mac PCs. Here's the step-by-step on how to record VR games the best way:
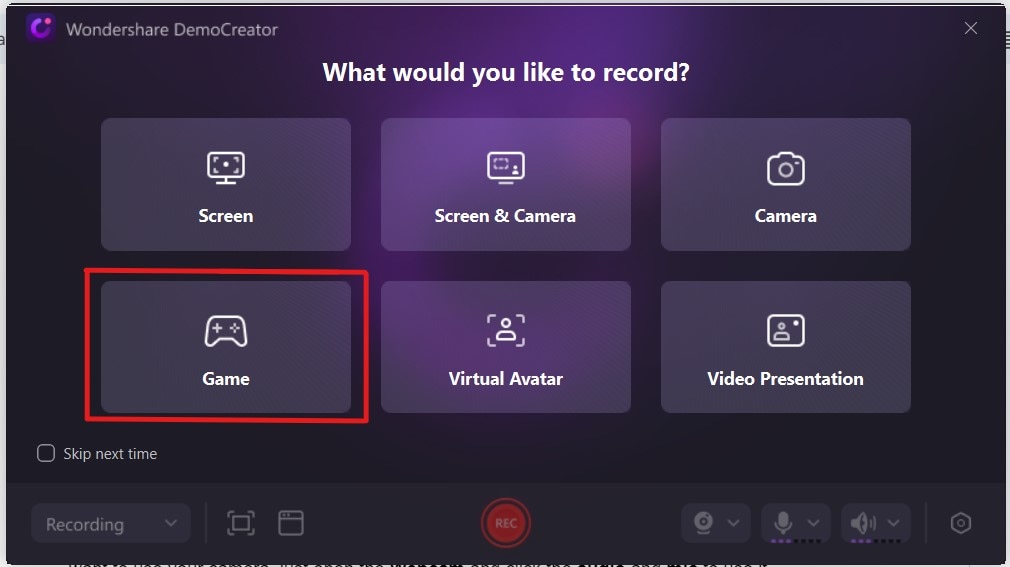
Step 1: Start the VR game and install DemoCreator. Launch the VR game recording software and select Video Recorder from the Home page.

Step 2: Choose Game from the recording mode. Next, select the VR game from the window capture options.
Step 3: Click REC to start recording the VR gameplay video. Press the keyboard shortcut F10 to stop recording.

Step 4: From the video editor, go to File > Project Settings to adjust Video Resolution, Frame Rate, and other settings. Trim and adjust recorded footage and audio as you want.

Step 5: Click Export from the top right navigation pane to save the VR gameplay to PC or share on social media apps.

Why DemoCreator Is the Best Way To Record VR Gameplay?
What makes DemoCreator the best game recording software for VR game videos? Here are its key features:
- Stable and Smooth Recording
DemoCreator prioritizes smooth performance, ensuring lag-free recording for extended sessions, even up to 24 hours. No dropped frames or choppy gameplay will ruin your VR video footage.
- High-Definition Capture
Record your VR video in stunning detail with resolutions reaching 4K and 8K while maintaining a smooth performance up to 120 FPS. This captures the immersive nature of VR perfectly.
- Live Player With Webcam Overlay
DemoCreator allows you to include a picture-in-picture window with your webcam footage on top of the VR gameplay. Additionally, a portrait cutout feature lets you remove your background for a clean, professional look.
- Multi-Track Recording and Editing
DemoCreator offers granular control over your recording. Edit the camera track, microphone audio, and VR gameplay footage independently. This game recorder allows for precise adjustments and creative freedom.
- Flexible Export Options
When you're finished, DemoCreator offers several export formats, including MP4, AVI, WMV, MOV, and MP3. You can even export your video in a vertical format with a blurred background, perfect for mobile viewing. Plus, directly share your recordings to platforms like YouTube, TikTok, and Vimeo.
Part 2. How To Record VR Gameplay on PC With OBS Studio?
Open Broadcaster Software, or OBS Studio, is a free and open-source application for PC VR game recording and live streaming. Throughout your stream, it can blend many sources into distinct scenes and transition between them. OBS Studio is generally accessible and available for Windows, Mac, and Linux. Additionally, it provides tools to enhance your final video capture, such as an audio mixer and customizable frame rates.
How To Record VR Gameplay for Free Using OBS?
Here's how to record VR games with OBS Studio step-by-step:
Step 1: Once installed, set up a new scene in OBS Studio. A scene is a container for the video sources. Click the . icon under the Sources section and choose Display Capture.

Step 2: Select Create New and click OK. Choose the appropriate option based on your VR setup, such as SteamVR.
Step 3: Once everything is set up, click Start Recording at the lower right of the OBS Studio interface. The VR gameplay will be captured into a video file.

Step 4: Once the VR game is over, click Stop Recording. Then, go to File > Show Recordings from the upper navigation pane to check the gameplay video.

While a powerful tool for recording virtual reality games (like in Steam VR), OBS Studio can be a bit complex to set up for beginners. Additionally, recording VR games can be demanding on your computer's resources. Make sure your PC meets the recommended system requirements for OBS Studio to avoid choppy recordings.
Part 3. How To Record VR Gameplay on PS5 Consoles?
Many PlayStation 4 games, including PlayStation VR games, are playable on PlayStation 5. It opens doors for VR enthusiasts who might be wondering: can you record VR gameplay on a PS5 console? The answer is yes, and there are advantages to doing so.
The PS5 works seamlessly with PlayStation VR (PSVR), so recording VR gameplay is a built-in feature. You don't need any additional hardware or software to start recording. Recording VR games this way lets you capture up to 60 minutes of your gameplay session.
How To Record VR Gameplay on PS5?
Follow these steps to capture PS VR gameplay on the PS5 consoles:
Step 1: While in the VR game, press the Create button on the DualSense wireless controller. It allows you to access a menu with options for recording a gameplay video.

Step 2: Choose between saving recent gameplay (up to an hour) or starting a new recording.
Step 3: Once you've captured the desired gameplay segment, press the Create button again and select Stop Recording. The recording will stop, and the captured clip will automatically be saved.
Capturing PS5 VR gameplay with these steps is straightforward, but the resulting videos won't convey the entire 3D experience. They'll be flat, 2D representations. Also, the PS5's built-in recording features offer limited editing options. You may need to use separate editing software to create polished recordings of your VR gameplay.
Part 4. How To Record VR Video on iPhone Devices?
iPhones themselves currently don't have built-in VR recording capabilities. However, you can achieve a similar effect using two methods:
- 360 Camera Attachment With a Dedicated App
Buy a 360-camera attachment that works with iPhones. These attachments usually come with their companion apps that guide you through recording and stitching the footage. Popular options include the Insta360 camera and Samsung Gear 360.

- Third-party Apps for iPhone
There are apps available on the App Store to capture 360-degree videos using your iPhone's built-in camera. One option you can try to record virtual reality games on iPhone and iPad is the Reality Mixer app.
Here's a basic overview of how to use Reality Mixer once you have it installed:
Requirements:
- Oculus Quest 1 or 2
- iPhone or iPad with an A12 chip or newer (LiDAR sensor recommended)
- Strong 5 GHz Wi-Fi network
How To Record VR Gameplay on iPhone?
Reality Mixer is a free and open-source app that lets you capture footage of yourself playing VR games, such as Beat Saber and The Thrill of the Fight. It can record mixed reality (MR) videos without a green screen and PC. Here's how to record VR games on your iOS device:
Step 1: Access Control Center before starting mixed reality capture, then tap Record.

Step 2: Launch the Mixed Reality Capture app on your Oculus Quest.
Step 3: Position your iPhone where you want it to capture the video. Ideally, keep it stationary throughout the process.
Step 4: Tap Connect and follow the on-screen instructions to calibrate the app using your Quest's right controller.

Step 5: Once calibrated, tap Start Mixed Reality on the main menu.

Step 6: Select your desired mode based on your setup. You can further configure chroma key settings if using a physical green screen.

Step 7: Close the Oculus Mixed Reality Capture app and launch the VR game on Quest.
Step 8: Tap Connect, put on your headset, and launch your game. The screen will switch to mixed reality, displaying your gameplay.
Step 9: After use, tap the screen for options and select Disconnect from the top left.

- Record customized screens with audio and edit them in different tracks.
- Capture gaming videos, tutorials, and presentations and then edit them in one tool.
- Built-in unlimited editing templates, special effects, and other sources.
- Supported export to MP4, MOV, MKV, GIF, and other formats.

Conclusion
You've explored several answers on how to record VR gameplay with and without a PC. For PC users, there's the option of using a dedicated game recorder or with OBS Studio. PlayStation 5 users can use the built-in recording features. Even mobile VR experiences can be captured with an iPhone.
So, how to record a VR video game stream the easiest and the best way? For PC VR recordings, DemoCreator stands out with its ability to capture unlimited gameplay without lag, user-friendly features, and powerful editing tools. But no matter which method you choose, recording VR gameplay allows you to share your experiences and immerse others in the virtual world.
FAQ
-
What Is the Best Screen Recorder for VR?
Wondershare DemoCreator is a screen recorder and video editor for capturing, editing, and sharing your virtual reality (VR) gameplay recordings. It's easy to use, with an intuitive interface and many tools, making it suitable for beginners and experienced gamers. -
How To Record VR Gameplay on Oculus Quest 3?
To access the Oculus menu while in a game, press the Meta button on the right-hand controller. Start recording your games by clicking the record video button. Remember to turn on the microphone if you would like to record your voice. -
How Do I Record VR Gameplay Nvidia?
Open the application that comes with your NVIDIA graphics processing unit (GPU) to record your VR gaming. Depending on your configuration, this could be another application or GeForce Experience. Next, select the ShadowPlay option from the options menu. Once ShadowPlay is activated, you may start capturing your virtual reality gameplay.


