How to Use Screen Recorder? – Mac, Android, iPhone, and Windows

A screen recorder is a tool that can essentially save or capture the screen contents, including streaming videos and video calls. These are otherwise impossible to save or download at this point if we talk of the technology area. With this facility, one not only saves some of the videos and images that are otherwise protected. However, one can also put forward the problems faced on their digital medium for troubleshooting problems to the experts. If you are thinking of how to use screen recorder on your computer or mobile phones, it is best to acquire some knowledge on them.
When it comes to digital devices such as computers and mobile phones, they run on different operating systems like Windows, Mac, or Android. Moreover, it is best to learn the process of using the screen recorder on each of the platforms. This is also because getting to know about these will not just save your time, but will ensure that you do it correctly. Here, we have tried to put down 4 ways that you may opt to use for the same:
Part 1. How to Use Screen Recorder on Mac
QuickTime app is famously known to be used to record the videos and images on the screen and even edit them on the Mac system. This tool is found to be supportive to different formats relative to audio or/and video files. The application is hosted inside the dock of your Mac, and the recording gets stored inside the Scratch disk or Movies folder of your device.
Furthermore, when it comes to this free-of-cost technology, you will be able to find it standard among most of the Apple products it's compatible with. The updation of this app is done on itself and that further ensures its security and safe nature.
If you are wondering how to use screen recorder on Mac, do not worry as it is the default media application. Moreover, here we have put down a quick and effective process for performing the same:
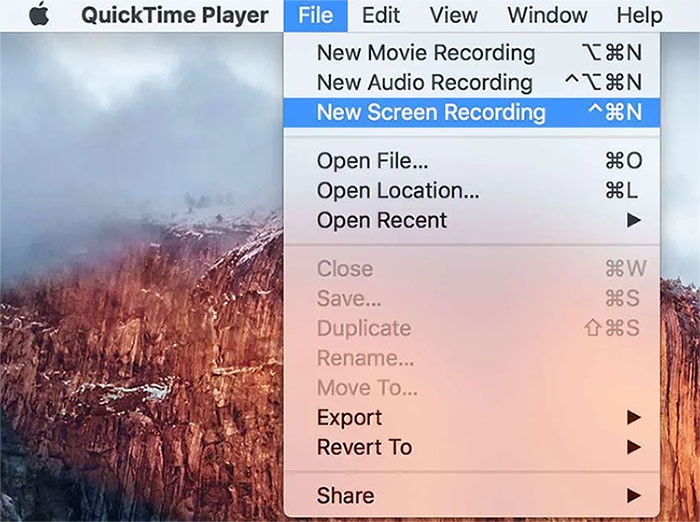
1. Open the QuickTime player on your Mac device. Now, opt to go to the File section. Now, at this point, tap the new screen recording prompt.
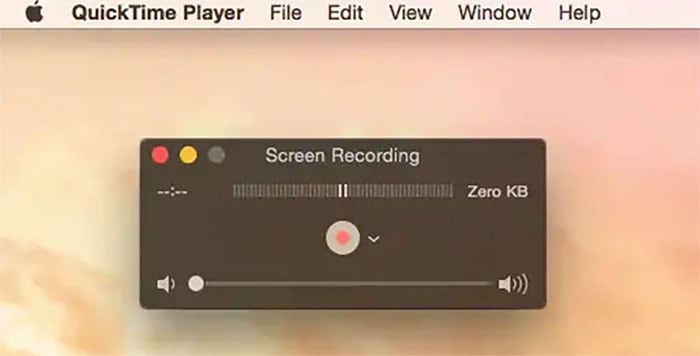
2. After clicking the "New Rcording", the screen recording prompt will appear.
3. Click the down arrow to make a proper setup. Use the options like microphone, none, etc., as preferred.
4. At this point, click Start recording. However, for a part recording of the screen, select the section by dragging the corners.
5. Now, click the Stop icon to finish. Save it when prompted and export it to your desired folder. Follow the above steps and be an expert of macOS screen recording.
Part 2. How to Record Screen on Windows
Screen recording in Windows can be done using Xbox bar, PowerPoint or applications like Wondershare DemoCreator. Let us discuss how to use screen recorder in Windows 10.
Record with Xbox bar
Xbox bar is the default screen recorder for Windows 10. You can use it to capture the games you play. Also, you can opt to make tutorials using Microsoft Office and Xbox bar. It is updated regularly so that one can get the best experience. You can save the media files and share them with whoever you wish to. However, before you start doing the same, it is best to learn how to use screen recorder in Windows 10.
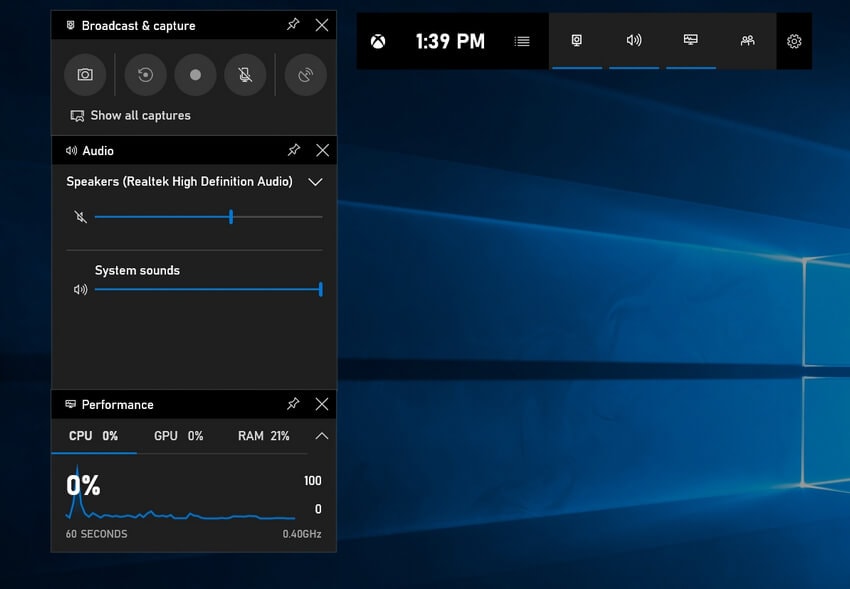
1. Open the Xbox bar app and then, opt to press "Windows key + G". Now, permit for the same by ticking "Yes".
2. Now, opt to press the keys- "Win + ALT + R"
3. To stop the process:
- At first, opt to click "Win + G" or go for the red button.
- Now, go for finding the saved videos on a subfolder that is named Captures inside Xbox menu Game DVR.
- At this point, you will be able to take still photos by pressing the following keys- "Win+ Alt PrtScn".
Record with PowerPoint
PowerPoint is a great tool to make any presentation and people have been using this tool since decades. If you need to record the screen or take screenshots while viewing or making the presentation, knowing how to do the same is quite beneficial. It will not only save your energy but allow you with a process to do the same in the correct manner. Moreover, with few clicks, you can record the screen and save them for future viewing. You can also share the same file with as many friends or colleagues as one wants.
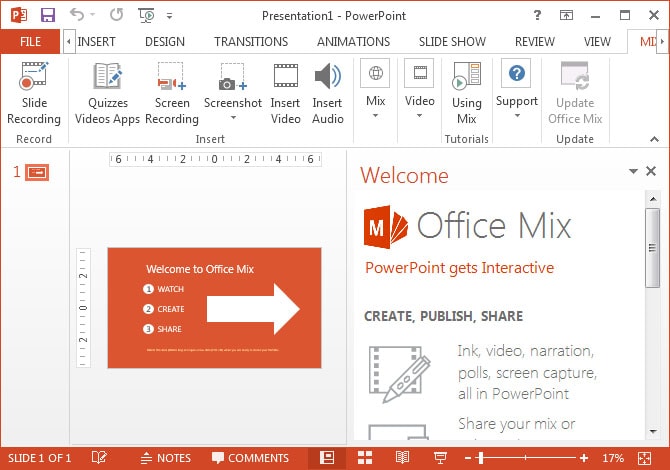
1. At first, opt to open the presentation, then click "Insert". Now, opt for selecting the desired window or some part by clicking the area. View the screenshot on your latest slide.
2. Display the window you want to capture the video. Now, opt to click the record button.
3. To stop the process, go for pressing the keys- "Windows + Shift + Q".
Again, opt for pressing the "Windows + Shift + Q". keys to view the video clipping.
Use an easy screen recorder
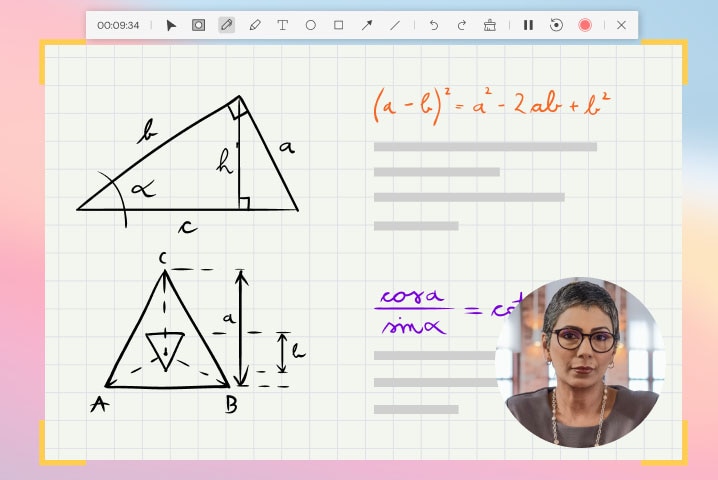
Using an easy screen recorder in Windows is the best solution. Using software like Wondershare DemoCreator can ease the problems of screen recording. It supports Windows laptops(such as HP laptop, Lenovo, ASUS, Dell etc.) and desktops, as well as macOS devices. Now, use this software for making video tutorials or do game recording effortlessly. The editing features of this screen recorder are simple, and one can adjust the speed of the video, cut, copy or paste straightforwardly.
It is one of the best software to use with Windows 10 that enables you to edit your video, including volume, thoroughly. One can select a target area and even crop the video while recording the screen using this software. Save your videos in many formats to suit your needs.
 Secure DownloadSecure Download
1. Launch the software on your PC. Click "New Recording" and a small window will open up.
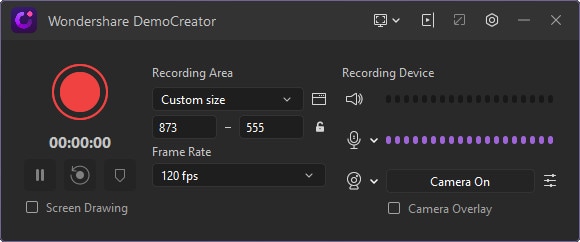
2. Now, opt to adjust the size of the screen, enable microphone and webcam as you need.
3. Click red button to start. You can draw on screen while recording. Press F10 after you finish recording.
4. The editor window will open up to edit, crop, and use special effects and many more to your screen recordings.
Part 3. How to Use Screen Recorder on iPhone
If you are using an iPhone with iOS 14 or higher, then click settings. Then tap control Center followed by "More controls." If you are using an iPhone having earlier versions of iOS, then tap "Customize Control."

1. Now, for screen recording, tap the "+" Add button beside the screen recorder.
2. On your iPhone, open the Control Center. Tap the record button in grey color and hold it. Now tap the microphone.
3.Tap to start recording and give 3 seconds. The countdown will begin.
4. Again open the Control center of the iPhone and tap the red status bar or the red button. To stop, tap the "Stop."
You can view your screen recording saved in your iPhone's Photos App.
Part 4. How to Record Screen on Android
Android devices and phones are easy to use, and they are also feature-rich. With easy usability, it is a cakewalk to record the screen if you know the technique of how to record screen on Android. The process of recording is almost identical in all Android devices, with minor changes here and there.
- To take a screenshot for images, open the desired screen. Now press the volume down button and the power on button at the same time. The screenshot will be captured and saved in the gallery.
- Some phones need 3 seconds to hold the power button and then tap the screenshot icon on the menu. It will capture the screen.
- Again, there is a “three-finger” acquire option inside the setting folder in many advanced phones. Enable it and just swipe three fingers of your hand on the desired phone, and the image will be captured.
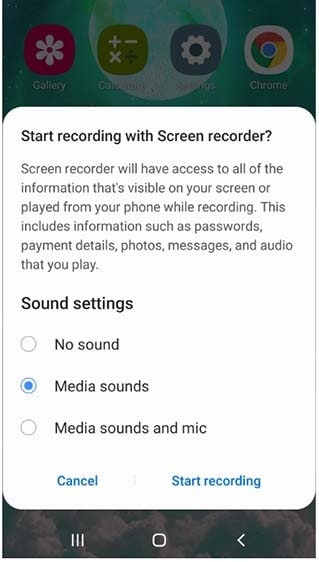
- To record videos, unlock your phone and swipe the idle screen twice. You will find the screen recording icon.
If there are many icons, one needs to swipe sideways to get the Screen Recorder icon. Tap to start after you choose videos that you want to record. The recording begins after a stipulated countdown. When you have captured the desired video and want to stop, again swipe down the screen and tap the Screen Recorder.The video will be stored inside your video gallery. Open it and enjoy the screen recording.
Conclusion
If you know to record your screen, including how to use screen recorder on chrome book, it becomes easy to cherish your memories. View the captured push messages, do videos for tutorials, or record the videos of games. Sometimes keeping a record is needed for future use as all videos cannot always be downloaded on the phone or other digital devices and only live streams are available. So, opt to learn to record the screen and save them in your gallery for future viewing.


