Skype has a built-in recorder that will help you record Skype meetings. However, this feature is accessible only on the paid version which is the Skype for business account, and also permission from the host to record the meeting. Besides, there is a storage cap also. The recorded meeting will be available only for 30 days from the day of the recording.
On the contrary with Wondershare DemoCreator’s Screen Recorder you can record the meeting on your device without having to seek anyone’s permission. The recording can be stored on the cloud and, thereby saving a lot of storage space. In this article, we will learn how to record a Skype meeting using the Skype for Business account and Wondershare DemoCreator.
In this article
Part 1: Steps to Record A Skype Meeting for Business
The Skype meeting recording option is only available for Skype for business accounts. If you use a Business account, recording the Skype meeting is very easy. Following are the steps to record a Skype meeting.
Step 1: Download Skype for business
Skype for Business makes it easy to collaborate with co-workers and business partners across the globe. Skype for business is typically pre-installed with Microsoft 365. However, if your system doesn’t already have it, you can Install Skype for business on windows from this link.
Once you have downloaded and installed Skype for Business, log in to your account.
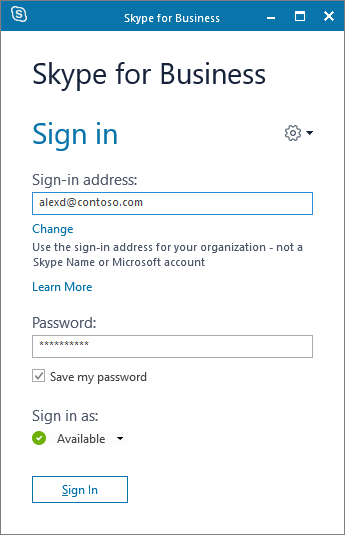
Step 2: Start Recording
Now begin a call. To start recording the meeting, click on the three dots at the bottom right of the screen, as shown in the picture below, and click on Start Recording. This will begin the recording of the meeting.
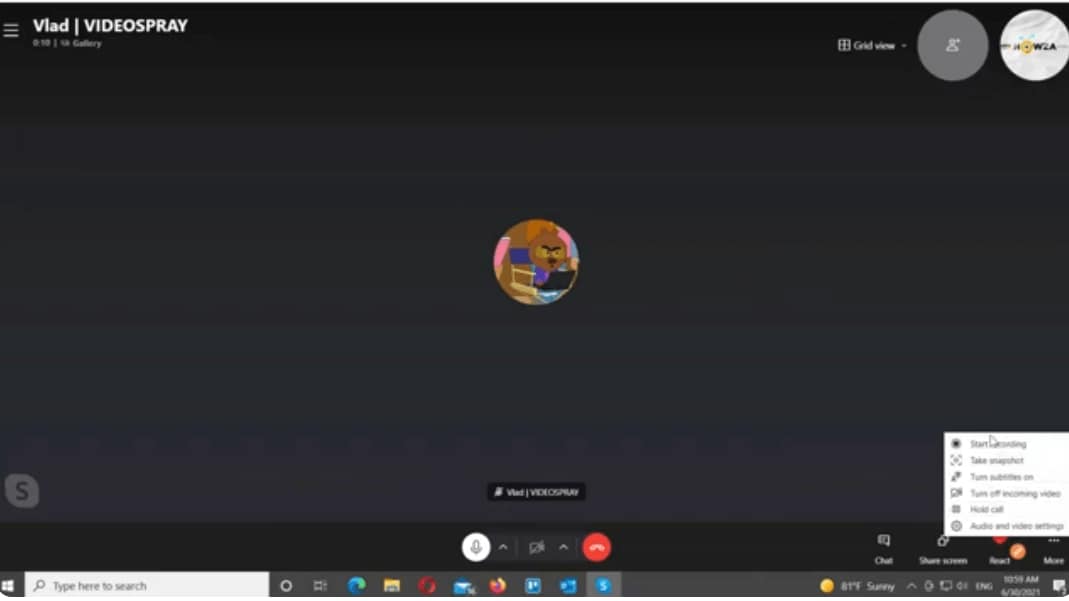
Step 3: Stop recording
Once you start the recording, everyone in the meeting will be notified that the meeting is being recorded, so there is no secret recording. Once you end the call, leave the meeting or stop the recording by clicking on the three dots again and selecting stop recording, the recording will be stopped.
As soon as the recording is stopped, it will be converted and automatically shared on the meeting chat within 24 hours of the meeting. This means everyone in the meeting will have access to the recording.
This recording will be available on the chat for 30 days, during which time you can download and save it locally on your device to keep it for a longer period of time if necessary.
Part 2: How to Record A Skype Meeting on Alternative Software - Wondershare DemoCreator [PC/Mac]
The two major drawbacks of recording a meeting on Skype for business are: first, it is possible to record the meeting on Skype only if you are using a Skype for Business Account. That means this feature is not available for the free version of Skype. Secondly, everyone in the meeting will be notified that the meeting is being recorded, and hence, if you need to do it secretly without anyone knowing, then this arrangement will not work for you.
In such a situation, the only alternative left for you is to use third-party software that can help you with recording and editing. Wondershare DemoCreator is one such software that can help you do this job easily and precisely. The following are some of the features of Wondershare DemoCreator that make it stand out from its competitors and become an ideal choice for recording the meeting.
Features:
- Simple and easy-to-use interface.
- AI-powered software to simplify and automate the process.
- High-quality recording with 4K/8K and up to 120FPS.
- Supports multiple file formats.
- Adjustable screen resolution to precisely record only what is needed and thereby reducing any need for edits.
How to Record A Skype Meeting using Wondershare DemoCreator?
Step 1: Download and Install Wondershare DemoCreator
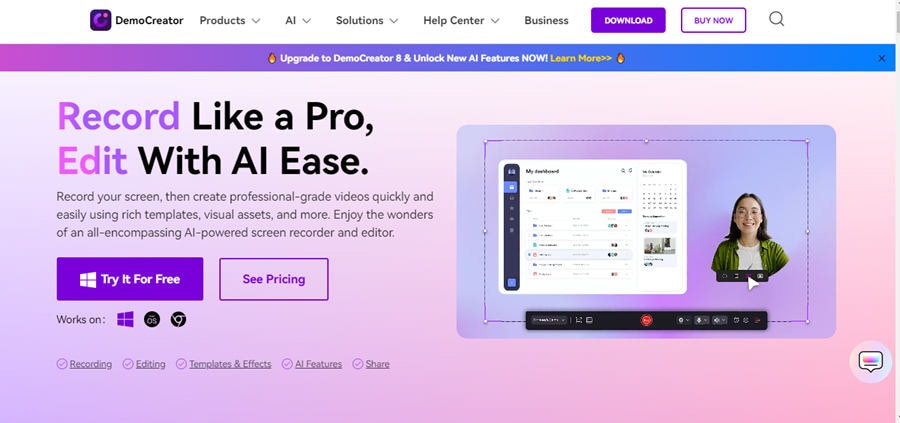
Download Wondershare DemoCreator by going to the link above and clicking on Try It For Free. The setup will be auto downloaded on your system. Go to the Downloads and open the setup. Follow the on-screen instructions to install DemoCreator software on your PC.
Step 2: Set up audio in Skype
Before you can begin recording the skype meeting in DemoCreator you need to adjust the audio settings in Skype. Go to Skype, click on the three dots button, and go to settings. You can now find audio and video settings where you need to activate both your microphone and speaker.
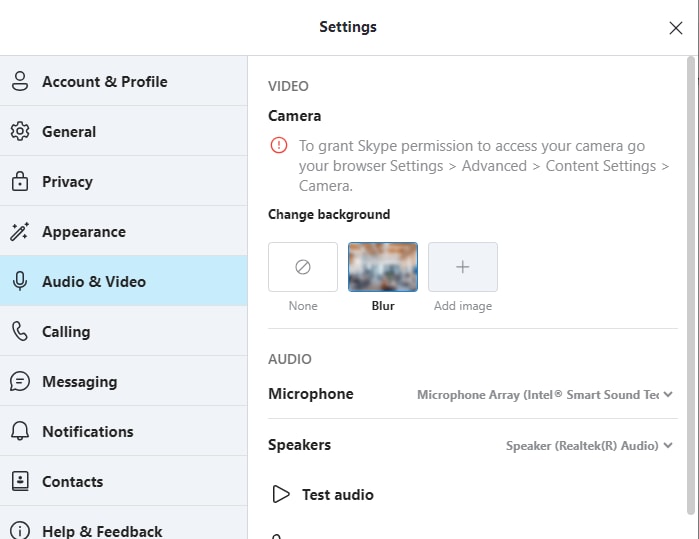
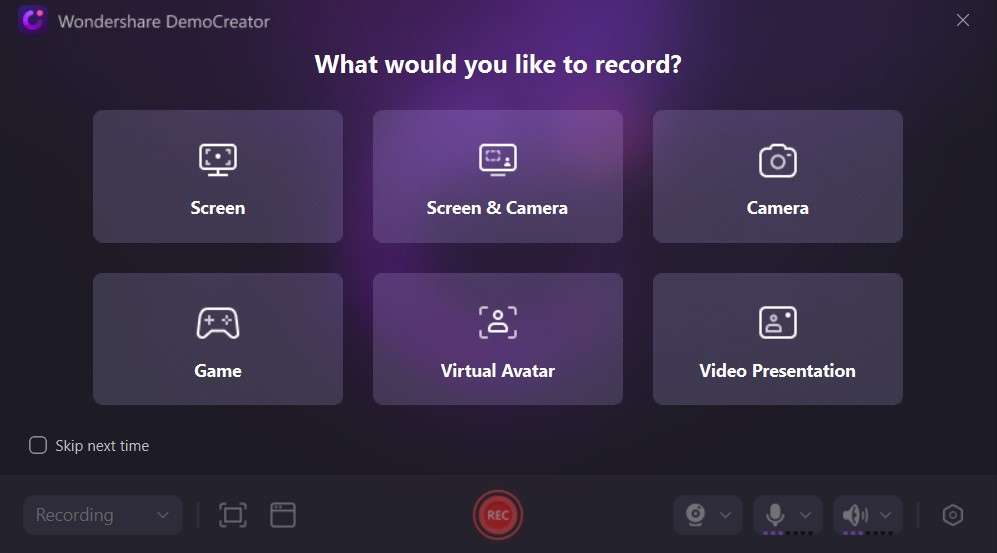
Step 3: Open Democreator software and select Video Recorder
Double-click on the DemoCreator icon on your desktop and select the Video Recorder option.
Step 4: Select Screen
DemoCreator allows six recording modes to choose from, for you to have a dedicated recording experience. As we are looking to record Skype Video calls, selecting the screen option is most apt. The Skype call will already have your camera on, and you don’t want to see yourself twice on the screen. Set the recording area. You may select from the default options or customise the recording area yourself as required based on the Skype recording meeting screen.

Step 5: Begin Skype meeting and recording
Begin the Skype meeting, once everyone has joined in, click on the red recording button in the DemoCreator Window to begin the recording. You can easily pause the recording in between and resume it as per requirement. Here, no one in the meeting will be notified that the meeting is being recorded. Once the meeting ends, you can click the stop button to end the recording.
Step 6: Edit recording
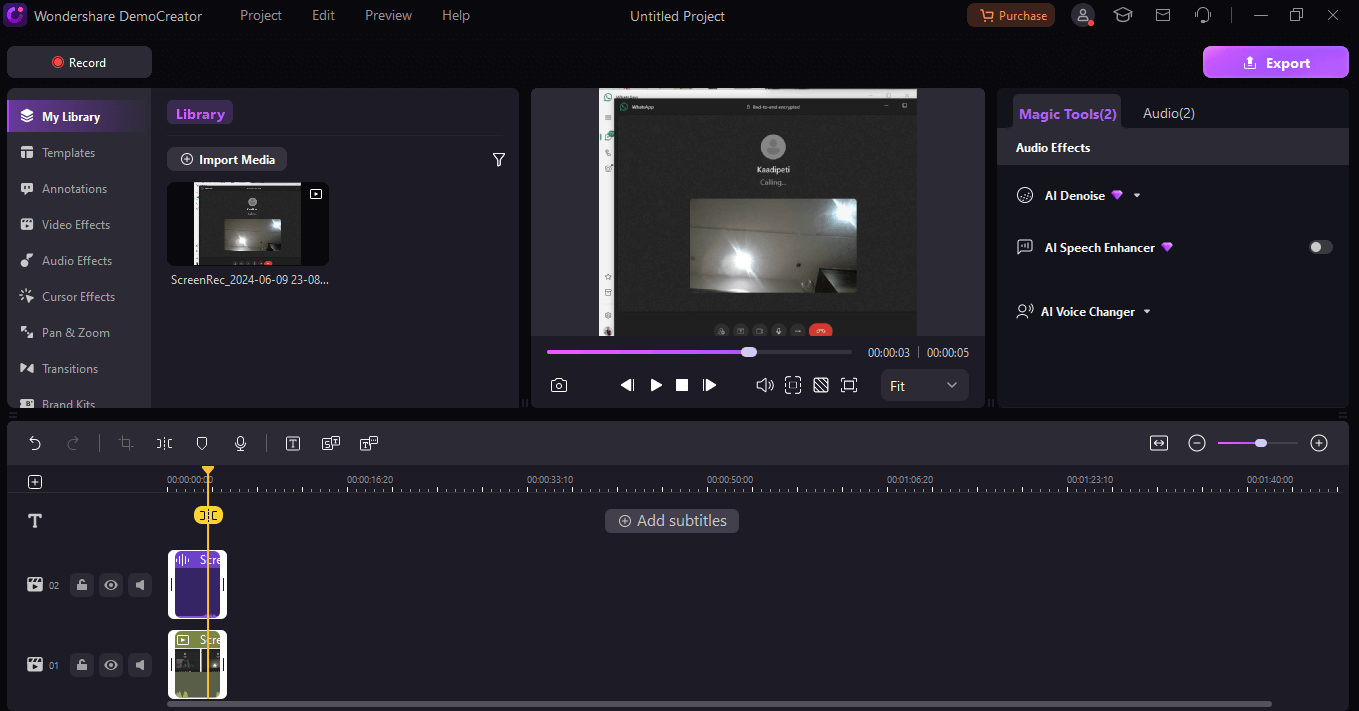
Once you stop the recording, you will be directly navigated to the video editor window of DemoCreator with your recording in the library. Drag the recording to the timeline and preview it. Here, you can trim the unwanted parts of the recording. You can also enhance the recording by using the various editing options, as well as AI-powered options such as denoise to remove any background disturbance and much more.
Step 7: Export
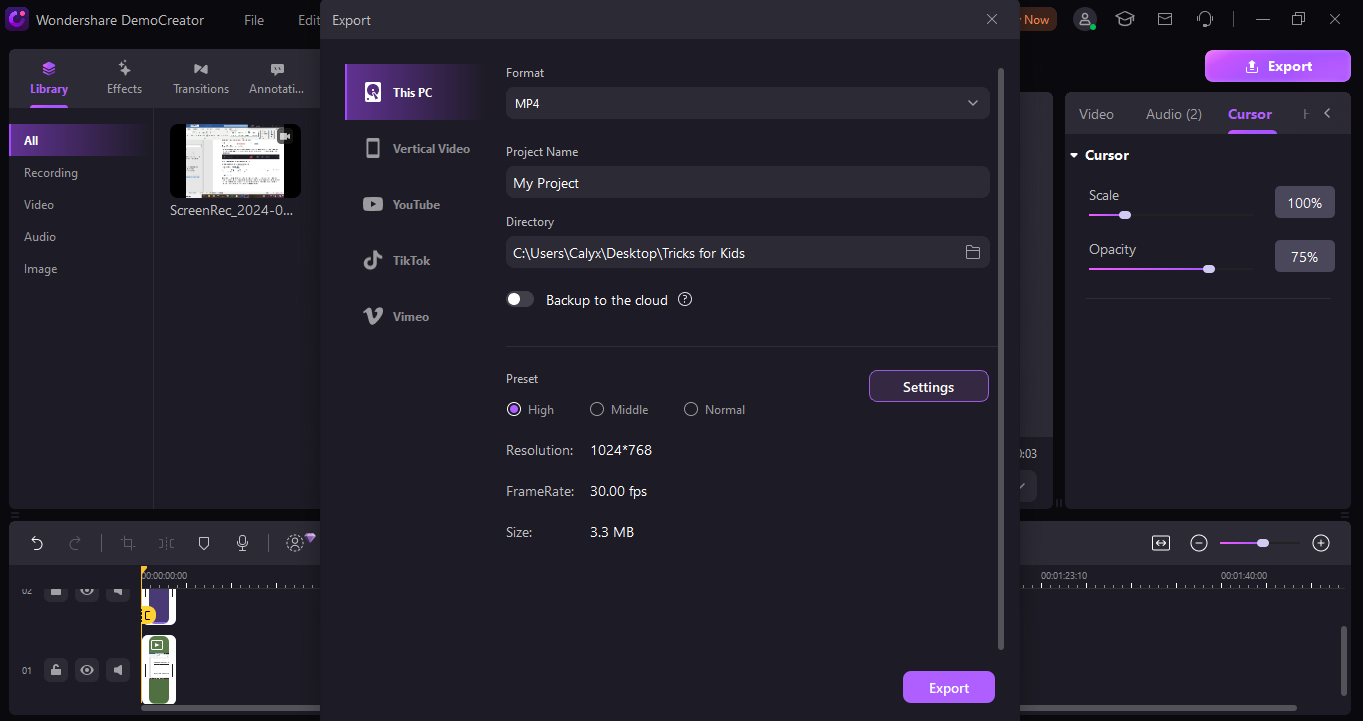
Click on export to save the recording. You may decide on the recording format and the location where you want to save the video. Click on Export again to save the video.
Part 3: Features to look for in a Screen Recorder for Skype
Recording a Skype meeting is very easy using a screen recorder. However, to make the experience seamless following are some of the qualities that a screen recorder must possess:
- Supports your Operating System. Very few screen recording software programs work well on Linux or Mac OS.
- The interface must be simple and easy to set up.
- Various other features besides a screen recorder are needed and useful for a seamless recording experience. Look at the features available before deciding on which software to use.
- Read the customer reviews and customer support availability.
Conclusion
The aforesaid are the steps to record a Skype meeting. If you have a Skype business account, then using the inbuilt recorder can be useful. However, in that case, Skype auto-shares the recording with all its participants, and if that is something you don’t want, then probably going with third-party software such as Wondershare DemoCreator will prove helpful.
FAQ
-
Q1: Can I record a Skype meeting on Skype for Free account?
A1: While the Skype for Free account doesn’t have a feature of recording a Skype meeting there are various other third-party software such as DemoCreator available in the market that can do the needful. -
Q2: How do I secretly record a Skype Call?
A2: If you use the Skype Call recorder then it will notify everyone that the meeting is being recorder and will also share the recording with everyone. You can use a Screen Recording software such as Wondershare DemoCreator if you want to secretly record a Skype Call.


