Skype is among the most popular applications for chatting, voice and video calls, online meetings and conferences, and much more. Skype call recording is often needed, especially when it is a formal meeting such as a business conference. You can record calls directly on Skype if you have a Skype for Business account. However, if not, then it might get a little tricky to record for Skype.
This article will show alternate ways of recording Skype Calls, especially when we don’t have a Skype for Business account.
In this article
There are different ways in which you can Skype video and audio calls on different devices. For convenience and easy understanding, we have tried to divide this into three main parts:
- Recording on your Mobile Device.
- Recording on your PC
- Recording online, whether on PC or mobile.
Part 1: How to Record Skype Calls with a Built-in Call Recorder
All the latest mobile devices, whether Android or Apple, have a built-in Screen Recorder. This screen recorder can record the screen with audio and save it to your Photos/gallery. Let us see how you can record Skype calls on different mobile devices:
i) Skype Call Recording on iOS Devices
All iOS devices, whether iPhone or iPad, have a built-in Screen recorder. The following steps are to record in Skype on an iOS device using a built-in Screen recorder.
Step 1: Getting the Screen Recorder to the Control Centre
All the iOS devices have built-in Screen Recorder and you can find it in the Control Centre by swiping down from your top right corner. If you cannot find it there, then you need to get it from the Control Centre. To do so, go to Settings > Control Centre. Scroll under more controls, find the Screen Recorder, and click on the Green + sign next to it. This will add the Screen Recorder to the Control Centre and you can now find it by Swiping down from the top right corner of your screen.
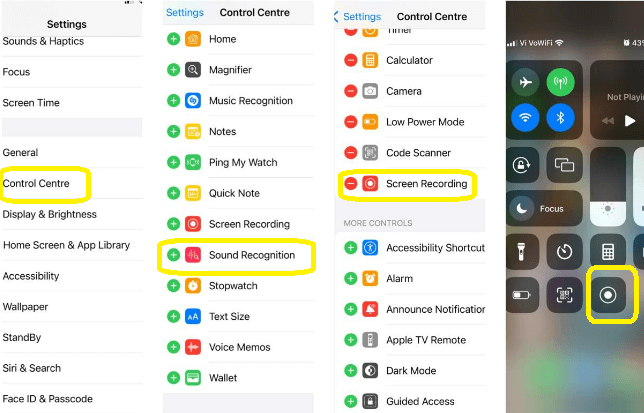
Step 2: Turn on the microphone.
By default, the microphone is turned off. So if you record a Skype meeting directly using the Screen Recorder, then there is the possibility that you only get the video of the recording without any audio. To record the screen with audio, you need to turn the microphone on. To do so -
- Swipe down from the top right corner of your screen.
- Long press on the Screen Recorder option.
- Click on the Microphone off button to turn on the microphone.
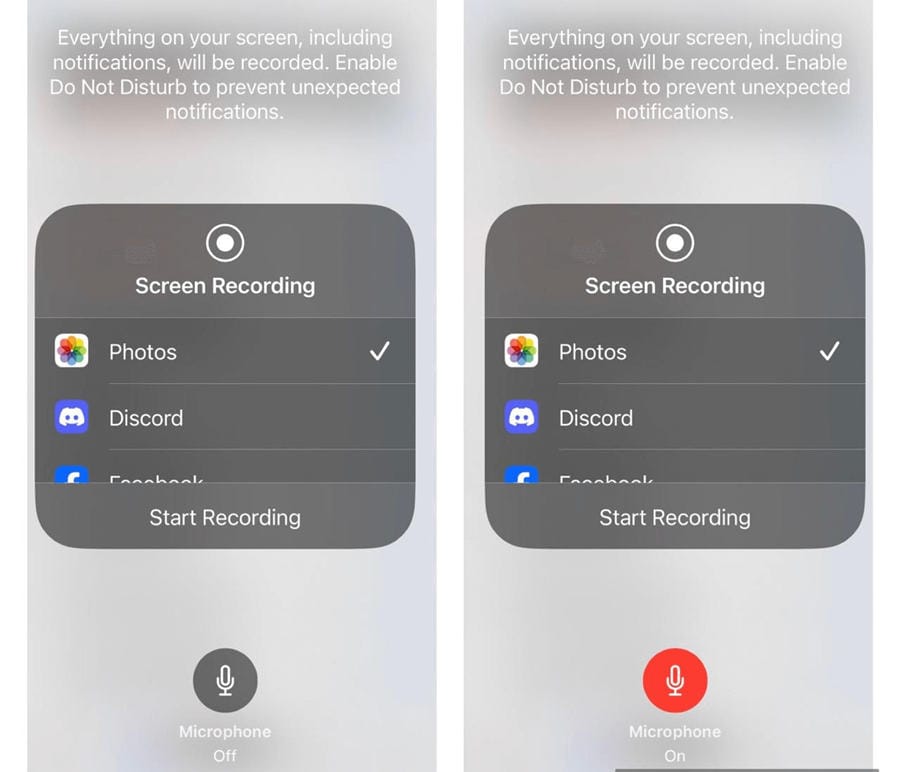
Step 3: Begin the Skype Call.
Step 4: Swipe down and begin the Screen Recording.
ii) Skype Call Recording on Android Devices
Android devices also have a built-in Screen Recorder. Let us see the steps for recording calls in Skype using Screen Recorder on Android Devices.
Step 1: Swipe down from the top to find the Screen Recorder. If you cannot find it there in your Shortcuts, you need to add it. You can do it by swiping down and clicking on +. Now drag the Screen Recorder down from the available buttons. In this way, you can add the Screen Recorder to the shortcut.
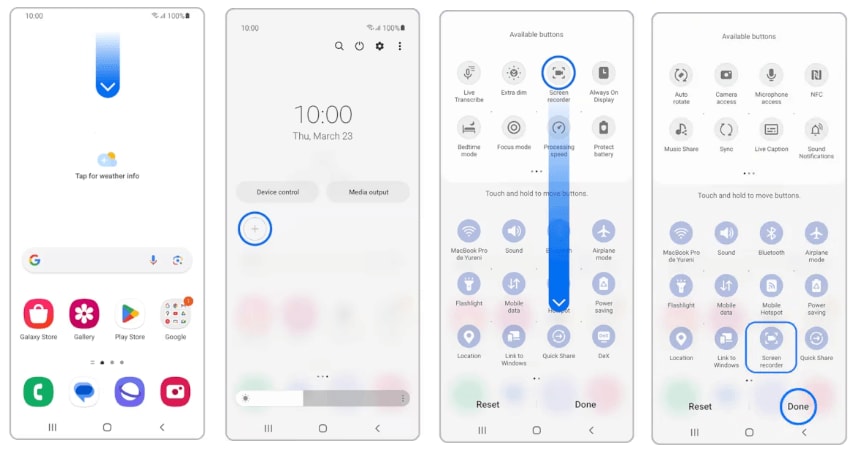
Step 2: Swipe to open the shortcuts and click on Screen Recorder.
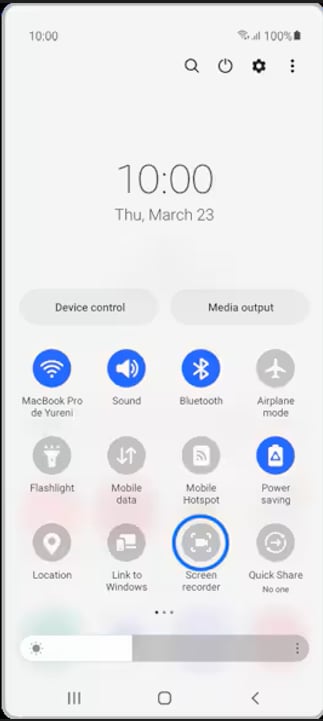
Step 3: Select the audio settings.
Choose from the options whether you simply want to record the media or want to record media with a microphone. Once selected, click on Start Recording.
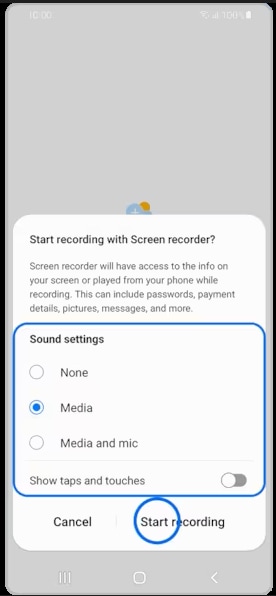
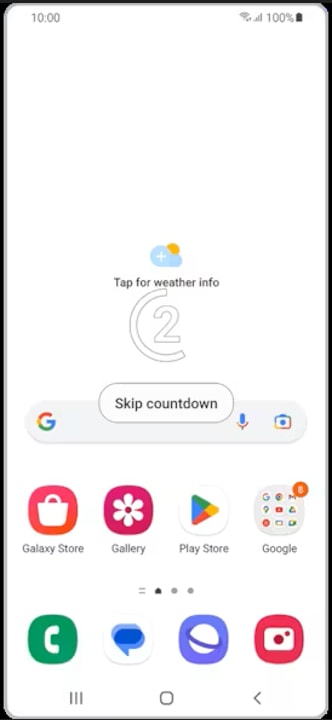
Step 4: Open Skype and begin the call. The Screen will be recorded with the microphone, and once your call is over, stop the recording. The recording will then be saved in your gallery, where you can playback it.
iii) Skype Call Recording on Older Versions of Android Devices Without a Built-in Recorder
All the latest Android devices are equipped with a built-in Screen Recorder. However, it might not be readily available for some old devices, so we’ll need to use a compatible Android call recorder. Let us see how to record a call on Skype on an Android device using XRecorder.
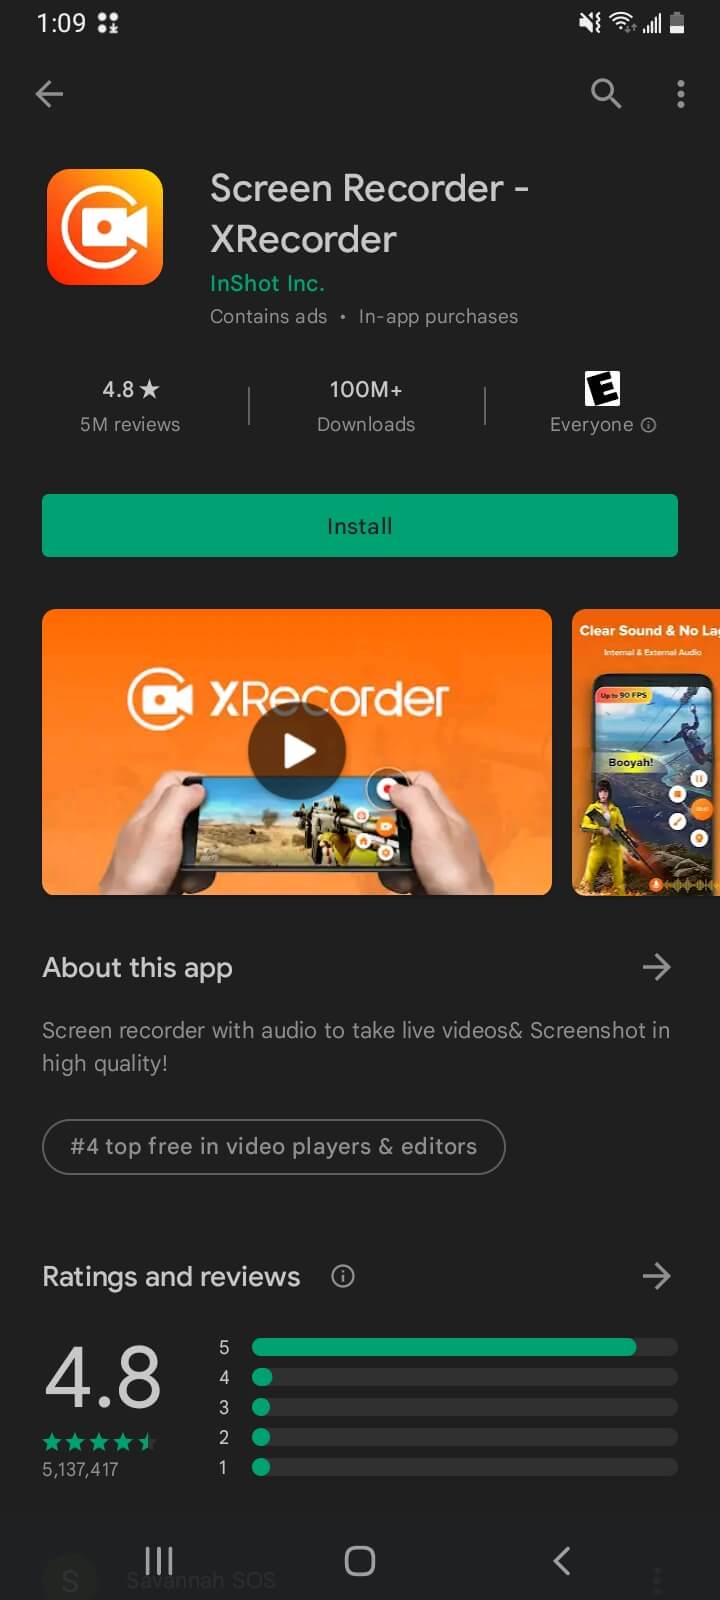
Step 1: Go to Google PlayStore and download the Screen Recorder – XRecorder.
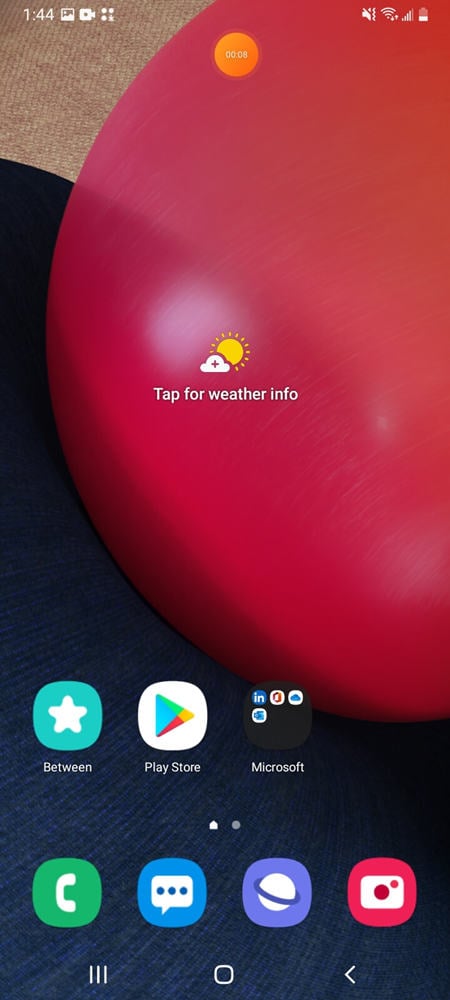
Step 2: Once the application is installed on your device, you will see the following options at the top of your Screen. Click on the Record option to begin recording.
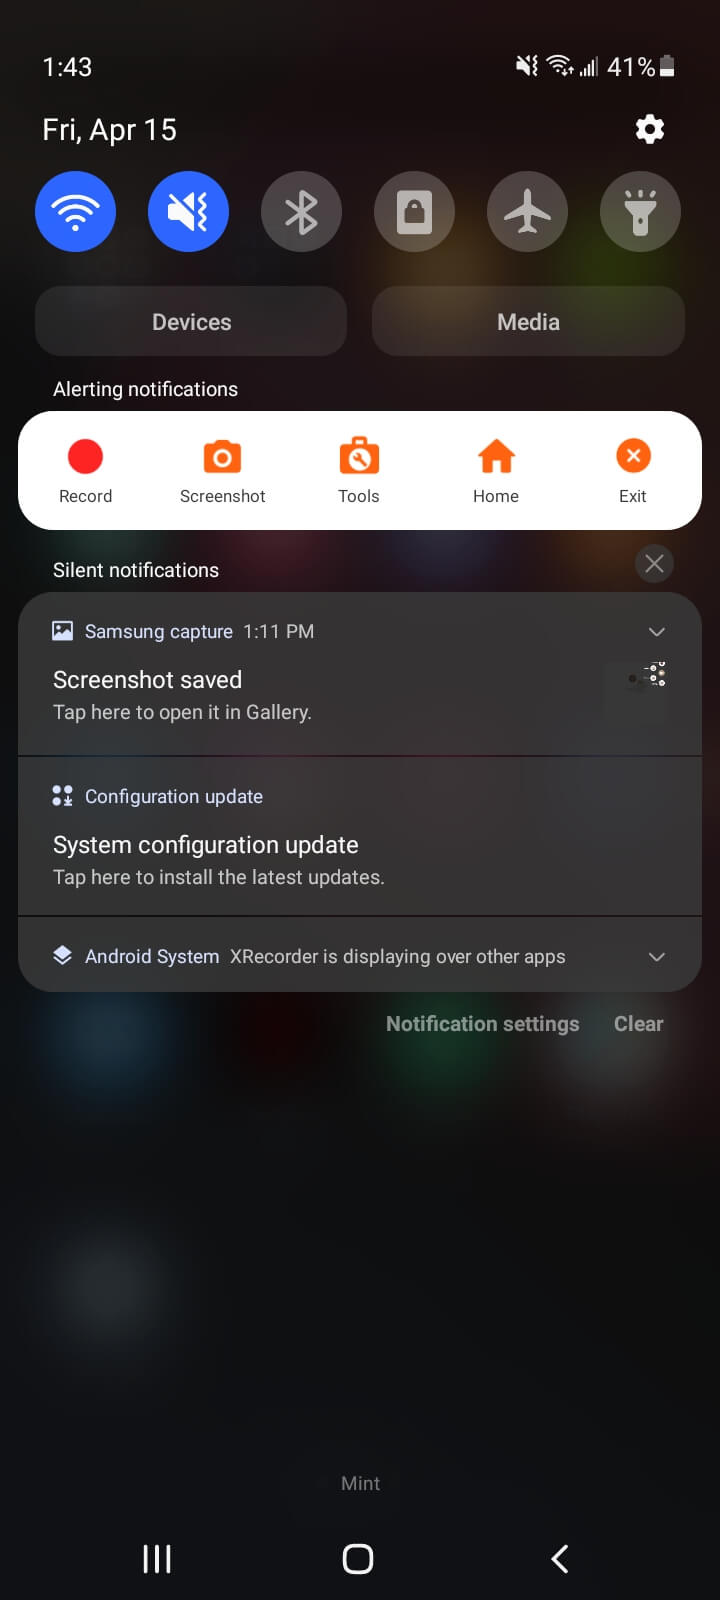
Step 3: Once your Recording has begun, you will see an Orange circle at the top of the Screen. This indicates that the screen is being recorded. Now begin your Skype Call. Once the call ends, click on this Orange button to stop recording. You will immediately shown the option to either save or share the recording. Choose the appropriate option as per your requirements.
Part 2: How to Record Skype Calls with Wondershare DemoCreator [Windows/Mac]
Wondershare DemoCreator is a kind Video Recording and Editing application that works well with Windows, Mac and Linux. With six dedicated recording options, you can specifically record what you want. Let us look at the features, pros, and cons of DemoCreator.
Features:
- Six dedicated recording options.
- Free Screen Recording.
- AI-powered recording and editing features.
- Edit with ease and create studio-quality recordings.
- Cloud storage is available to save space on your system.
How to record Skype on a PC using Wondershare DemoCreator
Step 1: Download and install Wondershare DemoCreator.
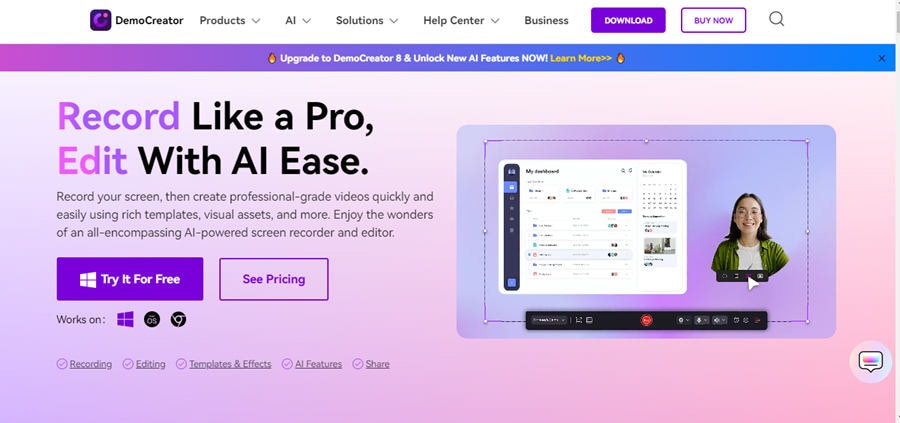
Go to the link above and click “Try It For Free”. This will automatically download the DemoCreator Setup on your PC. Open the setup and follow the onscreen instructions to install the DemoCreator App on your PC. You can also see a DemoCreator shortcut icon on your Desktop.
Step 2: Click on Video Recorder
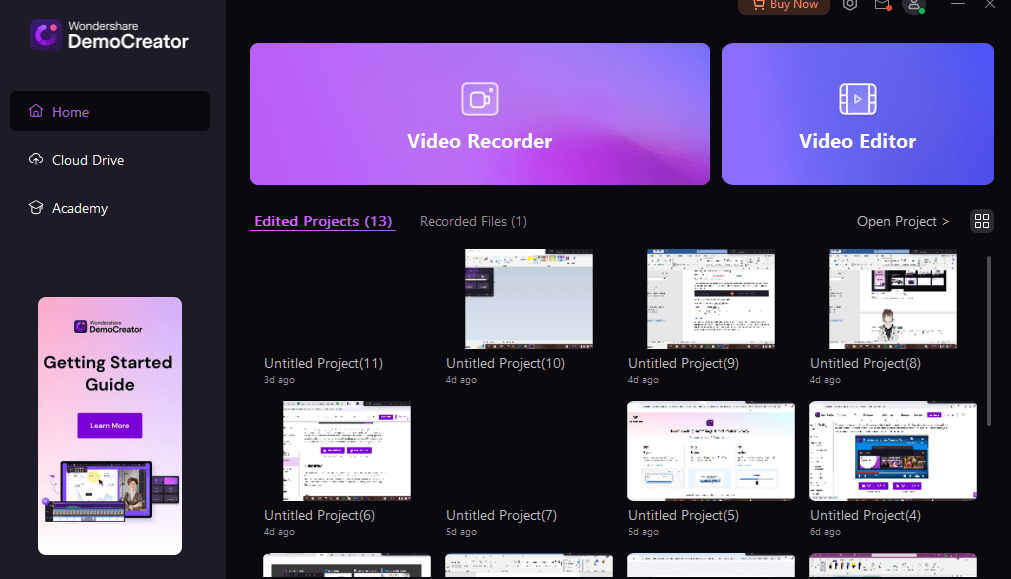
You can see two main options: Video Recorder and Video Editor. Right now, because we have to do call recording for Skype, Click on Video Recorder.
Step 3: Click on Screen.
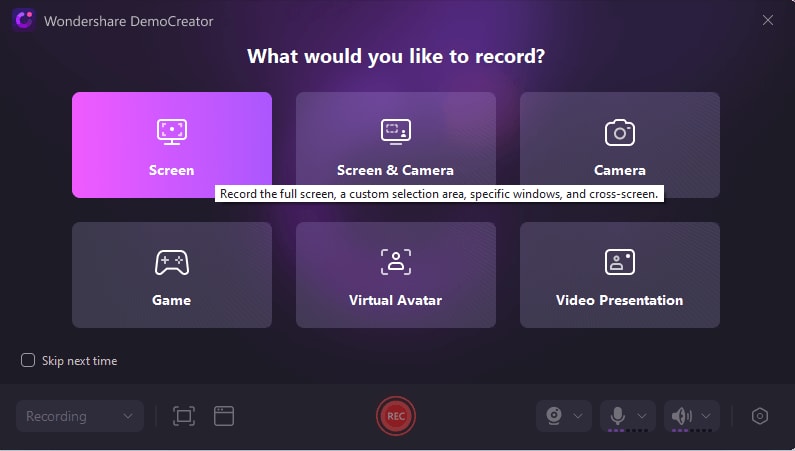
DemoCreator provides six dedicated recording options for an exclusive recording experience. Here, we want to record Skype Calls, and hence selecting Screen would be the right option.
Step 4: Setup Screen
You can see a dotted rectangle on your screen, which denotes the recording area. Open Skype and adjust the recording area. Once the setup is done, Click the Red recording button to begin recording.

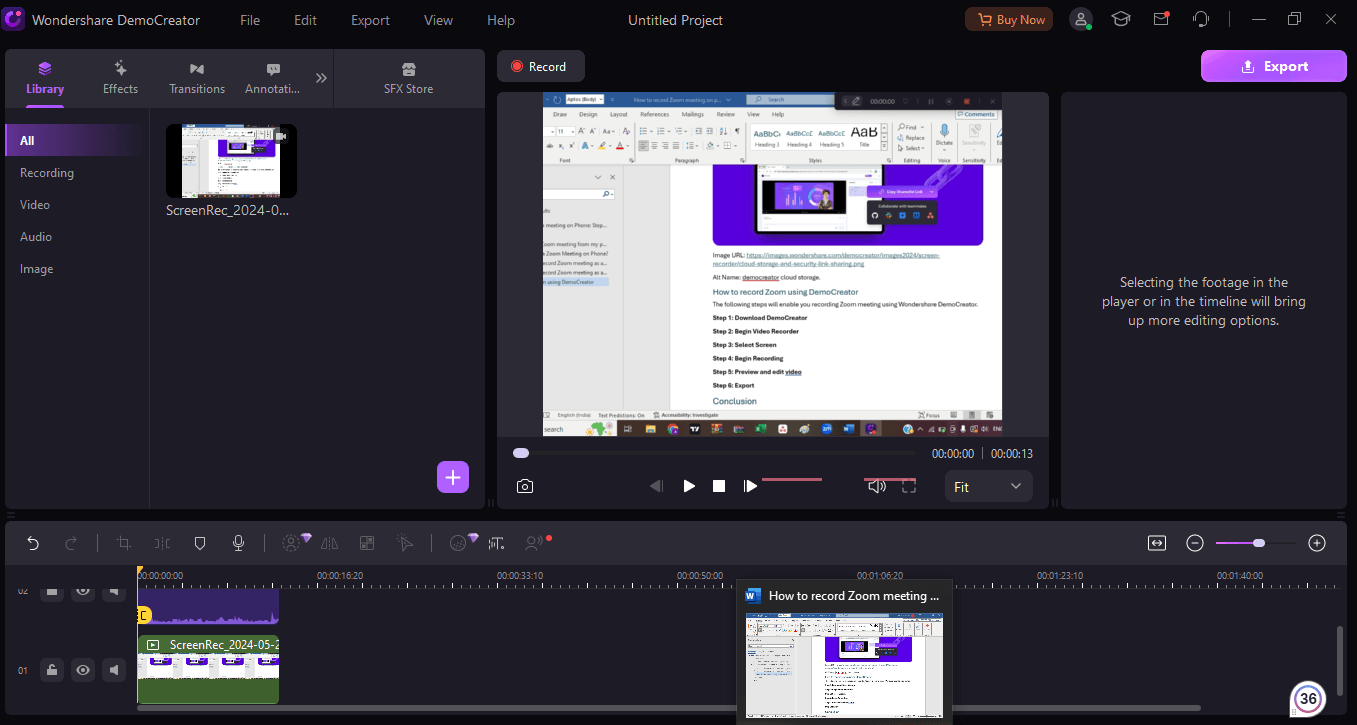
Step 5: Edit recording
Once your Skype call ends, click the red button at the top of the screen to stop recording. You can also pause and resume recording if need be. Once you stop the recording, you will automatically be taken to the Video editing window with your recording in the library. Here, you can trim, split, and edit the video. Add annotations, remove noise, etc, to enhance the quality of the recording.
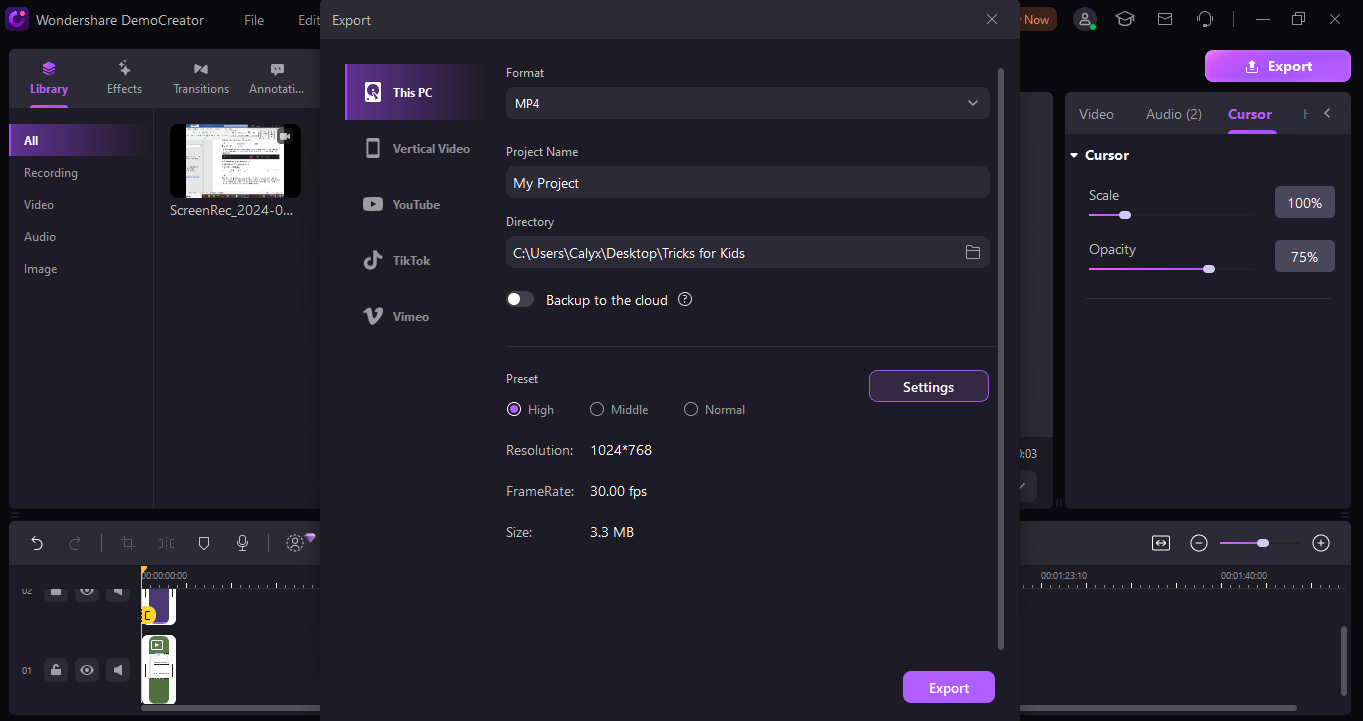
Step 6: Export Video
Once all your editing has been done, click on Export. You will be navigated to the next screen, where you can decide the format in which you want to save the video and its location. Once all the necessary changes have been done, click on export again. The recording will now be converted and saved at your desired location.
Part 3: How to Record Skype Calls with Demoair - Online Tool
DemoAir is the online extension of DemoCreator and aids you in recording the screen online without downloading any software on your PC. The following are the pros and cons of using DemoAir to record Skype Calls.
Let us now explore recording Skype using DemoAir
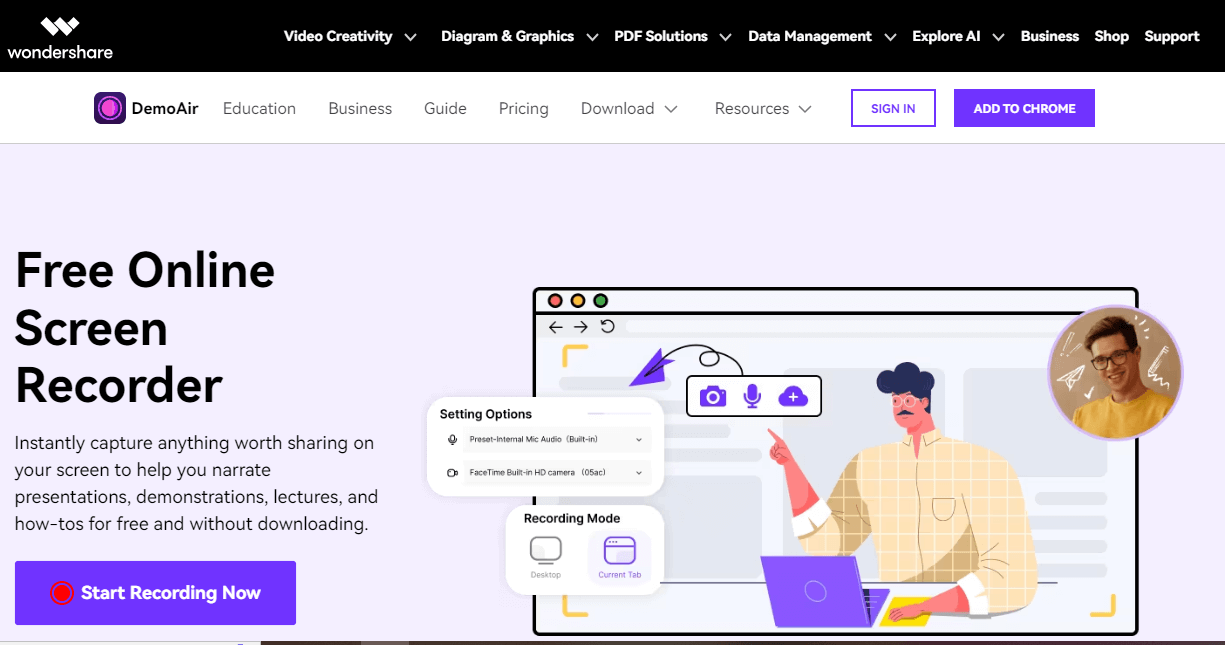
Step 1: Open the DemoAir website and click on Start Recording Now.
Step 2: Select the recording Mode
Four recording modes will be displayed – Screen Only, Webcam Only, Screen and Webcam and Only Audio. As we want to record Skype calls the ideal option to choose is Screen Only. Click on Start Recording.
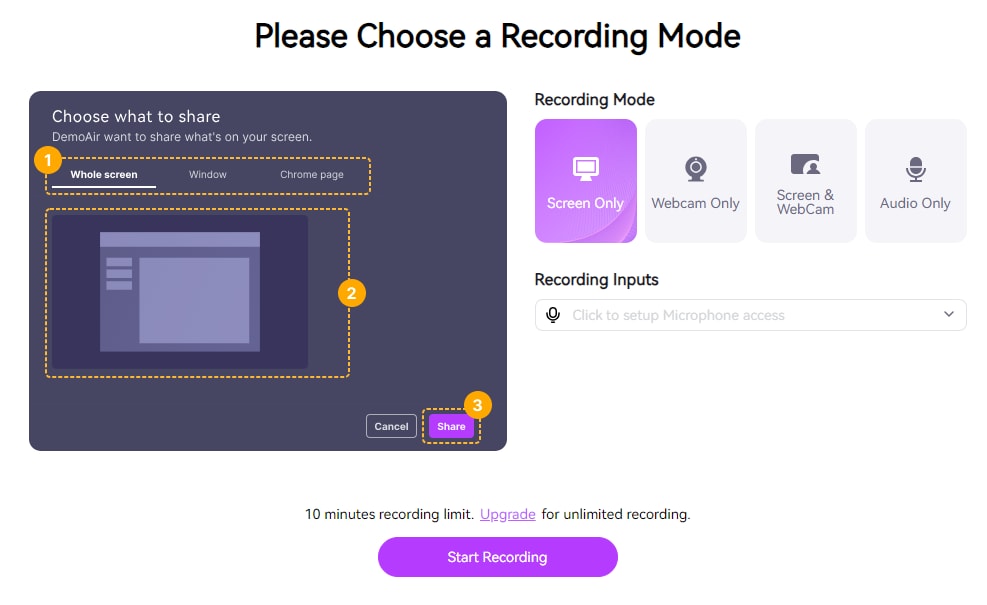
Step 3: Choose what you want to record. If you are using Skype on a Web Browser, choose the Chrome Tab with Skype. On the contrary, if you are using the Skype Application on your Windows, open the application, Select the Window option and choose the Skype Window. Once done, Click on Share.
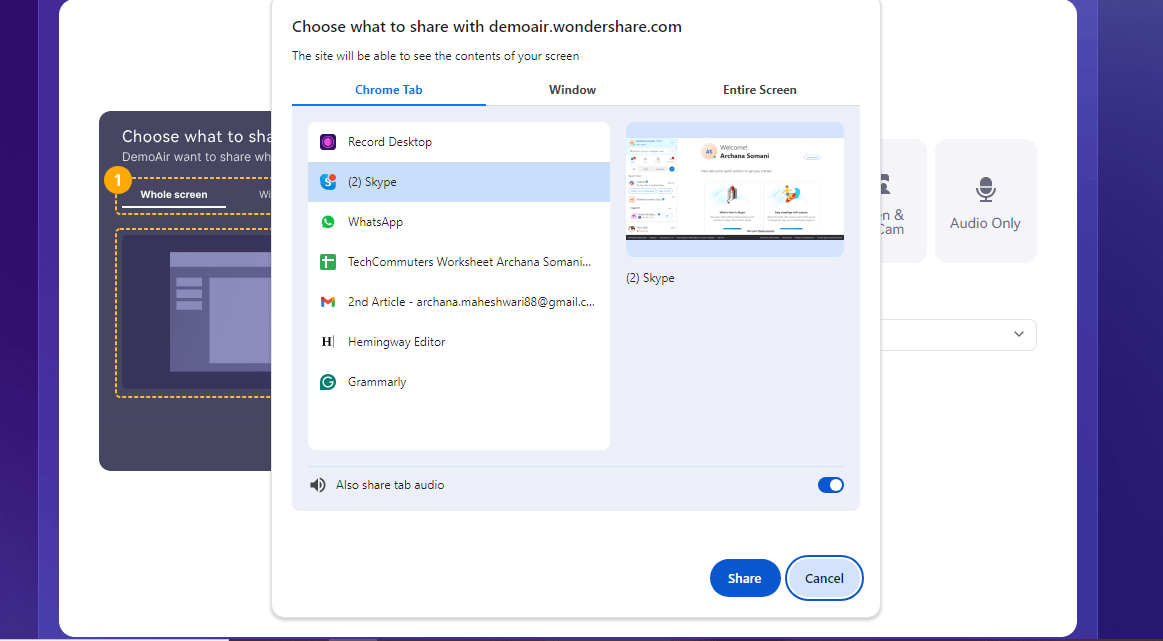
Step 4: Begin Skype Call
Once you click on Share, the recording will begin with a notification tab at the top stating Sharing this tab to demoair.wondershare.com. Begin your Skype Call. Once your call is done, click on the option Stop Sharing.

Step 5: Download/Save/Share the recording
Once you have stopped sharing, return to Wonndershare Webpage. Here, you will be able to preview your recording. You can save your recording to the cloud or download it to your computer. You can also share it directly with your social media account.
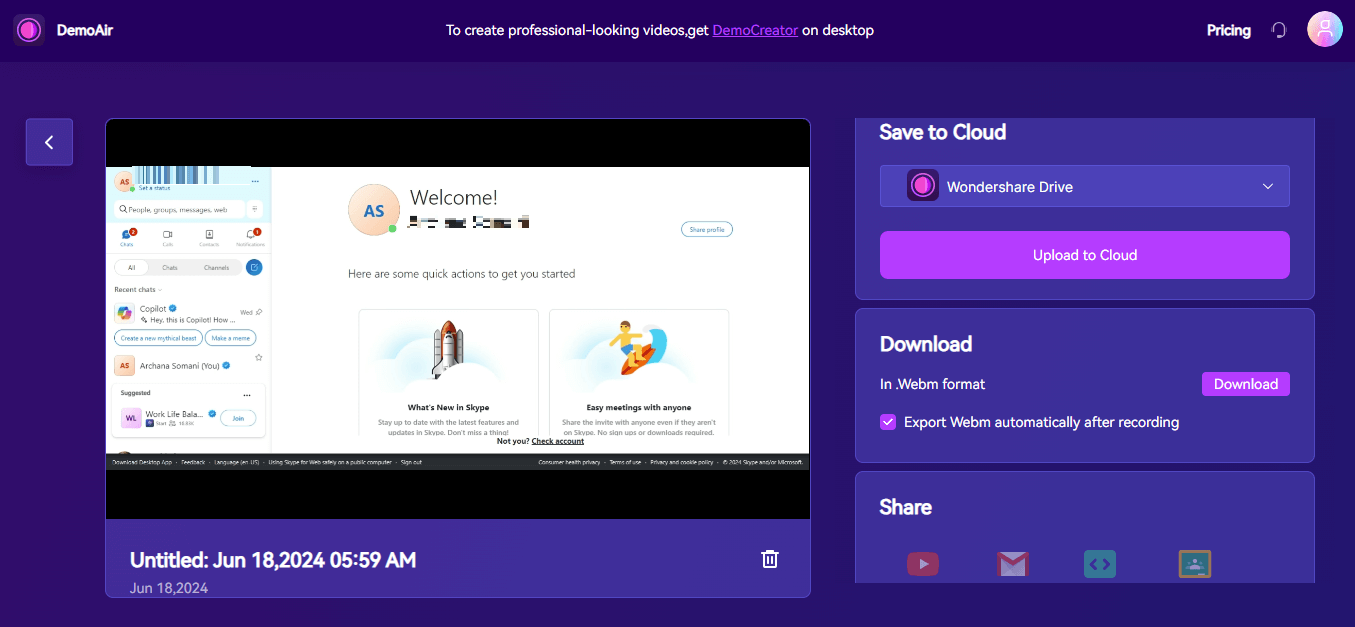
- Record customized screens with audio and edit them in different tracks.
- Capture gaming videos, tutorials, and presentations and then edit them in one tool.
- Built-in unlimited editing templates, special effects, and other sources.
- Supported export to MP4, MOV, MKV, GIF, and other formats.

Conclusion
There are several ways of Skype Call Recording on any device whether or not you use the Skype Business Account. There are numerous free tools available to help you if you need them. We would suggest using the DemoCreator Desktop version for high-quality recording and numerous editing features. You can also record the Skype Calls from your Web browser on any device using DemoAir, which is an online extension of DemoCreator.
FAQ
-
Q1: Can you record a Skype call secretly?
A1: Yes, it is possible to record a Skype call secretly. Simply use the screen recording app on your system and you will be able to record the Skype call without anyone knowing. -
Q2: What is the difference between Skype and Zoom?
A2: Both Skype and Zoom are wonderful platforms for video conferencing. However, there are a few basic differences such as Skype allows a maximum of 50 participants while in Zoom, you can add up to 100. Skype allows free meeting duration up to 4hrs while Zoom allows only 40 minutes.

