Best Steam Screen Recorders
From the commencement of Steam Games, the library of Steam games is growing like anything. In current times the Steam game library is a real treat of pleasure for the gamers community. For those who do not have any good idea of Steam and only familiar with the loading screen logo, Steam is a platform or game development organization that allows you to play games of different genres online.
A sound steam game recorder must be seamless and have a capacity of recording screen at a fair resolution long with live sound. The virtual world is anything for the community of games, and they always want to share and boast their in-game experience and achievement with other gamers—the tendency of sharing introduced the real essence of a sound Steam screen recorder.
In this entire article, we are about to disclose the three most popular Steam screen recording software along with their installation and recording process, so that you can have a comprehensive idea of contemporary Steam recording software. This entire demonstration and tutorial article will teach you how to record stem gameplay windows 10. You can also try these methods in other older versions of Windows too.
Wondershare DemoCreator
This is one of the most popular and straightforward desktop screen recording software available in the market. The application is so easy that it can be operated by kids also. Further, this application allows you to edit its recorded videos with some fundamental rituals only.
This application will really make you able to create and share your gaming content at ease and way faster than others. Now without further ado, let's know the process of installing if you do not have it on the desktop.
Download the Steam Video Recorder: You can directly download this application from the official website of Wondershare DemoCreator. There you will see the free download option.
 Secure Download
 Secure Download
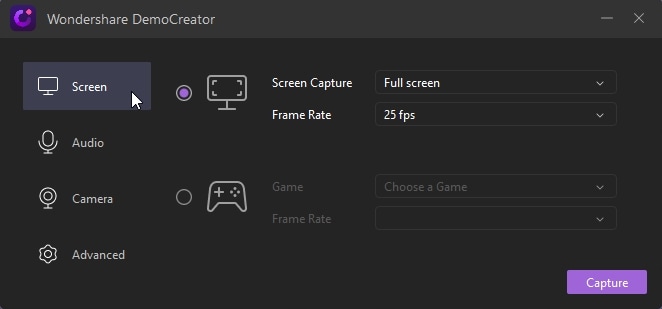
Configure the Recording Settings: After finishing the downloading, install it on the desktop or laptop wherever you want to perform the Steam recording. Double click on the icon appeared on the desktop after the installation. Now, this screen will show you two different options 'Capture' and 'Video Editor' to launch the steam record screen; you have to choose the capture option.

After that, it will show you another screen for configuring the application. Now, you have click on the top right settings icon to move to the settings panel. Here you can change the settings of Wondershare DemoCreator as per your need from Steam record gameplay.
Screen: Choose the Screen tab and select the gaming joystick icon to choose the Steam game you want to record, and then you can change the Frame Rate as per your choice.

Audio: Moving on to the next tab to change the audio recording settings of the recording. You can even turn off the audio recording option from here by selecting the Don't Capture option. Remember, you can only use one source for audio recording between 'Computer Audio' and 'Microphone.'
Camera: The Wondershare DemoCreator allows you to record parallel videos of yourself through the web camera of your computer. Likewise, the settings mentioned above, you can even set the resolution and frame rate of the camera also from this tab.
Advanced: In this section, you can set the path where you want to save to final output video file. Also, you can select the encoding preferences and recording shortcuts.
Start the Steam Game Recording: After setting up all the required parameters now, you are ready to record the gameplay. To start the process of capturing the press, the 'Capture' button. It will appear a screen from there; you need to press the Capture button only. After finishing the recording, the application will automatically redirect you to the editing panel of this application.
Add Annotations After Recording (Optional): After recording the entire Steam video, you can add annotation effects in the editor to make it cooler. This feature is perhaps the coolest feature of this application. There are a good amount of preloaded annotations available in the editing panel that can help you to modify your gameplay video to share with your gamer friends. You can add, resize, remove, copy, and pest annotation on the video. Even you can change the duration of an annotation with this application.
Save and Share the Recorded Steam Gameplay: After recording and adding annotation, you can directly export the video; however, to do that, you need to log in to the WanderShare DemoCreator account. After logging in, you can instantly share your Steam game recording with your friends.
Summary
This application is undoubtedly a one-stop solution for Steam record gameplay, although it has some cons too. This application offers limitations for free video recording; to avail every feature, you need to purchase the paid version of this application. Further, the annotation library has enough features, but that might not be sufficient for some Steam game video making.
OBS Screen Recorder
This open-source and simple screen recording application has all the qualities of becoming an all-time favorite Steam Screen Recorder for any gamers. This application is powerful and easy to operate. However, the graphical user interface is not as cool as the previously mentioned Wondershare DemoCreator application.
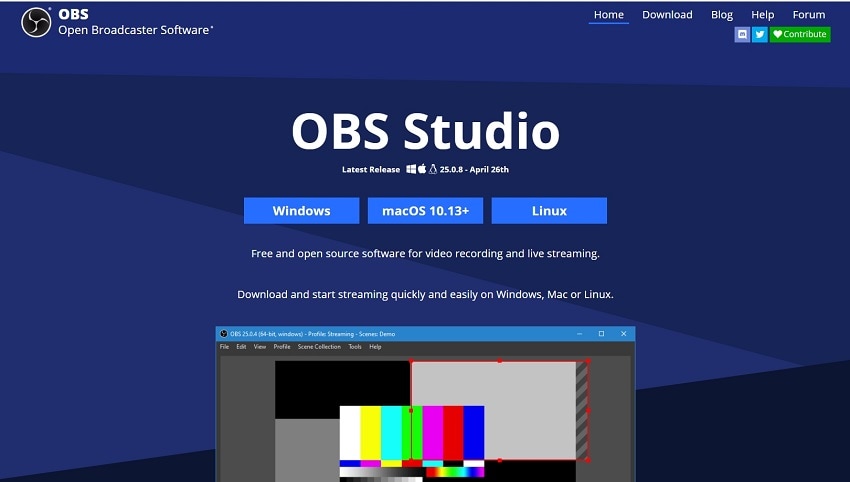
If you already have this application on your desktop, then double click on the icon to launch the application right away. Otherwise, you can download it from the official website by clicking OBS Project this link. The install it on the windows.

User Guide: After the installation process, you have to launch it for further configuration.
One the bottom left, this application has two sections called 'Scenes' and 'Sources.' Click on the plus icon on the Scenes section and name your scene for the Steam screen recording and press OK. The scene will be added to the screen.
Then move on to the adjacent section of 'Scenes,' called the 'Sources' section. Here you also have to click on the plus button to add a source for the screen recording. Choose the 'Display Capture' option and hit enter. If you have multiple displays, then you need to choose the specific monitor or display source for capturing the game.
Then you have to repeat the same process once more to add the 'Game Capture' screen from the 'Sources' tab. After selecting the game capture screen, a window will appear for further configuration. Name the screen and press OK to move on to the next advanced screen for setup.
From the Advanced setup panel, you need to choose a mode called 'capture Specific Window,' then select the Steam game window from the Window dropdown panel and press enter.
Repeating the same process, you can also add your web camera device in the process of recording. However, this is optional; you can also skip this to avoid if you do not want to include your face to the gameplay.
Finally, add the audio input device by using the same plus button, clicking on the option called 'Audio Input Capture' option.
Finally, click on the 'Start Recording' option located on the bottom right of the panel, and after recording clock on the stop recording option.
From the 'Controles' panel, you can go to the settings option to configure your screen recorder further like you can modify the video output format, change the resolution, change the frame rate, and set the drive path for saving the final output video.
Summary:
The OBS screen recorder is one of the most favorite Steam screen recorder of gamers fraternity; however, this application does not have any editing option for the final outcome.
Fraps Screen Recorder
This application is perhaps the most seamless and straightforward screen recording application of all time. By using this application, you can record your Steam gameplay within the blink of an eye.
Download the Fraps application for free by clicking Fraps Download . This link will redirect you to the official page of Fraps. Install it on your Windows operating system if you do not have it installed.
Fraps do not offer you a massive library of features; thereby, the interface and the operation are effortless to handle. The Steam game recording through Fraps is perhaps the fastest among all of its major contemporary competitors.

User Guide: Successfully installed!
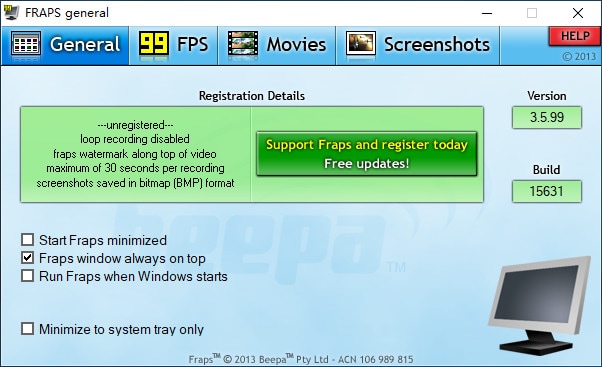
Now click on the icon appeared on the desktop and set the general settings like 'Start Fraps minimized,' 'Fraps windows always on top,' 'Run Fraps when Windows starts,' and 'Minimize to system tray only.' Check your preferred options as per your requirement of usage.
You can also set the benchmark settings under the 99FPS tab. From there, you can see the benchmarking hotkey and overlay hotkey, and even you can set the location of the benchmark overlay.
Now move on to the 'Movies' tab to set the video recording preferences.
Under the Movies tab, you can set the desired path of the recorded file saving. Also, you can set any of your preferred keys like the 'Video Capture Hotkey.' Further, you can set your preferred audio as stereo or multichannel.
If your computer has sufficient hardware and Graphics Processing, then you should Choose the Video Capture Settings both as 60FPS and Full-size to achieve a considerable quality Steam gameplay video.
Now using those hotkeys, you can record your steam game screen while playing.
Summary
If you do not want to record your Steam game videos with your webcam, and if you do not desire to modify or add annotations to your final video output, then this application is just meant for you.
Conclusion
All the above-mentioned screen recording programs are more than enough as a sound Steam screen recorder. However, we recommend you to go through the entire article multiple times so that you can choose the perfect one to satisfy your needs.
The OBS is an excellent alternative to modern Wondershare DemoCreator because the OBS screen recorder is free and open-source. However, we prefer the Wondershare DemoCreator over the other two options because it has more features to serve your purpose of Steam game screen recording and ornamenting the final product to attract your gamer friends.


