Top 11 Screen Recorder with Facecam

Facecam has become an integral part of communication purposes through live video. Due to this popularity, several users have incorporated it into their daily life. There are many instances where users find it difficult to capture their faces during a live video recording and gameplay video.
Furthermore, it becomes frustrating because you do not have an option to record these videos. But, all thanks to Facecam screen recorders, you can now easily capture videos, record streamline video, and record during gameplay. Screen recorder with Facecam helps in focusing your face and shoulder area while playing games and recording. This is why; a majority of users opt for Facecam recorders to make their videos effective.
It also helps game players to capture their reactions while playing games that grab the attention of viewers. Moreover, you can use this online tool for attending online meetings through video calls and communicate with anyone face-to-face.However, choosing the best Facecam screen recorder is vital. Here you can learn about some excellent Facecam for PC that can meet your desired needs.
Part 1. Online Facecam and Screen Recorder
Veed
Veed Screen Grabber Premium is an incredible and dependable screen recorder that can use for Facecam. It is a face cam and screen recorder that permits you to record in full-screen, locale mode, and webcam. Additionally, it can record the framework sound, amplifier, or both for portrayals. You can likewise put comments like shapes, lines, bolts, and messages to upgrade the chronicle. Besides that, this apparatus has a Task Scheduler that you can consequently record your screen at a given time. With Veed, you can record just your screen, just your webcam, or both at the same time! To begin utilizing this device, you can follow the steps below.
Step 1: Visit Veed.IO: To begin recording with this online toolkit, visit the official website and from there select from the list of layouts. You may also need to click on ‘Allow’ permission to access your screen, camera (for Facecam, and microphone access to your browser.

Step 2: Start Recording: Click the red button to start recording! You'll see a countdown before the recording starts. Right after the recording starts, you have unlimited retakes as well. You can also navigate to other pages while you are still recording.

Step 3: Stop/Export the Recording: You can playback your recordings to review them, click ‘Share’ to share with friends and colleagues, or ‘Edit’ to edit your video perfect for adding text, subtitles, and professional touches to your Facecam recording.

Panopto
Panopto is a Facecam recorder that records your face and screen simultaneously or simply records one of the two in particular. It is incredible and adaptable: Record your portrayal utilizing an amplifier while recording Facecam/screen or doing it simultaneously. Panopto Express will naturally identify screens and screens associated with your PC. Snap the screen symbol at the upper right and select the primary screen, application window, or program tab you need to show in your screen recording.
Step 1: Launch Panopto: Before you begin the game, open Panopto Screen Recorder.

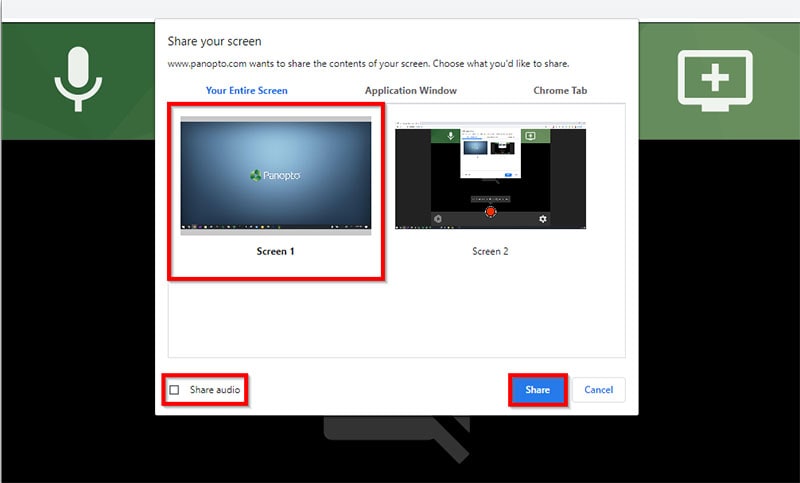
Step 2: Select and Customize Facecam Recording: You can choose to record the full game interface. To record an additional screen, application window, or browser tab in the same recording, click the screen icon again, select what you want to record, and then click “Share.” You’ll do this until you are sharing all of the screens, windows, and tabs you want to record.
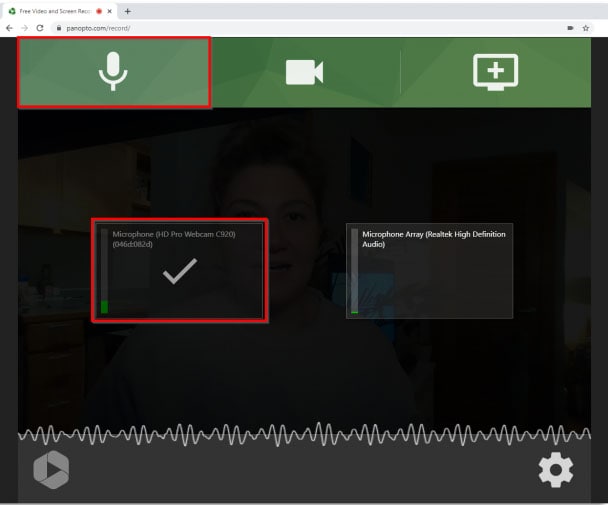
Step 3: Enable Facecam Button: Panopto Express will also detect connected the built-in cam and the attached microphones. If you might want to record a portrayal or yourself introducing alongside the screen recording, click the receiver symbol at the upper left and ensure the checkmark is over the mouthpiece you need to use to catch your voice.
Step 4: Start/Stop Recording: After you are done with the customization, hit the start button to start recording your Facecam with the screen. Right after you finish recording the Facecam, now you can also review the recording and click Save to save the video, or click Re-record to record again.
Screen Capture
Screen Capture is a straightforward free screen recorder with an underlying sound/video editorial manager. The alluring and natural interface permits you to make screencasts with no sweat of an expert. Even though this stage is free, it doesn't put any watermark and is sans promotion. It can record Skype discussions with Facecam without any limits and is in this manner helpful for Skype interviews and online phone calls. Additionally, various Windows applications can be singled out and caught as discrete components. Included is a fundamental easy to understand picture manager that is shockingly useful for achieving a cleaned look.
Step 1: Run the Online Recording App: Open the Screen Capture official site from your browser and enable the permissions to record your Facecam and microphone.
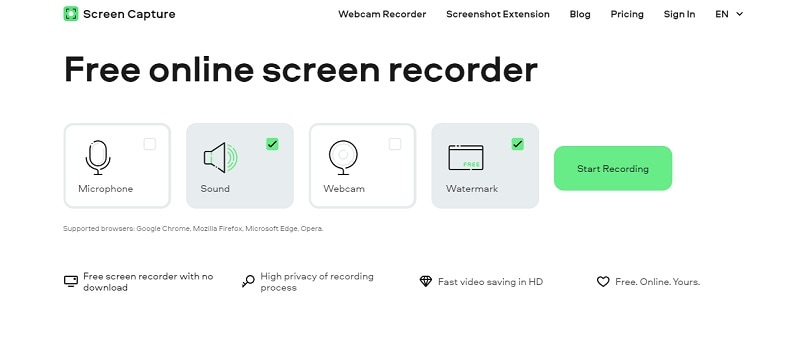
Step 2: Activate Extension: To capture the video stream, enable the Sound and Screen icons. To exclude your face and voice from the recording, don’t forget to disable the Microphone and Webcam icons. To start recording, click on the Start Recording button. Allow access to your microphone and webcam.
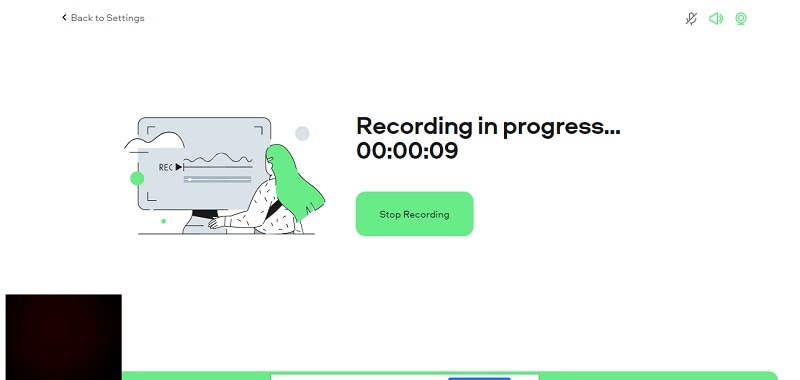
Step 3: Record and Save the Facecam: Open the tab you need to capture and record the video. When the stream is finished, stop recording and save the streaming video to your computer. You can rip streaming videos after saving. Using the online recorder is much more secure and faster than if you copy video from the internet. Your recordings are for your private use, no one else can access your files.
Part 2. Screen Recorder with Facecam Mac
QuickTime
On the off chance that you wish to record mac screen with audio QuickTime and make a drawing in the instructional guide on your Apple gadget, Quick Time will simply make it simpler for you. This instructional guide incorporates all you require to know to utilize QuickTime player for screen recording alongside dynamic sound info, how they are currently, Apple PCs won't allow you to record your PC sound with any of their inherent projects. Most projects that will allow you to record framework sound can be costly. This is an issue for a great many people that need a modest method to record framework sound out of the blue.
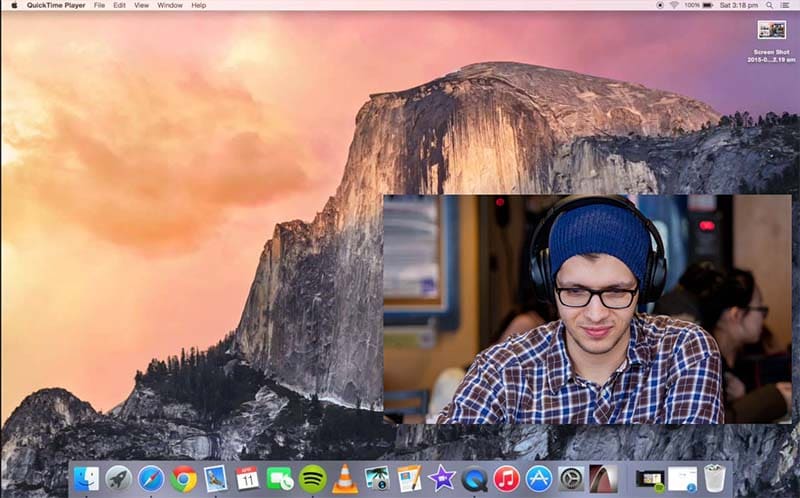
Step 1: Launch QuickTime Player: Open QuickTime Player from your Applications folder, then choose File > New Screen Recording from the menu bar. You will then see either the onscreen controls described above or the Screen Recording window described below.
Step 2: Customize the Recording Screen: Before starting your recording, you can click the arrow with the red-circled button, to change the recording settings: To record your voice or other audio with the screen recording, choose a microphone. To monitor that audio during recording, adjust the volume slider. If you get audio feedback, lower the volume or use headphones with a microphone.
Step 3: Start Recording: To start recording, click the red-circled button and then take one of these actions. To begin recording the entire screen click anywhere on the screen or drag to select an area to record, then click Start Recording within that area as shown below:
Step 4: End the Recording: To stop recording, click on the square-shaped button in the menu bar, or press Command-Control-Esc (Escape). Just after you stop recording, QuickTime Player automatically opens the recording. You can now play, edit, or share the recording
Screencast-O-Matic
Screencast-O-Matic is a simple to-utilize screen recorder that empowers you to catch any space on your screen. It gives an alternative to add video from your webcam and portrayal from your mouthpiece. You can enliven recordings with changes and overlay impacts. It permits you to catch your movement on the full screen or inside the tweaked locale. Screencast-O-Matic is an online screen recorder and video editor that sponsorships both webcam and screen narratives. What's more, you can share the record to YouTube without downloading any work territory application. It also helps customers in zooming, drawing, and including overlays the video records. Screencast-O-Matic moreover has additional features including decisions for modifying PC sound and synchronization of recording with video film.
Step 1: Visit Screencast-O-Matic Website: To launch this Facecam recorder. You can head to the official website and launch it directly after downloading.
You can also launch it directly from your Mac menu bar and if you have a Screencast-O-Matic account, you can log in to your account and click on the ‘recorder’ icon located on the upper right-hand corner of the page to launch the recorder.
Step 2: Launch the Facecam Recorder: Click on ‘Launch Free Recorder’ inside the web application and proceed towards customizing your screen and Facecam to enable while recording your screen.
Step 3: Start Recording: Within seconds, you’ll notice the screen recorder on your Mac computer and you can start recording. After you’re done with the recording, hit the stop button that will stop and save it inside your MacBook.
Part 3. iOS Facecam and Screen Recorder
Record It!
You can record your most loved applications and games with Screen Recorder+. Alongside every one of the standard highlights, the application likewise has an incredible supervisor that permits you to make changes following the video speed, pivot it, or even add a channel. You can likewise change the quality and settings of your screen recording. Record It! allow you to record your screen and sound simultaneously like the local screen recorder in iOS, however it additionally allows you to record utilizing your front camera to catch your responses to the screen. This can be useful if you're making recordings for YouTube or other online media destinations like Instagram because it will permit your watchers to see your face while you're talking and see your screen at the same time.
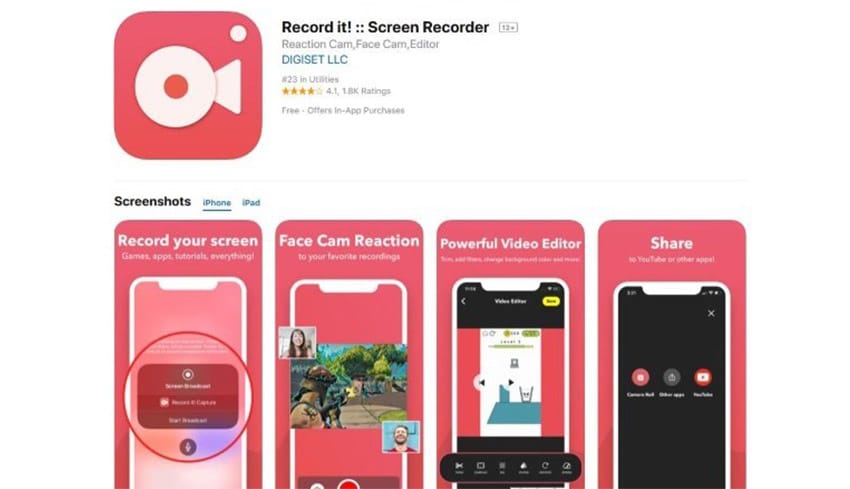
Step 1: Launch Recordit Facecam Recorder: Launch the RecordIt recorder application on your iOS device and inside the app, customize the Facecam recording to your personalized settings.
Step 2: Customize the Facecam Settings: In the next step, you can define the source of your recording screen, and also you can Mute/Unmute your attached mic to record sound. You can also refer to the editing options to edit the recorded files.
Step 3: Start/Finish the Recording: To start the Screen Recording by hitting the record Screen button as shown in the UI of the application. After that, hit the Done button to successfully end your Facecam recording and now you can save the Facecam recording with your settings.
TechSmith Capture
TechSmith Capture is an incredible screen recording application that is essential for the Camtasia set-up of video applications. On the off chance that you need to in the end send the chronicle to your PC or a colleague's, at that point this application will permit you to do it reasonably consistently. If you do any screen recording on your PC, you may perceive TechSmith from its Camtasia set-up of applications. With TechSmith Capture, not exclusively would you be able to record your screen, yet like other applications, it will record your receiver so you can add portrayal or voice-overs to your recordings.

Step 1: Launch TechSmith Facecam Recorder: Launch the RecordIt recorder application on your iOS device and inside the app, customize the Facecam recording to your personalized settings.
Step 2: Customize the Facecam Settings: In the next step, you can define the source of your recording screen, and also you can Mute/Unmute your attached mic to record sound. You can also refer to the editing options to edit the recorded files.
Step 3: Finish and Share the Recording: To start the Screen Recording by hitting the record Screen button. After that, hit the Done button to successfully end your Facecam recording and if you want, you can share the Facecam recording to various other platforms as specified in the list below:
DU Recorder
DU Recorder's screen catching element isn't it is most grounded. It's all the other things DU Recorder can do that make it great. In addition to the fact that it comes with a full exhibit of altering apparatuses, however, it will likewise permit you to live stream your screen to different stages like YouTube, Twitch, or Facebook. The application requires an in-application buy to dispose of the watermark, however. This application follows through on precisely what its name guarantees. In any case, it likewise has a fast and lightweight proofreader that permits you to roll out little improvements to your account like trim them, add channels or titles. The application likewise accompanies enlivened motions, which you may discover supportive on the off chance that you're making instructional exercises.

Step 1: Launch DU Facecam Recorder: Launch the RecordIt recorder application on your iOS device and inside the app, customize the Facecam recording to your personalized settings.
Step 2: Customize the Facecam Settings: In the next step, you can define the source of your recording screen, and also you can Mute/Unmute your attached mic to record sound and also uncheck the Facecam settings. You can also refer to the editing options to edit the recorded files.
Step 3: Start/Finish the Recording: To start the Screen Recording by hitting the record Screen button as shown in the UI of the application. After that, hit the Done button to successfully end your Facecam recording and now you can save the Facecam recording with your settings.
Part 4. Record Windows Screen with Face
Wondershare DemoCreator
Wondershare hopes to meet the developing screen recording and video altering needs of its clients and extend its client base. It gives progressed highlights like ongoing drawing and spotlight impacts while recording the screen and Facecam collectively, quick fare video without altering, fading impacts for the recording video and other advanced-level features with an all-in-one package. If you’re the one that wishes to utilize an elegant Facecam recorder with feature-rich customization for Windows PC, then you’re at the right place as in this section, we’ll be doing a step-by-step procedure to use this screen recorder with a Facecam recording functionality so being a beginner, you can get an idea of how you can use this toolkit effectively.
 Secure DownloadSecure Download
Step 1: Launch DemoCreator Screen Recorder: To proceed with recording your Facecam with the DemoCreator, here is the first step that involves opening the screen recorder so you can emphasize the intuitive Facecam recording feature easily. Just open the program and click on the New Recording button to get into it:
Step 2: Enable Facecam Recording Tool: Now in the next step, you need to simply enable this handy feature by simply going to the bottom left of the screen recorder window and slide the select the Integrated Webcam button to enable it accordingly.
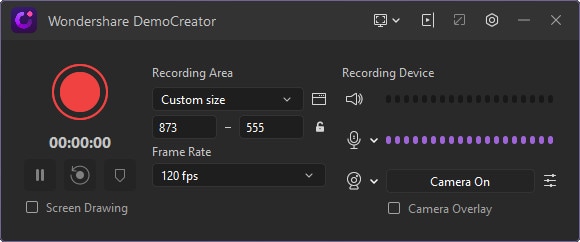
Step 3: Start Recording : Here’s the kicker of this guide, where you will be performing the live Facecam recording with the DemoCreator. So, to proceed without any delay, customize the screen recording essentials and hit the Start recording red-circled button as follow:
Step 4: Stop and Export Recording: Just as you’ve performed the Facecam recording inside the recording phenomena. It is being recorded well-accordingly and now you need to stop and save your video to your required destination. You can also use the post-production editing functionality to further enhance the Facecam recording effectively. For instance, if you want to export the recordings, hit the Export button at the top of the video editor interface and be with it.
Furthermore, if you want to share your recording on a social platform like YouTube, then hit the YouTube menu bar from the list and sign in to your channel to share it handily.
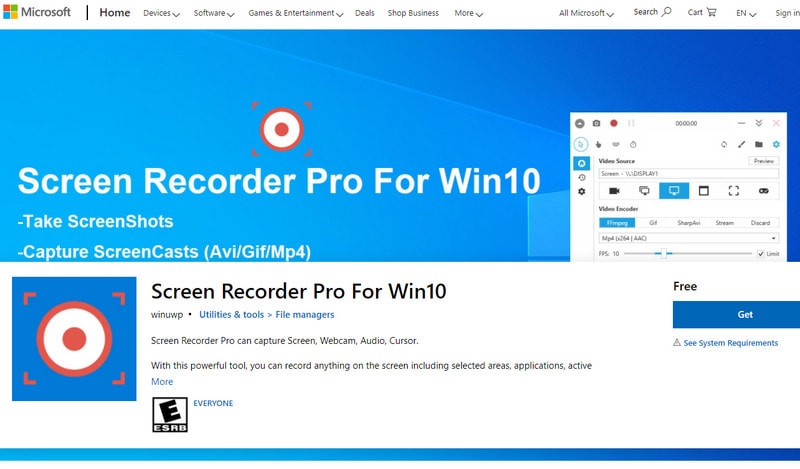
Screen Recorder Pro for Win10
Screen Recorder Pro is an expert video screen catch application that allows you to catch your PC screen movement to numerous famous video designs. Any application that sudden spikes in demand for your Windows PC can be recorded including the sound. With a PC mouthpiece, add your sound portrayal as you show how to utilize a site or clarify an item idea.
My Screen Recorder Pro gives the capacity to yield your screen accounts to AVI, WMV, Flash, and MP4 designs. When recording your PC action to WMV design, playback the video on any Windows PC, which simplifies appropriation. You can even make Flash documents that are intended to be played on a site and introduced to enormous crowds over the Internet.
Step 1: Install and Launch Screen Recorder Pro: Launch the RecordIt recorder application on your iOS device and inside the app, customize the Facecam recording to your personalized settings.
Step 2: Customize the Facecam Settings: In the next step, you can define the source of your recording screen, and also you can Mute/Unmute your attached mic to record sound. You can also refer to the editing options to edit the recorded files.
Step 3: Start/Finish the Recording: To start the Screen Recording by hitting the record Screen button as shown in the UI of the application. After that, hit the Done button to successfully end your Facecam recording and now you can save the Facecam recording with your settings.
Bandicam
Bandicam is remarkable among other screen recorder with pen apparatus for pc and game account application that engages you to record anything happens on your PC screen, a game-play and even catch content from external devices like XBOX or PlayStation. Bandicam brings you three undeniable annal modes; "Screen Capture" mode that permits you to record either the PC screen or even a specific zone of your screen, "Game Capture" mode that gets a movie of a game-play using DirectX/OpenGL developments on your system and "Screen Capture" mode for getting a movie from external contraptions like webcams, cells or game-playing devices. Practical with most major instinctive whiteboards, this screen recorder withdrawing devices for pc is an uncommon methodology for web tutoring and chronicles.

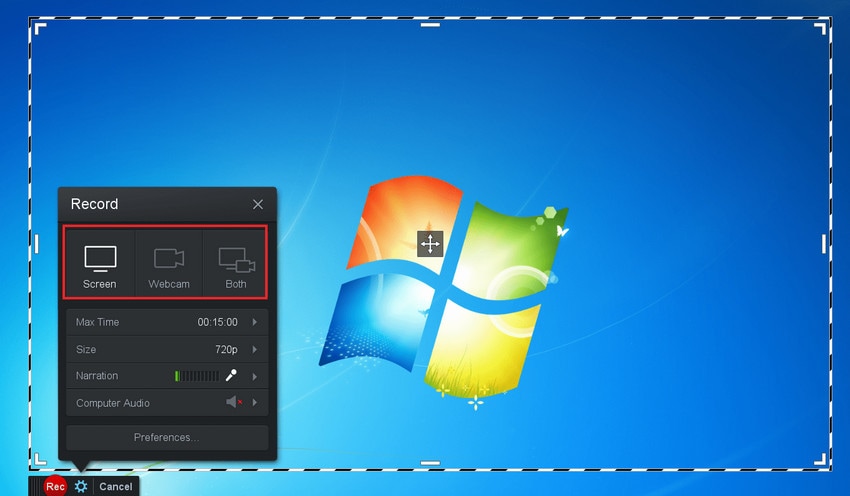
Step 1: Launch Bandicam on Desktop: Start Bandicam and choose the 'Rectangle on a screen' mode.
Step 2: Customize Facecam Settings: Enable the Facecam and start the Recording by hitting the Rec button as shown above. You can also select the area of the screen you want to record and start recording right away.
Step 3: Start/Save the Recording: Lastly, go to the 'Home -> Video' to play, edit or upload the captured videos with Facecam.
Create high-quality videos using face, voice, and screens are now easy with the above mentioned Facecam recording tools. However, it becomes necessary to opt for the best tool that can meet your exact requirements.


