Do you need help using OBS to record audio only for your favorite games without all the video distractions? Well, this article is good for you! In this guide, we'll introduce you to OBS (Open Broadcaster Software) and learn how OBS records audio only. But before we start, you must know that recording game audio only in OBS is a handy skill that offers various benefits. Whether you're short on storage space, aiming for focused content creation, or have copyright concerns. Using OBS record audio only is beneficial. So, if you are a dedicated one who wants to use the OBS audio, let's dive in and make your goal possible!
In this article
How to Make OBS Only Record Game Audio - Windows/Mac
OBS, or Open Broadcaster Software, is a tool many gamers and creators use to record videos. Although OBS doesn't have a direct option to just record audio, we can still do something similar by taking the audio from the recorded video. This lets us grab various audio tracks, like your microphone and computer sounds. What’s more, this method is favored for saving space, enhancing immersion in-game sounds, avoiding copyright issues, and providing more editing options. Recording game audio alone using OBS proves immensely useful for both gamers and creators.
Now, we'll explore the steps and configurations required to set up audio recording on both Windows and Mac systems.
How to Use OBS Record Audio Only on Windows
On Windows, recording sound through the microphone is straightforward. However, if you aim to capture internal desktop audio, such as game sounds or online music, you'll need OBS, an open-source broadcaster. Here's how to record audio only on Windows using OBS:
Step 1: Install OBS on your computer and launch the application.
Step 2: Navigate to Settings, which you can access by clicking "File" in the menu bar or the "Settings" button at the bottom right corner of your screen.

Step 3: In the Capture Settings, go to Audio settings and set Desktop Audio to "default." Disable other audio sources if unnecessary, then click "Apply" and "Ok" to save.

Step 4: Switch to Output settings and change the output mode to Advanced.

Step 5: Click "Apply" and "OK" to save settings. You can start recording your game audio by clicking ""Start Recording.""

How to Use OBS Record Audio Only on Mac
The method used for recording audio on Macs differs from that of Windows PCs. The reason behind this is Apple disabled the built-in framework for audio recording. Consequently, Mac users must download or have a separate recording application to record audio sounds. Here's how to record audio only on Mac using OBS:
Step 1: Download and launch OBS. Afterward, go to the website and download the plug-in audio called “Black hole.” This will allow you to record both OBs and desktop audio.

Step 2: Once logged in, return to the OBS and click the spotlight to search for the “Audio MIDI setup.” Look for the Audio for OBS, then click the . symbols on the right corner below to select the “Create Multi-Output Device.” Once all set up, check BlackHole 2ch.

Step 3: Go to OBS settings and look for the Audio. Select BlackHole 2ch and customize the other.

Step 4: Proceed to System preferences and look for the audio to see the audio output. Once found, make sure the Audio for OBS is selected.

Step 5: Lastly, you can now start using OBS to record your audio.

Whether you are using Windows or Mac devices, these steps are essential. Before we go to the best alternatives of OBS, you need to know how to optimize audio recording while using OBS.
Part 2. Tips for Optimizing Audio Recording in OBS
Before you start using OBS recorder audio only, you need to consider the following tips mentioned below:
- Monitoring Audio Levels: Monitor your audio levels using the audio mixer in OBS. Adjust volume levels to ensure your audio isn't too loud or soft, maintaining a balanced sound throughout your recording.
- Using Filters for Better Sound Quality: Enhance your audio with filters in OBS. Use noise suppression to reduce background noise, equalization to adjust the frequency balance, and a compressor to make loud and quiet sounds more even. This makes your recording sound better and more professional.
- Testing Before Recording: Before hitting record, take some time to test your audio setup. Ensure your audio levels aren't too high, which can cause clipping or distortion. Also, check that your filter settings are right for where you are and how your microphone is set up. This helps your recordings sound clear and free from unwanted noise.
- Managing File Formats and Settings: Choose the best format for you and others when saving your recordings. Consider if it will work on different devices and how big the files will be. Adjust the bitrate and sample rate settings to ensure the sound quality is good without making the files too big.
While OBS is excellent for recording audio, it can be challenging for beginners. For those seeking a more user-friendly option, we recommend exploring an alternative that offers a simpler interface.
OBS Alternative to Record Game Audio Only
Finding the right tool is crucial when capturing game audio exclusively. While OBS (Open Broadcaster Software) is popular, it's not the only option. Enter Wondershare DemoCreator, a powerful OBS alternative worth considering.
DemoCreator is a screen and sound recorder with video editing capabilities to fulfill your post-production requirements. Renowned for its exceptional features, Wondershare DemoCreator ranks among the leading PC screen recorders. It is compatible with Windows and Mac systems and boasts a user-friendly interface accessible to users of all skill levels. With DemoCreator, you can effortlessly capture and review anything streaming on your computer.
Comparing Wondershare DemoCreator and OBS
| Feature | Wondershare DemoCreator | OBS |
| Ease of Use | User-friendly interface with intuitive controls. Simple navigation for beginners. |
The steeper learning curve, especially for novices. Requires some technical knowledge to set up and use effectively. |
| Audio Editing Capabilities | Built-in audio editing tools for trimming, adjusting volume, adding effects, and more. Seamless integration with audio tracks for easy manipulation. |
Limited native audio editing features, primarily focused on recording and streaming. Relies on third-party software for advanced audio editing tasks. |
| Recording Efficiency | Efficient recording process with minimal system resource usage. Supports smooth recording of high-quality audio with customizable settings. |
Versatile recording options with extensive customization. It can be resource-intensive, particularly on lower-end systems, impacting recording efficiency. |
For detailed insights into utilizing this software as a superior alternative to OBS Studio, here's how to use DemoCreator:
Step 1: Start by opening Wondershare DemoCreator on your computer. You can find the application icon on your desktop or in the applications folder.

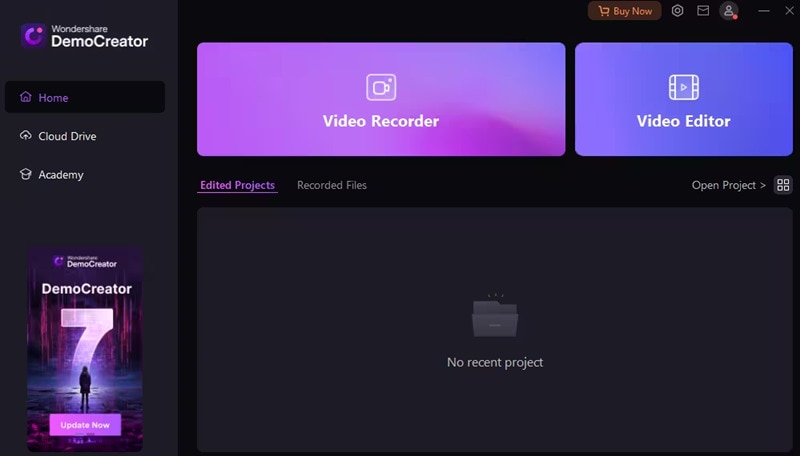
Step 2: In the main interface, click on the "Video Recording" tab at the top to access recording options. Choose the "Record Screen" mode to capture your gameplay along with the game audio.

Step 3: Before starting the recording, adjust the recording settings to ensure optimal audio quality. Click on the gear icon or "Settings" to open the recording settings menu. Under the "Audio" tab, select the audio source as "System Audio" or " Game Audio" to record the sound directly from your game.

Step 4: Once you've configured the settings, click on the red "REC" button to start recording. Launch your game and begin playing. DemoCreator will capture both the gameplay visuals and audio simultaneously.

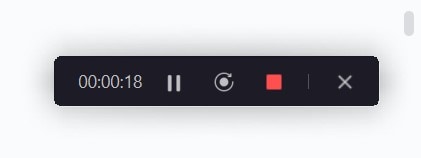
Step 5: When you've finished recording the gameplay and game audio, click on the stop button (square icon) in the recording toolbar or use the hotkey (default: F10) to stop the recording.

Step 6: If you want to further enhance or edit the recorded gameplay video, you can do so using DemoCreator's built-in Video Editor. Trim, cut, add annotations, transitions, effects, and more to customize your video according to your preferences.

Step 7: Once you've finished editing the video, select the output format and quality settings. Click on the ""Export"" button to export the final edited video with the game audio.

- Record customized screens with audio and edit them in different tracks.
- Capture gaming videos, tutorials, and presentations and then edit them in one tool.
- Built-in unlimited editing templates, special effects, and other sources.
- Supported export to MP4, MOV, MKV, GIF, and other formats.

Conclusion
While OBS Studio remains a robust option for game audio recording with its versatile features and customization options, Wondershare DemoCreator emerges as a compelling alternative, particularly for users seeking a more streamlined and user-friendly experience. With DemoCreator, recording game audio is simplified, offering an intuitive interface, dedicated audio recording capabilities, and built-in editing tools for enhancing gameplay recordings. Its accessibility across Windows and macOS platforms further solidifies its position as a valuable tool for gamers and content creators, providing a hassle-free solution for capturing high-quality game audio recordings.


