
OBS Studio is a powerhouse for YouTube content creators, offering immense flexibility for both live streaming and video recording. Its open-source nature and robust features make it a top choice for gamers, educators, and professionals alike. This guide will demystify OBS for YouTube, providing a comprehensive walkthrough of setup, best practices, and troubleshooting. We'll explore how to effectively use OBS for YouTube streaming, access official resources, and offer a clear, step-by-step setup process. Additionally, we'll introduce Wondershare DemoCreator as a user-friendly alternative for those seeking a simpler approach to OBS studio YouTube content creation.
In this article
Part 1: How to Stream on YouTube with OBS Studio
Streaming on YouTube using OBS Studio requires proper configuration to ensure high-quality video output. Follow these steps to set up OBS for YouTube streaming successfully.
Step-by-step guide to setting up OBS for YouTube streaming
Step 1Download and Install OBS Studio
Visit the official OBS Studio website and download the latest version for your operating system. Run the installer and follow the setup instructions. Once installed, launch OBS and complete the auto-configuration wizard if prompted.
Step 2Configure Stream Settings for YouTube
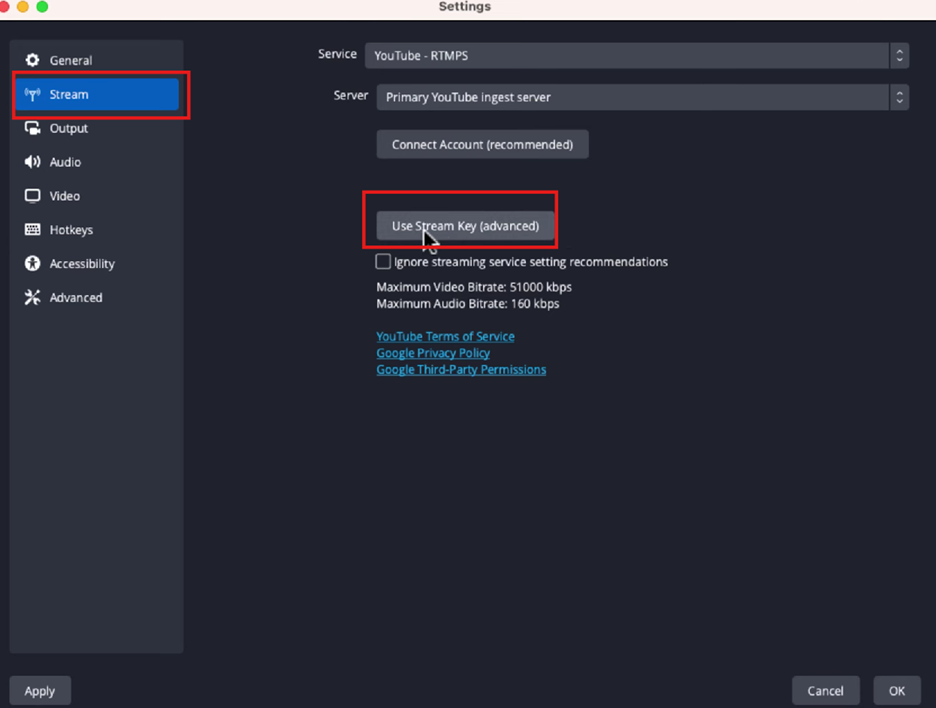
Open Settings > Stream, and select YouTube as your streaming service. Set the bitrate and resolution based on your internet speed and desired quality. A bitrate of 4500-6000 Kbps is recommended for 1080p streaming.
Step 3Connect OBS to Your YouTube Channel Using the Stream Key
Open YouTube Studio and go to the Stream Settings section. Copy the Stream Key, then return to OBS and navigate to Settings > Stream. Select YouTube as the service, paste the stream key, and click Apply to link OBS to your YouTube channel.
Step 4Adjust Video/Audio Settings and Go Live
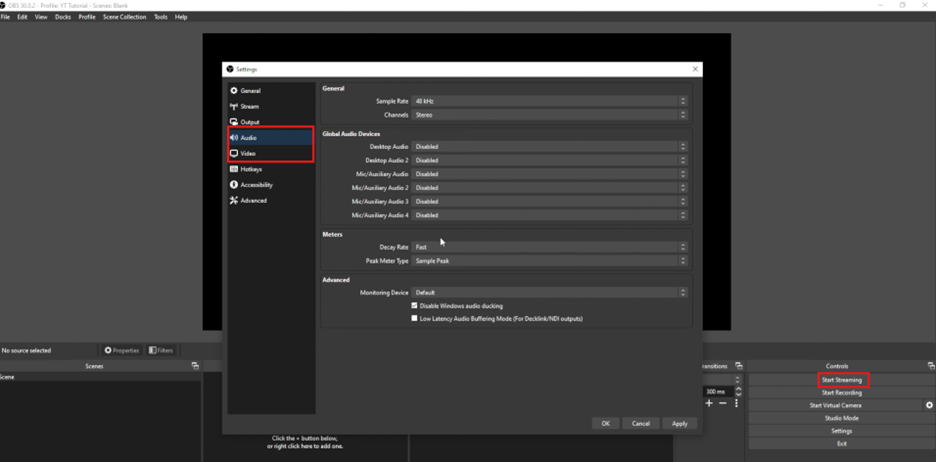
Under Settings > Video, set the resolution and frame rate to match YouTube’s recommended streaming specs. Adjust audio sources under Settings > Audio to ensure high-quality sound. Once everything is set, click Start Streaming to go live on YouTube.
Best OBS Settings for High-Quality YouTube Streaming
- Resolution: 1920x1080 (1080p) or 1280x720 (720p)
- Bitrate: 4500-6000 Kbps for 1080p, 2500-4000 Kbps for 720p
- Frame Rate: 30 FPS (or 60 FPS for smoother motion)
- Audio Bitrate: 128 Kbps (minimum) or 192 Kbps for higher quality
Part 2: How to Record YouTube Videos with OBS Studio
Recording high-quality videos with OBS Studio for YouTube requires proper configuration to ensure smooth playback and professional output. Follow these steps to set up OBS for recording instead of live streaming.
Step 1Set OBS to Recording Mode
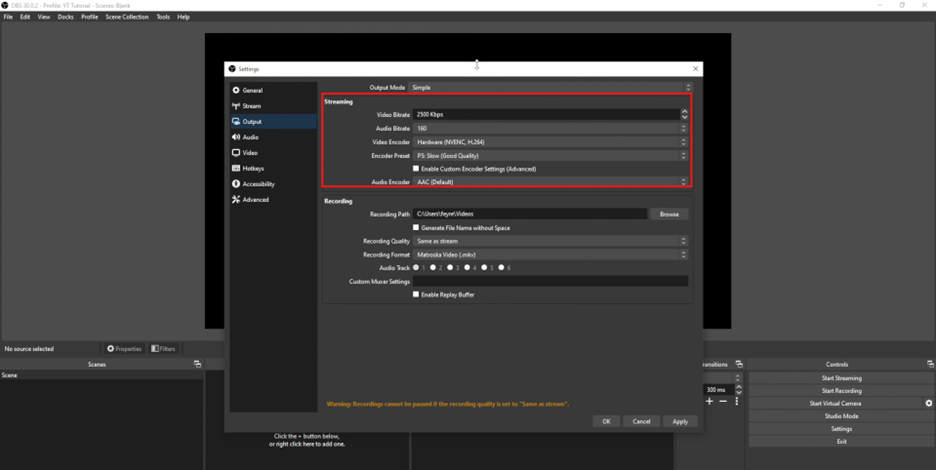
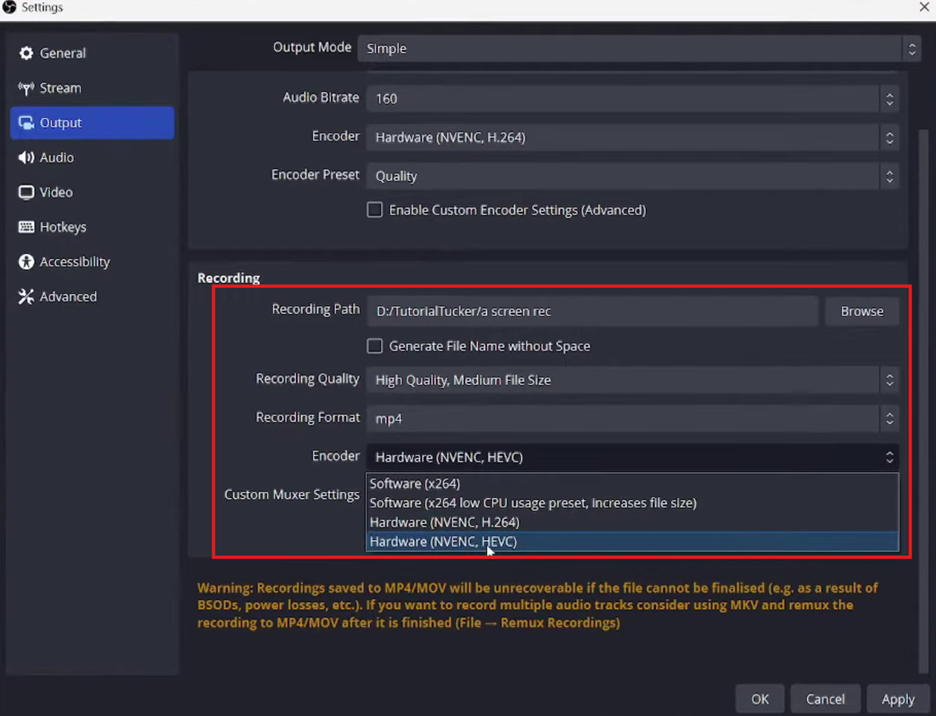
Open OBS Studio and navigate to Settings > Output. Under Output Mode, select Advanced, then switch to the Recording tab. Here, choose the Recording Format as MP4 or MKV, which ensures better compatibility and prevents data loss if a recording is interrupted. Setting the correct format is crucial to avoid issues when editing or uploading your video later.
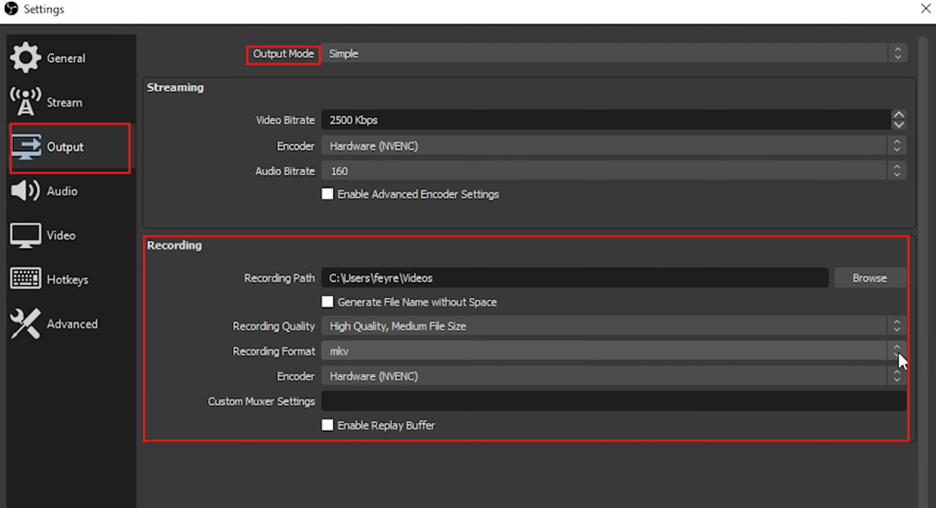
Step 2Adjust Bitrate, Resolution, and Audio Settings
In the Recording tab, adjust the Recording Quality based on your storage and processing capability. For high-quality YouTube videos, select High Quality, Indistinguishable Quality, or Lossless. Set the bitrate to 10,000-16,000 Kbps for smooth video output. If your PC supports it, enable hardware encoding (NVENC for NVIDIA GPUs or QuickSync for Intel CPUs) to reduce CPU load. In Settings > Video, set the Base (Canvas) Resolution and Output (Scaled) Resolution to 1920x1080 (1080p) for the best clarity. Under Settings > Audio, adjust the bitrate to 192 Kbps or higher to ensure professional-quality sound.
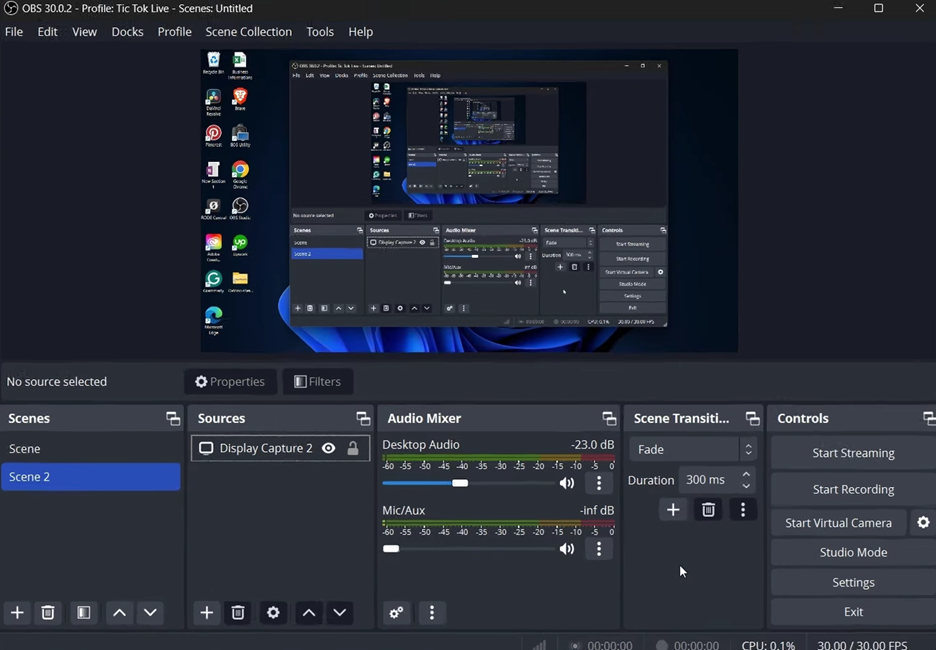
Step 3Select Video and Audio Sources
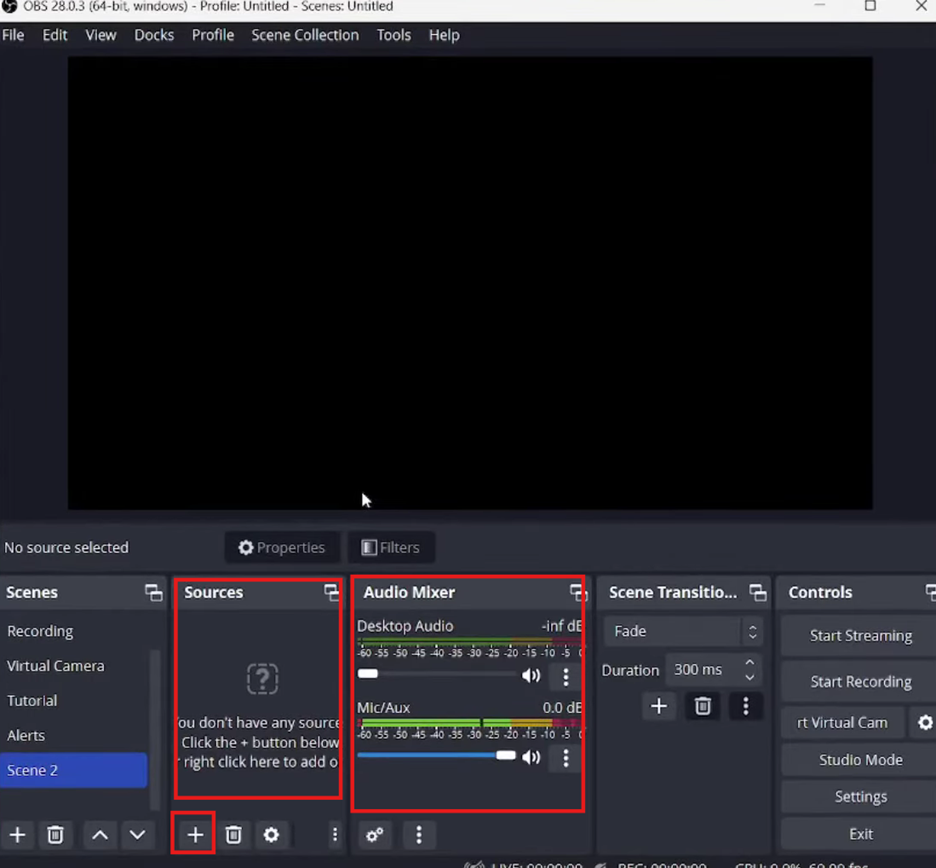
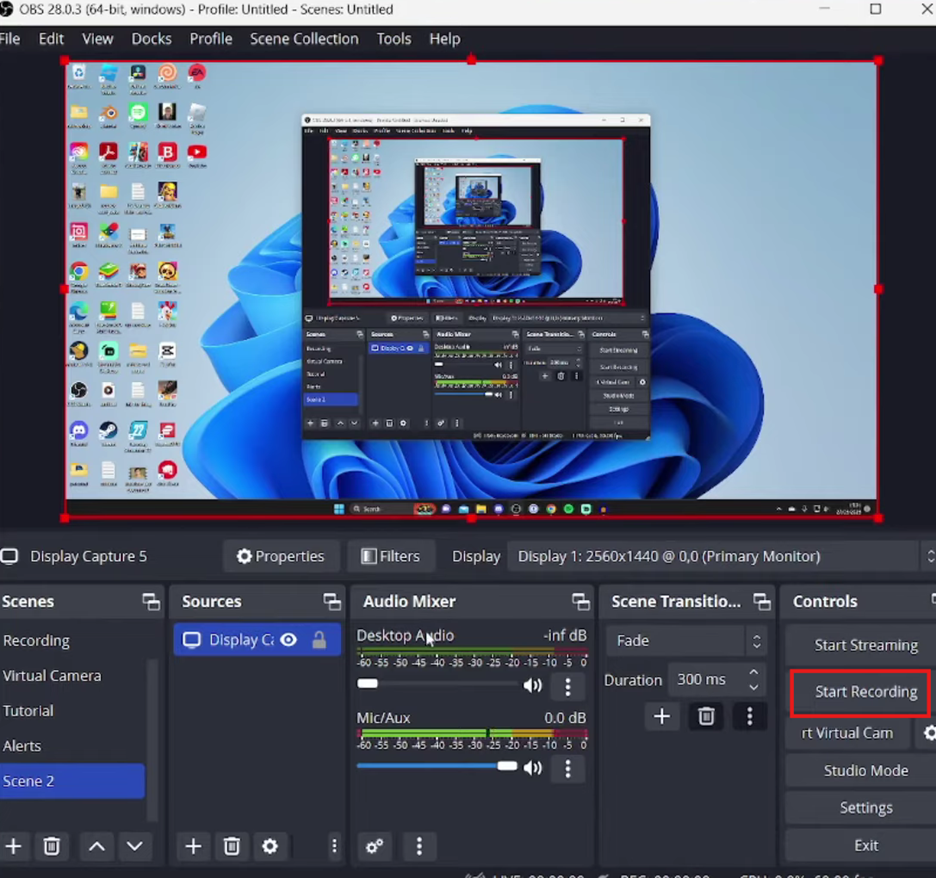
Click the + button under the Sources panel to add your video input. If recording your screen, select Display Capture for full-screen recording or Window Capture to record a specific application. If you want to include a webcam feed, add Video Capture Device, and position it within the scene as needed. Under the Audio Mixer, ensure that your microphone and system audio sources are properly configured. You can adjust volume levels and enable noise suppression to enhance voice clarity.
Step 4Record, Edit, and Upload to YouTube
Click Start Recording in OBS to begin capturing, ensuring your scene layout and audio sources are correctly set. Once finished, click Stop Recording, and the file will be saved automatically. Open the recorded video in an editor like Wondershare DemoCreator to trim, add transitions, and enhance visuals. Export the final video in MP4 format, then upload it to YouTube Studio with an optimized title, description, and tags.
Part 3: Common Issues & Troubleshooting OBS for YouTube
While OBS for YouTube streaming is a powerful tool, users often encounter issues like lag, buffering, and audio-video sync problems. These problems can affect stream quality and viewer experience. Below are some common issues and simple solutions to help optimize OBS performance.
- Fixing Stream Lag and Buffering Issues: Lag and buffering are often caused by high bitrate settings, unstable internet, or hardware limitations. Lower the bitrate in OBS Settings > Output to 4500-6000 Kbps for 1080p or 2500-4000 Kbps for 720p. For a more stable connection, switch to a wired Ethernet connection instead of Wi-Fi.
- Audio and Video Sync Problems in OBS: If your audio and video are out of sync, adjust the Sync Offset in Advanced Audio Properties under the Audio Mixer. Make sure your microphone and video capture devices are running at the same sample rate. Disabling Windows Audio Enhancements can also help prevent audio processing delays.
- How to Optimize OBS Settings for Slow Internet Connections: For slow internet, lower the bitrate to 2000-3000 Kbps and set Output (Scaled) Resolution to 1280x720. Reducing the frame rate to 30 FPS can help maintain a smoother stream. Enable Network Optimization under Settings > Advanced to prevent connection issues.
Part 4: Wondershare DemoCreator – The Best OBS Alternative for YouTube
OBS Studio offers advanced features but can be overwhelming for beginners. Wondershare DemoCreator provides a simpler approach, combining screen recording, live streaming, and editing tools in one platform. It’s an excellent choice for YouTube creators who want an easy-to-use alternative without complex configurations.

Why Wondershare DemoCreator is a Great Alternative to OBS
- Easier interface for beginners: DemoCreator features an intuitive design that simplifies the streaming and recording process. With minimal setup, users can start creating content right away.
- Built-in screen recording and live streaming: The software allows users to record their screen and go live on platforms like YouTube. This eliminates the need for multiple tools for different content types.
- Advanced video editing tools for YouTube content creators: Unlike OBS, DemoCreator includes built-in editing features such as transitions, effects, and annotations. This helps users refine their videos before uploading to YouTube.
- Preloaded templates and visual effects: DemoCreator offers ready-made templates, animated text, and visual effects to enhance videos. This feature helps content creators make their streams and recordings more engaging.
- Lightweight software with smooth performance: Compared to OBS, DemoCreator is optimized for lower-end systems and requires fewer resources. This ensures smooth streaming and recording without overloading your computer.
How to Stream or Record with Wondershare DemoCreator
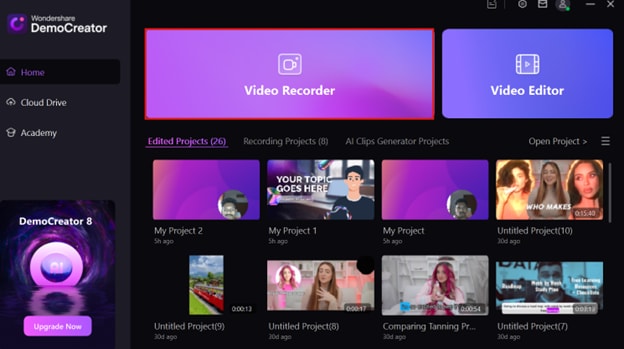
Step 1Install and Open Wondershare DemoCreator
Download Wondershare DemoCreator from the official website and install it on your computer. Launch the application to access the home interface, then select Video Recorder to enter the recording and streaming section. This mode allows you to configure screen capture, webcam, and audio settings for recording or live streaming.
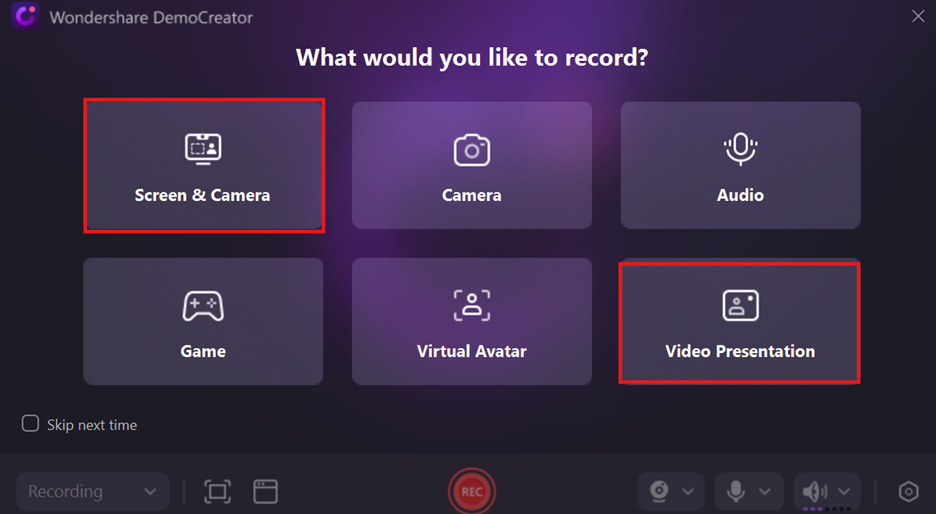
Step 2Choose Whether to Record or Live Stream
After selecting Video Recorder, you will see multiple options for recording and streaming. If you want to stream live on YouTube, choose Video Presentation Mode, which enables you to integrate your screen, webcam, and overlays into your stream. If you are creating a pre-recorded video, select Screen & Camera Mode to capture both your screen and webcam footage. Ensure that you select the right mode depending on your content type before proceeding to the next step.
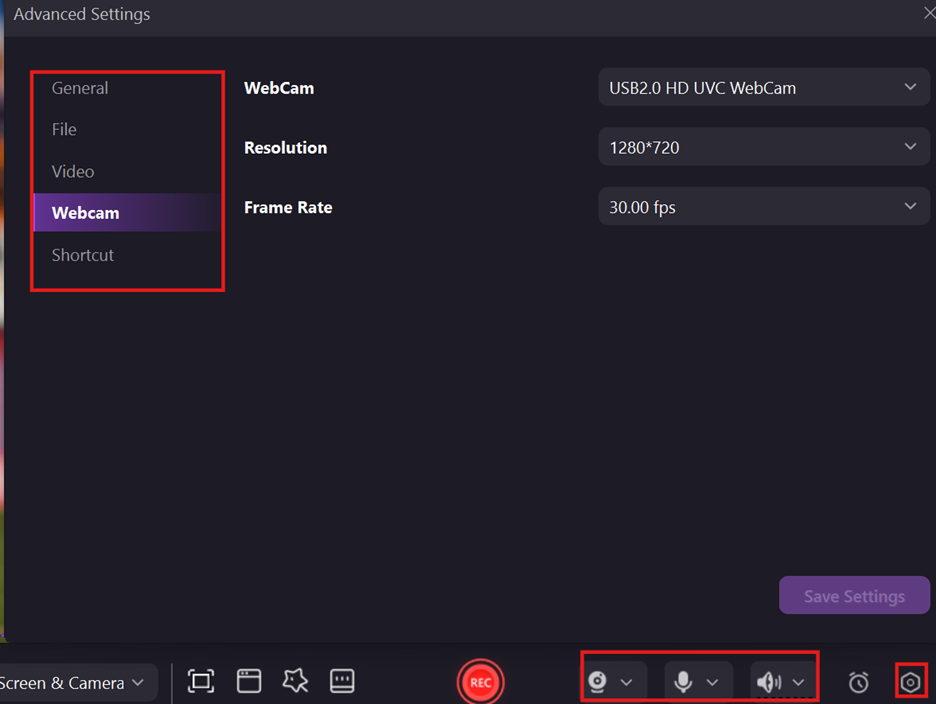
Step 3Customize Video/Audio Settings
Once you have selected the recording or streaming mode, configure your video resolution, frame rate, and aspect ratio for high-quality output. Adjust the audio settings to ensure clear sound, selecting your microphone and system audio sources. If using a webcam, modify the camera settings to adjust brightness, contrast, and positioning. You can also use the background feature to enhance your stream's appearance by removing or changing the background without a green screen.
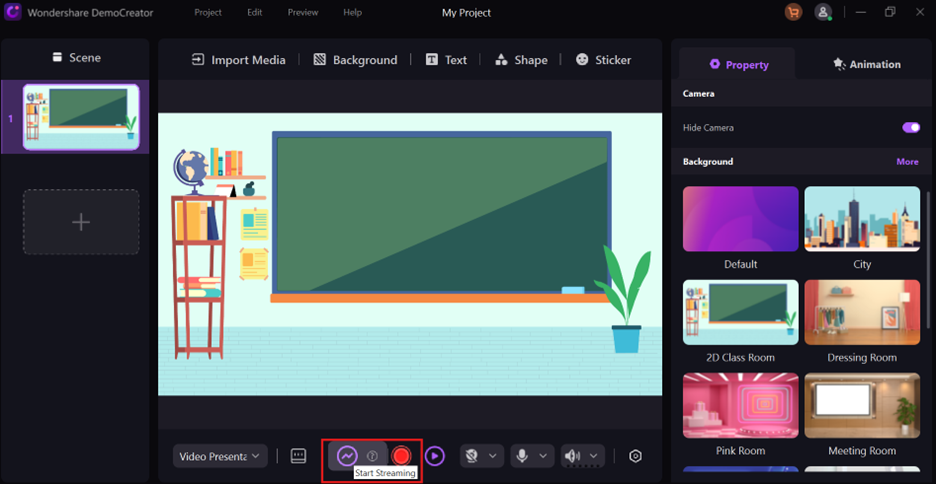
Step 4Start Streaming or Recording with One Click
After finalizing your settings, click the Start Streaming button to go live on YouTube. If you are recording instead, click Record to start capturing your content. During the session, you can add effects, transitions, and text overlays to enhance engagement. Once finished, save the recorded file or end your live stream, and if needed, edit the video directly in DemoCreator before uploading it to YouTube.
Conclusion
Setting up OBS for YouTube streaming and recording requires configuring video, audio, and encoding settings for optimal performance. Following the right steps ensures high-quality streams and recordings while troubleshooting helps fix common issues like lag and sync errors. For beginners, Wondershare DemoCreator offers a simpler alternative with built-in recording, streaming, and editing tools. It provides an intuitive interface, making content creation easier without complex setups. Choose the tool that best suits your experience level and needs to create engaging YouTube content effortlessly.
FAQs
-
1. How do I stream on YouTube with OBS Studio?
To stream on YouTube, download and install OBS Studio, configure your stream settings, and copy your YouTube Stream Key into OBS. Add your video and audio sources, adjust your resolution and bitrate, then click Start Streaming to go live. -
2. What are the best OBS settings for YouTube streaming?
For 1080p streaming, set the bitrate to 4500-6000 Kbps, use CBR (Constant Bitrate) encoding, and set the frame rate to 30 or 60 FPS. Adjust audio bitrate to 192 Kbps for clear sound and use hardware encoding (NVENC or QuickSync) for better performance. -
3. Why is my OBS YouTube stream lagging?
OBS stream lag is often caused by high bitrate, weak internet connection, or system overload. Lower the bitrate, reduce the resolution to 720p, use a wired Ethernet connection, and enable network optimization in OBS settings to improve performance. -
4. Can I record YouTube videos with OBS instead of live streaming?
Yes, OBS allows high-quality screen recording by switching to Recording Mode under Settings > Output. Adjust the bitrate, resolution, and format (MP4/MKV) to save the video, then edit it before uploading to YouTube. -
5. Is there an easier alternative to OBS for YouTube streaming?
Yes, Wondershare DemoCreator is a beginner-friendly alternative with built-in recording, live streaming, and editing tools. It offers a simpler interface, making it ideal for users who find OBS complex.


